

I’m thrilled to share my quick pizza dough recipe, perfect for a fast and delicious dinner. With just 2 cups of flour, salt, sugar, baking powder, olive oil, and warm water, you can mix up the ingredients in no time. After kneading, a brief one-hour rise gives the dough an airy texture. Roll it out, top it with your favorites, and bake! If you’re curious about ingredient tips and topping suggestions, there’s so much more to explore!
History
When I think about pizza dough, I can’t help but marvel at its rich history that stretches back thousands of years. Its ancient origins trace to the flatbreads of the Mediterranean, where simple ingredients like flour and water transformed into sustenance for early civilizations. As cultures evolved, so did the dough; each region infused its unique flavors and techniques, resulting in delightful cultural variations. From the Neapolitan style with its airy crust to the thick, hearty Sicilian version, pizza dough reflects the creativity of countless generations. This evolution inspires me to push boundaries, blending traditional methods with modern twists. Exploring the history of pizza dough not only deepens my appreciation but also fuels my passion for innovation in the kitchen.
Recipe
Making a quick pizza dough at home is both simple and satisfying. This recipe allows you to whip up a fresh and delicious pizza base in no time, perfect for those spontaneous pizza cravings. With just a few basic ingredients, you can create a dough that is soft, pliable, and ready to hold all your favorite toppings. Whether you’re in the mood for a classic Margherita or a loaded meat feast, this dough will serve as the perfect foundation.
To get started, gather your ingredients and prepare for a fun and engaging cooking experience. The best part about this dough is that it doesn’t require any rising time, so you can have your pizzas ready to bake in under 30 minutes. Just mix, knead, roll, and you’re all set to enjoy a homemade pizza that tastes as good as it looks!
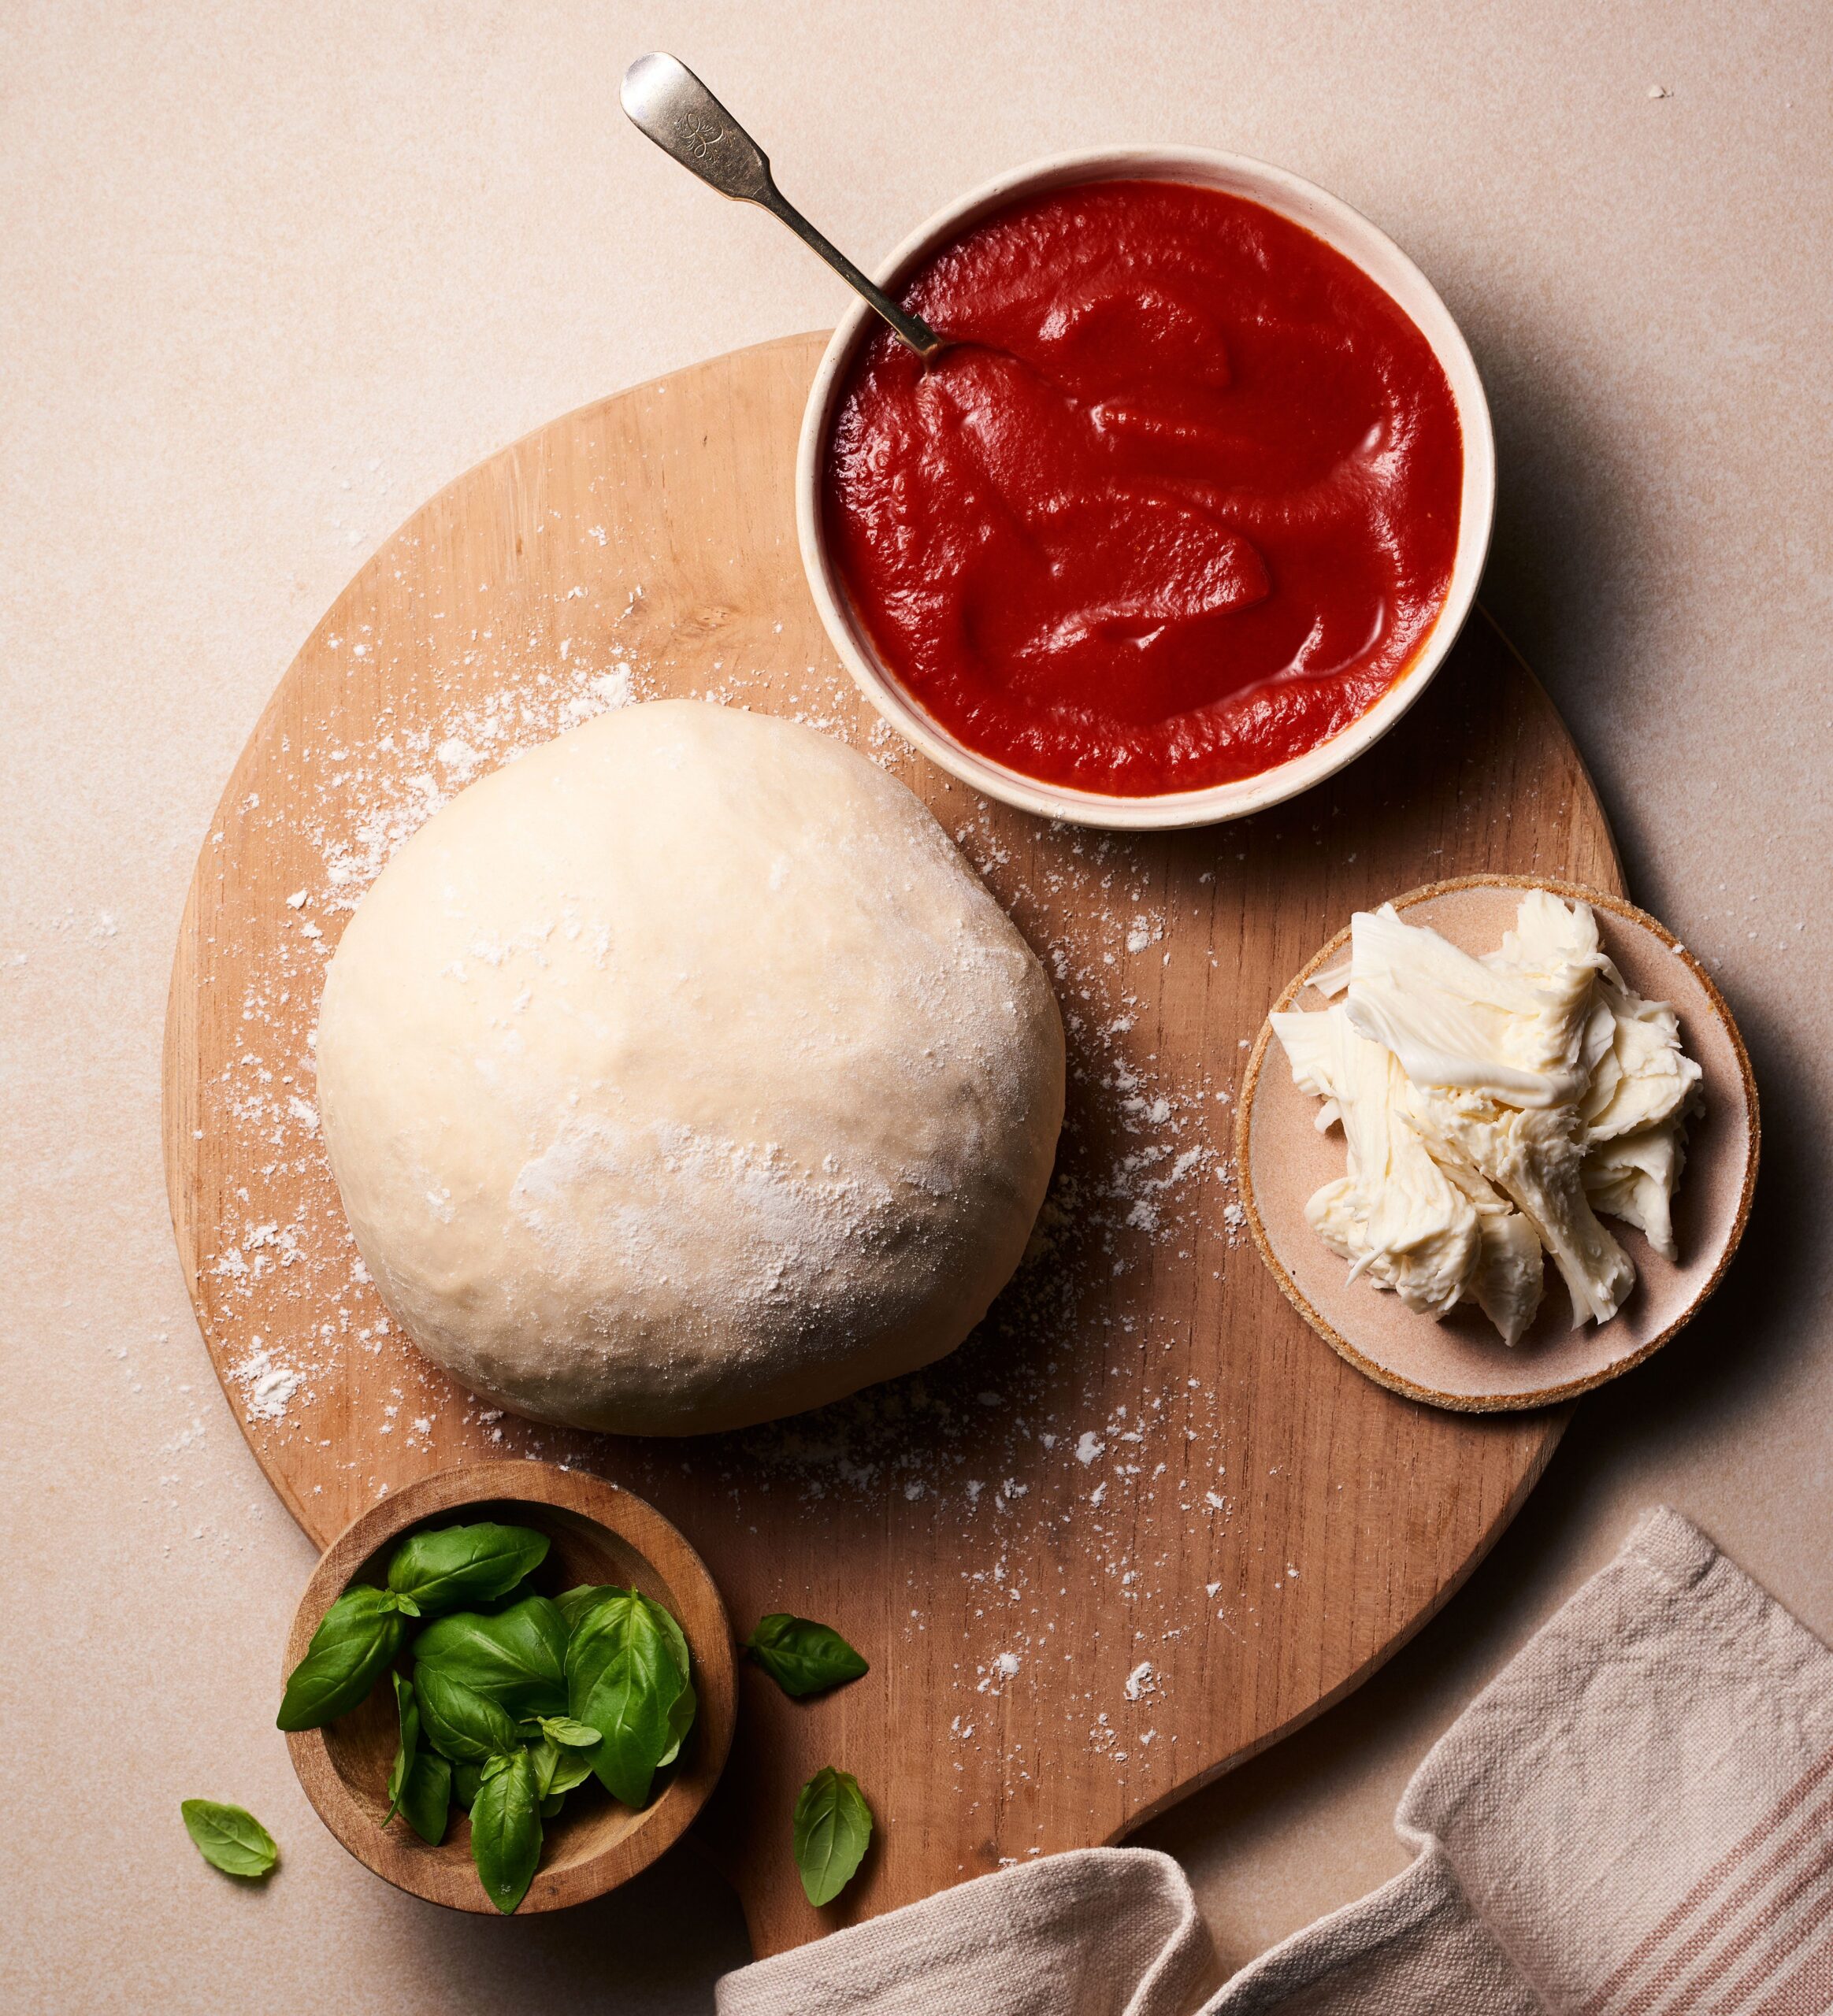
Ingredients:
- 2 cups all-purpose flour
- 1 teaspoon salt
- 1 teaspoon sugar
- 1 tablespoon baking powder
- 2 tablespoons olive oil
- 3/4 cup warm water
For the cooking instructions, combine the flour, salt, sugar, and baking powder in a large mixing bowl. Gradually add the olive oil and warm water to the dry ingredients, mixing until a dough forms. Knead the dough on a floured surface for about 5 minutes until smooth and elastic. Roll out the dough to your desired thickness and shape, then transfer it to a pizza stone or baking sheet. Add your favorite sauce, cheese, and toppings before baking in a preheated oven at 475°F (245°C) for about 12-15 minutes or until the crust is golden brown.
When cooking this pizza dough, remember that the thickness of the crust can greatly affect the cooking time. If you prefer a crispier base, roll the dough thinner and keep an eye on it while baking. Additionally, preheating your oven is essential for achieving a perfectly baked pizza. Experiment with different toppings and sauces to find your favorite combination, and don’t hesitate to make double the dough for future pizza nights!
Cooking Steps
To start making your pizza dough, I always begin by mixing warm water with yeast, which helps activate the ingredients. Then, I add sugar and flour to create a smooth mixture that sets the stage for kneading. Once I knead the dough thoroughly, it’s time to let it rise and transform into something delicious!
Step 1. Mix Warm Water and Yeast
Before diving into the mixing process, let’s guarantee the water temperature is just right. I find that warm water, around 110°F (43°C), is perfect for yeast activation. Too hot, and we risk killing the yeast; too cold, and it won’t activate properly. Once I’ve measured out the water, I pour it into a mixing bowl and sprinkle the yeast on top. I give it a gentle stir, ensuring it’s well combined and letting it sit for about five to ten minutes. This waiting period is essential—it allows the yeast to bloom, creating that delicious, airy texture we crave in pizza dough. Trust me, taking this step seriously is the secret to achieving a perfect crust that’ll impress anyone!
Step 2. Add Sugar and Flour
While the yeast is blooming, I prepare to enhance the dough’s flavor and texture by adding sugar and flour. I reach for a variety of sugar types, experimenting with brown sugar for a hint of caramel richness or a touch of honey for complexity. Each choice brings a unique sweetness that transforms the dough. Next, I consider the flour varieties; all-purpose flour works well, but I might also mix in some bread flour for added chewiness. I gently combine the sugar and flour in a bowl, watching the grains mingle. This step not only nourishes the yeast but also creates a foundation for a delightful crust. With these ingredients, I’m setting the stage for a truly innovative pizza experience!
Step 3. Knead the Dough Thoroughly
With the sugar and flour ready, it’s time to bring the dough to life through kneading. This step is crucial for developing a great dough texture, so let’s get our hands dirty! Here are some effective kneading techniques I use:
- Push and fold: Gently push the dough away, then fold it back over itself.
- Rotate: Turn the dough a quarter turn after each fold for even consistency.
- Use your palms: Press down with your palms for a smooth, elastic finish.
- Feel for readiness: The dough should be slightly tacky but not sticky.
- Knead for about 8-10 minutes: This guarantees gluten develops properly.
Enjoy the process, and you’ll be rewarded with a delightful pizza crust!
Step 4. Let Dough Rise for 1 Hour
After kneading the dough, I let it rise for about an hour, which is essential for achieving that perfect airy texture. This rising time is vital because it allows for dough fermentation, where the yeast works its magic. As the dough rests, it develops flavor and a light, bubbly structure. I find it best to cover the dough with a damp cloth or plastic wrap to retain moisture, creating an ideal environment for fermentation. During this hour, the dough expands, signaling that it’s ready for the next step. Trust me, this wait is worth it! You’ll be rewarded with a pizza base that’s crispy on the outside and soft on the inside, making every bite irresistible.
Step 5. Shape the Dough Into Balls
Now that your dough has risen beautifully, it’s time to shape it into balls for easy handling. This step not only helps with portion sizes but also creates a fantastic dough consistency that’s perfect for pizza-making. Here’s how I do it:
- Lightly flour your work surface to prevent sticking.
- Divide the dough into equal portions based on your desired pizza size.
- Gently stretch and fold the edges of each portion toward the center.
- Roll the dough between your palms to create smooth balls.
- Let them rest for a few minutes before use to enhance elasticity.
There’s something satisfying about forming these little dough balls, and they’ll serve as the perfect foundation for your culinary creations!
Nutritional Guide
As I whip up this quick pizza dough, I can’t help but think about its nutritional benefits. This simple recipe packs a punch with wholesome ingredients, contributing to a balanced diet. Here’s a caloric breakdown to keep you informed:
| Ingredient | Calories per Serving | Benefits |
|---|---|---|
| Flour | 100 | Provides energy and fiber |
| Yeast | 10 | Aids digestion, boosts metabolism |
| Olive Oil | 120 | Healthy fats, heart-healthy |
| Water | 0 | Hydration and essential for dough |
Final Thoughts
When it comes to whipping up a quick pizza dough, the nutritional benefits really enhance the experience. I love how versatile this dough can be, allowing for endless creativity with pizza toppings. Whether you’re a fan of classic margherita or adventurous with exotic ingredients, the right dough is key.
Here are a few exciting ideas to elevate your pizza game:
- Experiment with whole wheat or gluten-free dough variations.
- Add herbs and spices directly into the dough for flavor.
- Try a stuffed crust for a delectable surprise.
- Use seasonal vegetables as fresh toppings.
- Pair with unique sauces like pesto or BBQ for a twist.
Ultimately, quick pizza dough is not just about speed; it’s about innovation and deliciousness!
Frequently Asked Questions
Can I Use Whole Wheat Flour Instead of All-Purpose Flour?
Absolutely, I’ve used whole wheat flour instead of all-purpose flour before! It adds great nutritional benefits, but I’ve noticed the dough texture can be denser. Experimenting with ratios can yield delicious results for innovative recipes!
How Long Can I Store Leftover Dough?
I usually store leftover dough in an airtight container, and it lasts about three days in the fridge. For longer dough preservation, I freeze it—just make sure to use proper storing tips for ideal freshness!
Can I Freeze the Pizza Dough?
I’ve frozen pizza dough using innovative freezing techniques, and it’s like capturing a culinary masterpiece in time. For ideal dough storage, wrap it tightly, and you’ll enjoy fresh pizza anytime, even weeks later!
What Toppings Go Best With This Dough?
When I top this dough, I love classic toppings like pepperoni and mushrooms, but I also enjoy gourmet options like goat cheese and arugula. Each choice transforms the experience, making every bite uniquely delicious and satisfying.
Is This Dough Suitable for Gluten-Free Diets?
I’ve tried gluten-free alternatives, but the dough texture varies considerably. Some options create a denser base, while others yield a surprisingly light crust. Experimenting is essential for achieving that perfect balance in your gluten-free pizza experience!
Conclusion
In the end, this quick pizza dough isn’t just a recipe; it’s a canvas for creativity. Each ingredient represents a brushstroke, bringing together flavors and memories. As I roll out the dough, I’m reminded that life, like pizza, is about balance—too much of one thing can overwhelm the whole. So, embrace the art of cooking, savor the moments, and let your kitchen become a place where warmth and joy rise, just like that perfect crust.
Quick Pizza Dough Recipe
Ingredients
Equipment
Method
- In a large bowl, whisk together flour, salt, and baking powder.
- Make a well in the center, then add olive oil and warm water. Stir until a shaggy dough forms.
- Turn onto a floured surface and knead for 3-5 mins until smooth. If sticky, add a little more flour.
- Cover with a damp cloth and let rest for 10 mins (no yeast = no long rise!).
- Preheat oven to 475°F (245°C).
- Divide dough into 2 balls, roll out on parchment paper, and add toppings.
- Bake for 12-15 mins until crust is golden.