

If you’re in a pinch for dinner, I’ve got the perfect solution: a quick and easy no-yeast pizza dough! Just mix 2 cups of all-purpose flour, 1 tablespoon of baking powder, 1 teaspoon of salt, and a tablespoon of olive oil. Add in some water until the dough forms, knead it, and then shape it into a crust. Bake it at 450°F for a delightful homemade pizza experience. Stick around, and I’ll share more tips and topping ideas to elevate your pizza night!
History
When I think about the history of pizza, it’s fascinating to realize that this beloved dish has roots that stretch back centuries. Its ancient origins can be traced to flatbreads topped with various ingredients in civilizations like the Egyptians and Greeks. As I dive deeper, I discover how pizza evolved, each region adding its unique twist. In Italy, for example, tomatoes transformed a simple flatbread into the iconic Margherita. Meanwhile, in the United States, the pizza scene exploded, giving birth to regional variations like New York’s thin crust and Chicago’s deep-dish. This culinary journey reflects a blend of cultures and innovations, showcasing how pizza has become a global favorite, constantly adapting while maintaining its nostalgic charm.
Recipe
If you’re craving homemade pizza but don’t have yeast on hand, don’t worry! This quick and easy pizza dough recipe requires no yeast and can be whipped up in no time. With simple ingredients and minimal effort, you can enjoy delicious, fresh pizza right from your oven. Perfect for those spontaneous pizza nights or when you just want to try your hand at making your own crust without the waiting time that yeast demands.
This no-yeast pizza dough is not only straightforward but also versatile. You can customize it with your favorite toppings or even use it as a base for calzones or flatbreads. Whether you’re cooking for yourself, family, or friends, this recipe will surely impress. Get ready to roll out the dough and release your inner pizzaiolo!
Ingredients:
- 2 cups all-purpose flour
- 1 tablespoon baking powder
- 1 teaspoon salt
- 1 tablespoon olive oil
- 3/4 cup water
- Optional: 1 teaspoon garlic powder or Italian seasoning for added flavor
Cooking Instructions:
In a large mixing bowl, combine the flour, baking powder, and salt. Stir in the olive oil and gradually add the water, mixing until the dough comes together. Knead the dough on a floured surface for about 5 minutes until smooth and elastic. Roll the dough out to your desired thickness, then transfer it to a pizza stone or baking sheet. Preheat your oven to 450°F (230°C) and bake the crust for 10-12 minutes until lightly golden. Remove from the oven, top with your favorite sauce and toppings, and return to the oven for an additional 10-15 minutes, or until the cheese is melted and bubbly.
Extra Tips:
For best results, verify your oven is fully preheated before baking the pizza. This will help achieve a crispy crust. Feel free to experiment with different herbs and spices in the dough to enhance the flavor. If you prefer a thicker crust, do not roll the dough out too thin. Additionally, you can par-bake the crust for a few minutes before adding toppings if you like a crunchier base. Enjoy your homemade pizza with a side of fresh salad or your favorite dipping sauces!
Cooking Steps
Let’s get started on making that pizza dough! First, I’ll mix the dry ingredients together before gradually adding the wet ones. Once that’s done, it’s time to knead the dough until it’s smooth and ready for rolling out!
Step 1. Mix Dry Ingredients Together
To create the perfect base for your no-yeast pizza, I start by combining the dry ingredients in a large mixing bowl. First, I measure out the flour, baking powder, and salt, making sure I stick to the right ingredient ratios for that ideal texture. Using a whisk, I mix these elements thoroughly, employing circular mixing techniques to aerate the flour and blend the leavening agent evenly. This step is essential; it guarantees that every bite of pizza has the same delightful rise and flavor. I often feel the excitement build as I watch the ingredients transform into a cohesive mixture, ready to support the vibrant toppings that will soon follow. Trust me, nailing this part sets the stage for pizza perfection!
Step 2. Add Wet Ingredients Gradually
With the dry ingredients perfectly blended, it’s time to bring life to the dough by adding the wet ingredients gradually. I start by measuring out my liquids, paying close attention to the wet ingredient ratios. Pouring a little at a time, I stir gently, watching as the flour absorbs the moisture. This gradual addition is key; it allows me to control the dough’s consistency, guaranteeing it’s neither too sticky nor too dry. As I mix, I can feel the dough coming together, transforming from a sandy texture to something that feels promising. This method not only enhances the dough’s flavor but also guarantees a smooth blend. Trust me, taking it slow here makes all the difference in your final pizza crust!
Step 3. Knead Dough Until Smooth
As I plunge into kneading the dough, I can already envision the delightful crust that awaits. The key to achieving the perfect dough texture lies in mastering a few kneading techniques. I start by folding the dough over itself, pressing down with the palms of my hands. I can feel the resistance gradually soften, transforming from sticky to smooth. With each push and fold, I’m building gluten, which gives the dough that lovely elasticity. I keep my workspace lightly floured to prevent sticking but avoid overdoing it; I want that moisture to remain. After about 5 to 7 minutes, the dough feels silky and pliable, a reflection of my dedication. It’s time to let it rest and rise!
Step 4. Roll Out the Dough
Once the dough has rested, I enthusiastically sprinkle a bit of flour on my countertop, ready to release its potential. Gently, I place the dough in the center, feeling its smooth texture beneath my fingertips. I start pressing it down, coaxing it into a round shape, letting my excitement build as I envision the final product. Using a rolling pin, I roll it out, adjusting the pressure to achieve my desired pizza thickness. I love that moment when the dough stretches, revealing its elasticity while remaining soft and pliable. If it resists, I let it rest for a minute before continuing. The transformation is magical, and soon, I have a canvas ready for my creative toppings!
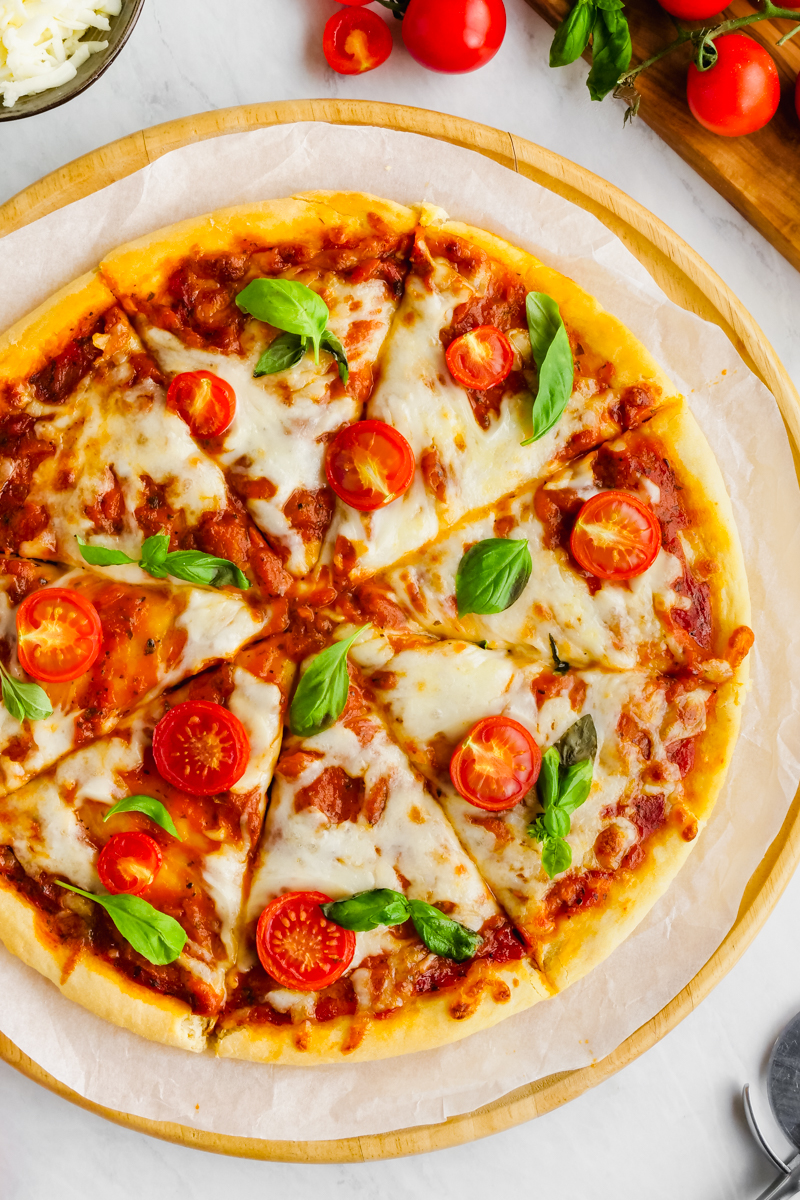
Step 5. Add Toppings of Choice
What toppings should I choose to create the perfect pizza? The beauty of pizza lies in the endless topping combinations available, so let your creativity flow! I love mixing my favorite toppings to craft a unique masterpiece each time. Here are some ideas to inspire you:
- Fresh basil and mozzarella
- Spicy pepperoni and jalapeños
- Caramelized onions and goat cheese
- Grilled veggies and pesto
Experiment with different flavors and textures; don’t be afraid to go bold! Layering these toppings on your rolled-out dough will elevate your pizza, making each bite a delightful surprise. Remember, the key is balancing flavors—choose a mix that excites your palate, and you can’t go wrong!
Nutritional Guide
When it comes to enjoying pizza without the wait for yeast to rise, understanding the nutritional value of your dough is key. This no-yeast pizza dough offers several nutritional benefits, making it a versatile option for many dietary considerations.
Here’s a quick look at the nutritional aspects:
| Nutrient | Amount per Serving |
|---|---|
| Calories | 150 |
| Carbohydrates | 30g |
| Protein | 4g |
| Fiber | 2g |
Final Thoughts
While I’ve shared the ins and outs of making this no-yeast pizza dough, it’s important to remember that simplicity doesn’t compromise flavor or satisfaction. Exploring pizza alternatives opens up a world of culinary creativity. You can easily customize your dough variations to suit your taste. Here are a few ideas to inspire you:
- Cauliflower crust for a low-carb option
- Chickpea flour for a protein-packed twist
- Whole wheat flour for added nutrition
- Herbs and spices to elevate flavor
Making this no-yeast pizza dough means you can whip up a delicious meal in no time. So, don’t hesitate to experiment and discover your favorite combinations. Enjoy the journey of creating your perfect pizza!
Frequently Asked Questions
Can I Freeze Pizza Dough Without Yeast?
I’ve tried freezing dough, and it works! For ideal dough storage, wrap it tightly in plastic wrap and use a freezer bag. This method preserves freshness, making it easy to whip up quick meals later!
How Long Does No Yeast Pizza Dough Last?
Did you know no yeast pizza dough can last up to three days in the fridge? For ideal shelf life, I recommend storing it in an airtight container. Freshness guarantees the best taste and texture!
Can I Use Gluten-Free Flour for This Dough?
I’ve experimented with gluten-free flour for this dough, and it creates a unique texture. Just keep in mind, the dough might be a bit different, but it’s still delicious and offers great gluten-free options!
Is There a Substitute for Baking Powder?
If you need a substitute for baking powder, I’ve found that combining baking soda with vinegar works wonders. Just use one part baking soda and two parts vinegar; it’ll create that much-needed leavening effect.
Can I Add Herbs to the Pizza Dough?
I love adding herb combinations like oregano and basil to my dough for flavor enhancement. It transforms the base into something extraordinary, creating a deliciously aromatic and savory experience that truly elevates my pizza creations.
Conclusion
In the end, making a marvelous meal without yeast is both simple and satisfying. With a little creativity and a dash of determination, you’ll discover delightful dough that dazzles. Each bite bursts with flavor, proving that pizza perfection doesn’t always require yeast. So roll up your sleeves, embrace the ease of this recipe, and enjoy a delicious dinner that brings joy to your table. Trust me, your taste buds will thank you for this tasty twist!
Pizza Dough Recipe No Yeast
Ingredients
Equipment
Method
- Mix Dry Ingredients: In a bowl, whisk together flour, baking powder, and salt.
- Add Wet Ingredients: Pour in olive oil and warm water. Stir until a shaggy dough forms.
- Knead Dough: Turn onto a floured surface and knead for 2–3 minutes until smooth.
- Rest Dough: Let the dough rest for 5 minutes (no yeast = no long rise!).
- Shape & Top: Roll out into your desired thickness, transfer to a baking sheet, and add toppings.
- Bake: Preheat oven to 425°F (220°C) and bake for 15–20 minutes until golden.
Notes
- No Baking Powder? Substitute with 1 tsp baking soda + 1 tsp vinegar.
- Crispier Crust: Pre-bake the dough for 5 minutes before adding toppings.
- Storage: Wrap unused dough tightly and refrigerate for up to 2 days.