

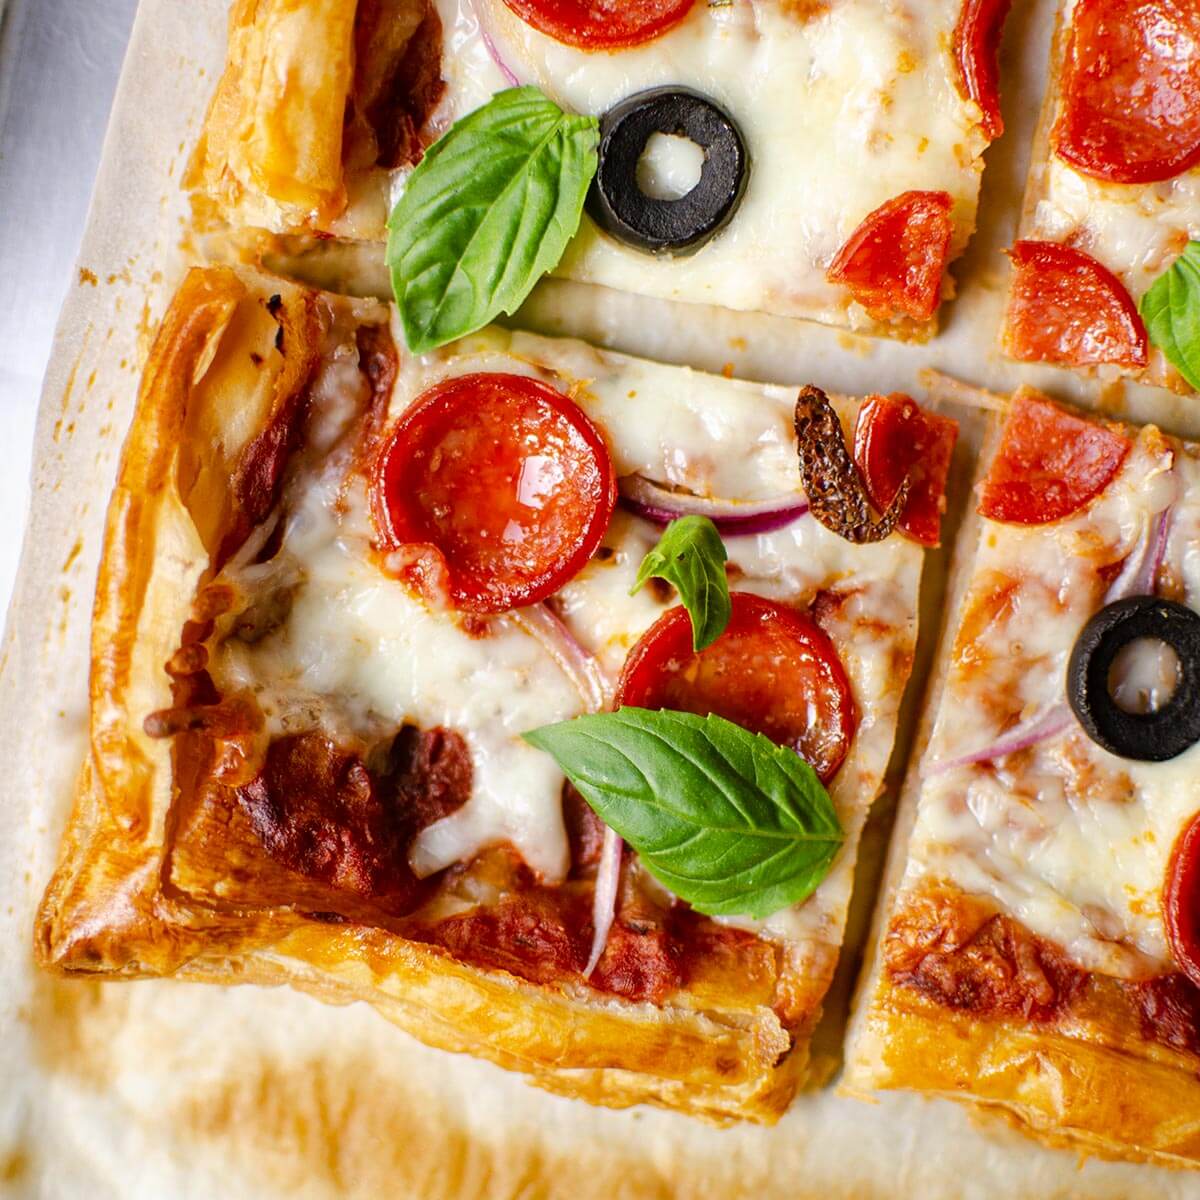
I love making pizza puffs, a fun twist on classic pizza! You’ll need refrigerated puff pastry, mozzarella cheese, pepperoni, and pizza sauce. Simply roll out the dough, fill with the tasty mixture, seal it up, and bake until golden brown. They’re perfect for parties or cozy nights in. Plus, you can get creative with fillings, making them your own. Stick around, and I’ll share more about cooking tips and exciting variations!
History
When I think about the origins of pizza puffs, I can’t help but feel a sense of nostalgia. These delightful bites trace their roots back to Italy, where culinary innovation first transformed traditional pizza into something even more exciting. The concept of wrapping savory ingredients in dough showcases the Italian origins of this snack, blending the familiar with the innovative. As pizza migrated across the globe, it evolved, and the pizza puff emerged as a delectable fusion of flavors and textures. I love how these morsels capture the essence of classic Italian cuisine while inviting creativity in fillings and spices. This culinary evolution continues to inspire chefs and home cooks alike, making pizza puffs a staple in modern gastronomy.
Recipe
Pizza puffs are a delightful snack that combines the classic flavors of pizza with a fun, bite-sized twist. Perfect for parties, game days, or a cozy night in, these little pockets of goodness are sure to please everyone. Whether you’re serving them as an appetizer or a main dish, pizza puffs are easy to make and can be customized with your favorite toppings.
The beauty of pizza puffs lies in their versatility. You can fill them with pepperoni, cheese, vegetables, or even a combination of all three. They can be baked or fried, depending on your preference. With just a few simple ingredients and steps, you can create a delicious treat that captures the essence of pizza in every bite.
Ingredients:
- 1 package of refrigerated puff pastry (2 sheets)
- 1 cup shredded mozzarella cheese
- 1 cup diced pepperoni
- 1/2 cup pizza sauce
- 1/2 teaspoon Italian seasoning
- 1 egg (for egg wash)
- Flour (for dusting)
- Salt and pepper to taste
To make the pizza puffs, start by preheating your oven to 400°F (200°C) and line a baking sheet with parchment paper. On a lightly floured surface, roll out the puff pastry and cut it into squares, about 3 inches on each side. In a mixing bowl, combine the shredded mozzarella, diced pepperoni, pizza sauce, Italian seasoning, salt, and pepper. Place a tablespoon of the mixture in the center of each pastry square, then fold the corners over to form a pocket and seal the edges by pressing with a fork. Brush the tops with a beaten egg for a golden finish. Bake in the preheated oven for 15-20 minutes, or until puffed and golden brown.
When making pizza puffs, feel free to experiment with different fillings and sauces based on your tastes. You can also try adding cooked vegetables like bell peppers or mushrooms for added flavor and nutrition. If you prefer a healthier option, consider baking instead of frying. For extra crispiness, let the puffs cool for a few minutes on a wire rack after baking, and serve them warm with extra pizza sauce for dipping. Enjoy your homemade pizza puffs!
Cooking Steps
Let’s get started on making those delicious pizza puffs! First, I’ll preheat my oven to 375°F, setting the stage for that perfect golden finish. Then, I’ll roll out the pizza dough and prepare to fill it with a cheesy mixture that’s sure to delight.
Step 1. Preheat Oven to 375°F
As I prepare to whip up those delicious pizza puffs, the first step is to preheat the oven to 375°F. This oven temperature is ideal for achieving that perfect golden-brown crust while ensuring the filling is hot and bubbly. While the oven warms, I take a moment to gather my ingredients—this is where the magic happens! A few baking tips: always check your oven’s accuracy with an oven thermometer, as not all ovens heat evenly. Once it reaches 375°F, I’m ready to plunge into my next steps with confidence. That initial heat sets the stage for those scrumptious pizza puffs, so I can’t rush this part. Trust me, your taste buds will thank you later!
Step 2. Roll Out Pizza Dough
Rolling out the pizza dough is a essential step that can make or break your pizza puffs. I love the feeling of transforming my dough into the perfect canvas for delicious fillings. To achieve that ideal dough thickness, I always focus on a few key aspects:
- Surface Preparation: Use a floured surface to prevent sticking and allow for smooth rolling.
- Even Pressure: Apply consistent pressure with your rolling pin, ensuring an even thickness throughout.
- Check for Elasticity: If the dough springs back, let it rest for a few minutes before continuing.
Using a gentle rolling technique not only helps in achieving the right thickness but also keeps the dough from becoming tough. Trust me, this step is essential for tasty pizza puffs!
Step 3. Fill With Cheese Mixture
With the dough perfectly rolled out, it’s time to bring the flavor to life by filling it with a delightful cheese mixture. I love experimenting with different cheese varieties to create the ultimate flavor combinations. For this batch, I mix creamy ricotta, tangy feta, and melted mozzarella, creating a rich, gooey filling that’ll tantalize your taste buds. To elevate the flavor, I sprinkle in some fresh herbs like basil and oregano, along with a hint of garlic powder. Each bite promises a burst of cheesy goodness. Spoon the mixture onto the center of each dough circle, making sure not to overfill, so every puff comes out perfectly. The anticipation builds as I prepare to seal these cheesy delights!
Step 4. Seal Edges of Dough
Carefully fold the edges of each dough circle over the cheese filling, ensuring a snug fit that locks in all that deliciousness. Now, let’s talk about some effective sealing methods that elevate our pizza puffs. Here are a few dough techniques that I find incredibly useful:
- Pinch and Twist: This method creates a beautiful, decorative edge while ensuring a tight seal.
- Fork Pressing: Using a fork to press down the edges adds a rustic charm and reinforces the seal.
- Egg Wash: Brushing the edges with a bit of egg before sealing provides a golden finish and extra adhesion.
Step 5. Bake for 15 Minutes
After sealing those delightful dough pockets, it’s time to bring them to life in the oven. Preheat your oven to 400°F, ensuring it’s just right for those pizza puffs to achieve that perfect golden-brown hue. I carefully place each puff on a parchment-lined baking sheet, giving them a little space to expand. Using innovative baking techniques, I brush the tops with a touch of olive oil for extra crispiness. Set the timer for 15 minutes and let the magic happen. As they bake, the aroma fills the kitchen, teasing my taste buds. Keep an eye on them; cooking times can vary slightly depending on your oven. Once they’re puffed and golden, they’re ready to be devoured!
Nutritional Guide
When it comes to enjoying pizza puffs, it’s essential to contemplate their nutritional value. These delightful bites can be both satisfying and nourishing if we consider their caloric content and ingredient benefits. For instance, you’ll find that incorporating whole wheat flour and fresh vegetables can elevate the health profile of your pizza puffs.
| Nutrient | Amount per Serving |
|---|---|
| Calories | 150 |
| Protein | 6g |
| Fiber | 3g |
Choosing quality ingredients not only enhances flavor but also contributes to a balanced diet. By understanding the nutritional aspects, we can create pizza puffs that are both delicious and innovative, allowing us to indulge without the guilt.
Final Thoughts
Although I enjoy indulging in pizza puffs, I also appreciate how easy they are to customize, making them a perfect treat for any occasion. With endless pizza variations, you can experiment and create a unique snack that’s tailored to your taste. Here are some innovative snack ideas I love:
- Spicy Pepperoni: Add jalapeños and pepper jack cheese for a zesty kick.
- Veggie Delight: Use spinach, mushrooms, and feta for a fresh, healthy twist.
- Sweet Treat: Try Nutella and banana for a dessert version that’ll satisfy your sweet tooth.
These pizza puffs are not just versatile; they’re a fun way to get creative in the kitchen. So, gather your favorite ingredients and start experimenting! You’ll never run out of delicious options.
Frequently Asked Questions
Can I Freeze Leftover Pizza Puffs?
I love using proper freezing techniques. I pack my leftover pizza puffs in airtight storage containers to keep them fresh. Just thaw them in the fridge when you’re ready, and they taste amazing!
What Dipping Sauces Pair Well With Pizza Puffs?
When I enjoy pizza puffs, I love dipping them in marinara sauce for that classic flavor. Ranch dressing adds a creamy twist that surprises my taste buds. Both options elevate the experience to a whole new level!
How Can I Make Pizza Puffs Gluten-Free?
You won’t believe how easy it is to make pizza puffs gluten-free! Just swap regular flour for gluten-free flour, and experiment with pizza puff variations like adding different cheeses or veggies for a tasty twist!
Can I Use Different Fillings for Pizza Puffs?
I love experimenting with different fillings. You can try creative combinations like spinach and feta or BBQ chicken. The possibilities are endless, and each bite brings a delightful surprise. Get creative and enjoy!
How Long Do Pizza Puffs Stay Fresh in the Fridge?
Imagine biting into a warm, cheesy delight! I’ve found that when stored properly, pizza puffs stay fresh in the fridge for about 3 to 4 days, maximizing their delicious lifespan with a little care.
Conclusion
To sum up, making pizza puffs is an adventure that transforms your kitchen into a pizza paradise! The delightful aroma wafting through the air is simply irresistible, and I promise, they’ll vanish faster than you can say “yum!” Whether you’re hosting a party or enjoying a cozy night in, these little pockets of cheesy goodness will steal the show. So, roll up your sleeves, get cooking, and let your taste buds revel in this delicious creation!
Pizza Puffs Recipe
Ingredients
Equipment
Method
- Preheat Oven – Preheat oven to 375°F (190°C). Grease a muffin tin or line with paper liners.
- Mix Dry Ingredients – In a bowl, whisk together flour, baking powder, salt, Italian seasoning, and garlic powder.
- Add Wet Ingredients – Stir in milk and egg until just combined.
- Fold in Cheese & Pepperoni – Gently mix in mozzarella, Parmesan, and chopped pepperoni.
- Fill Muffin Tin – Divide the batter evenly into 12 muffin cups (about ¾ full).
- Bake – Bake for 18-20 minutes until golden and puffed.
- Cool & Serve – Let cool for 5 minutes, then remove from the tin. Serve warm with pizza sauce for dipping.
Notes
- Variations: Add diced bell peppers, olives, or cooked sausage for extra flavor.
- Storage: Keep in an airtight container for up to 3 days (reheat in oven for best texture).
- Freezing: Freeze baked puffs and reheat in the oven when needed.