

To end your Christmas dinner on a sweet note, I’ve got 13 delightful dessert recipes that’ll impress everyone. From the classic Christmas Yule Log Cake to festive Gingerbread Cookies, each treat brings joy and flavor to your table. You’ll love the creamy Eggnog Cheesecake and the rich Peppermint Bark Brownies, plus warm Spiced Apple Crisp topped with ice cream. With so many delicious options, your guests will leave happy and satisfied. Stick around, and I’ll share more scrumptious ideas!
Classic Christmas Yule Log Cake
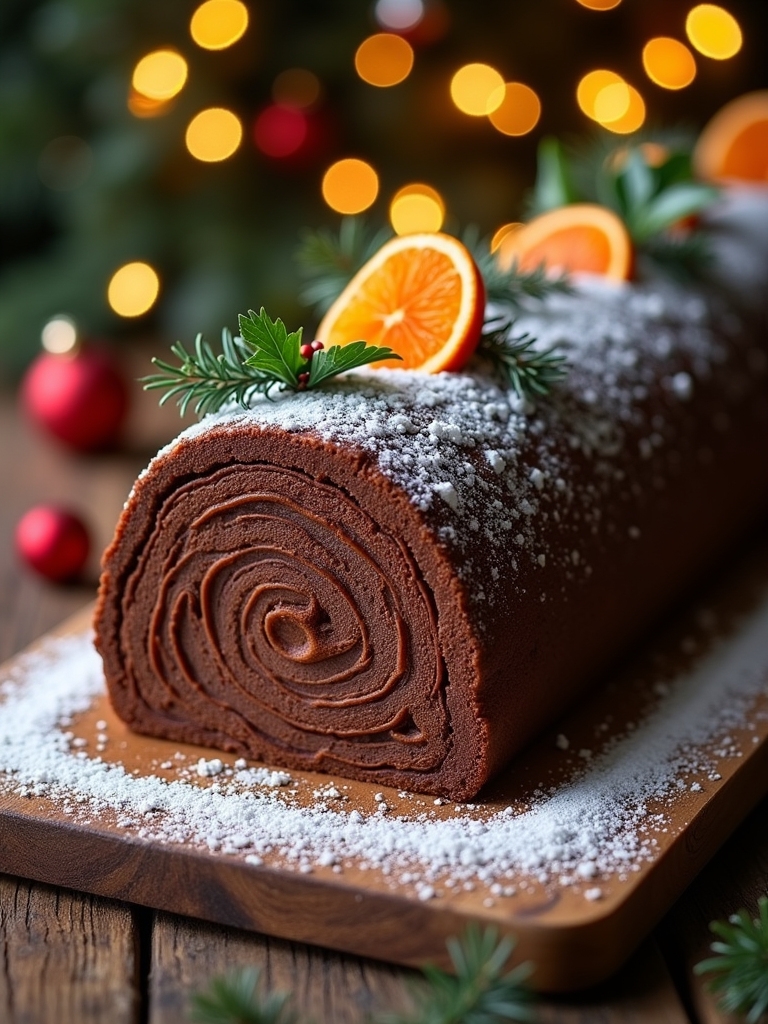
The Classic Christmas Yule Log Cake, known as “Bûche de Noël,” is a traditional holiday dessert that captures the spirit of the season. This delightful cake resembles a log, symbolizing warmth and comfort during the winter months. Made with a light and airy chocolate sponge cake rolled with rich chocolate ganache, the Yule Log is not only visually stunning but also a treat for the taste buds. It’s adorned with festive toppings like powdered sugar and marzipan mushrooms to create an enchanting centerpiece for your Christmas dinner.
Creating a Yule Log may seem intimidating, but with a little patience and attention to detail, you can master this classic dessert. The key lies in achieving a soft sponge that can be rolled without cracking, and a luscious filling that complements the chocolate flavor. This cake is perfect for impressing your guests and will surely become a beloved tradition in your holiday celebrations.
Ingredients:
- 4 large eggs
- ¾ cup granulated sugar
- 1 teaspoon vanilla extract
- ½ cup all-purpose flour
- ¼ cup unsweetened cocoa powder
- ½ teaspoon baking powder
- ¼ teaspoon salt
- 1 cup heavy cream
- 8 ounces semisweet chocolate, chopped
- 2 tablespoons unsalted butter
- Powdered sugar (for dusting)
- Marzipan (for decorations, optional)
Instructions:
Preheat your oven to 350°F (175°C) and line a 15×10-inch jelly roll pan with parchment paper. In a mixing bowl, beat the eggs and granulated sugar together until thick and pale, then stir in the vanilla. Sift the flour, cocoa powder, baking powder, and salt over the egg mixture and gently fold until just combined. Pour the batter into the prepared pan, spreading it evenly. Bake for about 12-15 minutes, or until the cake springs back when lightly touched. Once baked, remove from the oven, let it cool slightly, then invert onto a clean kitchen towel dusted with powdered sugar. Carefully peel off the parchment paper and roll the cake tightly in the towel, letting it cool completely. Meanwhile, prepare the ganache by heating the heavy cream until just simmering, then pouring it over the chopped chocolate and butter. Stir until smooth. Unroll the cooled cake, spread a layer of ganache, and re-roll it gently. Frost the outside with the remaining ganache, and use a fork to create a bark-like texture. Chill until set.
Extra Tips:
When making the Yule Log, make certain that all ingredients are at room temperature for better incorporation, especially the eggs. To prevent the cake from cracking, do not overbake and keep the cake rolled in the towel until it’s completely cool. If you’re feeling creative, you can add festive decorations like chocolate shavings or edible glitter for a shimmering effect. Finally, if you want to prepare the cake in advance, it can be made a day ahead; just store it in the refrigerator and let it come to room temperature before serving for the best flavor and texture.
Gingerbread Cookies With Royal Icing
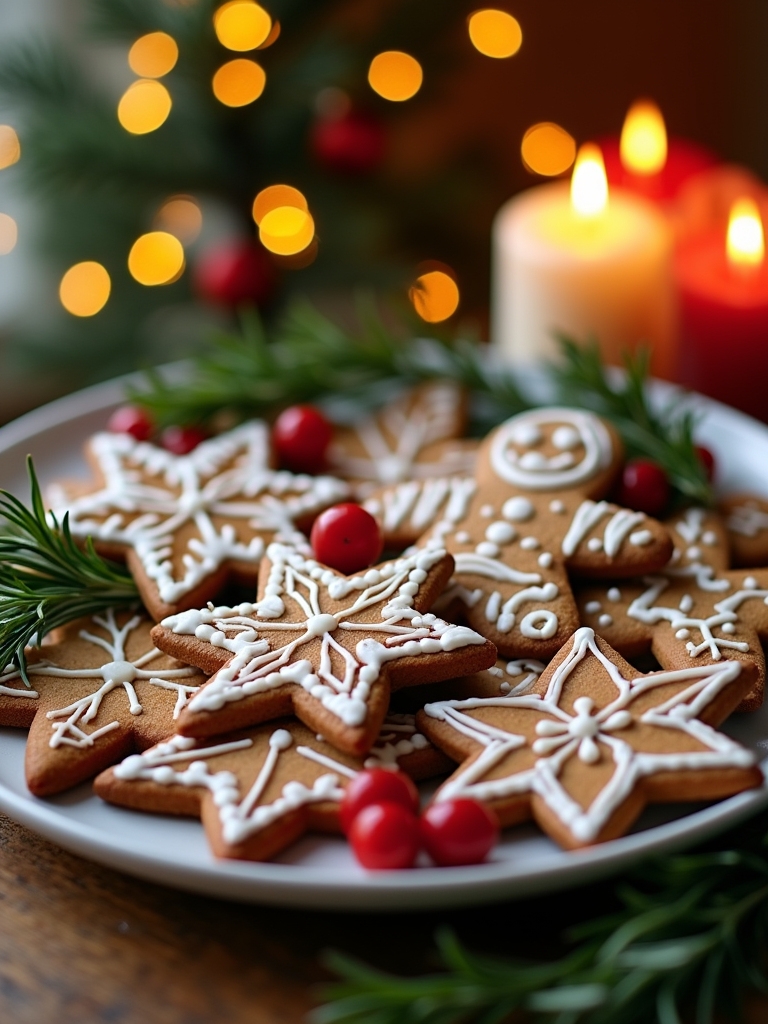
Gingerbread cookies are a beloved holiday treat that evoke the warmth and joy of the Christmas season. With their rich blend of spices and sweet molasses flavor, these cookies are perfect for decorating and sharing with family and friends. The addition of royal icing not only enhances their festive appeal but also allows for endless creativity in design, making them a delightful activity for both kids and adults alike. Whether you hang them on your tree, use them as holiday gifts, or simply enjoy them with a cup of hot cocoa, gingerbread cookies are sure to bring holiday cheer.
Creating gingerbread cookies with royal icing doesn’t have to be intimidating. With a few simple ingredients and some patience, you can craft these delicious, decorative cookies. From rolling out the dough to piping intricate designs, this recipe provides a fun and rewarding experience. So gather your loved ones, roll up your sleeves, and let’s get baking!
Ingredients:
- 3 cups all-purpose flour
- 1 teaspoon baking soda
- 1 tablespoon ground ginger
- 1 tablespoon ground cinnamon
- 1 teaspoon ground cloves
- 1/2 teaspoon salt
- 3/4 cup unsalted butter, softened
- 3/4 cup brown sugar, packed
- 1/2 cup unsulfured molasses
- 1 large egg
- 1 teaspoon vanilla extract
- 2 cups powdered sugar (for royal icing)
- 2 egg whites (or 1 tablespoon meringue powder mixed with 2 tablespoons water)
- Food coloring (optional)
To make the gingerbread cookies, start by whisking together the flour, baking soda, spices, and salt in a bowl. In a separate bowl, cream the softened butter and brown sugar together until light and fluffy. Add the molasses, egg, and vanilla extract to the butter mixture and mix well. Gradually add the dry ingredients to the wet ingredients, stirring until a dough forms. Divide the dough into two discs, wrap in plastic wrap, and chill in the refrigerator for at least 1 hour. Once chilled, preheat your oven to 350°F (175°C). Roll out the dough on a lightly floured surface to about 1/4 inch thickness, cut into desired shapes, and place them on a lined baking sheet. Bake for 8-10 minutes or until they’re firm but not overbaked. Let them cool completely before decorating.
When preparing royal icing, it is crucial to achieve the right consistency. Aim for a stiff peak for outlining and a thinner consistency for flooding your cookies. If your icing is too thick, add a few drops of water; if it’s too runny, add more powdered sugar. You can also use piping bags or squeeze bottles for more precise decorating. Consider making a variety of colors for a more festive look, and don’t forget to let your decorated cookies dry completely before stacking or storing them. Enjoy the process and let your creativity shine through in your designs!
Peppermint Bark Brownies
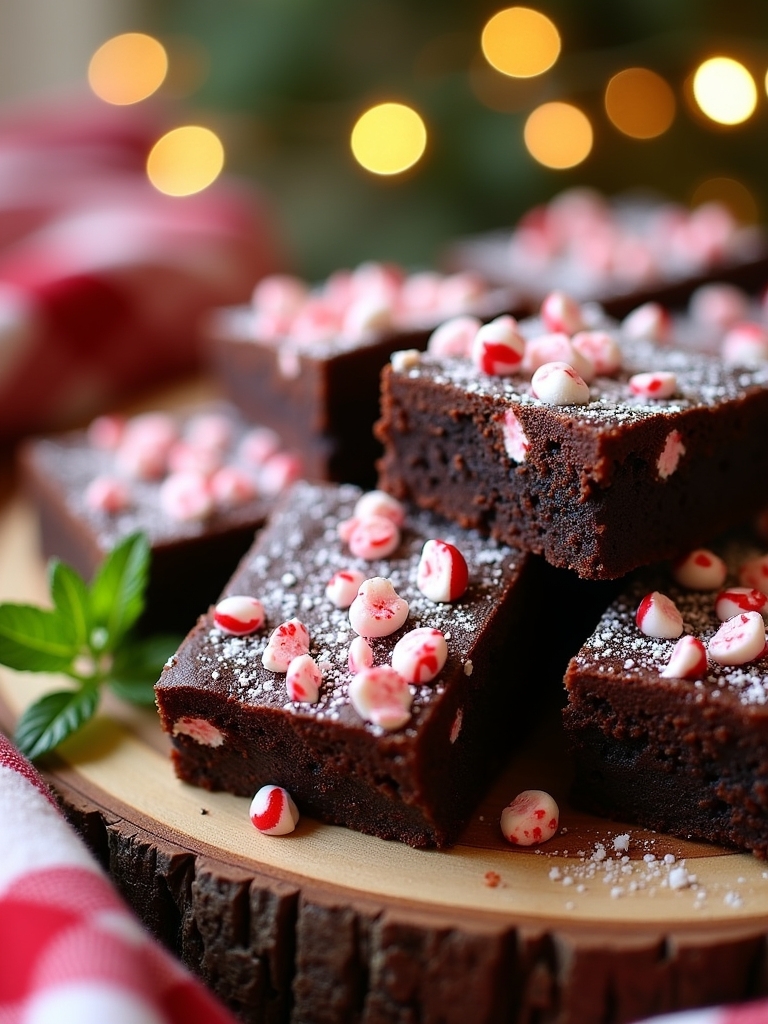
Peppermint Bark Brownies are the perfect festive treat to elevate your Christmas dinner dessert table. Combining the rich, fudgy texture of brownies with the crisp, invigorating flavor of peppermint bark, these brownies are sure to impress your guests. The layers of chocolate and peppermint create a delightful contrast that captures the essence of the holiday season. Whether you’re hosting a festive gathering or simply celebrating the season with loved ones, these brownies will add a touch of sweetness to your festivities.
Making Peppermint Bark Brownies is a simple yet rewarding process. Start by preparing a rich brownie base, allowing the chocolate flavor to shine through. Once the brownies are baked and cooled, it’s time to add the peppermint bark topping, which brings a festive flair and a satisfying crunch. This dessert is not only delicious but also visually appealing, making it a showstopper at any holiday gathering.
Ingredients:
- 1 cup unsalted butter
- 2 cups granulated sugar
- 4 large eggs
- 1 teaspoon vanilla extract
- 1 cup all-purpose flour
- 1 cup unsweetened cocoa powder
- 1/2 teaspoon salt
- 1/2 teaspoon baking powder
- 1 cup crushed peppermint candies or candy canes
- 8 ounces white chocolate, chopped
- 1/2 cup semi-sweet chocolate chips
Instructions:
Preheat your oven to 350°F (175°C) and grease a 9×13-inch baking pan. In a large mixing bowl, melt the butter and stir in the granulated sugar until well combined. Add the eggs one at a time, mixing well after each addition, and then stir in the vanilla extract. In another bowl, whisk together the flour, cocoa powder, salt, and baking powder. Gradually add the dry ingredients to the wet mixture until just combined. Pour the brownie batter into the prepared baking pan and bake for 25-30 minutes or until a toothpick inserted in the center comes out with a few moist crumbs. Allow the brownies to cool completely in the pan before topping them with crushed peppermint candy and melted white chocolate.
Extra Tips:
To guarantee your Peppermint Bark Brownies turn out perfectly, make sure to let the brownies cool completely before adding the white chocolate layer. This will help the chocolate set properly and prevent it from melting into the brownies. Additionally, you can customize your peppermint bark by using different types of chocolate or by adding a sprinkle of sea salt on top for a sweet and salty contrast. For an extra festive touch, consider drizzling melted dark chocolate over the white chocolate layer before it sets. Enjoy your holiday baking!
Eggnog Cheesecake
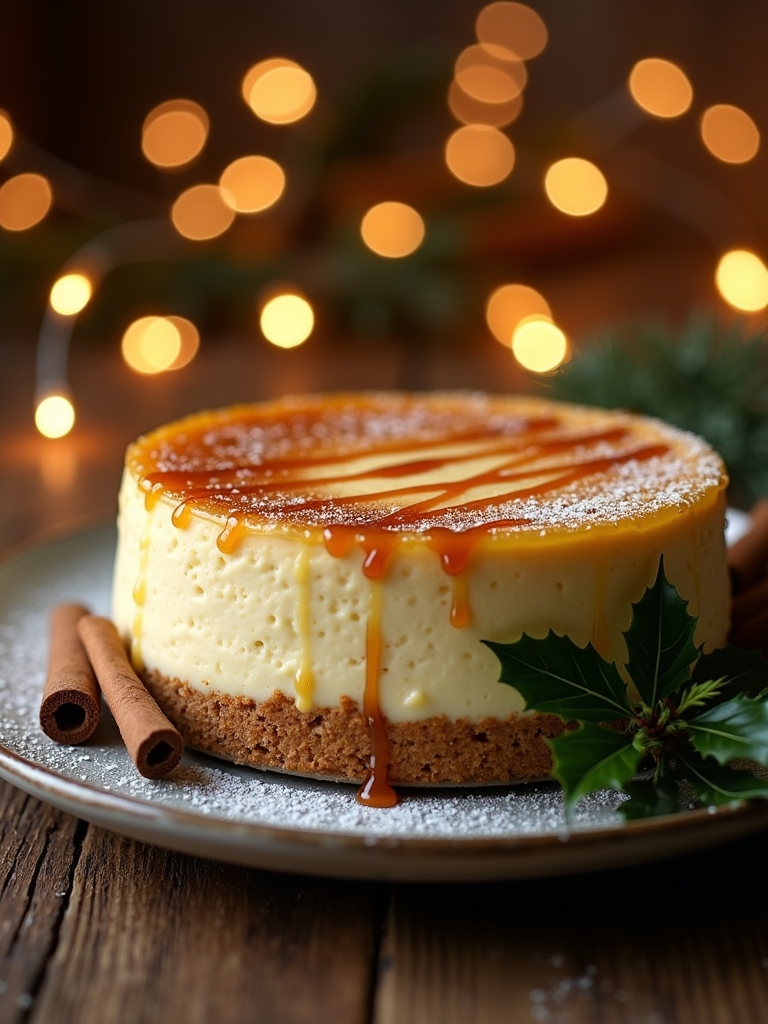
Eggnog Cheesecake is a delightful dessert that perfectly captures the essence of the holiday season. This rich and creamy cheesecake is infused with the warm flavors of eggnog, making it a festive addition to your Christmas dinner table. With a buttery graham cracker crust and a smooth filling topped with whipped cream, it’s bound to impress your guests and leave them craving more.
Preparing an Eggnog Cheesecake is a simple process that brings together classic cheesecake techniques with the festive flavors of eggnog. The creamy filling is made with cream cheese, sugar, eggs, and of course, eggnog, which adds a rich and spicy flavor reminiscent of holiday cheer. This dessert can be made ahead of time, allowing you to enjoy more time with family and friends during the busy holiday season.
Ingredients:
- 1 ½ cups graham cracker crumbs
- ½ cup unsalted butter, melted
- 2 cups cream cheese, softened
- 1 cup granulated sugar
- 3 large eggs
- 1 cup eggnog
- 1 teaspoon vanilla extract
- 1 teaspoon ground nutmeg
- ½ teaspoon ground cinnamon
- Whipped cream for topping
Instructions:
Preheat your oven to 325°F (160°C). In a medium bowl, combine the graham cracker crumbs and melted butter until well mixed, then press the mixture firmly into the bottom of a 9-inch springform pan to form the crust. In a large mixing bowl, beat the cream cheese and sugar together until smooth and creamy. Add in the eggs one at a time, mixing well after each addition. Gradually incorporate the eggnog, vanilla extract, nutmeg, and cinnamon, mixing until fully combined. Pour the cheesecake filling into the prepared crust and smooth the top. Bake for 55-60 minutes, or until the center is set but still slightly jiggly. Turn off the oven and let the cheesecake cool in the oven with the door ajar for about an hour before transferring it to the refrigerator to chill for at least 4 hours, preferably overnight.
Extra Tips:
For the best results, make certain all your ingredients are at room temperature before you start mixing to guarantee a smooth and creamy texture. You can also enhance the flavor by using a high-quality eggnog or even homemade if you have time. If you want to add an extra touch, consider garnishing the top with a sprinkle of nutmeg or cinnamon, or even some chocolate shavings. This cheesecake can be made a couple of days in advance, making it a great option for holiday gatherings where you want to minimize day-of cooking stress!
Spiced Apple Crisp With Vanilla Ice Cream
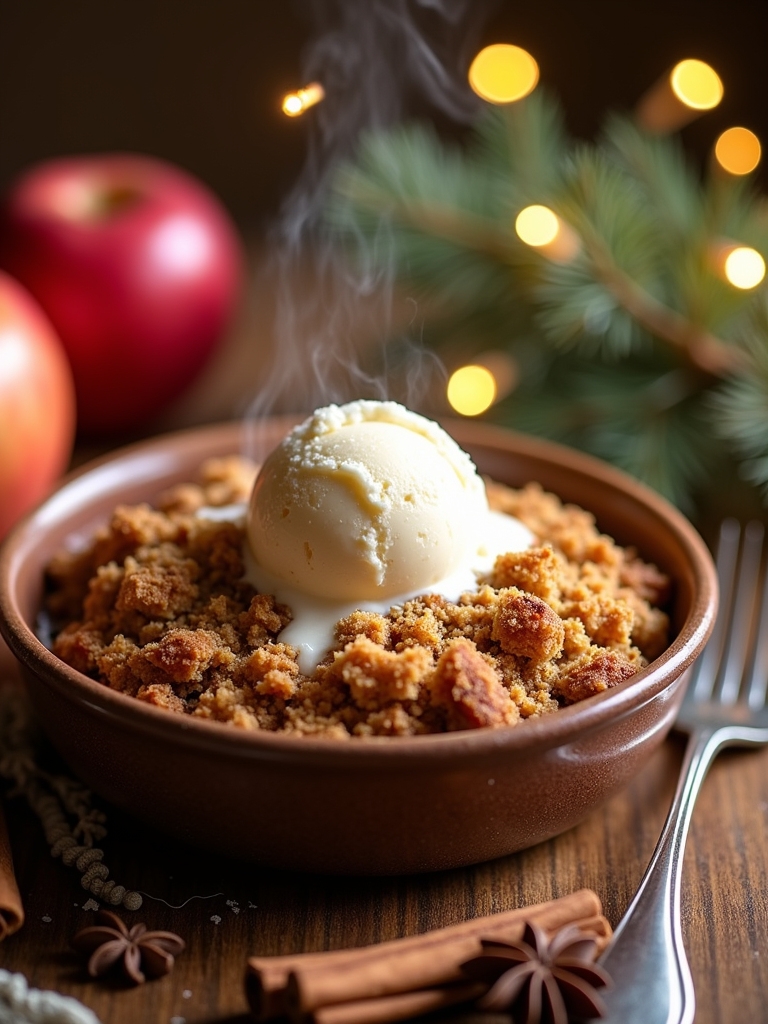
Spiced Apple Crisp with Vanilla Ice Cream is a delightful dessert that marries warm, cinnamon-kissed apples with a crunchy topping, making it a perfect finish to any Christmas dinner. This dish not only brings comfort but also a festive flair to your table, as the aroma of baking apples fills the air, evoking memories of holiday gatherings and cozy family moments. Paired with a scoop of creamy vanilla ice cream, this dessert is sure to please both kids and adults alike.
To create the ultimate spiced apple crisp, it is crucial to select fresh, tart apples that will hold their shape while baking. Granny Smith apples are a fantastic choice due to their crispness and tangy flavor, which beautifully contrasts the sweetness of the crisp topping. The combination of spices like cinnamon and nutmeg enhances the apple’s natural sweetness and adds a warm, inviting flavor profile that is synonymous with the holiday season.
Ingredients:
- 6 cups of peeled and sliced Granny Smith apples
- 1/2 cup granulated sugar
- 1 teaspoon ground cinnamon
- 1/4 teaspoon ground nutmeg
- 1 tablespoon lemon juice
- 1 cup rolled oats
- 1/2 cup all-purpose flour
- 1/2 cup brown sugar, packed
- 1/2 cup unsalted butter, melted
- 1/4 teaspoon salt
- Vanilla ice cream, for serving
To prepare the Spiced Apple Crisp, preheat your oven to 350°F (175°C). In a large mixing bowl, combine the sliced apples, granulated sugar, cinnamon, nutmeg, and lemon juice, tossing until the apples are well coated. Transfer the apple mixture to a greased 9×13-inch baking dish. In another bowl, mix together the oats, flour, brown sugar, melted butter, and salt until crumbly. Sprinkle this mixture evenly over the apples. Bake in the preheated oven for 40-45 minutes or until the apples are tender and the topping is golden brown. Serve warm with a scoop of vanilla ice cream on top.
When making your Spiced Apple Crisp, feel free to experiment with different types of apples for a varied flavor profile. Combining several varieties, such as Honeycrisp or Fuji, can add depth to the dish. Additionally, you can adjust the sweetness by reducing the amount of sugar based on your preference or even adding chopped nuts to the topping for an extra crunch. Remember to let the crisp cool for a few minutes before serving to allow the flavors to meld beautifully, ensuring each bite is a delicious blend of warm apples and crunchy topping.
Chocolate Pecan Pie
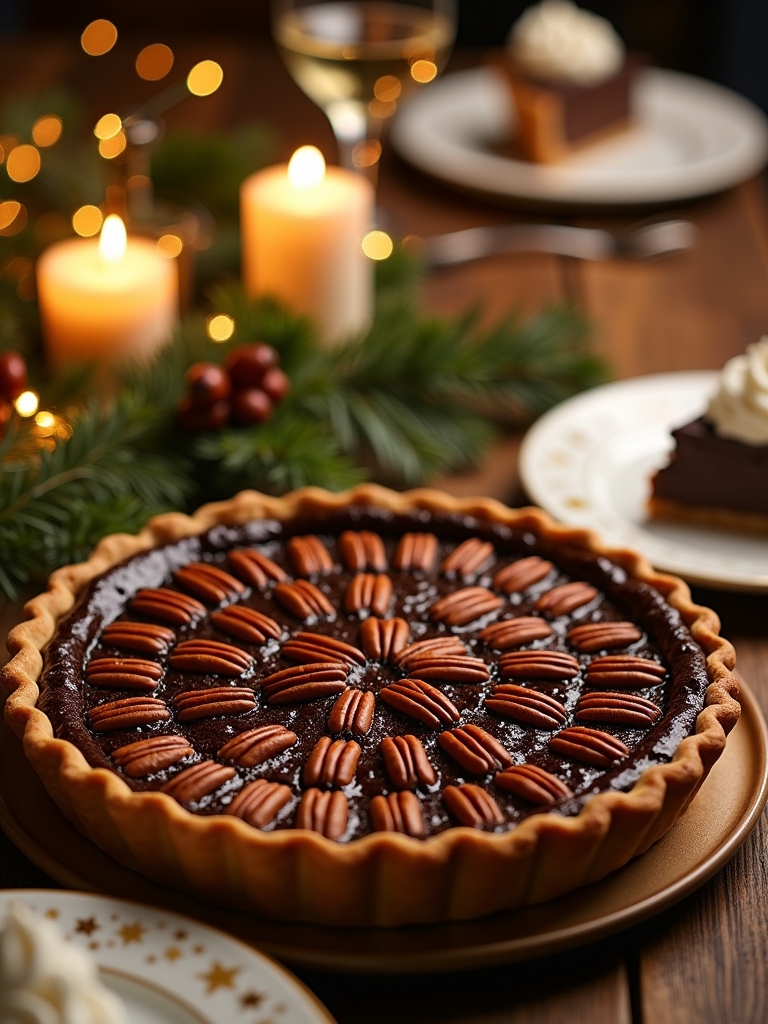
Chocolate pecan pie is a delightful twist on the classic dessert that combines the rich flavors of chocolate and the crunchy texture of pecans. Perfect for the holiday season, this pie is a crowd-pleaser that will have your guests coming back for seconds. The balance of sweetness from the chocolate and the nuttiness of the pecans creates a luxurious dessert that pairs wonderfully with a scoop of vanilla ice cream or a dollop of whipped cream.
Indulge in the rich flavors of chocolate and crunchy pecans with this delightful holiday pie that will leave everyone wanting more.
Making a chocolate pecan pie is easier than it sounds and doesn’t require any fancy techniques. The crust can be made from scratch or purchased pre-made for convenience. As the pie bakes, the chocolate melts and mingles with the eggs and corn syrup, resulting in a gooey filling that sets perfectly as it cools. With just a few simple steps, you can create a stunning dessert that will be the highlight of your Christmas dinner.
Ingredients:
- 1 unbaked pie crust (9-inch)
- 1 cup pecans, chopped
- 1 cup semi-sweet chocolate chips
- 3 large eggs
- 1 cup corn syrup
- 1 cup brown sugar, packed
- 1/4 cup unsalted butter, melted
- 1 teaspoon vanilla extract
- 1/4 teaspoon salt
Instructions:
Preheat your oven to 350°F (175°C). In a mixing bowl, whisk together the eggs, corn syrup, brown sugar, melted butter, vanilla extract, and salt until well combined. Stir in the chopped pecans and chocolate chips. Pour the filling into the unbaked pie crust, making sure the pecans and chocolate chips are evenly distributed. Bake for 50-60 minutes, or until the filling is set and the top is golden brown. Allow the pie to cool completely before slicing, as this will help the filling firm up.
Extra Tips:
For added flavor, toast the pecans in a dry skillet over medium heat for a few minutes before adding them to the filling. This will enhance their nuttiness and give your pie an extra depth of flavor. If you prefer a sweeter pie, you can increase the amount of brown sugar slightly. Also, be sure to check the pie towards the end of the baking time; if the crust edges are browning too quickly, cover them with aluminum foil to prevent burning. Enjoy your chocolate pecan pie with a scoop of ice cream or a sprinkle of sea salt to elevate the flavors!
Cranberry Orange Tart

Indulging in a Cranberry Orange Tart is a wonderful way to celebrate the festive season. This delightful dessert combines the tartness of fresh cranberries with the vibrant zest of oranges, creating a perfect balance of flavors that will impress your guests. The buttery crust serves as a delicious base, while the filling is both tangy and sweet, making it an ideal finish to your Christmas dinner.
Making this tart is not only straightforward but also a fun activity to do with family or friends. As the aromas of citrus and cranberries fill your kitchen, you can look forward to sharing this beautiful dessert. Whether served with a dollop of whipped cream or a scoop of vanilla ice cream, the Cranberry Orange Tart is sure to become a holiday favorite.
Ingredients:
- 1 ½ cups all-purpose flour
- ½ cup unsalted butter, cold and cubed
- ¼ cup powdered sugar
- 1 egg yolk
- 2-3 tablespoons ice water
- 1 ½ cups fresh cranberries
- 1 cup granulated sugar
- 1 tablespoon orange zest
- ¼ cup freshly squeezed orange juice
- 2 eggs
- 1 teaspoon vanilla extract
- 1 tablespoon cornstarch
- Pinch of salt
Instructions:
To make the tart crust, combine the flour, cold butter, and powdered sugar in a food processor, pulsing until the mixture resembles coarse crumbs. Add the egg yolk and ice water, mixing until the dough forms. Press the dough into a tart pan and refrigerate for 30 minutes. Preheat your oven to 350°F (175°C). In a saucepan, combine the cranberries, granulated sugar, orange zest, and orange juice. Cook over medium heat until the cranberries burst and the mixture thickens. Remove from heat and let cool slightly. In a bowl, whisk together the eggs, vanilla extract, cornstarch, and salt, then fold in the cranberry mixture. Pour the filling into the tart shell and bake for 30-35 minutes or until set. Cool completely before serving.
Extra Tips:
For an extra special touch, consider garnishing your Cranberry Orange Tart with candied orange slices or a sprinkle of toasted almonds for added texture. You can also make the tart a day in advance; this allows the flavors to meld beautifully. Serve it chilled or at room temperature, and if you want to enhance the flavor, a light dusting of powdered sugar just before serving adds a lovely finishing touch.
Red Velvet Cupcakes With Cream Cheese Frosting
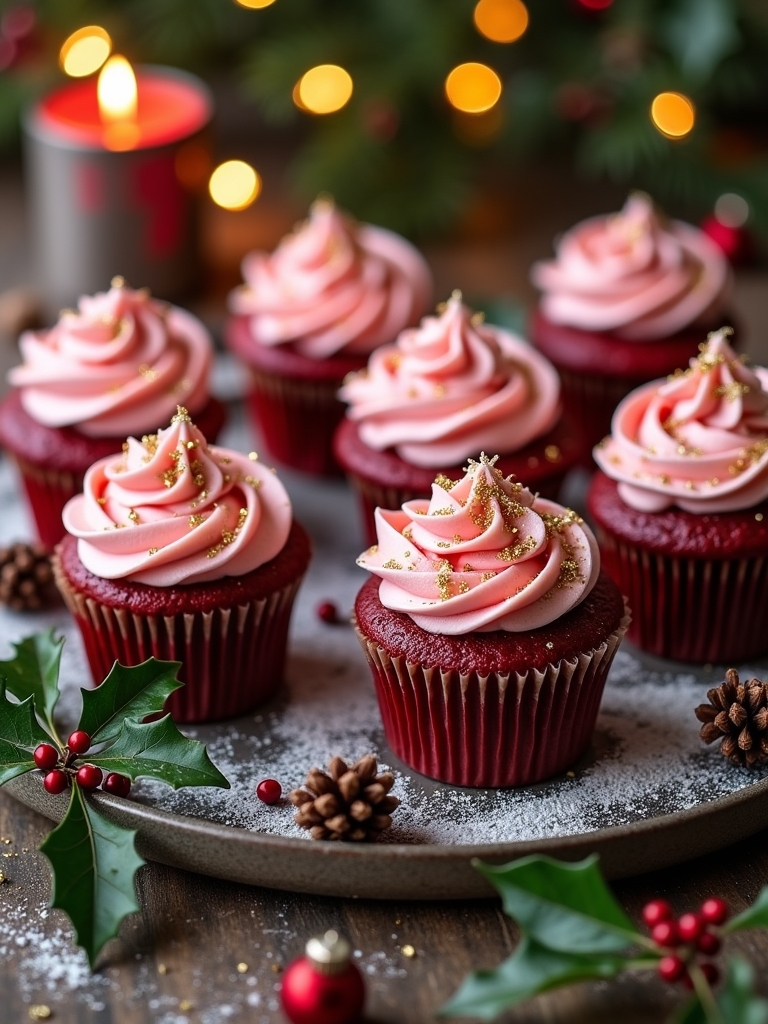
Red velvet cupcakes are a festive treat perfect for Christmas dinner, bringing both color and flavor to your dessert table. These vibrant cupcakes are not only visually appealing but also boast a rich, chocolatey taste that pairs wonderfully with the tangy cream cheese frosting. The combination of the moist cake and the smooth frosting creates a delightful experience for your taste buds, making them a must-have during the holiday season.
Red velvet cupcakes bring vibrant color and rich flavor to your holiday dessert table, making them a delightful must-have for Christmas celebrations.
To make the red velvet cupcakes even more special, consider adding festive decorations like sprinkles or edible glitter. These small touches can elevate your presentation, making them a standout dessert that guests will remember. Whether you’re hosting a gathering or looking to impress your loved ones with a homemade treat, these red velvet cupcakes are sure to be a hit.
Ingredients:
- 1 ½ cups all-purpose flour
- 1 cup granulated sugar
- 1 tsp baking soda
- 1 tsp cocoa powder
- ½ tsp salt
- 1 cup vegetable oil
- 1 cup buttermilk, room temperature
- 2 large eggs
- 2 tbsp red food coloring
- 1 tsp vanilla extract
- 1 tsp white vinegar
Instructions:
Preheat your oven to 350°F (175°C) and line a cupcake tin with paper liners. In a large bowl, whisk together the flour, sugar, baking soda, cocoa powder, and salt. In another bowl, combine the vegetable oil, buttermilk, eggs, red food coloring, vanilla extract, and vinegar. Gradually add the wet ingredients to the dry ingredients, mixing until just combined. Fill each cupcake liner about two-thirds full with batter and bake for 18-20 minutes, or until a toothpick inserted into the center comes out clean. Allow the cupcakes to cool completely before frosting.
Extra Tips:
When making red velvet cupcakes, make sure to use high-quality cocoa powder for the best flavor. If you want to enhance the cream cheese frosting, consider adding a dash of vanilla extract or a sprinkle of lemon juice to balance the sweetness. For a more festive touch, you can top the frosted cupcakes with crushed peppermint candies or seasonal sprinkles. Store any leftovers in an airtight container in the refrigerator, as the cream cheese frosting needs to be kept cool.
Mini Pavlovas With Seasonal Fruit
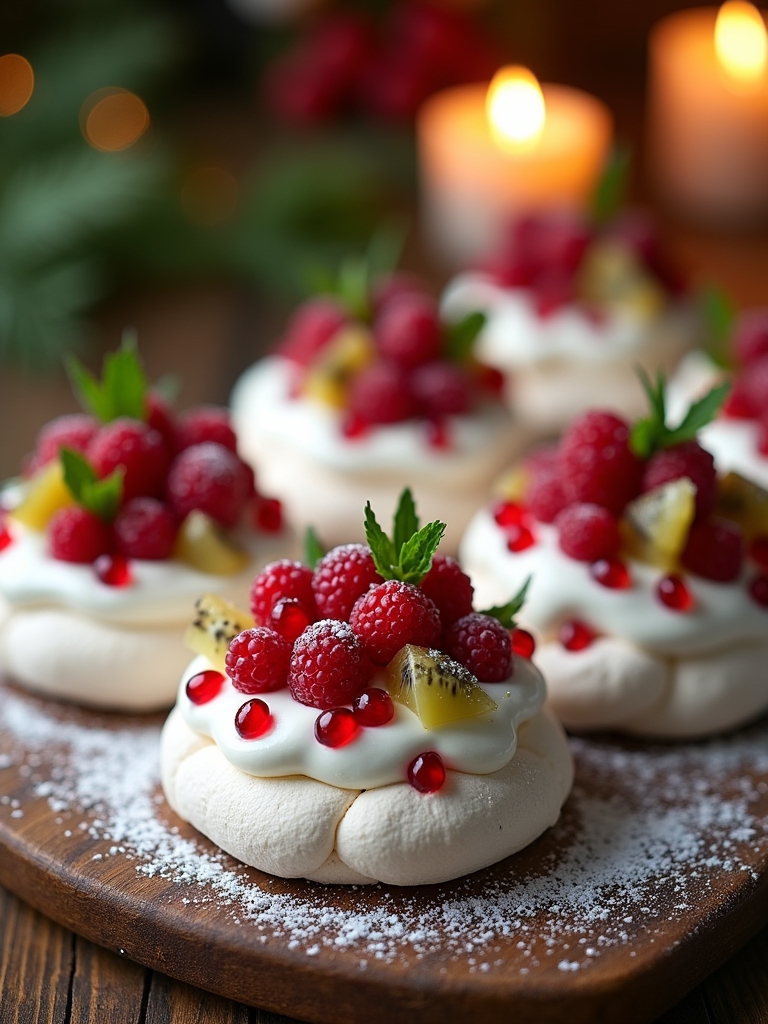
Mini pavlovas are delightful meringue-based desserts that are light, airy, and perfect for any festive occasion, especially Christmas. These charming little treats have a crisp outer shell and a soft, marshmallow-like center, making them an irresistible addition to your holiday dessert table. Topped with seasonal fruits like pomegranate seeds, kiwi, and berries, they not only look beautiful but also provide a burst of flavor that pairs wonderfully with the sweetness of the meringue.
Creating mini pavlovas can be a fun and interactive experience, especially when you involve family or friends in the decorating process. Once you master the basic meringue technique, you can customize the toppings based on your preferences or what’s available in your area. These pavlovas are not only gluten-free but also provide a light finish to a hearty Christmas dinner, leaving your guests feeling satisfied yet not overly stuffed.
Ingredients:
- 4 large egg whites
- 1 cup granulated sugar
- 1 teaspoon white vinegar
- 1 teaspoon cornstarch
- 1 teaspoon vanilla extract
- 1 cup heavy whipping cream
- 2 tablespoons powdered sugar
- Seasonal fruits (e.g., kiwi, pomegranate seeds, berries, mandarin segments)
Instructions:
Preheat your oven to 250°F (120°C) and line a baking sheet with parchment paper. In a clean mixing bowl, whisk the egg whites on medium speed until soft peaks form. Gradually add the granulated sugar, one tablespoon at a time, until the mixture is glossy and stiff peaks form. Gently fold in the vinegar, cornstarch, and vanilla extract. Using a spoon or piping bag, dollop or pipe the meringue mixture into small rounds on the prepared baking sheet, creating a slight well in the center for the toppings. Bake for 1 hour, then turn off the oven and let the pavlovas cool completely inside the oven.
Extra Tips:
When making mini pavlovas, make certain that your mixing bowl and utensils are free from any grease or remnants of egg yolk, as this can affect the meringue’s ability to whip properly. For best results, use room temperature egg whites, as they whip up to a greater volume. You can prepare the pavlovas a day in advance and store them in an airtight container to keep them crisp. When ready to serve, whip the heavy cream with powdered sugar until soft peaks form, fill the pavlovas with the cream, and top with your choice of seasonal fruits for a truly festive dessert!
Peppermint Meringue Kisses
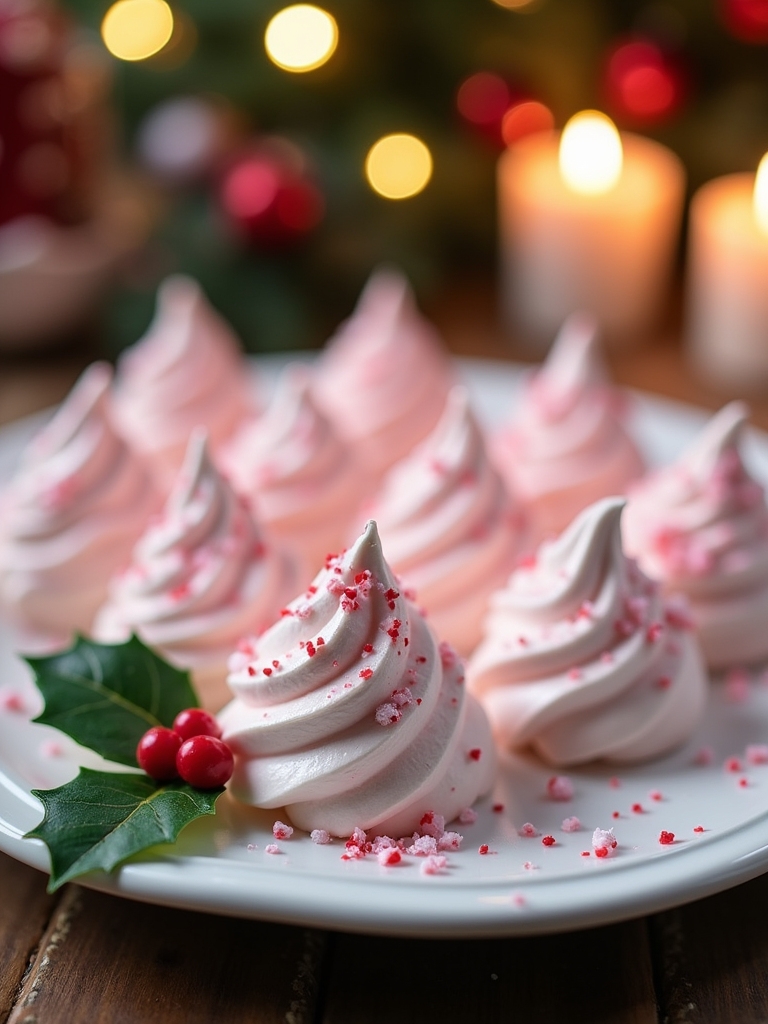
Peppermint Meringue Kisses are a delightful and festive dessert that add a touch of elegance to your Christmas dinner. These light and airy confections are made from whipped egg whites and sugar, flavored with peppermint extract, and can be embellished with crushed candy canes for a crunchy finish. Their delicate texture and sweet minty flavor make them a perfect complement to the rich and hearty holiday meals.
Preparing these meringues is a straightforward process, making them an accessible treat for both novice and experienced bakers alike. Once you master the technique of whipping egg whites to the right consistency, the possibilities are endless. You can experiment with different flavors and colors, but the classic peppermint version is sure to be a crowd-pleaser during the holiday season.
Ingredients:
- 3 large egg whites
- 1/4 teaspoon cream of tartar
- 3/4 cup granulated sugar
- 1/2 teaspoon peppermint extract
- 1/4 teaspoon vanilla extract
- Pinch of salt
- Crushed candy canes or peppermint candies (optional, for garnish)
Instructions:
Preheat your oven to 200°F (93°C) and line a baking sheet with parchment paper. In a clean, dry mixing bowl, combine the egg whites and cream of tartar. Using an electric mixer, beat the egg whites on medium speed until soft peaks form. Gradually add the granulated sugar, one tablespoon at a time, and continue beating until stiff peaks form and the mixture is glossy. Gently fold in the peppermint and vanilla extracts, along with a pinch of salt. Using a piping bag fitted with a star tip, pipe small mounds or kisses onto the prepared baking sheet. Bake for 1.5 to 2 hours, or until the meringues are dry and can be easily lifted off the parchment paper. Allow them to cool completely before serving.
Extra Tips:
For best results, make certain that your mixing bowl and beaters are free from any grease, as even a small amount can prevent the egg whites from whipping properly. Additionally, make sure your egg whites are at room temperature before beating them, as this helps to achieve maximum volume. If you want to add color, you can use gel food coloring, but be cautious not to overmix the batter after adding color. Finally, store your Peppermint Meringue Kisses in an airtight container to maintain their crispness and flavor. Enjoy these festive treats as a sweet ending to your Christmas dinner!
Buche De Noel (French Yule Log)
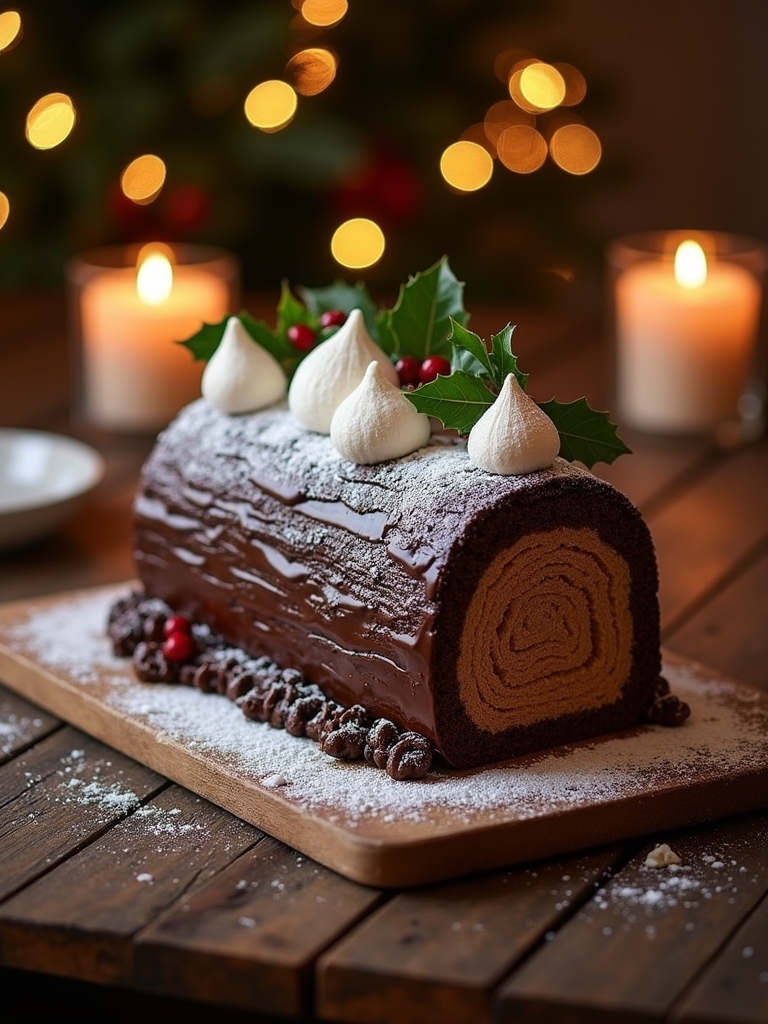
Buche De Noel, or Yule Log, is a delightful and festive dessert that beautifully represents the spirit of Christmas. This traditional French cake is designed to resemble a log, symbolizing the Yule log that families would burn in their fireplaces during the holiday season. With its rich chocolate flavor and creamy filling, this dessert is not only a feast for the eyes but also a delicious treat that brings a touch of French elegance to your holiday table.
Creating a Buche De Noel involves making a light and airy sponge cake, rolling it up with a luscious filling, and then decorating it to resemble a log. The cake is typically covered with a chocolate ganache or buttercream, and artistic touches such as meringue mushrooms or edible decorations can be added to enhance its rustic appearance. This dessert is sure to impress your guests and become a cherished part of your holiday traditions.
Ingredients:
- 4 large eggs
- 1 cup granulated sugar
- 1 cup all-purpose flour
- 1/3 cup unsweetened cocoa powder
- 1/4 teaspoon salt
- 1 teaspoon vanilla extract
- 1 cup heavy cream
- 1/2 cup powdered sugar
- 8 oz semisweet chocolate, chopped
- 1/2 cup unsalted butter, at room temperature
- 1 teaspoon instant coffee granules (optional)
- Edible decorations (e.g., powdered sugar, meringue mushrooms)
Cooking Instructions:
Preheat your oven to 350°F (175°C) and line a 15×10 inch jelly roll pan with parchment paper. In a mixing bowl, beat the eggs and granulated sugar together until pale and fluffy. Gently fold in the flour, cocoa powder, and salt, taking care not to deflate the batter. Pour the mixture into the prepared pan and spread it evenly. Bake for about 12-15 minutes or until the cake springs back when lightly touched. Once baked, let it cool for a few minutes before flipping it onto a clean kitchen towel dusted with powdered sugar. Roll the cake tightly in the towel and let it cool completely.
To make the filling, whip the heavy cream with powdered sugar until soft peaks form. In a separate bowl, melt the chocolate and butter together until smooth, then stir in the instant coffee if using. Once the cake is cool, unroll it and spread the whipped cream filling evenly over the surface. Roll the cake back up, this time without the towel, and place it seam-side down on a serving platter. To create the log effect, use a serrated knife to cut a small section of the cake to attach at an angle to one end, resembling a branch. Cover the entire cake with the chocolate ganache or buttercream, then use a fork to create bark-like texture. Decorate with edible decorations as desired.
Extra Tips:
When making Buche De Noel, it’s important to verify your sponge cake is light and fluffy to roll easily without cracking. Be gentle when folding in dry ingredients to maintain the airiness of the batter. If you want to add a twist, consider flavoring the cream filling with a splash of rum or orange zest for an extra festive touch. Additionally, let your cake chill in the refrigerator for a bit before serving; this will help the flavors meld and make cutting easier. Finally, don’t hesitate to get creative with your decorations—this dessert is all about celebrating the holiday spirit!
Snowman Cake Pops
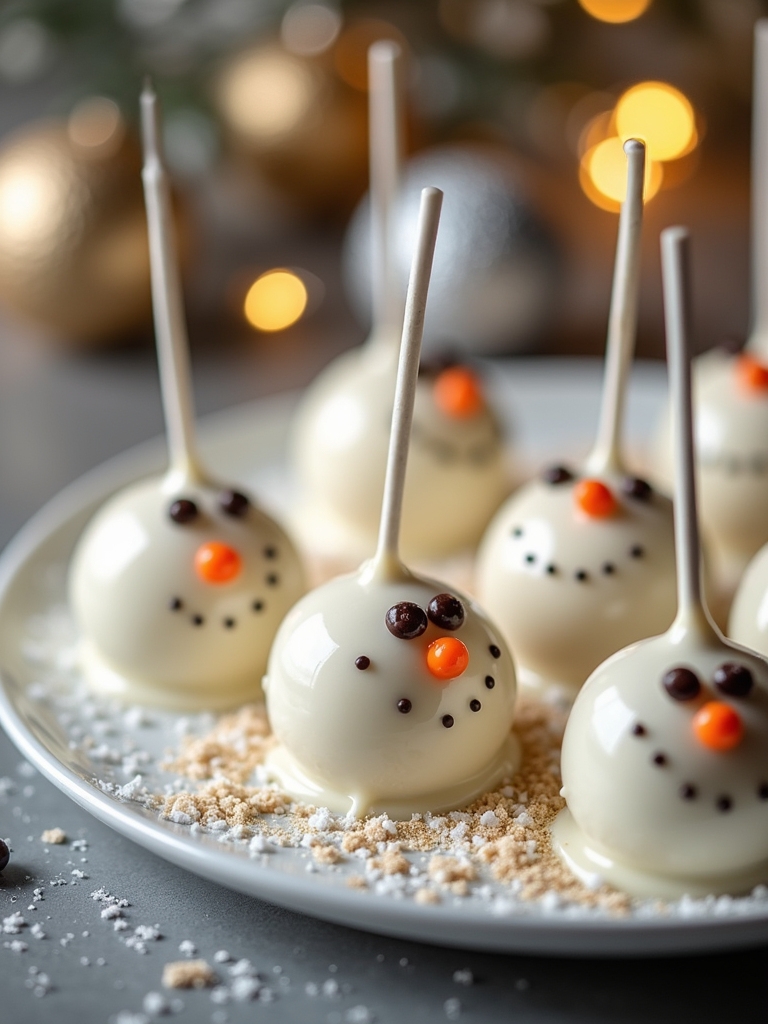
Snowman Cake Pops are a delightful and festive treat that will add a touch of whimsy to your Christmas dinner dessert table. These adorable little snowmen are not only visually appealing but also incredibly delicious, making them a favorite among both kids and adults alike. They can be made ahead of time and stored in the refrigerator, allowing you to enjoy the holiday festivities without stress. With their sweet cake centers and charming decorations, Snowman Cake Pops are sure to be a hit at your holiday gathering.
To create these delightful treats, you can use any flavor of cake mix and frosting you prefer. The cake is crumbled and mixed with frosting to form the perfect base for your pops, which are then dipped in white chocolate and decorated to resemble cheerful snowmen. The best part is that you can get creative with the decorations, using candy and edible markers to give each snowman its own personality. Gather your ingredients and let’s get started on making these fun holiday desserts!
Ingredients:
- 1 box of cake mix (any flavor)
- 1 can of frosting (any flavor)
- 1 pound of white chocolate or candy melts
- Lollipop sticks
- Mini chocolate chips (for eyes)
- Orange candies or icing (for noses)
- Colored sprinkles or edible glitter (for decoration)
- Wax paper
Instructions:
Begin by baking the cake according to the box instructions and allow it to cool completely. Once cooled, crumble the cake into a large bowl and mix in about half of the frosting until the mixture is moist but not overly sticky. Roll the mixture into balls, about 1 inch in diameter, and then shape them into snowman bodies by forming a larger ball for the bottom and a smaller ball for the head. Insert a lollipop stick into each snowman and place them on a baking sheet lined with wax paper. Freeze the cake pops for about 30 minutes to firm them up. While they’re chilling, melt the white chocolate or candy melts in a microwave-safe bowl, stirring until smooth. Dip each cake pop into the melted chocolate, ensuring they are fully coated, and allow excess to drip off. Place the pops back on the wax paper and while the chocolate is still wet, decorate with mini chocolate chips for eyes, orange candies for noses, and sprinkles for additional embellishments.
Extra Tips:
When it comes to decorating your Snowman Cake Pops, let your creativity shine! You can use various candies for different features, such as pretzel sticks for arms or small candies for hats. If you’re having trouble with the chocolate coating, try adding a small amount of vegetable oil to the melted chocolate to thin it out. Make sure to store your cake pops in the fridge if you’re not serving them right away, as this helps maintain their shape and keeps the chocolate from melting. Enjoy making these festive treats and have fun experimenting with different decorations!
Festive Fruitcake Cookies
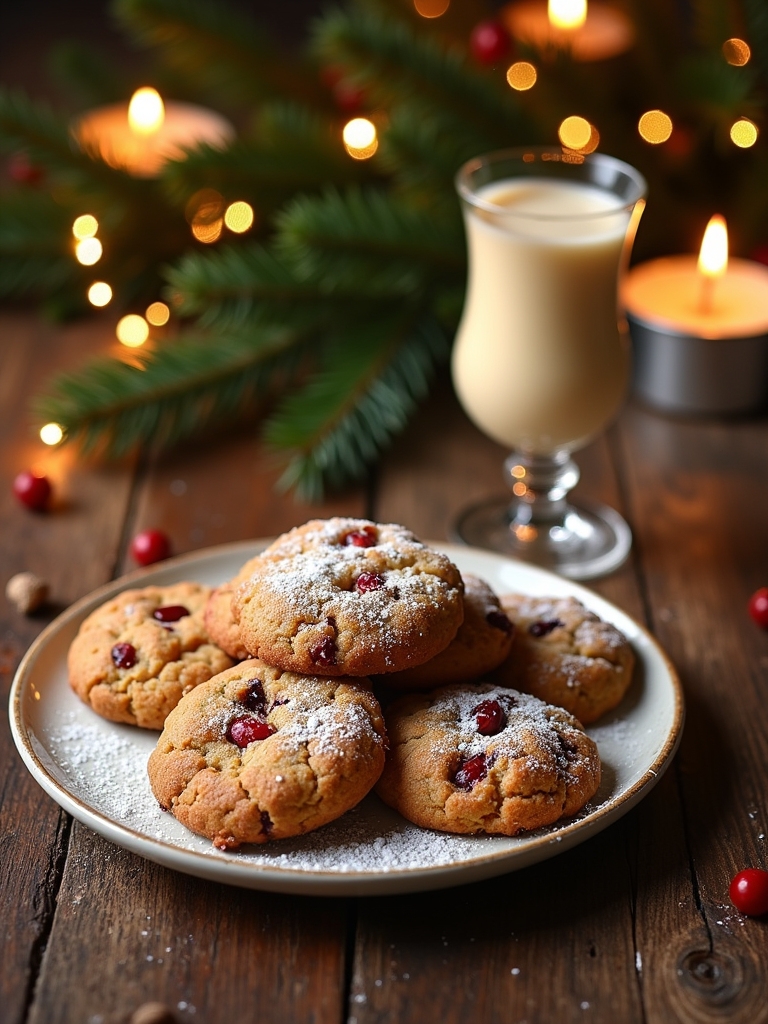
The holiday season is the perfect time to embrace the rich flavors of traditional fruitcake in a more approachable and fun form – cookies! These Festive Fruitcake Cookies are a delightful twist on the classic dessert, combining dried fruits, nuts, and warm spices to create a chewy, flavorful treat that encapsulates the spirit of Christmas. Perfect for sharing with family and friends or leaving out for Santa, these cookies are sure to be a highlight of your holiday dessert table.
Making these cookies is not only a great way to use up leftover dried fruits and nuts, but they also come together quickly and easily. The combination of textures and flavors creates a festive burst in every bite. With a little bit of planning, you can have a batch of these cookies ready to enjoy in no time. So gather your ingredients and get ready to spread some holiday cheer with these delicious Festive Fruitcake Cookies!
Ingredients:
- 1 cup all-purpose flour
- 1/2 teaspoon baking soda
- 1/2 teaspoon ground cinnamon
- 1/4 teaspoon ground nutmeg
- 1/4 teaspoon salt
- 1/2 cup unsalted butter, softened
- 1/2 cup brown sugar, packed
- 1/4 cup granulated sugar
- 1 large egg
- 1 teaspoon vanilla extract
- 1 cup mixed dried fruits (raisins, cranberries, cherries, etc.)
- 1/2 cup chopped nuts (walnuts, pecans, etc.)
- 1/4 cup chopped candied ginger (optional)
- 1/2 teaspoon orange zest (optional)
Instructions:
Preheat your oven to 350°F (175°C) and line a baking sheet with parchment paper. In a medium bowl, whisk together the flour, baking soda, cinnamon, nutmeg, and salt. In a large bowl, cream the softened butter, brown sugar, and granulated sugar until light and fluffy. Beat in the egg and vanilla extract, mixing until well combined. Gradually add the dry ingredients to the wet mixture, stirring until just combined. Gently fold in the dried fruits, nuts, and candied ginger or orange zest, if using. Drop rounded tablespoons of dough onto the prepared baking sheet, spacing them about two inches apart. Bake for 10-12 minutes or until the edges are lightly golden. Allow the cookies to cool on the baking sheet for a few minutes before transferring them to a wire rack to cool completely.
Extra Tips:
For an even more festive touch, consider drizzling your cooled cookies with a simple glaze made of powdered sugar and milk or adding a sprinkle of holiday-themed sprinkles. You can also experiment with different combinations of dried fruits and nuts based on your preferences or what you have on hand; just make sure to keep the total amounts the same. These cookies also freeze well, so feel free to make a double batch and save some for later – they’re perfect for unexpected guests during the holiday season!
Frequently Asked Questions
Can I Make These Desserts Ahead of Time?
Absolutely, I love to make ahead! Most desserts store well in the fridge or freezer. Just guarantee they’re sealed properly to maintain freshness. It saves time and lets me enjoy the festivities stress-free.
What Are Some Gluten-Free Dessert Options?
Oh sure, who needs gluten? I’ve whipped up divine chocolate mousse and almond flour brownies. By embracing gluten-free baking and alternative flours, I’ve turned dessert into a daring adventure. Trust me, you’ll love it!
How Can I Store Leftover Desserts?
I store leftover desserts using innovative dessert preservation techniques. I prefer airtight ideal storage containers, which keep flavors fresh and textures intact. Labeling them helps me remember what’s inside for future indulgence!
Are There Dairy-Free Alternatives for These Recipes?
I recently swapped heavy cream with coconut cream in a chocolate mousse, and it turned out fantastic. You’ll love using dairy-free substitutes and plant-based options for delicious, innovative desserts that everyone can enjoy!
What Drinks Pair Well With Christmas Desserts?
I love pairing festive cocktails with desserts, like a spiced cranberry margarita. For wine pairing, a rich port complements chocolate treats beautifully. These innovative choices elevate the experience and make every bite even more delightful!
Conclusion
As we wrap up our festive dessert journey, remember that 78% of people say dessert is the best part of any holiday meal. With these 13 delightful recipes, you’re sure to create sweet memories that will linger long after the last bite. Whether you choose a classic Yule log or some cheerful snowman cake pops, each treat adds a dash of joy to your Christmas celebration. So, let’s bake up some happiness and make this holiday unforgettable!