

If you’re looking for delicious gluten-free Christmas dinner recipes, I’ve got some amazing options that won’t sacrifice flavor! Start with an Herb-Roasted Turkey with Garlic and Sage, or a Honey-Glazed Ham with Pineapple. Pair these with sides like Creamy Mushroom Risotto, Garlic Mashed Potatoes with Chives, and Maple-Glazed Brussels Sprouts. For dessert, enjoy a Decadent Chocolate Flourless Cake or Classic Pumpkin Pie with a gluten-free crust. Trust me, you’ll want to discover all these delightful dishes!
Herb-Roasted Turkey With Garlic and Sage
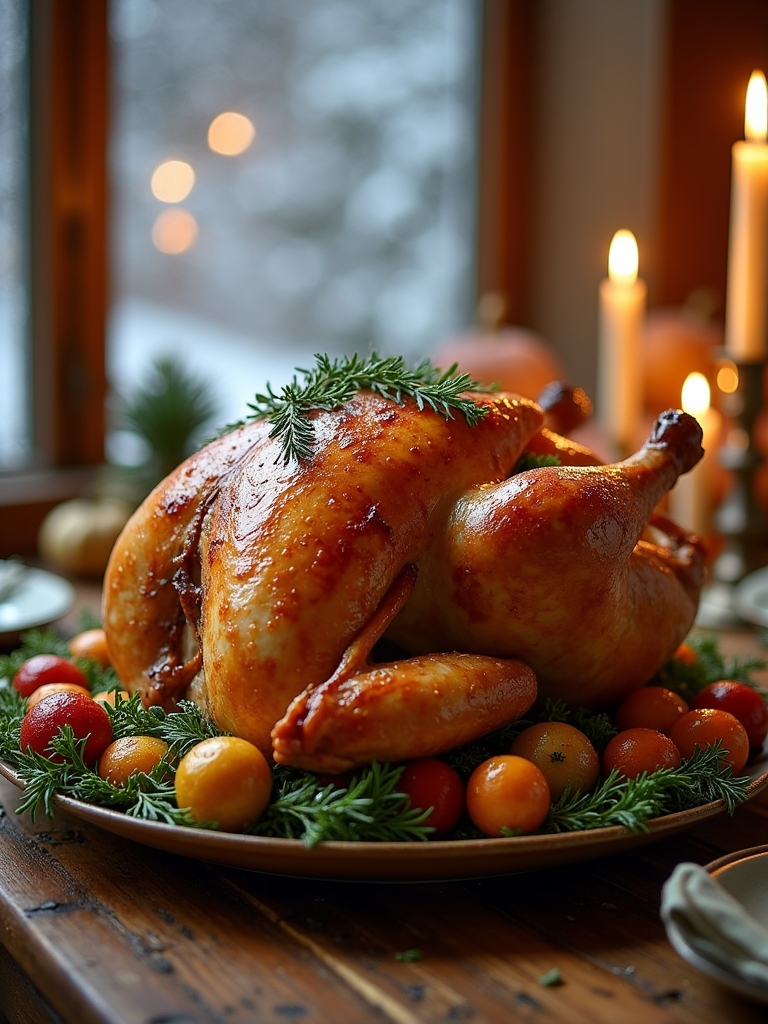
Herb-Roasted Turkey With Garlic and Sage is a delightful centerpiece for any gluten-free Christmas dinner. This succulent turkey is infused with aromatic herbs and garlic, providing a mouthwatering flavor that will impress your family and guests. The combination of fresh sage and garlic creates a fragrant rub that enhances the natural taste of the turkey, guaranteeing a juicy and tender result. With a perfect golden-brown skin and a savory aroma wafting through your home, this dish will certainly become a holiday favorite.
Preparing this turkey is simple yet rewarding, allowing you to spend more time with loved ones and less time in the kitchen. You’ll want to start with a high-quality, fresh turkey for the best results. As it roasts, the herbs and garlic will meld together, creating a deliciously aromatic experience. Serve it with your favorite gluten-free sides, and you’ll have a festive feast that everyone can enjoy without worry.
Ingredients:
- 1 whole turkey (12-14 pounds)
- 1/4 cup olive oil
- 1 tablespoon sea salt
- 1 tablespoon black pepper
- 1 tablespoon garlic powder
- 6 cloves garlic, minced
- 1 cup fresh sage leaves, chopped
- 1 cup fresh thyme leaves, chopped
- 1 lemon, zested and juiced
- 1 onion, quartered
- 2 cups low-sodium chicken broth
Cooking Instructions:
Preheat your oven to 325°F (165°C). Rinse the turkey inside and out, pat it dry with paper towels, and place it on a roasting rack in a large roasting pan. In a bowl, mix together olive oil, sea salt, black pepper, garlic powder, minced garlic, chopped sage, chopped thyme, lemon zest, and lemon juice to create the herb rub. Gently loosen the turkey skin and spread the herb mixture evenly underneath, as well as over the skin. Stuff the cavity with quartered onion and pour chicken broth into the bottom of the roasting pan. Roast the turkey for approximately 3 to 3.5 hours, basting every 30 minutes with the pan juices, until the internal temperature reaches 165°F (74°C) in the thickest part of the thigh. Let the turkey rest for at least 20 minutes before carving.
Extra Tips:
To make sure your turkey remains moist and flavorful, consider brining it overnight in a simple saltwater solution. This step can help to enhance the juiciness of the meat. Additionally, for a beautiful presentation, you can garnish the serving platter with fresh herbs and lemon slices. Always use a reliable meat thermometer to check for doneness, and remember that the turkey will continue to cook slightly while resting. Finally, don’t forget to save those pan drippings to make a delicious gluten-free gravy!
Honey-Glazed Ham With Pineapple
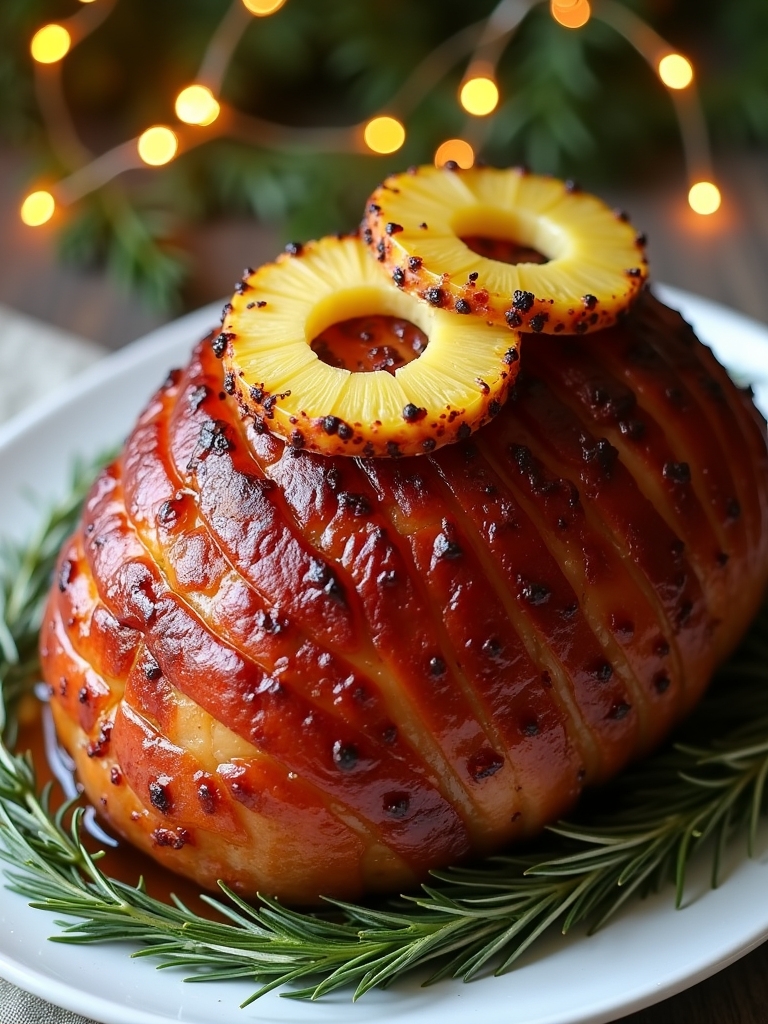
When planning a gluten-free Christmas dinner, a Honey-Glazed Ham with Pineapple is a fantastic centerpiece that is certain to impress your guests. The sweet and savory combination of honey and pineapple creates a delicious glaze that complements the rich flavor of the ham perfectly. This dish not only looks festive but also fills the room with a delightful aroma as it bakes, making it a holiday staple for many families. Plus, it’s simple to prepare, allowing you to spend more time enjoying the company of your loved ones.
To enhance the flavors of the ham, choose a high-quality cut, preferably one that is pre-cooked or partially cooked. The glaze is made with easily accessible ingredients that you may already have in your pantry, making this dish both convenient and budget-friendly. Serve the honey-glazed ham with your favorite gluten-free sides for a complete holiday meal that everyone can enjoy.
Ingredients:
- 1 fully cooked bone-in ham (5-7 lbs)
- 1 cup honey
- 1 cup pineapple juice
- 1/4 cup brown sugar
- 2 tablespoons Dijon mustard
- 1/2 teaspoon ground cinnamon
- 1/4 teaspoon ground cloves
- Fresh pineapple slices (optional, for decoration)
Cooking Instructions:
Preheat your oven to 325°F (165°C). In a saucepan, combine honey, pineapple juice, brown sugar, Dijon mustard, cinnamon, and cloves over medium heat. Stir until the sugar is dissolved and the mixture is well combined. Place the ham in a roasting pan, cut side down, and score the surface with shallow diagonal cuts for better glaze penetration. Brush a generous layer of the honey mixture over the ham and cover it loosely with foil. Bake for about 1.5 to 2 hours, basting every 30 minutes with the remaining glaze, until heated through and caramelized. If using, add pineapple slices during the last 20 minutes of baking for added flavor and decoration.
Extra Tips:
To guarantee the ham remains moist and flavorful, avoid overcooking it. Use a meat thermometer to check the internal temperature; it should reach at least 140°F (60°C) for pre-cooked ham. If you desire a crispy outer layer, remove the foil during the last 30 minutes of baking and increase the oven temperature to 400°F (200°C). For an extra touch, consider garnishing the ham with fresh herbs like rosemary or thyme before serving, which not only adds visual appeal but also enhances the aroma of the dish.
Creamy Mushroom Risotto
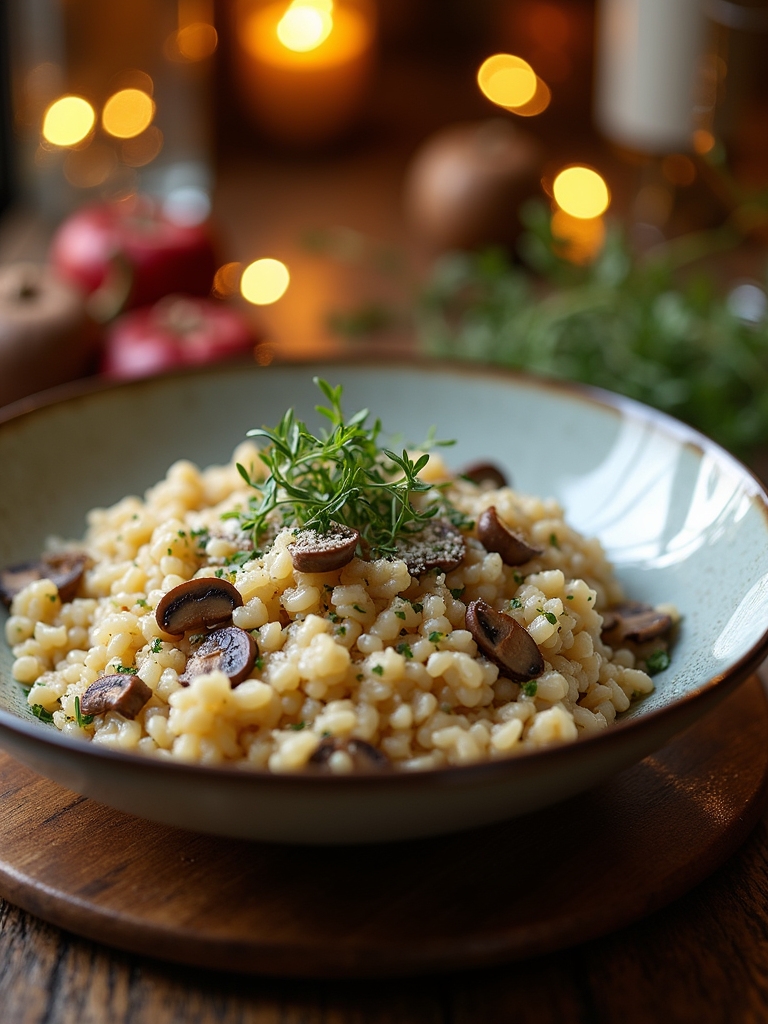
Creamy mushroom risotto is a delightful dish that brings warmth and comfort to any holiday table. This gluten-free recipe is perfect for a Christmas dinner, offering a rich and creamy texture that pairs beautifully with a variety of main courses. The earthy flavor of mushrooms combined with the creaminess of Arborio rice makes this dish a standout choice for those looking to impress their guests while accommodating gluten sensitivities.
Preparing risotto requires a bit of patience and attention, but the results are well worth the effort. As you stir the rice and gradually add broth, the grains release their starches, creating that signature creamy consistency. This dish can be customized with different types of mushrooms, herbs, or even a sprinkle of Parmesan cheese for added flavor. It’s a versatile recipe that can easily become a family favorite during the festive season.
Ingredients:
- 1 1/2 cups Arborio rice
- 4 cups vegetable broth (gluten-free)
- 1 cup white wine (optional)
- 2 tablespoons olive oil
- 1 medium onion, finely chopped
- 3 cloves garlic, minced
- 8 ounces mushrooms, sliced (cremini or shiitake work well)
- 1/2 cup grated Parmesan cheese (optional for a vegan version)
- Salt and pepper, to taste
- Fresh parsley, chopped (for garnish)
In a large saucepan, heat the olive oil over medium heat. Add the onions and garlic, sautéing until the onions are translucent. Stir in the sliced mushrooms and cook until they are tender. Add the Arborio rice, stirring to coat each grain with oil, and toast for about 2 minutes. If using wine, pour it in and let it simmer until mostly evaporated. Gradually add the vegetable broth, one ladle at a time, stirring continuously until the liquid is absorbed before adding more. Continue this process until the rice is creamy and al dente, approximately 18-20 minutes. Stir in the Parmesan cheese, if using, and season with salt and pepper. Serve warm, garnished with fresh parsley.
When making creamy mushroom risotto, remember that patience is key. Stirring frequently helps release the starches from the rice, contributing to the dish’s creaminess. You can keep the risotto warm by covering it with a lid while you finish any other dishes. If you find the risotto thickening too much before serving, simply add a splash of broth or water to loosen it up. Feel free to experiment with different types of mushrooms or add in some fresh herbs for an extra layer of flavor. Enjoy your festive cooking!
Garlic Mashed Potatoes With Chives
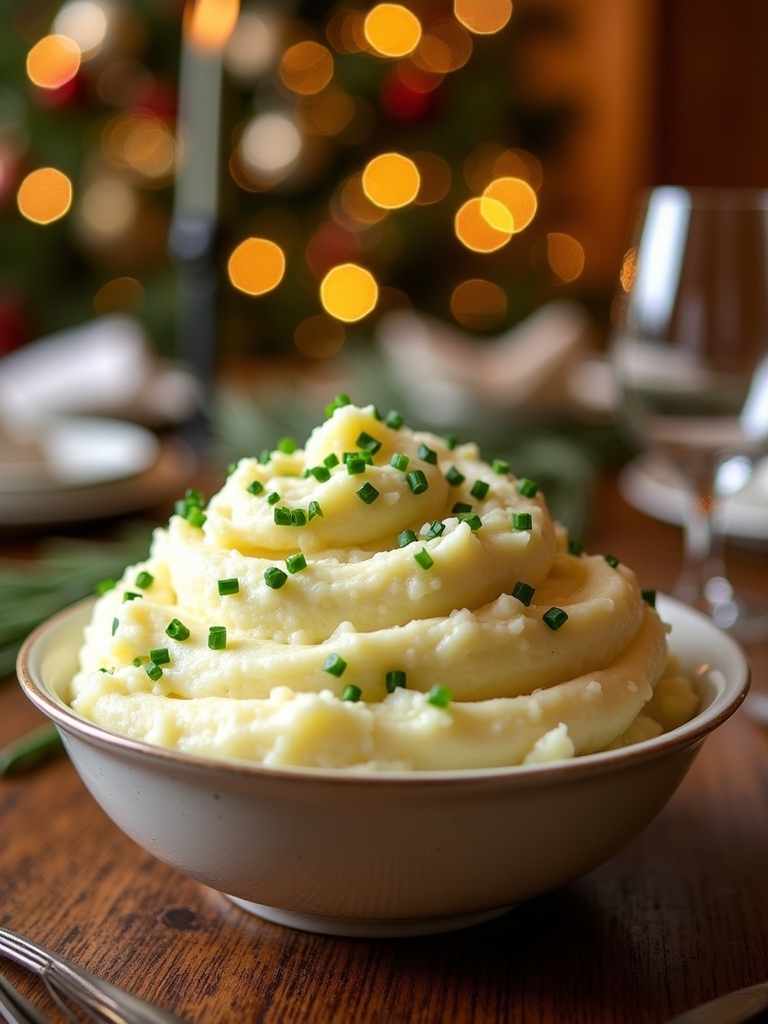
Garlic mashed potatoes with chives are a delightful and creamy side dish that can elevate any holiday dinner, especially a gluten-free Christmas feast. The combination of buttery potatoes, roasted garlic, and fresh chives creates a comforting dish that is both flavorful and easy to prepare. This recipe guarantees that everyone at the table can enjoy a delicious and satisfying accompaniment to their main meal without worrying about gluten in the ingredients.
To make these garlic mashed potatoes, you will need some basic ingredients that are gluten-free and readily available. The key to achieving the perfect texture lies in using starchy potatoes, such as Yukon Gold or Russet, which provide a smooth and creamy consistency. Roasting the garlic adds a rich depth of flavor, while the chives contribute a fresh and vibrant touch, making this dish a standout on your Christmas dinner table.
Ingredients:
- 2 pounds Yukon Gold potatoes
- 1 head of garlic
- 4 tablespoons unsalted butter
- 1/2 cup milk (or dairy-free alternative)
- Salt, to taste
- Freshly ground black pepper, to taste
- 1/4 cup chopped fresh chives
Cooking Instructions:
Start by preheating your oven to 400°F (200°C). Cut the top off the head of garlic, drizzle with a little olive oil, and wrap it in foil. Roast in the oven for about 30-35 minutes, until the cloves are soft and caramelized. Meanwhile, peel and chop the Yukon Gold potatoes into even chunks, then place them in a large pot of salted water. Bring to a boil and cook until tender, about 15-20 minutes. Drain the potatoes and return them to the pot. Squeeze the roasted garlic cloves into the potatoes, add the butter, and pour in the milk. Mash everything together until smooth and creamy, then stir in the chopped chives. Season with salt and pepper to taste.
Extra Tips:
For an extra creamy texture, consider using a potato ricer for mashing instead of a traditional masher. This will help avoid lumps and give you a velvety finish. If you prefer a stronger garlic flavor, you can add more roasted cloves to the mix. Feel free to adjust the amount of milk to achieve your desired consistency. To keep the mashed potatoes warm until serving, you can place them in a heatproof bowl over a pot of simmering water or in a slow cooker on low. Enjoy this comforting dish as part of your gluten-free holiday celebration!
Maple-Glazed Brussels Sprouts
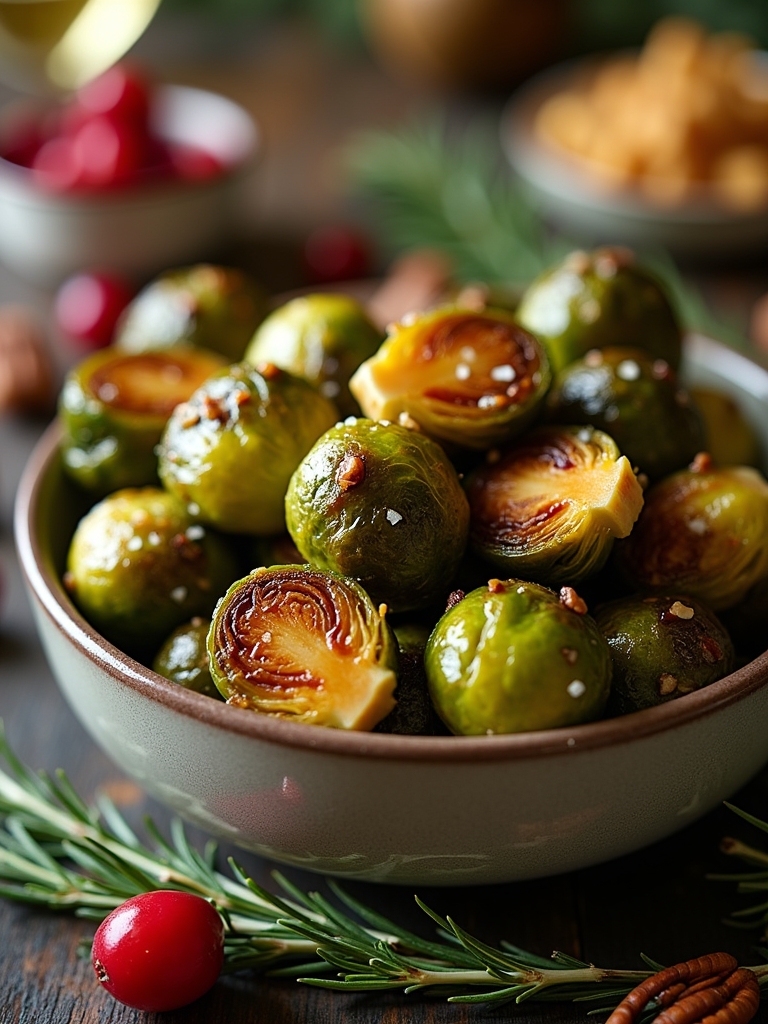
Maple-glazed Brussels sprouts are a delightful side dish that can elevate any Christmas dinner. Their nutty flavor and crisp texture pair wonderfully with the sweet and rich notes of maple syrup, creating a harmonious balance that will please any palate. This dish not only adds a pop of color to your table but also offers a nutritious option that is gluten-free and packed with vitamins.
Preparing maple-glazed Brussels sprouts is both simple and quick, making it an ideal choice for the busy holiday season. With just a handful of ingredients, you can create a dish that is both elegant and comforting. Whether you’re hosting a festive gathering or enjoying a quiet holiday dinner, these Brussels sprouts are sure to become a favorite.
Elevate your holiday meals with these simple and elegant maple-glazed Brussels sprouts, perfect for any festive gathering.
Ingredients:
- 1 pound Brussels sprouts, trimmed and halved
- 3 tablespoons olive oil
- 1/4 cup pure maple syrup
- Salt and pepper to taste
- 1 tablespoon balsamic vinegar (optional)
- 1/4 cup chopped pecans (optional)
To prepare the maple-glazed Brussels sprouts, preheat your oven to 400°F (200°C). In a large bowl, toss the halved Brussels sprouts with olive oil, maple syrup, salt, and pepper until they are evenly coated. Spread them out in a single layer on a baking sheet and roast in the oven for about 20-25 minutes, turning halfway through, until they are golden brown and tender. If using, add balsamic vinegar and chopped pecans during the last 5 minutes of roasting for added flavor and crunch.
When cooking maple-glazed Brussels sprouts, remember that the size of the sprouts can affect cooking time—smaller ones may cook faster, while larger ones may need a bit longer. To guarantee even roasting, try to select Brussels sprouts that are similar in size. For an extra touch, consider adding some crispy bacon or a sprinkle of crumbled feta cheese after roasting for added flavor. Enjoy this dish warm, and feel free to experiment with different nuts or add dried cranberries for a festive twist!
Roasted Root Vegetables With Thyme
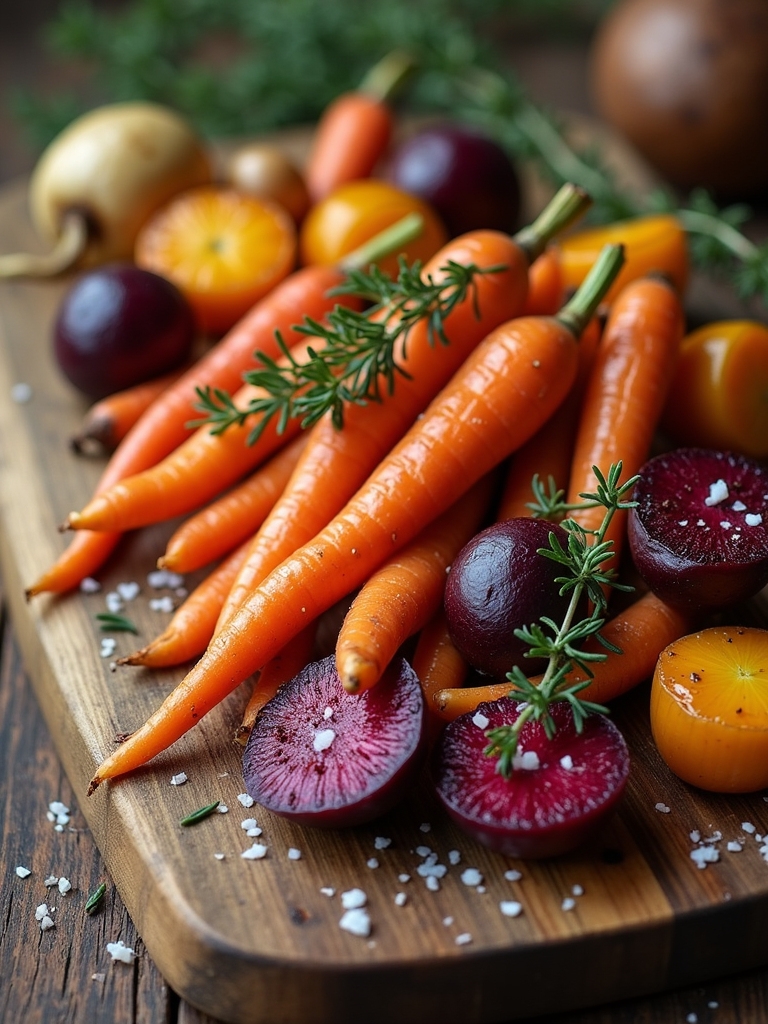
Roasted root vegetables with thyme make for a delightful and colorful side dish that perfectly complements any Christmas dinner. The combination of sweet and earthy flavors from the vegetables, enhanced by the aromatic essence of fresh thyme, creates a hearty and satisfying dish that everyone can enjoy. This gluten-free recipe is simple to prepare and allows the natural flavors of the veggies to shine through while adding a festive touch to your holiday table.
To start, choose a variety of root vegetables for a vibrant presentation and diverse taste. Carrots, parsnips, sweet potatoes, and turnips work beautifully together. Roasting these vegetables not only brings out their sweetness but also gives them a lovely caramelization that adds depth to the dish. This recipe requires minimal prep time and can be made ahead, making it a perfect addition to your Christmas dinner spread.
Ingredients:
- 2 large carrots, peeled and cut into chunks
- 2 large parsnips, peeled and cut into chunks
- 1 medium sweet potato, peeled and cubed
- 1 medium turnip, peeled and cut into chunks
- 3 tablespoons olive oil
- 2 teaspoons fresh thyme leaves (or 1 teaspoon dried thyme)
- Salt and pepper to taste
Cooking Instructions:
Preheat your oven to 425°F (220°C). In a large mixing bowl, combine the chopped carrots, parsnips, sweet potato, and turnip. Drizzle the olive oil over the vegetables, sprinkle with thyme, salt, and pepper, and toss well to guarantee everything is evenly coated. Spread the seasoned vegetables in a single layer on a baking sheet lined with parchment paper. Roast in the preheated oven for about 30-35 minutes, or until the vegetables are tender and golden, stirring halfway through for even cooking.
Extra Tips:
For a variation in flavor, consider adding a splash of balsamic vinegar or a sprinkle of garlic powder to the vegetable mix before roasting. You can also experiment with different herbs, such as rosemary or sage, to match your holiday theme. To guarantee even cooking, try to cut the vegetables into similar sizes, and don’t overcrowd the baking sheet; this will help them roast rather than steam. Enjoy your roasted root vegetables hot from the oven for the best texture and taste!
Cranberry Pecan Salad
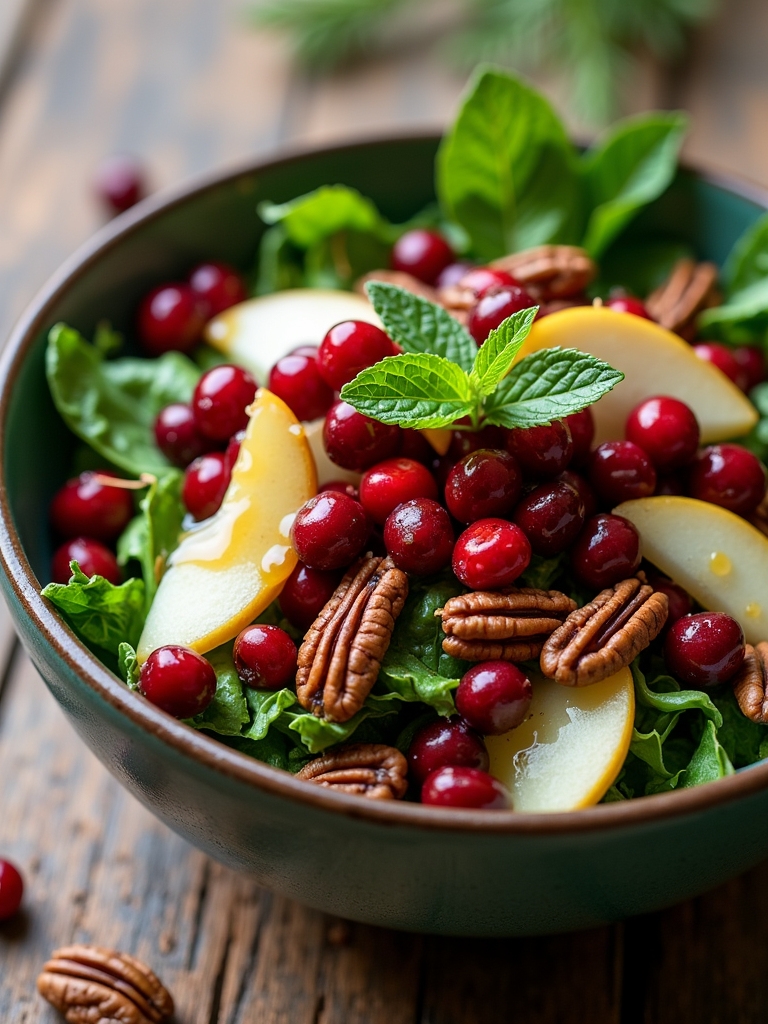
Cranberry Pecan Salad is a delightful addition to any gluten-free Christmas dinner, offering a revitalizing balance of flavors and textures that can brighten up the table. The tartness of fresh cranberries pairs wonderfully with the nuttiness of pecans, while the crispness of greens adds a satisfying crunch. This salad not only looks stunning with its vibrant colors but also provides a healthy option that complements richer holiday dishes.
Creating this salad is simple and quick, making it an ideal choice for busy holiday preparations. With just a few fresh ingredients and a zesty dressing, you can whip up this festive salad in no time. Serve it as a starter or as a side dish, and watch as it becomes a favorite among both gluten-free and non-gluten-free guests alike!
Ingredients:
- 4 cups mixed salad greens (spinach, arugula, or lettuce)
- 1 cup fresh cranberries (or dried cranberries if preferred)
- 1 cup pecans, toasted
- 1/2 cup crumbled feta cheese (optional)
- 1/4 cup red onion, thinly sliced
- 1/4 cup olive oil
- 2 tablespoons balsamic vinegar
- 1 tablespoon honey or maple syrup
- Salt and pepper to taste
In a large salad bowl, combine the mixed greens, cranberries, toasted pecans, feta cheese, and sliced red onion. In a separate small bowl, whisk together the olive oil, balsamic vinegar, honey or maple syrup, salt, and pepper until well combined. Pour the dressing over the salad ingredients and toss gently until everything is evenly coated. Serve immediately, or chill for up to 30 minutes to let the flavors meld.
When preparing Cranberry Pecan Salad, feel free to customize it to your taste. You can add other ingredients like sliced apples, pears, or even roasted butternut squash for an extra layer of flavor. If you’re making the salad ahead of time, consider keeping the dressing separate until just before serving to prevent the greens from wilting. This salad is best enjoyed fresh, but if there are leftovers, store them in an airtight container in the refrigerator for up to two days.
Gluten-Free Stuffing With Sausage and Apples

When it comes to Christmas dinner, stuffing is a quintessential dish that can elevate your holiday feast, and our Gluten-Free Stuffing with Sausage and Apples is no exception. This delightful recipe combines savory sausage, sweet apples, and aromatic herbs to create a delicious stuffing that everyone at the table will enjoy. Perfectly gluten-free, it guarantees that those with dietary restrictions can partake in the joy of traditional holiday flavors without compromise.
To achieve the perfect texture and taste, we use gluten-free bread as the base, allowing it to soak up all the flavorful ingredients without falling apart. The addition of fresh herbs and spices enhances the overall flavor profile, while the apples provide a sweet contrast to the savory sausage. Whether served alongside roast turkey or enjoyed on its own, this stuffing is sure to be a highlight of your Christmas dinner.
Using gluten-free bread as a base, this stuffing absorbs flavors beautifully, balancing savory sausage with sweet apples for a memorable holiday dish.
Ingredients:
- 1 pound gluten-free bread, cubed
- 1 pound Italian sausage (or any preferred sausage)
- 1 medium onion, diced
- 2 celery stalks, diced
- 2 apples, peeled and diced (preferably a sweet variety like Honeycrisp)
- 1/4 cup fresh parsley, chopped
- 1 teaspoon dried thyme
- 1 teaspoon dried sage
- 1/2 teaspoon salt
- 1/2 teaspoon black pepper
- 2 cups vegetable or chicken broth
- 2 tablespoons olive oil or butter
Instructions:
In a large skillet, heat the olive oil or butter over medium heat. Add the diced onion and celery, sautéing until they are softened, about 5 minutes. Incorporate the sausage, breaking it apart as it cooks until browned. Stir in the diced apples, herbs, salt, and pepper, cooking for an additional 2-3 minutes. In a large mixing bowl, combine the sautéed mixture with the cubed gluten-free bread and pour in the broth, mixing well until the bread is evenly moistened. Transfer the mixture to a greased baking dish and bake at 350°F (175°C) for 30-35 minutes, or until golden brown on top.
Extra Tips:
To make sure your gluten-free stuffing has the best texture, let the gluten-free bread cubes dry out for a few hours or overnight before assembling the stuffing. This will help absorb the broth better and prevent a soggy stuffing. Additionally, feel free to customize the recipe by adding nuts, dried fruits, or other herbs to suit your taste. If you’re preparing this dish ahead of time, you can assemble it the day before and store it in the refrigerator; just add a few extra minutes to the baking time when you’re ready to cook it.
Sweet Potato Casserole With Marshmallow Topping
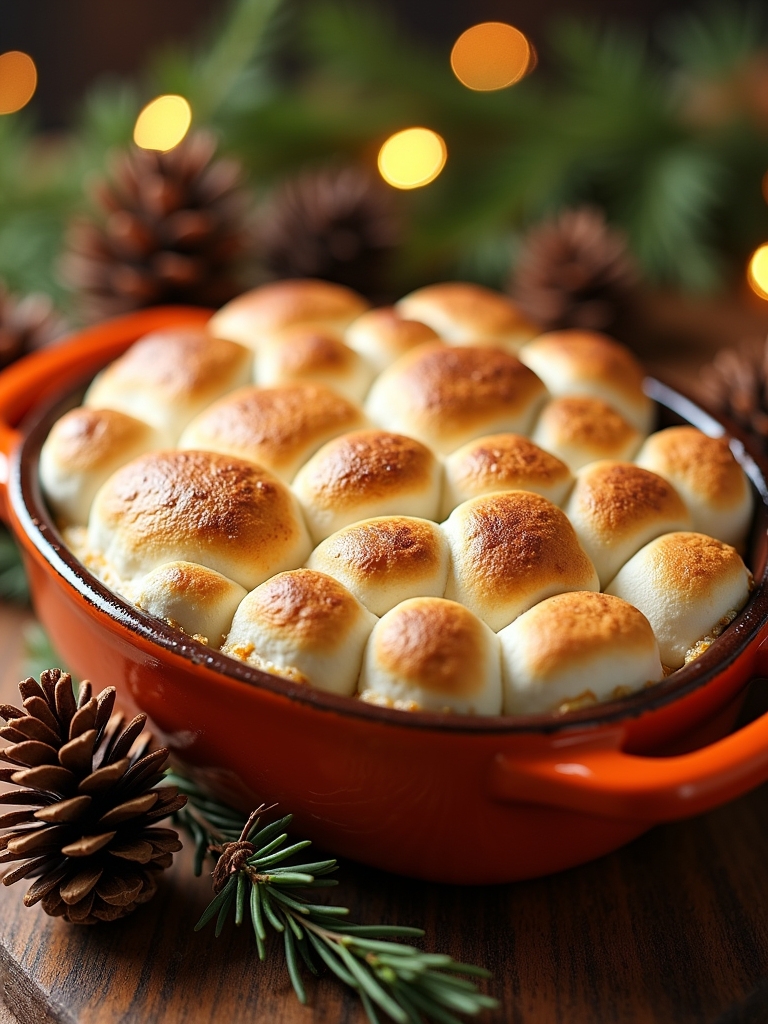
Sweet Potato Casserole with Marshmallow Topping is a delightful dish that brings warmth and comfort to any holiday table, especially for those following a gluten-free diet. The natural sweetness of the sweet potatoes pairs beautifully with the fluffy, toasted marshmallows, creating a perfect harmony of flavors and textures. This dish not only serves as a delicious side but also as a comforting dessert, making it a versatile addition to your Christmas dinner.
Preparing this casserole is quite simple, allowing you to focus on enjoying the holiday season with your loved ones. With just a few ingredients and a little time, you can whip up a dish that is sure to impress both gluten-free guests and those without dietary restrictions. So, roll up your sleeves and get ready to create a festive and flavorful Sweet Potato Casserole that everyone will love!
Ingredients:
- 4 cups sweet potatoes, peeled and cubed
- ½ cup milk (dairy or non-dairy)
- ½ cup brown sugar
- 1 teaspoon vanilla extract
- ½ teaspoon ground cinnamon
- ¼ teaspoon ground nutmeg
- ¼ teaspoon salt
- 2 tablespoons unsalted butter or dairy-free alternative
- 2 cups mini marshmallows
Cooking Instructions:
Preheat your oven to 350°F (175°C). In a large pot, boil the sweet potatoes in salted water until they are tender, about 15-20 minutes. Drain and mash the sweet potatoes in a large mixing bowl. Stir in the milk, brown sugar, vanilla extract, cinnamon, nutmeg, salt, and butter until well combined and creamy. Transfer the mixture to a greased baking dish, spreading it evenly. Top with mini marshmallows and bake in the preheated oven for 25-30 minutes, or until the marshmallows are golden brown and toasty.
Extra Tips:
For an extra layer of flavor, consider adding a sprinkle of chopped pecans or walnuts on top of the marshmallows before baking for a delightful crunch. If you prefer a less sweet casserole, reduce the amount of brown sugar to your taste. Additionally, this dish can be prepared ahead of time; simply assemble it up to the point of baking and store it in the refrigerator. When ready to serve, just pop it in the oven to heat through and toast the marshmallows before enjoying!
Green Bean Almondine
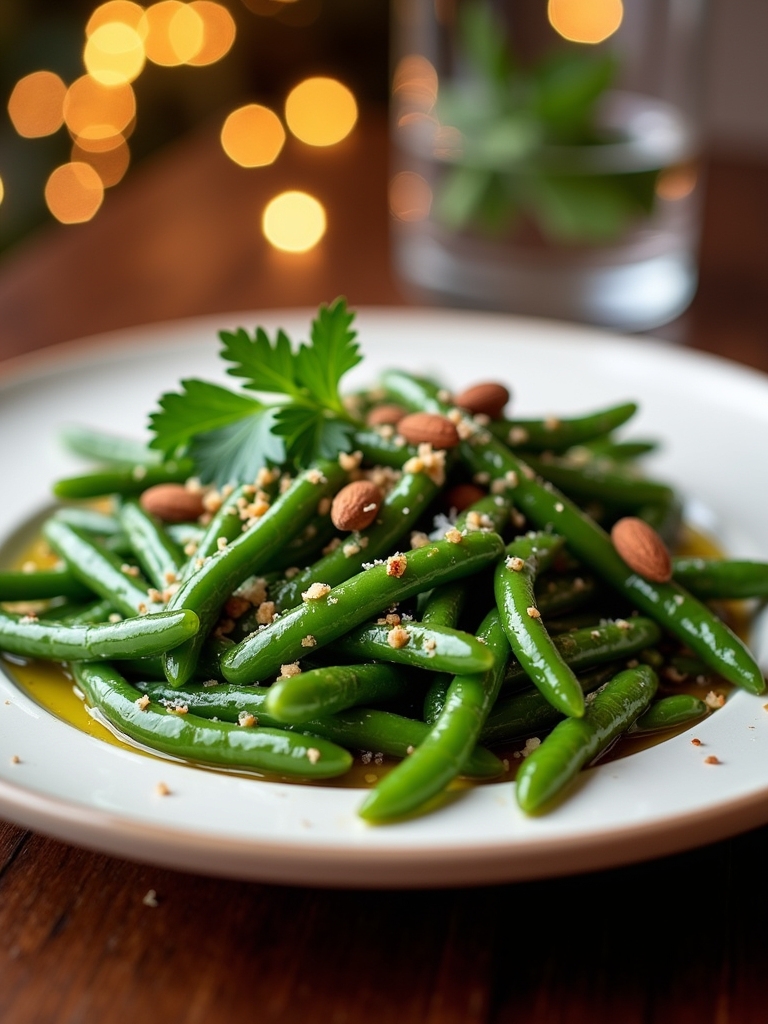
Green Bean Almondine is a delightful and elegant side dish that brings a burst of color and flavor to your Christmas dinner table. This classic recipe features fresh green beans sautéed with sliced almonds and finished with a touch of lemon juice, providing a perfect balance of crunch and zest. Not only is it gluten-free, but it’s also a healthy addition to your festive spread, making it a favorite among both kids and adults alike.
Preparing Green Bean Almondine is simple and quick, allowing you to focus on other parts of your meal without sacrificing quality. The vibrant green beans retain their crispness while being enveloped in the buttery, nutty flavor of almonds. This dish can be made ahead of time and reheated, making it a convenient choice for your holiday gathering.
Preparing Green Bean Almondine is quick and easy, letting you enjoy a flavorful, vibrant side dish without compromising on quality.
Ingredients:
- 1 pound fresh green beans, trimmed
- 1/4 cup sliced almonds
- 2 tablespoons unsalted butter
- 1 tablespoon olive oil
- 2 cloves garlic, minced
- Salt and pepper to taste
- 1 tablespoon fresh lemon juice
- Zest of 1 lemon (optional)
To prepare Green Bean Almondine, start by bringing a large pot of salted water to a boil. Add the green beans and blanch for about 3-4 minutes until they are bright green and tender-crisp. Immediately transfer the beans to a bowl of ice water to stop the cooking process. Drain the beans and set them aside. In a large skillet over medium heat, melt the butter and olive oil together. Add the sliced almonds and sauté until they are golden brown, about 2-3 minutes. Then, stir in the minced garlic and cook for an additional minute until fragrant. Finally, add the blanched green beans, season with salt and pepper, and toss to combine. Drizzle with lemon juice and zest before serving.
When making Green Bean Almondine, make certain that you don’t overcook the green beans during the blanching process, as they should remain bright green and slightly crunchy. You can also experiment with adding other ingredients, such as shallots or a sprinkle of Parmesan cheese, to enhance the flavor. If you prefer a vegan version, simply substitute the butter with a plant-based alternative. This dish can be served warm or at room temperature, making it versatile for your holiday meal.
Festive Quinoa Salad With Pomegranate
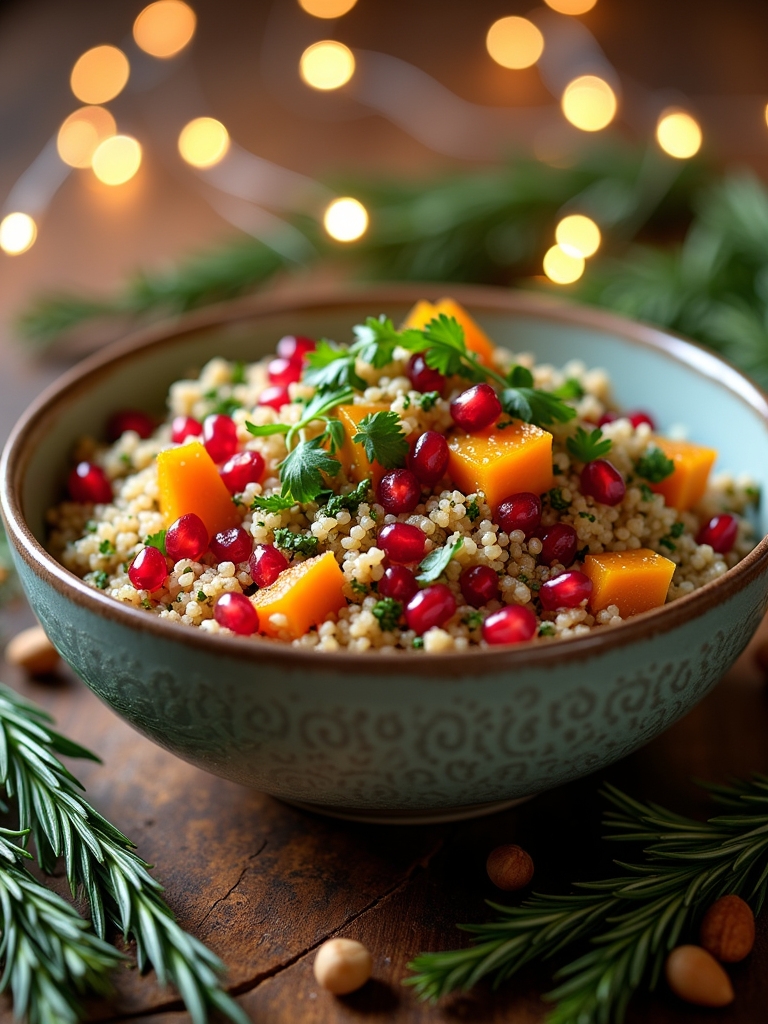
Quinoa is an incredibly versatile and nutritious grain that makes for a perfect addition to any festive meal, especially during the holiday season. This Festive Quinoa Salad with Pomegranate not only brings a pop of color to your Christmas dinner table but also combines delightful flavors and textures. The nutty taste of quinoa pairs beautifully with the sweet and tart burst of pomegranate seeds, while fresh herbs and a zesty dressing elevate the dish to a truly festive level.
This salad is not only gluten-free but also packed with protein and fiber, making it a healthy option for your holiday feast. It can be served warm or at room temperature, allowing for flexibility in meal prep. Whether you are hosting a large gathering or enjoying a cozy dinner with family, this salad is sure to impress your guests and satisfy their taste buds while keeping your menu gluten-free.
Ingredients:
- 1 cup quinoa
- 2 cups vegetable broth or water
- 1 cup pomegranate seeds
- 1/2 cup chopped cucumber
- 1/2 cup diced red bell pepper
- 1/4 cup finely chopped red onion
- 1/4 cup chopped fresh parsley
- 1/4 cup crumbled feta cheese (optional)
- 3 tablespoons olive oil
- 2 tablespoons lemon juice
- Salt and pepper to taste
To prepare the Festive Quinoa Salad with Pomegranate, start by rinsing the quinoa under cold water to remove its natural coating, called saponin, which can impart a bitter flavor. In a medium saucepan, combine the rinsed quinoa and vegetable broth (or water) and bring to a boil. Once boiling, reduce the heat to low, cover, and simmer for about 15 minutes or until the quinoa is fluffy and all the liquid has been absorbed. Remove from heat and let it cool slightly. In a large bowl, combine the cooked quinoa, pomegranate seeds, cucumber, red bell pepper, red onion, parsley, and feta cheese (if using). In a separate bowl, whisk together the olive oil, lemon juice, salt, and pepper, then pour the dressing over the salad and toss gently to combine.
When preparing this salad, feel free to customize the ingredients based on your preferences or what you have on hand. You can add other seasonal vegetables or nuts for added crunch and flavor. Chopped walnuts or sliced almonds make a great addition, providing extra texture and nutritional benefits. Additionally, for a touch of sweetness, consider incorporating diced apples or a handful of dried cranberries. This salad can be made ahead of time and stored in the refrigerator, allowing the flavors to meld beautifully, so it’s perfect for holiday meal prep!
Decadent Chocolate Flourless Cake

Indulging in a rich dessert is a quintessential part of any Christmas celebration, and this Decadent Chocolate Flourless Cake is no exception. Perfect for those who are gluten-sensitive or simply seeking a luscious treat, this cake boasts a velvety texture and an intense chocolate flavor that will impress all your guests. With minimal ingredients and straightforward preparation, you can whip up this delightful dessert without the hassle of traditional baking methods.
The beauty of a flourless cake lies in its simplicity; it highlights the quality of its chocolate and allows for variations in flavor, such as adding espresso powder or vanilla extract. This cake is not only gluten-free but also naturally rich, making it an ideal end to your festive feast. Serve it with a dollop of whipped cream or a scoop of vanilla ice cream for an extra touch of indulgence.
Ingredients:
- 8 ounces semisweet or bittersweet chocolate, chopped
- ½ cup unsalted butter
- ¾ cup granulated sugar
- ¼ teaspoon salt
- 1 teaspoon vanilla extract
- 4 large eggs
- ½ cup unsweetened cocoa powder
- Powdered sugar for dusting (optional)
Instructions:
Preheat your oven to 350°F (175°C) and grease an 8-inch round cake pan, lining the bottom with parchment paper for easy release. In a medium saucepan over low heat, melt the chopped chocolate and butter together, stirring until smooth. Remove from heat and stir in the granulated sugar, salt, and vanilla extract. Allow the mixture to cool slightly before whisking in the eggs one at a time, followed by the cocoa powder until the batter is well combined. Pour the batter into the prepared pan and bake for 25-30 minutes, or until the cake has set around the edges but is still slightly soft in the center. Let it cool in the pan for 10 minutes before inverting onto a serving plate.
Extra Tips:
For the best flavor, use high-quality chocolate, as it greatly impacts the cake’s richness. If you want to enhance the chocolate flavor even further, consider adding a teaspoon of espresso powder to the batter. Be careful not to overbake the cake, or it may lose its signature fudgy texture. Once cooled, you can store the cake in an airtight container in the refrigerator for up to a week, making it a perfect make-ahead dessert for your holiday gatherings. To elevate the presentation, serve with fresh berries or a sprinkle of sea salt for a delightful contrast.
Classic Pumpkin Pie With Gluten-Free Crust

The holidays are a time for celebration, and nothing says Christmas quite like a classic pumpkin pie. With its warm spices and creamy filling, this dessert is a favorite among many. For those following a gluten-free diet, the good news is that you can still enjoy this seasonal delight with a gluten-free crust that is just as delicious as the traditional version. This recipe combines the natural sweetness of pumpkin with a hint of cinnamon, nutmeg, and ginger, all nestled in a flaky crust that will satisfy everyone at the table.
Making a gluten-free pumpkin pie is straightforward and rewarding. You can use a pre-made gluten-free pie crust or make your own with gluten-free flour blends. The filling is simple to prepare, requiring only a few ingredients that come together quickly. Whether you’re serving this at a holiday gathering or enjoying it quietly at home, this classic pumpkin pie will surely be a hit and leave your guests asking for seconds.
Ingredients:
- 1 gluten-free pie crust (store-bought or homemade)
- 2 cups pumpkin puree (canned or freshly made)
- 3/4 cup brown sugar
- 1/2 teaspoon salt
- 1 teaspoon ground cinnamon
- 1/2 teaspoon ground nutmeg
- 1/2 teaspoon ground ginger
- 1/4 teaspoon ground cloves
- 3 large eggs
- 1 cup evaporated milk
- 1 teaspoon vanilla extract
Instructions:
Preheat your oven to 425°F (220°C). In a large mixing bowl, combine the pumpkin puree, brown sugar, salt, cinnamon, nutmeg, ginger, and cloves, mixing well until smooth. Add the eggs one at a time, beating well after each addition. Gradually stir in the evaporated milk and vanilla extract until fully incorporated. Pour the filling into the prepared gluten-free pie crust and place it in the preheated oven. Bake for 15 minutes, then reduce the temperature to 350°F (175°C) and continue baking for an additional 40-50 minutes, or until the filling is set and a knife inserted in the center comes out clean. Let the pie cool before serving.
Extra Tips:
When making your gluten-free pumpkin pie, consider chilling the pie crust before filling it; this will help keep it flaky during baking. If you prefer a sweeter pie, feel free to adjust the sugar to your taste. Additionally, for an extra touch, serve your pie with a dollop of whipped cream or a sprinkle of cinnamon on top. Finally, make sure to let the pie cool completely before slicing; this will help it hold its shape and make for a prettier presentation. Enjoy your holiday baking!
Eggnog Panna Cotta With Nutmeg

Eggnog Panna Cotta with Nutmeg is a delightful and festive dessert that embodies the spirit of the holiday season. This creamy Italian treat combines the rich flavors of traditional eggnog with a silky panna cotta base, creating a luscious end to your gluten-free Christmas dinner. The warm notes of nutmeg and the sweetness of vanilla make this dessert a comforting choice, sure to impress your family and friends at the holiday table.
Making Panna Cotta may seem intimidating, but it’s surprisingly simple and requires minimal ingredients. The beauty of this dish lies in its ability to be prepared ahead of time, allowing you to enjoy more time with your loved ones during the holiday festivities. Pair it with a sprinkle of freshly grated nutmeg or a drizzle of caramel sauce for an added touch of elegance.
Ingredients:
- 1 cup eggnog (store-bought or homemade)
- 1 cup heavy cream
- 1/4 cup granulated sugar
- 1 packet (2 1/4 teaspoons) unflavored gelatin
- 1 teaspoon vanilla extract
- 1/2 teaspoon ground nutmeg
- Pinch of salt
Instructions:
In a small bowl, sprinkle the gelatin over 2 tablespoons of cold water and let it bloom for about 5 minutes. In a saucepan, combine the eggnog, heavy cream, sugar, vanilla extract, nutmeg, and salt, and heat over medium heat until it starts to steam, but do not boil. Remove from heat and whisk in the bloomed gelatin until fully dissolved. Pour the mixture into serving cups or ramekins and refrigerate for at least 4 hours, or until set.
Extra Tips:
For the best results, make certain that your gelatin is fully dissolved before adding it to the cream mixture to avoid lumps. You can also customize the flavor by adding a splash of bourbon or rum to the eggnog for an adult twist. Serve the panna cotta with festive garnishes like whipped cream, a sprinkle of nutmeg, or even some candied pecans for added texture and holiday flair. If you wish to make this dessert even more special, consider layering it with a spiced cranberry sauce for a tangy contrast to the creamy sweetness.
Frequently Asked Questions
What Are Gluten-Free Substitutes for Common Cooking Ingredients?
I love using gluten-free flours like almond or coconut for baking. For sweetness, alternative sweeteners like agave or coconut sugar work wonders. They add unique flavors while keeping my dishes delightful and innovative. Give them a try!
How Can I Ensure Cross-Contamination Is Avoided?
I treat my kitchen like a fortress, ensuring gluten awareness reigns. I designate specific utensils and surfaces for gluten-free cooking, thoroughly clean everything, and label items. This way, cross-contamination doesn’t stand a chance during my culinary adventures.
Are All Store-Bought Sauces Gluten-Free?
Not all store-bought sauces are gluten-free. I always check the gluten-free labels and scrutinize the sauce ingredients. It’s essential to find innovative options that keep my meals delicious and safe for gluten-sensitive friends.
How Do I Know if a Product Is Truly Gluten-Free?
To know if a product’s truly gluten-free, I check gluten-free labeling, scrutinize ingredient sourcing, and research brands. I want assurance, innovation, and peace of mind when choosing what I consume and share with others.
Can I Make These Recipes Dairy-Free as Well?
I love using dairy-free alternatives like almond milk and coconut cream. By making simple recipe modifications, I can create delicious dishes that cater to both gluten-free and dairy-free diets without losing any flavor.
Conclusion
As we gather around the table this holiday season, let these gluten-free recipes be the shining stars that illuminate our feast. Just like ornaments on a tree, each dish brings its own flavor and joy, creating a beautiful tapestry of taste. So, embrace the spirit of togetherness, share laughter, and savor every bite. With these delightful options, you won’t just celebrate Christmas; you’ll craft unforgettable memories that linger long after the last crumb is gone. Enjoy!