

If you’re looking to ease the stress of Christmas dinner, I’ve got 11 fantastic make-ahead recipes for you! Creamy garlic mashed potatoes and honey-glazed carrots can be prepped in advance, while an herb-roasted turkey and cranberry sauce make perfect partners for any feast. Don’t forget delicious sides like baked honey-balsamic Brussels sprouts and stuffed mushrooms. To finish, treat your guests with decadent chocolate yule log and eggnog cheesecake. Stick around, and I’ll share more delightful options!
Creamy Garlic Mashed Potatoes
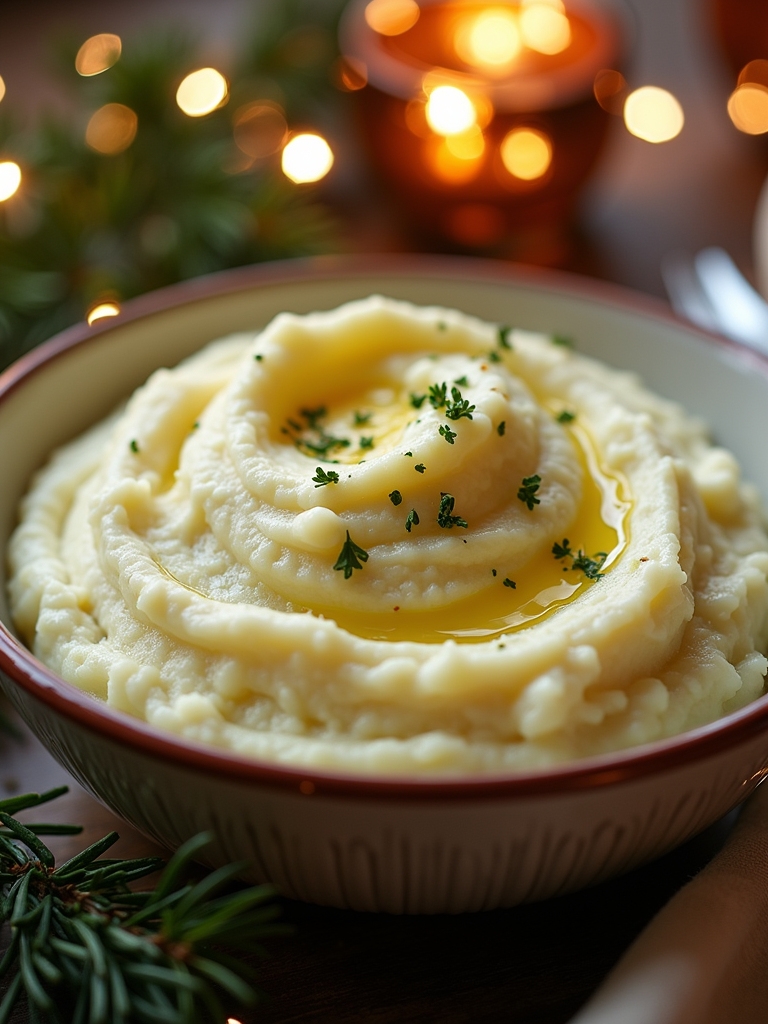
Creamy Garlic Mashed Potatoes are the perfect side dish for your Christmas dinner, bringing a delightful combination of buttery flavor and a hint of garlic that pairs beautifully with any holiday entrée. The richness of the cream and the smooth texture of the potatoes create a comforting dish that will have your guests asking for seconds. Plus, they can be made ahead of time, allowing you to spend more time with family and friends on the big day.
To prepare these delicious mashed potatoes, you’ll want to select the right type of potatoes. Yukon Gold or Russet potatoes are ideal for achieving that creamy consistency. The addition of roasted garlic elevates the flavor profile, making these mashed potatoes a standout dish. With just a few simple steps, you can create a delicious side that will complement your holiday feast.
Ingredients:
- 2 pounds Yukon Gold or Russet potatoes
- 1 head of garlic
- 1 cup heavy cream
- ½ cup unsalted butter
- Salt, to taste
- Pepper, to taste
- Fresh chives or parsley, chopped (for garnish)
To prepare the Creamy Garlic Mashed Potatoes, start by preheating your oven to 400°F (200°C). Cut the top off the head of garlic, drizzle with olive oil, wrap it in foil, and roast for about 30-35 minutes until the cloves are soft and caramelized. While the garlic is roasting, peel and chop the potatoes into uniform chunks. Boil them in salted water for about 15-20 minutes until fork-tender. Drain the potatoes and return them to the pot. Squeeze the roasted garlic cloves into the pot, add the butter, and pour in the heavy cream. Mash until smooth, then season with salt and pepper to taste. If preparing ahead of time, allow the potatoes to cool, then store in an airtight container in the refrigerator. Reheat gently before serving.
When making Creamy Garlic Mashed Potatoes, feel free to adjust the proportions of butter and cream according to your preference for richness. For an extra layer of flavor, you can also add cream cheese or sour cream to the mix. If you find the potatoes too thick after reheating, simply stir in a little more cream or milk until you reach your desired consistency. To keep them warm while you finish your holiday feast, you can place the mashed potatoes in a slow cooker on the warm setting. Garnish with freshly chopped chives or parsley just before serving for a pop of color and freshness!
Herb-Roasted Turkey
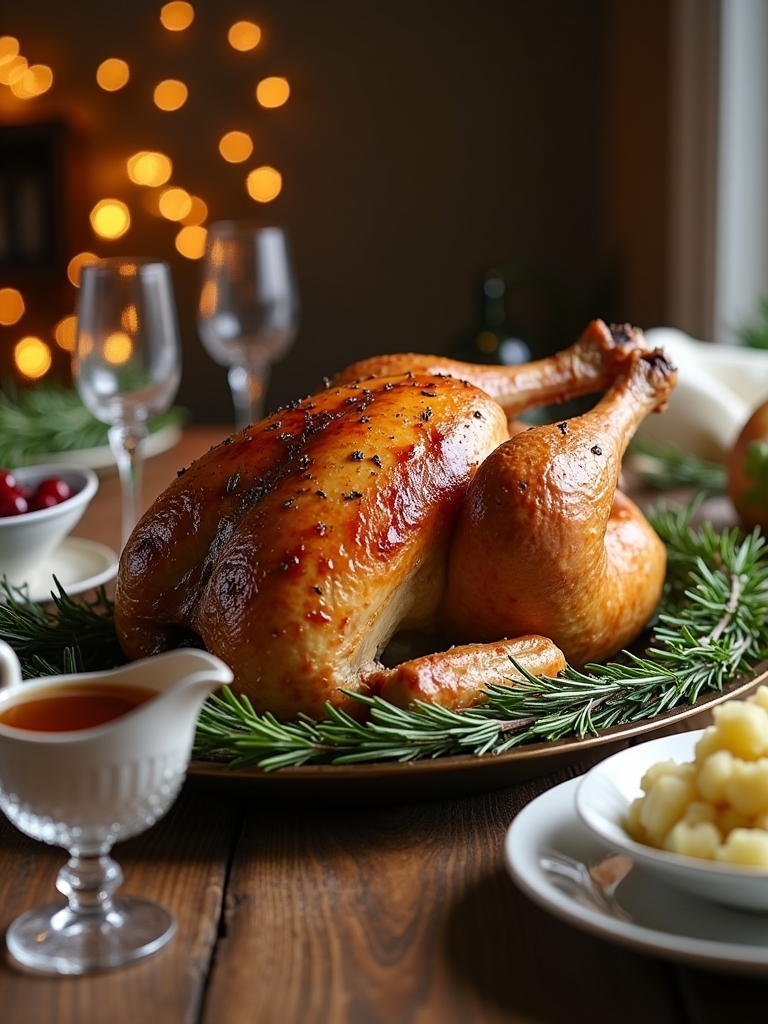
Herb-roasted turkey is the quintessential centerpiece of any Christmas dinner, filling the room with warmth and a delightful aroma that signals the season’s arrival. This recipe brings together the robust flavors of fresh herbs, garlic, and citrus, creating a succulent bird that is sure to impress your family and friends. Preparing your turkey ahead of time allows the flavors to meld beautifully, guaranteeing a juicy and flavorful dish that is less stressful on the big day.
Herb-roasted turkey embodies the spirit of Christmas, filling your home with warmth and delightful aromas, perfect for impressing loved ones.
To achieve the perfect herb-roasted turkey, it is essential to choose a high-quality bird and allow it to marinate overnight. The combination of fresh herbs like rosemary, thyme, and sage, along with the zesty brightness of lemon, brings an unparalleled depth of flavor. This make-ahead approach not only enhances the taste but also frees up your time on Christmas Day, letting you focus on spending time with loved ones rather than worrying about the oven.
Ingredients:
- 1 (12-14 pound) whole turkey, thawed
- 1/2 cup unsalted butter, softened
- 4 cloves garlic, minced
- 2 tablespoons fresh rosemary, chopped
- 2 tablespoons fresh thyme, chopped
- 2 tablespoons fresh sage, chopped
- Zest of 1 lemon
- Juice of 1 lemon
- Salt and pepper, to taste
- 2 cups low-sodium chicken broth
- Fresh herbs for garnish (optional)
To start, preheat your oven to 325°F (165°C). In a small bowl, combine the softened butter, minced garlic, chopped herbs, lemon zest, lemon juice, salt, and pepper to create a herb butter. Gently loosen the skin of the turkey over the breast and thighs, being careful not to tear it, and rub half of the herb butter underneath the skin. Rub the remaining herb butter all over the outside of the turkey. Place the turkey on a roasting rack in a large roasting pan and pour the chicken broth into the pan. Cover the turkey loosely with foil and roast for about 2 hours, then remove the foil and continue roasting for an additional 1 to 2 hours, or until the internal temperature reaches 165°F (74°C) in the thickest part of the thigh. Allow the turkey to rest for at least 30 minutes before carving.
A few tips to guarantee your herb-roasted turkey is a success: First, brining the turkey overnight in a saltwater solution can enhance moisture and flavor. If time allows, consider making the herb butter a day ahead and refrigerating it, which will deepen the flavors. Always use a meat thermometer to check for doneness, as ovens can vary. Finally, don’t forget to save the pan drippings to make a delicious gravy, rounding out your Christmas dinner perfectly. Enjoy the feast!
Honey-Glazed Carrots
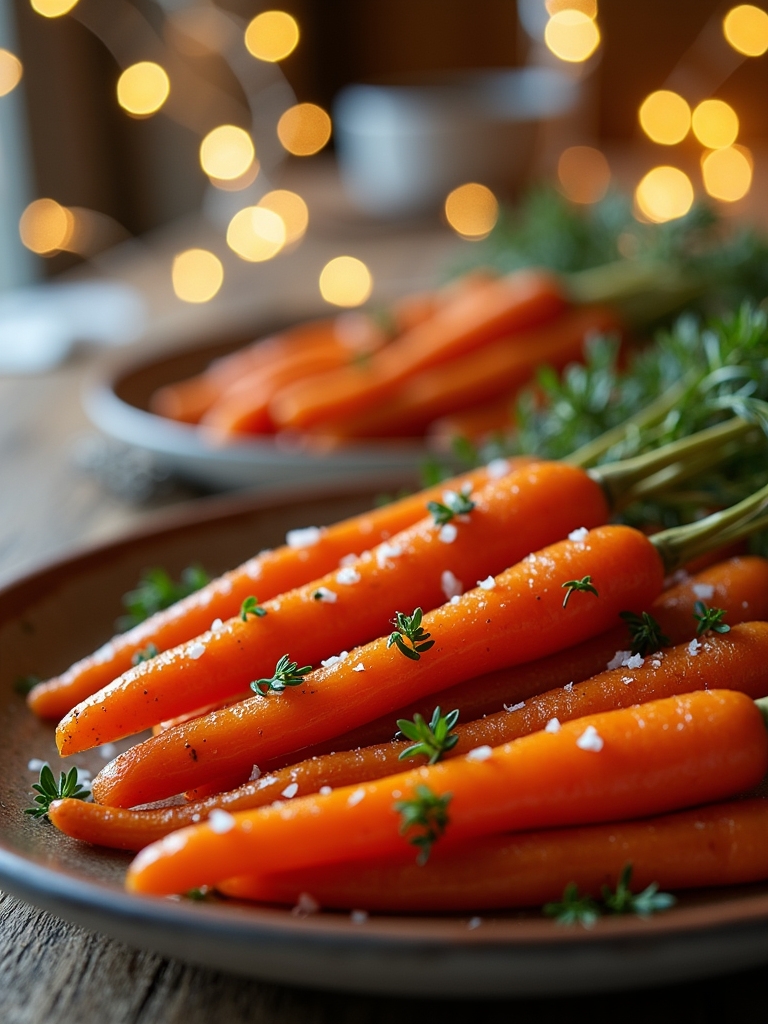
Honey-Glazed Carrots are a delightful and festive side dish that will elevate your Christmas dinner. The natural sweetness of the carrots is enhanced by the rich, sticky honey glaze, making them a perfect complement to any holiday meal. This dish is not only visually appealing with its vibrant orange color, but it also provides a deliciously tender crunch that is sure to please both kids and adults alike. The best part? You can prepare these beautiful carrots ahead of time, allowing you to enjoy more time with your loved ones during the holiday celebrations.
To make your Honey-Glazed Carrots even more special, consider using a mix of different types of carrots, such as rainbow or baby carrots, for a colorful presentation. This recipe is simple and straightforward, making it an ideal addition to your make-ahead Christmas dinner menu. With just a few ingredients and some easy steps, you can whip up this scrumptious side dish that will have everyone asking for seconds.
Ingredients:
- 1 pound of carrots, peeled and cut into sticks or rounds
- 3 tablespoons of unsalted butter
- 3 tablespoons of honey
- 1 tablespoon of brown sugar
- Salt and pepper to taste
- Fresh parsley, chopped (for garnish)
Cooking Instructions:
In a large pot, bring salted water to a boil and add the carrots. Cook for about 5-7 minutes until they are tender but still crisp. Drain the carrots and set them aside. In the same pot, melt the butter over medium heat, then stir in the honey and brown sugar until combined. Add the cooked carrots back into the pot, tossing them in the honey glaze until they are well coated. Season with salt and pepper to taste and cook for an additional 2-3 minutes, allowing the flavors to meld together. Remove from heat and garnish with chopped parsley before serving.
Extra Tips:
For added depth of flavor, you can incorporate spices such as cinnamon or nutmeg into the honey glaze. If you’re preparing these carrots ahead of time, cook them until just tender, then store them in an airtight container in the refrigerator. When you’re ready to serve, simply reheat them in a pan, adding a splash of water to steam them back to life, and finish with the honey glaze for that fresh taste. Enjoy your delicious Honey-Glazed Carrots alongside your holiday feast!
Cranberry Sauce With Orange Zest
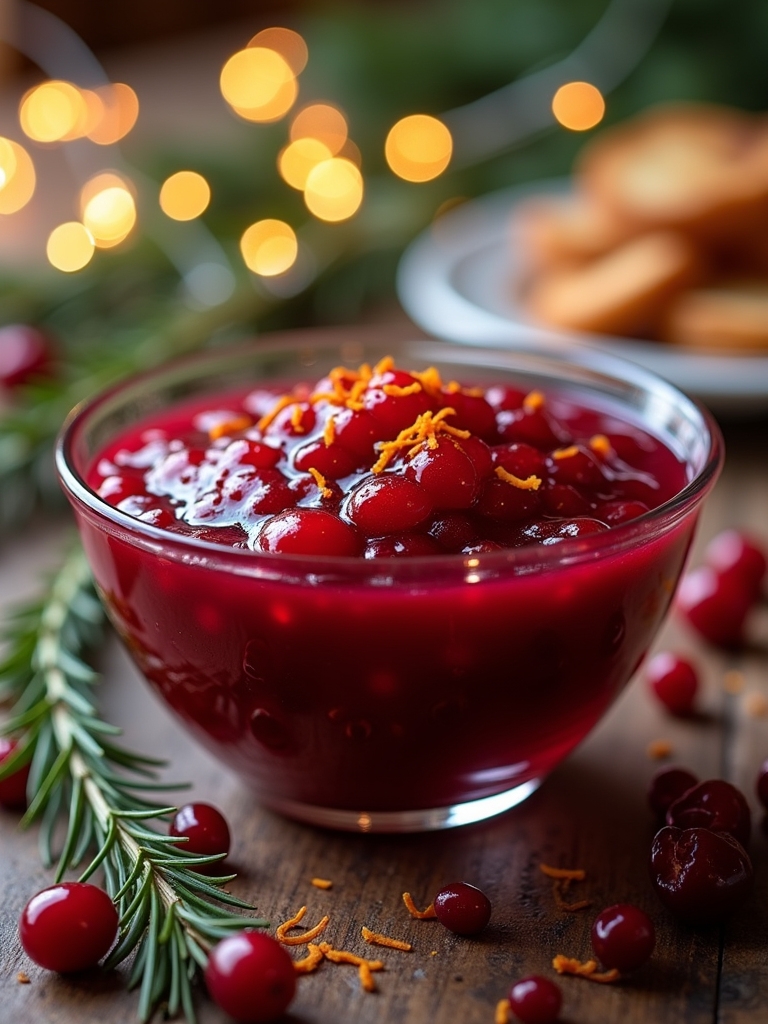
Cranberry sauce is a quintessential accompaniment to any holiday feast, and the addition of orange zest elevates this classic dish to new heights. The tartness of fresh cranberries pairs beautifully with the bright, citrusy notes of orange, creating a revitalizing contrast to rich meats and savory sides. This make-ahead cranberry sauce is not only easy to prepare, but it also allows the flavors to meld together, making it a perfect option for your Christmas dinner.
Preparing cranberry sauce in advance means less stress on the day of your celebration. This recipe can be made a few days before your gathering and stored in the refrigerator until you’re ready to serve. The vibrant colors and delightful flavors of this sauce will impress your guests and add a festive touch to your holiday table.
Ingredients:
- 12 oz fresh cranberries
- 1 cup granulated sugar
- 1 cup orange juice (freshly squeezed if possible)
- Zest of 1 large orange
- 1/4 teaspoon ground cinnamon (optional)
- 1/4 teaspoon salt
In a medium saucepan, combine the fresh cranberries, sugar, orange juice, orange zest, cinnamon (if using), and salt. Bring the mixture to a boil over medium heat, stirring occasionally. Once boiling, reduce the heat to low and let it simmer for about 10-15 minutes, or until the cranberries burst and the sauce thickens to your desired consistency. Remove the saucepan from the heat and allow the sauce to cool completely before transferring it to an airtight container. Refrigerate it until ready to serve.
When making cranberry sauce, feel free to customize it to your taste. You can add different spices like nutmeg or ginger for an extra kick or mix in chopped nuts or dried fruits such as raisins or apricots for added texture. Always taste the sauce before serving; if you prefer it sweeter, simply add a bit more sugar. Remember, the flavors will deepen as it sits, so making it a day or two in advance is ideal for achieving the best taste!
Spinach and Cheese Stuffed Mushrooms
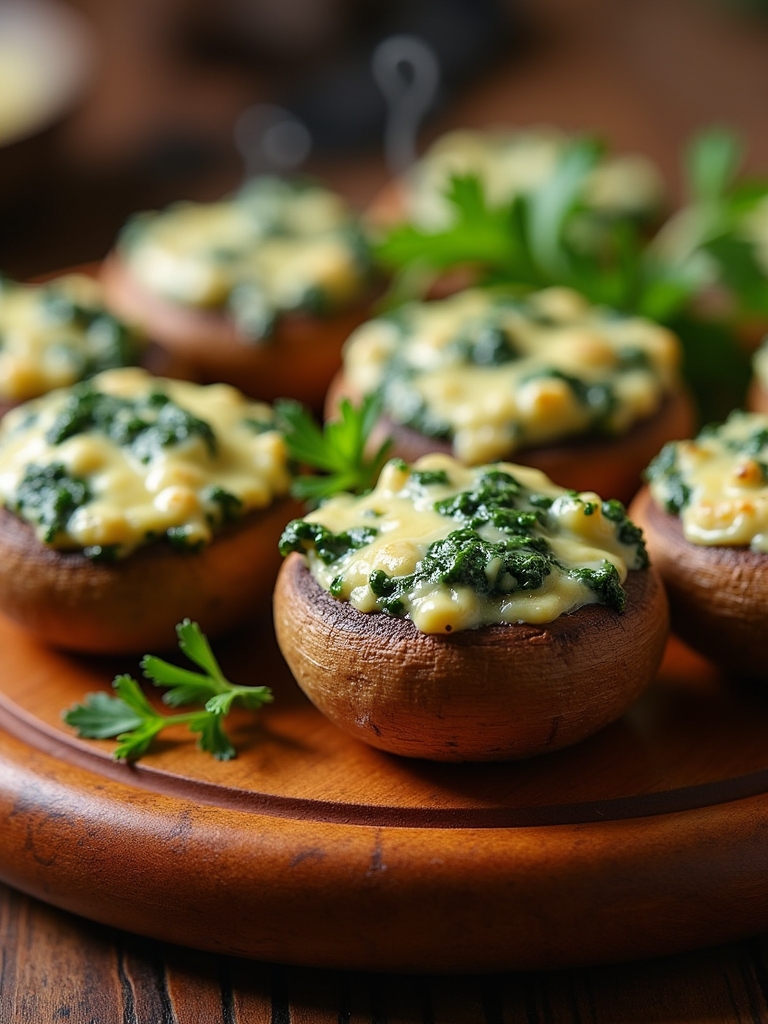
Spinach and Cheese Stuffed Mushrooms are a delightful appetizer perfect for your Christmas dinner. These bite-sized treats are not only delicious but also easy to prepare ahead of time, allowing you to enjoy the festive season without being stuck in the kitchen. The earthy flavor of the mushrooms pairs beautifully with the creamy, cheesy filling, while the addition of spinach adds a vibrant touch and a dose of nutrition. Whether served warm or at room temperature, they are sure to be a hit among your guests.
Preparing these stuffed mushrooms can be a fun and creative process. You can customize the filling to suit your taste, adding herbs, spices, or even different types of cheese. The great thing about this recipe is that it allows for flexibility; you can make them a day in advance, store them in the fridge, and bake them just before serving. This way, you can focus on enjoying time with your loved ones during the holidays.
Ingredients:
- 16 large cremini or button mushrooms
- 1 cup fresh spinach, chopped
- 1 cup cream cheese, softened
- 1/2 cup grated Parmesan cheese
- 1/2 cup shredded mozzarella cheese
- 2 cloves garlic, minced
- 1/4 teaspoon red pepper flakes (optional)
- Salt and pepper, to taste
- 1 tablespoon olive oil
- Fresh parsley, chopped (for garnish)
To prepare the Spinach and Cheese Stuffed Mushrooms, preheat your oven to 375°F (190°C). Start by cleaning the mushrooms and removing the stems. Finely chop the stems and set them aside. In a skillet, heat olive oil over medium heat and sauté the chopped mushroom stems and minced garlic until softened, about 3-4 minutes. Add the chopped spinach and cook until wilted. In a mixing bowl, combine the cooked mixture with cream cheese, Parmesan, mozzarella, red pepper flakes, salt, and pepper. Mix until well combined. Fill each mushroom cap with the cheese and spinach mixture, placing them on a baking sheet. Bake for 20-25 minutes or until the mushrooms are tender and the tops are golden.
When making Spinach and Cheese Stuffed Mushrooms, consider using different types of cheese for a unique flavor profile. You can also add breadcrumbs to the filling for extra texture or try incorporating herbs like thyme or basil for added freshness. If you’re preparing these ahead of time, simply cover the filled mushrooms with plastic wrap and refrigerate them until you’re ready to bake. This dish can also be frozen; just be sure to thaw them in the refrigerator before baking. Enjoy these scrumptious bites as part of your holiday feast!
Classic Green Bean Casserole
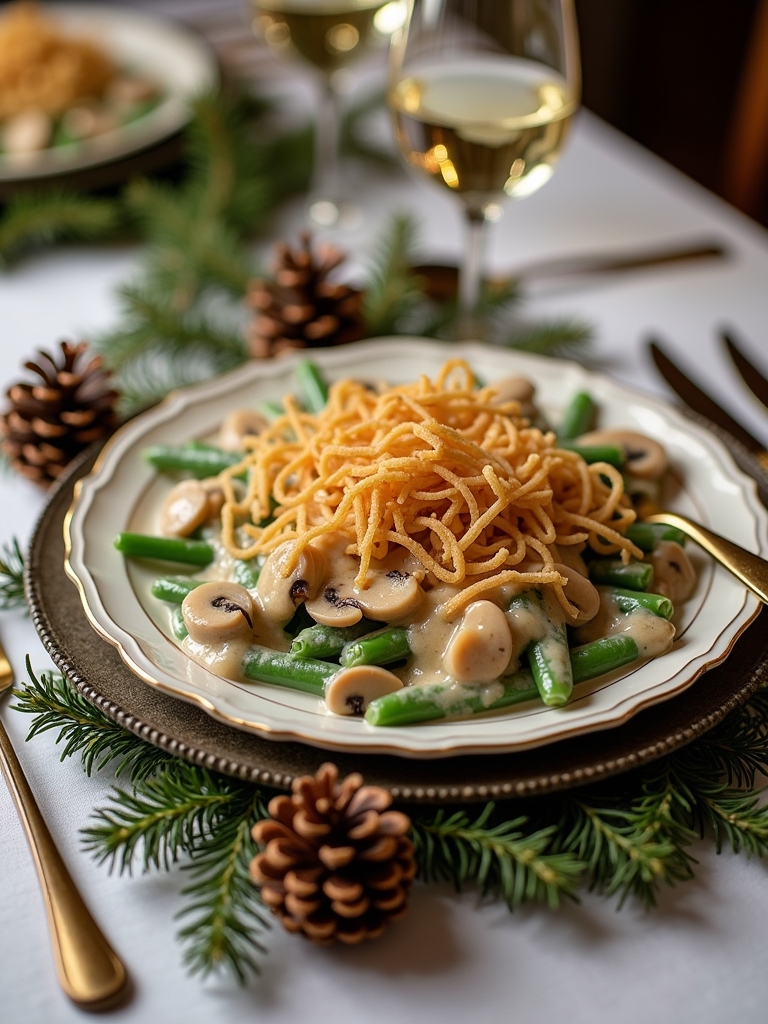
Classic Green Bean Casserole is a beloved dish that graces many holiday tables, especially during Christmas. This creamy, savory casserole is made with tender green beans, a rich mushroom sauce, and topped with crispy fried onions. It offers a delightful contrast of textures and flavors, making it a perfect side dish that complements any holiday feast. Preparing this dish ahead of time guarantees that you can enjoy the festive atmosphere without the stress of last-minute cooking.
To make your cooking experience even smoother, you can assemble the casserole in advance and store it in the refrigerator until you’re ready to bake. This not only saves you time on Christmas day but also allows the flavors to meld beautifully. When it’s time to serve, simply pop it in the oven to warm through and crisp up the topping, and you’ll have a delicious side dish that’s sure to impress your family and friends.
Ingredients:
- 1 pound fresh green beans, trimmed and cut into 1-inch pieces
- 1 can (10.5 ounces) cream of mushroom soup
- ¾ cup milk
- 1 teaspoon soy sauce
- 1/8 teaspoon black pepper
- 1 ½ cups French fried onions, divided
- 1 cup shredded cheddar cheese (optional)
- Cooking spray or butter for greasing the baking dish
Instructions:
Preheat your oven to 350°F (175°C) and lightly grease a 2-quart baking dish with cooking spray or butter. In a large pot of boiling salted water, blanch the green beans for about 5 minutes until they are bright green and slightly tender. Drain the beans and place them in a large mixing bowl. In a separate bowl, combine the cream of mushroom soup, milk, soy sauce, and black pepper. Stir this mixture into the green beans along with 1 cup of French fried onions and the cheddar cheese if using. Mix everything together until well combined, then transfer the mixture to the prepared baking dish. Top with the remaining ½ cup of French fried onions.
Extra Tips:
For added flavor, consider sautéing some garlic or shallots in butter before mixing them into the casserole. You can also use fresh mushrooms instead of canned soup for a more homemade touch. If you prefer a lighter version, substitute low-fat milk and a reduced-fat cream of mushroom soup. This casserole can be assembled a day in advance; just cover it tightly with plastic wrap and store it in the fridge until you’re ready to bake. If baking directly from the refrigerator, you might need to add a few extra minutes to the cooking time.
Savory Stuffing With Sausage and Apples
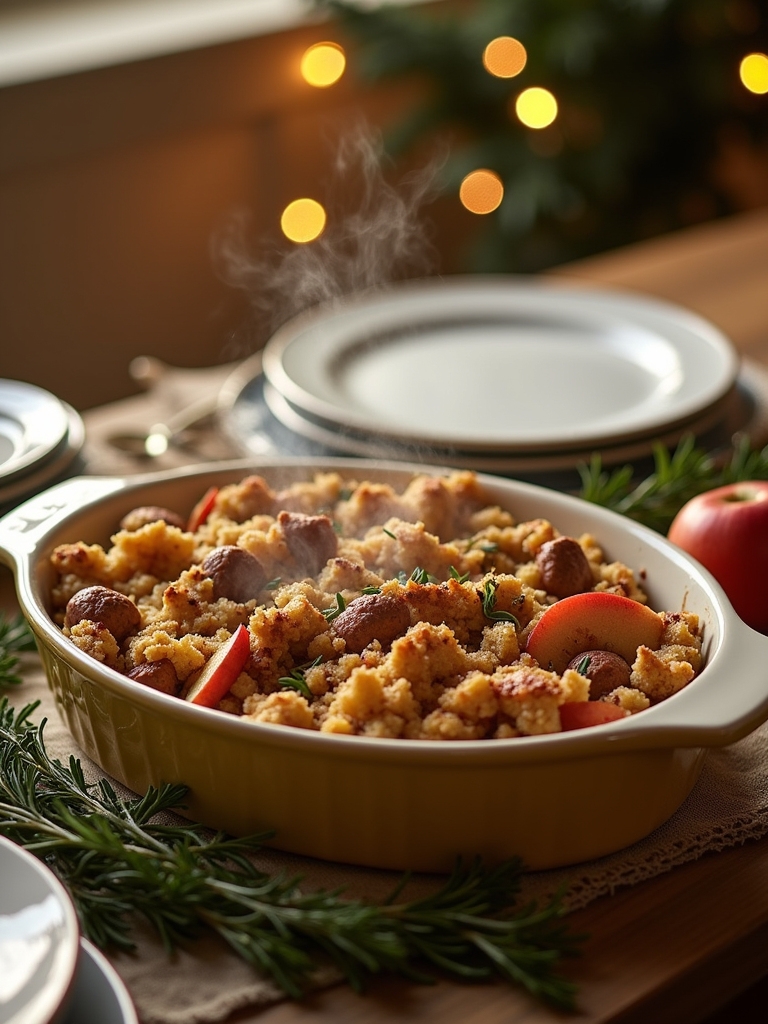
Savory Stuffing With Sausage and Apples is a delightful dish that brings together the rich flavors of savory sausage and the natural sweetness of apples. This stuffing is perfect for your Christmas dinner, providing a robust and comforting side that pairs beautifully with turkey, ham, or even a cozy vegetarian main dish. By preparing it in advance, you can save time on the big day, allowing you to enjoy the festivities with your family and friends instead of being stuck in the kitchen.
Savory Stuffing With Sausage and Apples offers a delightful blend of flavors, making it the perfect festive side for your Christmas dinner.
This stuffing is not only easy to make, but it also boasts layers of flavor that will elevate your holiday meal. The combination of herbs, sausage, and fresh apples creates a wonderful balance of savory and sweet, guaranteeing that each bite is packed with flavor. Whether you choose to bake it separately or stuff it inside your bird, this dish will become a cherished part of your holiday tradition.
Ingredients:
- 1 pound Italian sausage (mild or spicy, based on preference)
- 1 large onion, diced
- 2 celery stalks, diced
- 2 apples, peeled and diced (preferably Granny Smith or Honeycrisp)
- 1 tablespoon fresh sage, chopped (or 1 teaspoon dried sage)
- 1 tablespoon fresh thyme, chopped (or 1 teaspoon dried thyme)
- 1 teaspoon salt
- 1/2 teaspoon black pepper
- 1/2 cup dried cranberries (optional)
- 8 cups bread cubes (French or sourdough)
- 2 cups chicken or vegetable broth
- 1/4 cup unsalted butter, melted
- 2 large eggs, beaten
- Fresh parsley, for garnish (optional)
In a large skillet over medium heat, cook the Italian sausage until browned and cooked through, breaking it up with a wooden spoon as it cooks. Add the diced onion and celery, cooking until softened, about 5-7 minutes. Stir in the diced apples, sage, thyme, salt, pepper, and cranberries (if using), and cook for an additional 2-3 minutes. In a large mixing bowl, combine the bread cubes, sausage mixture, melted butter, broth, and beaten eggs. Mix until everything is well combined. Transfer the mixture to a greased baking dish and cover with foil. Refrigerate if making ahead, or bake immediately at 350°F (175°C) for 30 minutes. Remove the foil and bake for another 15-20 minutes until golden brown on top.
When preparing Savory Stuffing With Sausage and Apples, remember that you can customize the ingredients based on your preference. Feel free to add nuts for a crunchy texture or swap out herbs to suit your taste. Additionally, if making ahead, be sure to let the stuffing cool completely before covering and refrigerating to maintain its texture. On the day of serving, you can reheat it in the oven for a few minutes, adding a splash of broth if it seems dry. Enjoy this festive dish as a warm and inviting addition to your Christmas dinner spread!
Baked Honey-Balsamic Brussels Sprouts
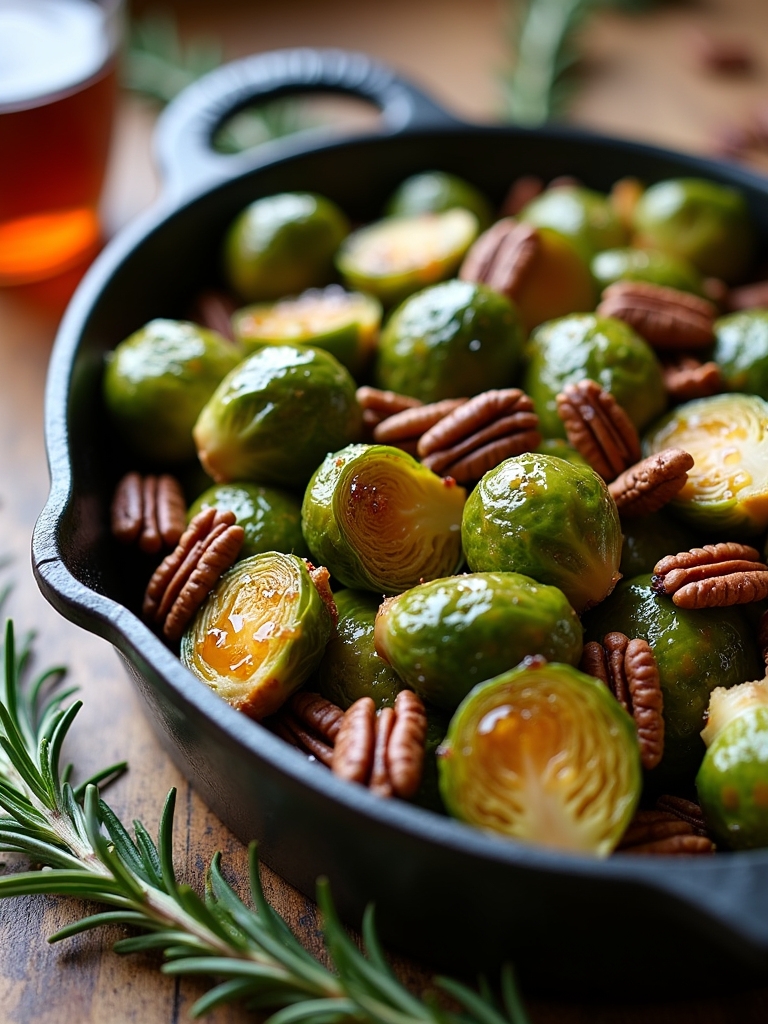
Baked Honey-Balsamic Brussels Sprouts are a delightful side dish that combines the earthy flavor of Brussels sprouts with the sweetness of honey and the acidity of balsamic vinegar. This dish not only brings a burst of flavor to your holiday table but also provides a beautiful pop of color. Preparing these Brussels sprouts in advance allows the flavors to meld beautifully, making them the perfect make-ahead option for your Christmas dinner.
The baking process caramelizes the Brussels sprouts, enhancing their natural flavors while the honey-balsamic glaze adds a rich, tangy sweetness. Whether you’re hosting a festive gathering or simply enjoying a cozy meal at home, these Baked Honey-Balsamic Brussels Sprouts will leave your guests asking for seconds. With just a few simple ingredients and straightforward preparation, this dish will quickly become a holiday favorite.
Ingredients:
- 1 ½ pounds Brussels sprouts, trimmed and halved
- 3 tablespoons olive oil
- 3 tablespoons balsamic vinegar
- 2 tablespoons honey
- 1 teaspoon garlic powder
- Salt and pepper to taste
- Optional: ¼ cup chopped walnuts or pecans for topping
Instructions:
Preheat your oven to 400°F (200°C). In a large bowl, toss the halved Brussels sprouts with olive oil, balsamic vinegar, honey, garlic powder, salt, and pepper until they are evenly coated. Spread the Brussels sprouts in a single layer on a baking sheet lined with parchment paper. Bake in the preheated oven for 20-25 minutes, or until the Brussels sprouts are tender and caramelized, stirring halfway through for even cooking. If desired, sprinkle the chopped nuts over the Brussels sprouts during the final 5 minutes of baking for added crunch.
Extra Tips:
For even more flavor, consider adding a sprinkle of red pepper flakes for a hint of heat or some grated Parmesan cheese before serving. You can also prepare the Brussels sprouts a few hours in advance and store them in the refrigerator until ready to bake. If you want a more intense flavor, marinate the sprouts in the honey-balsamic mixture for an hour before roasting. Ultimately, remember that the key to perfectly roasted Brussels sprouts is ensuring they have enough space on the baking sheet; overcrowding can lead to steaming instead of roasting. Enjoy your festive dish!
Decadent Chocolate Yule Log
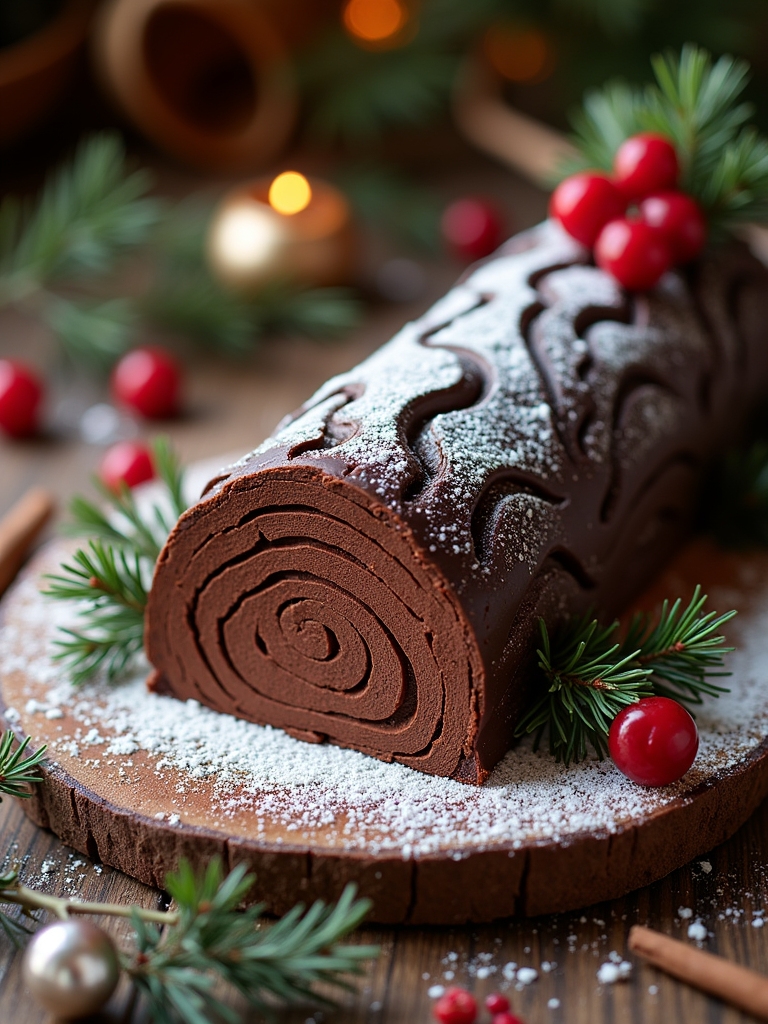
The Decadent Chocolate Yule Log, or Bûche de Noël, is a classic Christmas dessert that combines the rich flavors of chocolate with the festive spirit of the holiday season. This elegant cake, resembling a log, is not only visually stunning but also a delightful treat for chocolate lovers. With its soft sponge cake and luscious filling, it’s a dessert that brings joy to any holiday gathering. Preparing this cake ahead of time means you can spend more quality moments with family and friends during the festive celebrations.
To achieve the perfect Yule Log, you’ll need to master the art of rolling the sponge cake without cracking it, and to create a velvety chocolate ganache that will adorn your creation. This dessert offers flexibility regarding flavors; you can infuse your ganache with orange zest, coffee, or even liqueurs to personalize it. By making this dessert in advance, you guarantee that the flavors meld beautifully, creating a richer taste that will impress your guests.
Ingredients:
- 4 large eggs
- 1 cup granulated sugar
- 1 cup all-purpose flour
- 1/3 cup unsweetened cocoa powder
- 1/2 teaspoon baking powder
- 1/4 teaspoon salt
- 1 teaspoon vanilla extract
- 1 cup heavy cream
- 8 oz bittersweet chocolate, chopped
- 1/4 cup unsweetened cocoa powder (for dusting)
- Powdered sugar (for decoration)
- Fresh berries or mint leaves (for garnish)
To make the Decadent Chocolate Yule Log, start by preheating your oven to 350°F (175°C) and greasing a 15×10-inch jelly roll pan. Line the bottom with parchment paper and grease the paper as well. In a mixing bowl, beat the eggs and granulated sugar together until light and fluffy. In a separate bowl, whisk together the flour, cocoa powder, baking powder, and salt. Gently fold the dry ingredients into the egg mixture along with the vanilla extract. Spread the batter evenly in the prepared pan and bake for 10-12 minutes until the sponge springs back when lightly touched. Once baked, immediately turn the cake out onto a clean kitchen towel dusted with cocoa powder. Roll the cake with the towel from the short end, allowing it to cool completely. Meanwhile, prepare the ganache by heating the heavy cream until it simmers, then pouring it over the chopped chocolate. Let it sit for a few minutes before stirring until smooth. Unroll the cooled cake, spread a layer of ganache, and re-roll the cake carefully. Frost the outside with remaining ganache and decorate as desired.
When making a Yule Log, it’s important to roll the cake while it’s still warm to prevent cracking. If the cake does crack, don’t worry—just use the ganache to cover any imperfections. Allow the cake to chill in the refrigerator for at least a few hours or overnight to let the flavors develop. For a festive touch, dust the top with powdered sugar for a snowy effect, and consider adding some fresh berries or mint leaves for garnish. Enjoy the process of creating this holiday masterpiece, and remember that practice makes perfect!
Eggnog Cheesecake

Eggnog cheesecake is a delightful twist on traditional cheesecake that captures the spirit of the holiday season. This creamy dessert combines the rich flavors of eggnog with the smooth texture of cheesecake, making it a perfect addition to your Christmas dinner table. Not only is it delicious, but it can be made ahead of time, allowing you to enjoy more time with family and friends during the holidays.
Eggnog cheesecake offers a festive twist on classic cheesecake, perfect for holiday gatherings and made ahead for easy entertaining.
To prepare your eggnog cheesecake, start by selecting high-quality eggnog, as this will greatly enhance the flavor of your dessert. Using a graham cracker crust adds a delightful crunch that complements the creamy filling, while a sprinkle of nutmeg on top gives it a festive touch. This cheesecake is sure to impress your guests and become a cherished holiday tradition.
Ingredients:
- 1 ½ cups graham cracker crumbs
- ½ cup unsalted butter, melted
- 2 cups cream cheese, softened
- 1 cup granulated sugar
- 1 cup eggnog
- 3 large eggs
- 1 teaspoon vanilla extract
- ½ teaspoon ground nutmeg
- ½ teaspoon ground cinnamon
- Whipped cream (for topping)
Instructions:
Preheat your oven to 325°F (160°C). In a bowl, mix the graham cracker crumbs with melted butter until well combined, then press the mixture firmly into the bottom of a 9-inch springform pan to create the crust. In a large mixing bowl, beat the softened cream cheese and granulated sugar together until smooth. Gradually add in the eggnog, mixing well. Then, incorporate the eggs, one at a time, along with the vanilla extract, nutmeg, and cinnamon, confirming everything is well blended. Pour the cheesecake filling over the crust and bake for about 50-60 minutes or until the center is set but slightly jiggly. Turn off the oven and leave the cheesecake inside with the door ajar for an hour to cool gradually. Afterward, refrigerate for at least 4 hours or overnight before serving.
Extra Tips:
To guarantee your eggnog cheesecake has a perfect texture, make sure all your ingredients are at room temperature before you start mixing. This helps to avoid lumps in the batter. Additionally, if you’re preparing this dessert in advance, it’s best to store it in an airtight container in the refrigerator to maintain its freshness. For an extra festive touch, consider garnishing each slice with a dollop of whipped cream and a dusting of nutmeg or cinnamon right before serving. Enjoy this delightful dessert that will surely be a hit at your holiday gathering!
Mulled Wine With Spices
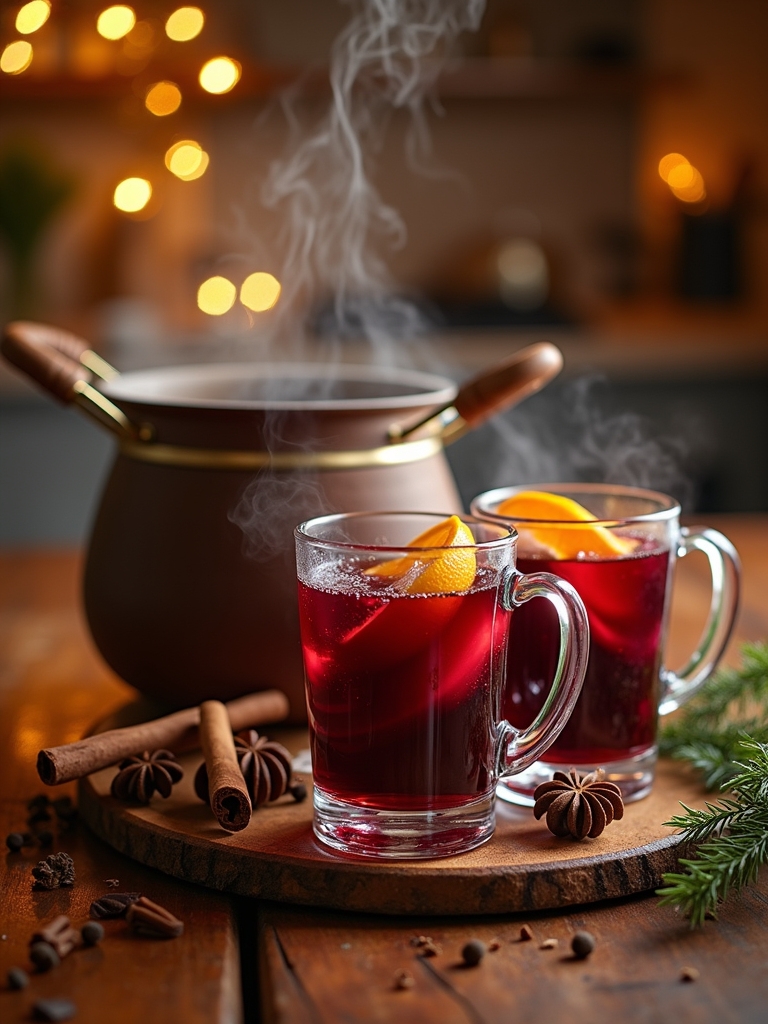
Mulled wine is a classic holiday beverage that warms the soul and fills the air with the welcoming scents of spices and citrus. Perfect for cozy gatherings, this aromatic drink can be prepared in advance, allowing you to spend more time with family and friends. The combination of red wine, warm spices, and fruit creates a delightful concoction that enhances the festive spirit of Christmas dinner.
To make your mulled wine truly special, choose a good-quality red wine that you enjoy drinking. The addition of spices such as cinnamon, cloves, and star anise brings out the wine’s natural flavors while infusing it with a comforting warmth. This recipe is easy to prepare and can be simmered on the stove or in a slow cooker, making it an ideal make-ahead option for your holiday celebration.
Ingredients:
- 1 bottle of red wine (750 ml)
- 1 orange, sliced
- 1 lemon, sliced
- 1/4 cup of honey or sugar (to taste)
- 3 cinnamon sticks
- 4-6 whole cloves
- 2-3 star anise
- 1/4 cup of brandy (optional)
- Fresh cranberries or additional orange slices for garnish
Cooking Instructions:
In a large pot, combine the red wine, sliced orange and lemon, honey or sugar, cinnamon sticks, cloves, and star anise. Heat the mixture over medium heat until it starts to simmer, then reduce the heat to low and let it steep for about 20-30 minutes, stirring occasionally. If desired, add the brandy for an extra kick. After steeping, strain the mulled wine into a serving pitcher, discarding the spices and fruit slices. Keep warm on low heat or in a slow cooker until ready to serve.
Extra Tips:
For an even richer flavor, consider letting the mulled wine sit overnight in the refrigerator after cooking and then reheating it gently before serving. This allows the spices to meld beautifully with the wine. Additionally, feel free to experiment with different spices and fruits based on your preferences—cardamom pods, ginger, or pomegranate can add a unique twist. Finally, serve the mulled wine in heatproof mugs or glasses, garnished with fresh cranberries or an additional slice of orange for a festive touch. Enjoy the warmth and cheer this delightful drink brings to your holiday festivities!
Frequently Asked Questions
How Far in Advance Can I Prepare These Recipes?
I usually prepare recipes up to three days in advance. With a solid make-ahead timeline, proper recipe storage in airtight containers keeps everything fresh. This way, I can enjoy the festivities without stress!
Can I Freeze Any of These Dishes?
Absolutely, I can freeze many of these dishes! I’ve found that using proper freezing techniques and thawing methods really helps maintain their flavor. It’s a game-changer for stress-free holiday meal planning, trust me!
What Are Some Easy Side Dishes for Christmas Dinner?
I love serving roasted vegetables and creamy mashed potatoes for Christmas dinner. They’re simple yet flavorful, and I often add fresh herbs for that innovative twist. Trust me, your guests will rave about these sides!
How Do I Safely Reheat Make-Ahead Dishes?
I always use the oven or stovetop for reheating methods, ensuring even heat distribution. For food safety, I check that dishes reach 165°F. It keeps everything delicious and safe for my holiday gatherings!
Are There Vegetarian Options for the Main Course?
Absolutely, I’ve found amazing vegetarian alternatives that burst with festive flavors! Think stuffed butternut squash or savory mushroom Wellington. They’re not just innovative; they’ll impress everyone at the table, making your dinner truly special.
Conclusion
As you prepare for your Christmas dinner, I hope these make-ahead recipes bring you joy and ease. Just imagine, while the turkey’s roasting, you can relax with family, sipping mulled wine and sharing stories. It’s funny how a little planning can turn a hectic holiday into a smooth celebration. So, embrace the magic of cooking in advance, and let the delicious aromas and laughter fill your home. Here’s to a stress-free holiday season filled with love and great food!