

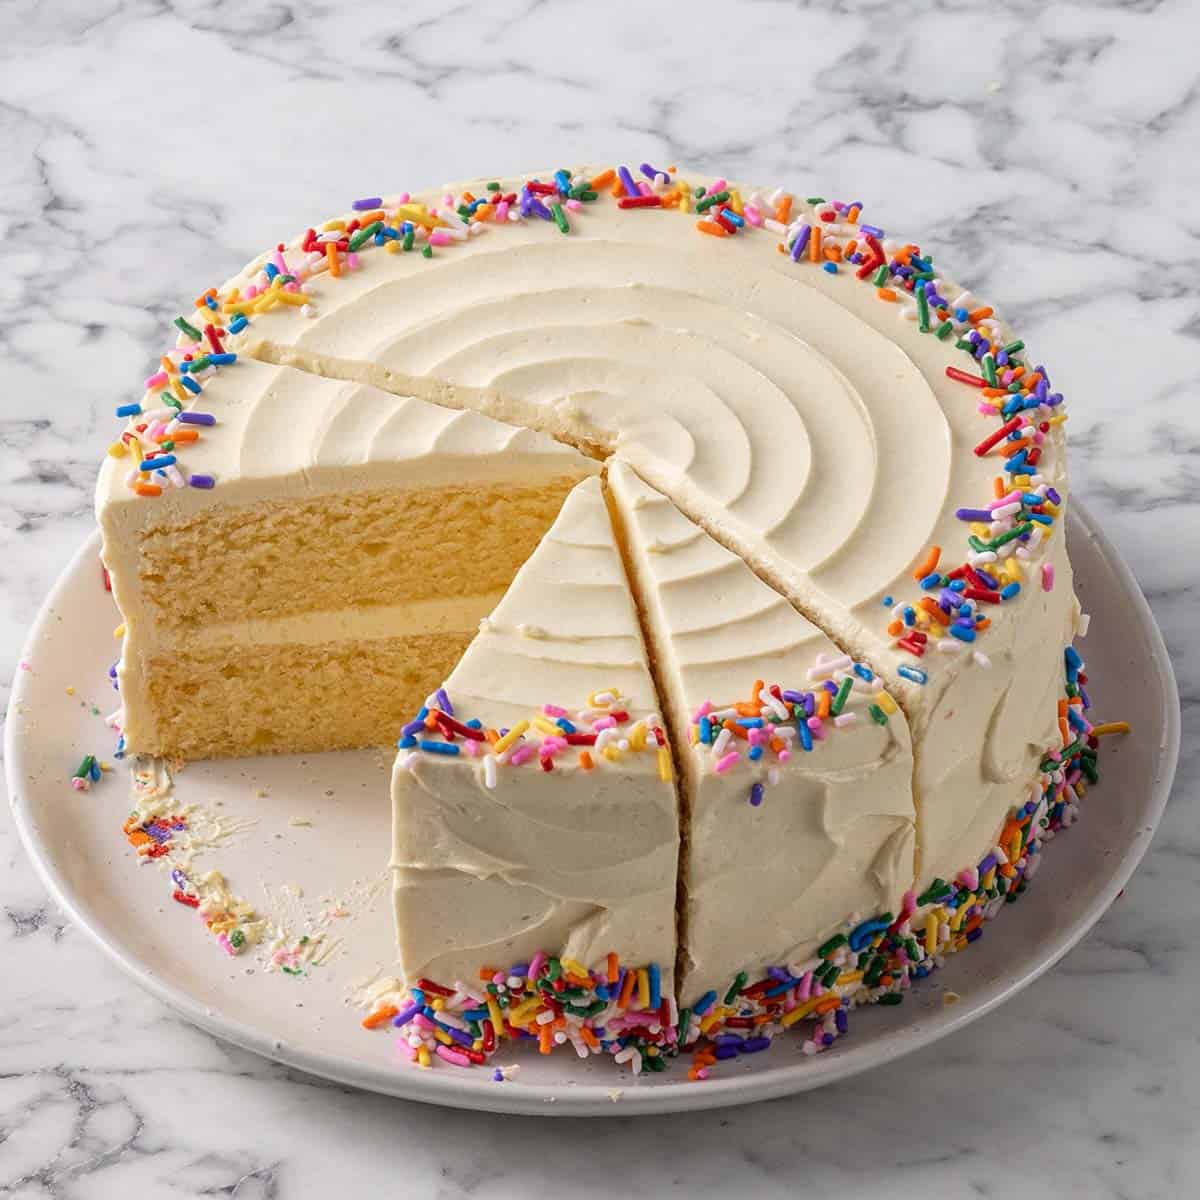
I adore baking a classic vanilla cake, which combines a light texture with delightful flavor. To make it, I mix 2 cups of flour, 1 ½ cups of sugar, ½ cup of butter, 1 cup of milk, and 3 ½ teaspoons of baking powder. After creaming the butter and sugar, I gradually incorporate the other ingredients, creating a smooth batter. This cake’s versatility in decoration and flavor allows for endless creativity. Discover more tips and variations to elevate your baking game!
History
When I think about the history of vanilla cake, I can’t help but marvel at how this simple dessert has evolved over centuries. Its cake origins trace back to ancient civilizations where honey and nuts created the earliest forms of sweet treats. As baking traditions flourished, so did the techniques and ingredients, leading to the delightful vanilla flavor we cherish today. The introduction of vanilla beans from Mexico in the 16th century transformed desserts, adding a rich, aromatic depth. By the 19th century, vanilla cake became a staple at celebrations, embodying innovation in the culinary world. Each slice tells a story of cultural exchange and creativity, reminding us how far we’ve come in our baking journeys and the endless possibilities that lie ahead.
Recipe
Vanilla cake is a classic dessert that is loved for its light texture and delightful flavor. Perfect for birthdays, celebrations, or simply an afternoon treat, this cake is easy to make and can be dressed up with frosting, fruits, or a dusting of powdered sugar. The simplicity of the vanilla flavor allows it to pair wonderfully with a variety of toppings, making it a versatile choice for any occasion.
A timeless favorite, vanilla cake’s light texture and delightful flavor make it perfect for any celebration or casual treat.
To achieve the best results, it’s important to use high-quality vanilla extract and guarantee all your ingredients are at room temperature before you begin. This cake is not only delicious but also serves as a great base for other flavors and styles, whether you choose to layer it with cream, fruit, or chocolate ganache.
Ingredients:
- 2 cups all-purpose flour
- 1 ½ cups granulated sugar
- ½ cup unsalted butter, softened
- 1 cup milk
- 3 ½ teaspoons baking powder
- 1 teaspoon vanilla extract
- ½ teaspoon salt
- 3 large eggs
Instructions:
Preheat your oven to 350°F (175°C) and grease two 9-inch round cake pans. In a large mixing bowl, cream together the softened butter and sugar until light and fluffy. Add the eggs one at a time, incorporating each one fully before adding the next. Mix in the vanilla extract. In a separate bowl, whisk together the flour, baking powder, and salt. Gradually add the dry ingredients to the butter mixture, alternating with the milk, and mix until smooth. Pour the batter evenly into the prepared pans and bake for 25-30 minutes, or until a toothpick inserted into the center comes out clean. Allow the cakes to cool in the pans for 10 minutes before transferring them to a wire rack to cool completely.
Extra Tips:
For a more flavorful cake, consider adding a pinch of almond extract or a tablespoon of lemon zest to the batter. Make sure your ingredients are at room temperature, as this helps create a better texture. If you want to make a layered cake, be sure to level the tops of the cakes with a serrated knife once they are cool. This not only makes for a more attractive presentation but also guarantees even frosting. Enjoy your baking and feel free to experiment with different frostings and fillings!
Cooking Steps
Let’s get started on the cooking steps that’ll transform our ingredients into a delightful vanilla cake. First, I’ll preheat the oven to 350°F, setting the stage for that perfect rise. With the oven warming up, I’ll mix the dry ingredients thoroughly to guarantee a smooth batter.
Step 1. Preheat Oven to 350°F
Preheating the oven to 350°F is an essential step in baking the perfect vanilla cake. This precise oven temperature creates an ideal environment for the cake to rise beautifully, ensuring a light and fluffy texture. I always set my oven ahead of time, allowing it to reach that golden heat before pouring in my cake batter. While the oven warms up, I gather my baking equipment, ensuring everything is within reach—my mixing bowls, measuring cups, and spatula. This preparation not only streamlines the process but also builds anticipation for that delightful aroma that will soon fill my kitchen. With the oven ready, I’m one step closer to creating a scrumptious treat that’s sure to impress!
Step 2. Mix Dry Ingredients Thoroughly
With the oven now warmed to the perfect temperature, it’s time to focus on mixing the dry ingredients. This step is essential for achieving that light, airy texture we all desire in a vanilla cake. I start by sifting flour to eliminate any lumps and guarantee a smooth batter. Then, I carefully measure sugar, letting each grain fall like tiny crystals of sweetness.
Here’s what I include in my dry mix:
- All-purpose flour
- Granulated sugar
- Baking powder
- Baking soda
- A pinch of salt
I whisk everything together until it’s well combined, creating a harmonious blend that invites creativity. This simple yet important step sets the stage for a deliciously fluffy cake, bursting with flavor!
Step 3. Add Wet Ingredients Gradually
As I begin to incorporate the wet ingredients, I find it vital to do so gradually, allowing each component to blend seamlessly into the dry mix. This step is significant; by paying attention to the wet ingredient ratios, I guarantee that my batter reaches the perfect consistency. I slowly pour in the milk, followed by the eggs and melted butter, stirring gently with each addition. The gradual addition not only prevents clumps but also allows the flavors to meld beautifully. I watch as the mixture transforms from a coarse blend to a silky batter, rich and inviting. This patient approach creates a foundation for a vanilla cake that’s tender and moist, making every bite a delightful experience.
Step 4. Fold in Vanilla Extract
Now that my batter has reached a smooth consistency, it’s time to fold in the star ingredient: vanilla extract. This aromatic elixir, with its rich vanilla origins, will elevate the flavor profiles of my cake to new heights. As I gently incorporate it, I’m careful not to overmix, preserving the lightness of the batter. Here’s how I do it:
- Measure out pure vanilla extract—quality matters!
- Pour it slowly into the center of the batter.
- Use a spatula to fold it in, scraping the sides for even distribution.
- Watch for that glossy finish, signaling it’s well-blended.
- Trust your senses; the fragrant aroma is intoxicating!
With this step, my cake is truly becoming a masterpiece!
Step 5. Pour Batter Into Pans
Once everything is well-mixed, I carefully prepare to pour the batter into my greased pans, ensuring that each layer will bake evenly. I take a moment to appreciate the silky cake consistency before gently pouring the first batch, letting it cascade gracefully into the pan. Using a spatula, I scrape every last bit from the bowl, maximizing flavor and texture. As I repeat this process with the second pan, I focus on even distribution, a vital baking technique that guarantees uniform baking. I give each pan a slight shake to settle the batter, creating a smooth surface. With the oven preheated and ready, I feel the excitement build—my vanilla cake is on the brink of becoming a reality!
Nutritional Guide
Understanding the nutritional profile of a vanilla cake can help you make informed choices when indulging in this delightful treat. Let’s break down the caloric content and ingredient benefits, so you can savor each bite mindfully.
| Nutrient | Amount per Slice (1/12 of a 9-inch cake) |
|---|---|
| Calories | 250 |
| Carbohydrates | 35g |
| Sugars | 18g |
| Protein | 3g |
| Fats | 10g |
The caloric content varies based on the ingredients you choose—opt for organic or whole ingredients for additional health benefits. For instance, using real vanilla extract not only enhances flavor but also provides antioxidants. By understanding these elements, you’ll enjoy your vanilla cake without compromising your health goals.
Final Thoughts
As you savor each slice of vanilla cake, it’s important to remember that enjoyment can coexist with mindfulness. This simple yet versatile dessert invites creativity and exploration in the kitchen. Here are some baking tips and flavor variations to elevate your experience:
- Experiment with extracts: Try almond, lemon, or coconut for a twist.
- Incorporate spices: A hint of cinnamon or nutmeg can add warmth.
- Add zest: Fresh citrus zest brightens the flavor profile.
- Layer with fruit: Berries or peaches can bring freshness and color.
- Frost creatively: Cream cheese, chocolate ganache, or whipped cream can transform your cake.
Embrace these innovations, and let each bite of your vanilla cake be a celebration of flavor and joy!
Frequently Asked Questions
Can I Use Gluten-Free Flour for This Vanilla Cake?
Absolutely, I’ve experimented with gluten-free alternatives in my baking. Just remember to adjust your liquid ratios and consider adding a binding agent like xanthan gum. Trust me, it can yield delicious results! Happy baking!
How Can I Make the Cake More Moist?
To make the cake more moist, I often use a buttermilk substitution or add sour cream. These ingredients create that luscious texture we crave, ensuring each bite melts in your mouth. Trust me; it’s worth it!
What Is the Best Way to Store Leftover Cake?
To store leftover cake, I recommend airtight cake storage containers. They’re perfect for cake preservation methods, keeping moisture in. Just slice, wrap, and tuck it away; your cake will stay fresh and delicious for days!
Can I Freeze the Vanilla Cake?
Sure, you can freeze the cake! It’s like putting a warm hug in the freezer. Just use proper freezing techniques to maintain that delightful cake texture, and you’ll enjoy it later just as much.
What Are Some Popular Frosting Options for Vanilla Cake?
When I think of frosting options, I love experimenting with flavors like lavender or raspberry. Combining unique frosting techniques, like piping rosettes or creating a smooth finish, elevates the cake’s presentation and taste to new heights.
Conclusion
As I take that first bite of the warm, fluffy vanilla cake, a wave of nostalgia washes over me. The buttery sweetness dances on my tongue, reminding me of family gatherings and laughter echoing through the kitchen. But wait—there’s something magical lurking in every slice, a hint of vanilla that beckons for another taste. Will you join me in savoring this delightful creation? The secret to happiness might just be a forkful of this irresistible cake.
Vanilla Cake Recipe
Ingredients
Equipment
Method
- Preheat oven to 350°F (175°C).
- Grease and flour a 9-inch cake pan or line with parchment paper.
- In a bowl, whisk together flour, baking powder, and salt. Set aside.
- Using an electric mixer, beat butter and sugar until light and fluffy (~3 mins).
- Beat in eggs one at a time, then add vanilla extract.
- Mix in ½ of the flour mixture, then ½ of the milk. Repeat until just combined (do not overmix).
- Pour batter into the pan and smooth the top.
- Bake for 25-30 mins or until a toothpick comes out clean.
- Let cool in the pan for 10 mins, then transfer to a wire rack.
- Frost or dust with powdered sugar (optional).
Notes
- Room Temperature Ingredients: Ensure butter, eggs, and milk are at room temperature for even mixing.
- Avoid Overmixing: Stir until just combined to keep the cake tender.
- Storage: Store in an airtight container for up to 3 days or freeze for longer shelf life.
- Variations: Add lemon zest, chocolate chips, or top with fresh berries.