

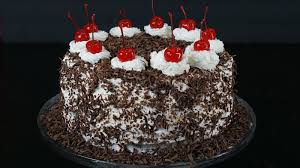
I’m thrilled to share my Black Forest Cake recipe, a delightful treat that perfectly balances rich chocolate layers, tart cherries, and fluffy whipped cream. It all starts with quality ingredients like cocoa powder and morello cherries, creating a deliciously moist cake. I love layering the cake with whipped cream and decorating it with chocolate shavings for a stunning presentation. Want to discover more about the baking steps and serving suggestions? Let’s get into the details!
History
When I think about the history of Black Forest cake, I can’t help but be captivated by its rich and flavorful origins. This delectable dessert hails from Germany, specifically the Black Forest region, known for its lush landscapes and cherry orchards. The cake’s cultural significance goes beyond mere indulgence; it reflects the region’s traditions and celebrates local ingredients. The combination of dark chocolate, cherries, and whipped cream symbolizes a harmony of flavors that has inspired countless variations worldwide. I find it fascinating how this cake, with its roots in German heritage, has transcended borders, becoming a beloved treat in many cultures. Each slice tells a story of innovation, tradition, and a celebration of life’s sweetest moments.
Recipe
Black Forest Cake, or Schwarzwälder Kirschtorte, is a classic German dessert that is both decadent and delightful. This rich chocolate cake is layered with whipped cream and cherries, creating a harmonious combination of flavors and textures that is sure to impress. Traditionally, the cake is made with a special cherry schnapps known as Kirsch, which adds a distinctive touch to the dessert. With its luxurious layers and elegant presentation, Black Forest Cake is perfect for celebrations or simply indulging yourself.
Making a Black Forest Cake may seem intimidating, but with the right ingredients and a little patience, you can create a show-stopping dessert that rivals any bakery. The key to success lies in the quality of your ingredients—use the best chocolate, fresh cherries, and real whipped cream for the most flavorful results. Whether you are baking for a special occasion or just to satisfy your sweet tooth, this recipe will guide you through the process step-by-step.
Creating a stunning Black Forest Cake is achievable with quality ingredients and patience—perfect for any occasion or sweet craving.
Ingredients:
- 2 cups all-purpose flour
- 2 cups granulated sugar
- 3/4 cup unsweetened cocoa powder
- 1 1/2 teaspoons baking powder
- 1 1/2 teaspoons baking soda
- 1 teaspoon salt
- 2 large eggs
- 1 cup whole milk
- 1/2 cup vegetable oil
- 2 teaspoons vanilla extract
- 1 cup boiling water
- 1 jar (24 oz) morello cherries, drained (reserve the juice)
- 2 cups heavy whipping cream
- 2 tablespoons powdered sugar
- 1/4 cup Kirsch (cherry schnapps)
- Chocolate shavings (for decoration)
To prepare the Black Forest Cake, start by preheating your oven to 350°F (175°C). Grease and flour two 9-inch round cake pans. In a large mixing bowl, combine the flour, sugar, cocoa powder, baking powder, baking soda, and salt. Add the eggs, milk, oil, and vanilla, and mix until well combined. Gradually add the boiling water to the batter, mixing until smooth. Divide the batter evenly between the prepared cake pans and bake for 30-35 minutes, or until a toothpick inserted in the center comes out clean. Once baked, allow the cakes to cool in the pans for 10 minutes before transferring them to wire racks to cool completely. Once cooled, slice each cake in half horizontally to create four layers.
When assembling the cake, place one layer on a serving plate and drizzle with some reserved cherry juice, followed by a layer of whipped cream and a portion of cherries. Repeat this process for the next two layers, and then top the final layer with more whipped cream. Decorate the top with chocolate shavings and any remaining cherries. Chill the cake in the refrigerator for at least one hour before serving to allow the flavors to meld.
Extra Tips: To enhance the flavor of your Black Forest Cake, consider adding a splash of vanilla extract to the whipped cream for added depth. If you prefer a less sweet cake, you can reduce the amount of sugar in the whipped cream or use a lighter cream. For a more intense chocolate flavor, you can also substitute some of the all-purpose flour with additional cocoa powder. Finally, serving the cake with extra cherries on the side can elevate the presentation and provide a fresh burst of flavor with each slice. Enjoy your baking!
Cooking Steps
Let’s get started on creating this delightful Black Forest Cake! First, I’ll preheat my oven to 350°F, setting the stage for a perfect bake. Then, I’ll mix the dry ingredients thoroughly, ensuring every bite of cake is packed with flavor and texture.
Step 1. Preheat Oven to 350°F
To kick off this delightful Black Forest cake, I always start by preheating the oven to 350°F. This vital step sets the perfect oven temperature for achieving that moist, decadent texture we all crave. While waiting, I gather my tools and ingredients, utilizing effective baking techniques to guarantee a successful outcome. Here’s what I focus on:
- Make sure the oven rack is positioned in the center for even baking.
- Use an oven thermometer to double-check the temperature.
- Allow the oven to preheat for at least 10-15 minutes.
- Avoid opening the door too soon to maintain heat.
- Prepare your baking pans while the oven warms up.
With everything in place, I’m ready to plunge into the next steps of this scrumptious cake!
Step 2. Mix Dry Ingredients Thoroughly
Before diving into the mixing bowl, I make sure to gather all my dry ingredients—flour, cocoa powder, baking powder, baking soda, and a pinch of salt. I find that mixing these dry ingredients thoroughly is essential for achieving that perfect Black Forest Cake. Using a whisk, I blend them together, ensuring that the cocoa powder disperses evenly, enhancing the cake’s rich flavor. Proper ingredient proportions are key; too much baking powder can lead to a cake that rises too quickly and collapses. By employing effective baking techniques, I create a uniform mixture that allows all flavors to meld beautifully. This step sets the foundation for a moist, decadent cake that will surely impress anyone who takes a bite!
Step 3. Fold in Whipped Cream
As the cake layers cool, I turn my attention to the whipped cream, which will add that signature lightness to my Black Forest Cake. To achieve the perfect cake texture, I gently fold the whipped cream into the chocolate mixture, ensuring it remains airy and fluffy. Here’s how I do it:
- Start with chilled heavy cream for ideal volume.
- Beat it until soft peaks form, but don’t overwhip.
- Use a spatula for folding to maintain airiness.
- Add whipped cream in batches for better incorporation.
- Gently combine in a figure-eight motion, avoiding vigorous stirring.
This careful technique enhances the cake texture, marrying richness with a delicate touch that truly elevates my Black Forest Cake to new heights.
Step 4. Add Cherries and Chocolate Shavings
Once the whipped cream is perfectly folded into the chocolate mixture, I turn my attention to the delightful toppings that will crown my Black Forest Cake—juicy cherries and decadent chocolate shavings. First, I gently arrange the cherry toppings on the cake, ensuring they’re evenly spaced for that eye-catching appeal. Their vibrant red color pops against the rich chocolate layers, creating a feast for the eyes. Next, I take a vegetable peeler and shave a block of dark chocolate, letting the delicate curls cascade over the cherries like edible confetti. This chocolate decoration not only adds an elegant touch but enhances the cake’s flavor profile. The combination of cherries and chocolate elevates my creation into a luxurious dessert experience!
Step 5. Bake for 30 Minutes
With my cake batter ready and the cherry and chocolate toppings set aside, I preheat the oven to 350°F (175°C). As I prepare to bake for 30 minutes, I know that this vital baking time will shape the cake’s texture. I place the cake pans in the oven and set a timer, feeling excited about the transformation ahead.
Here’s what to keep in mind during this stage:
- Check for even baking by rotating the cakes halfway through.
- Use a toothpick to test doneness—moist crumbs should cling.
- Don’t open the oven door too soon; it can deflate your cakes.
- Allow the cakes to cool briefly before removing them.
- Patience is key; let them cool completely before frosting.
The anticipation builds!
Nutritional Guide
While indulging in a slice of Black Forest Cake, it’s important to contemplate the nutritional content that comes with this delightful dessert. Understanding its caloric content and ingredient benefits can enhance your experience, making each bite even more rewarding.
Here’s a quick nutritional guide:
| Nutrient | Amount per Slice |
|---|---|
| Calories | 350 |
| Sugar | 25g |
| Fat | 15g |
| Protein | 5g |
| Fiber | 1g |
The rich chocolate not only satisfies cravings but also provides antioxidants. Cherries, the star of this cake, are packed with vitamins and can even boost heart health. So, while enjoying this treat, you can appreciate the goodness hidden within!
Final Thoughts
Three layers of rich chocolate, luscious cherries, and whipped cream come together in a symphony of flavors that make Black Forest Cake a timeless dessert. I love the versatility of this cake; it invites creativity through various cake variations and serving suggestions.
Indulge in the timeless delight of Black Forest Cake, where rich chocolate, cherries, and whipped cream harmonize beautifully.
Here are a few ideas to elevate your Black Forest Cake experience:
- Add a twist: Try using dark chocolate or even white chocolate for the layers.
- Fruit fusion: Incorporate raspberries or strawberries alongside cherries for a vibrant flavor profile.
- Garnish creatively: Top with chocolate shavings, edible flowers, or a drizzle of cherry syrup.
- Serve with style: Pair each slice with a scoop of vanilla ice cream or a dollop of crème fraîche.
- Explore flavors: Experiment with flavored whipped cream, like vanilla bean or almond.
Enjoy every bite!
Frequently Asked Questions
Can I Make Black Forest Cake Without Alcohol?
Absolutely, I’ve made non-alcoholic versions using cherry juice or coffee for flavor enhancements. You won’t miss the alcohol; those alternatives bring out rich flavors, making the cake just as delightful and satisfying!
What Are the Best Substitutes for Cherries?
If you’re looking for cherry alternatives, consider using raspberries or strawberries. They offer vibrant colors and flavors. I love topping my desserts with these fruits; they add a fresh twist and delightful sweetness, making every bite exciting.
How Should I Store Leftover Black Forest Cake?
When I store leftovers, I wrap them tightly in plastic wrap. Keeping the cake in the fridge guarantees ideal conditions, preserving its moisture and flavor. I love enjoying those sweet bites for days afterward!
Can I Freeze Black Forest Cake?
Freezing a cake’s like capturing a moment in time! I recommend slicing it first, wrapping each piece tightly to preserve that luscious texture. With these freezing tips, you’ll savor every delightful bite later.
What Type of Chocolate Is Best for This Cake?
When I make this cake, I love using rich dark chocolate for depth and sweet milk chocolate for balance. The combination creates a delightful harmony that elevates the entire dessert, making it truly irresistible!
Conclusion
As I take a bite of this rich, chocolatey Black Forest cake, it feels like a sweet hug on a chilly day. The layers of fluffy cake, tart cherries, and creamy frosting come together in perfect harmony, making every slice an indulgent delight. I hope you enjoy baking and savoring this classic dessert as much as I do. So, roll up your sleeves and bring a taste of Germany into your kitchen—your taste buds will thank you!
Black Forest Cake Recipe
Ingredients
Equipment
Method
- Preheat oven to 350°F (175°C). Grease and line two 9-inch round pans.
- In a bowl, sift flour, cocoa powder, baking powder, baking soda, and salt.
- In another bowl, beat sugar, eggs, milk, oil, and vanilla until smooth.
- Gradually mix dry ingredients into wet ingredients.
- Stir in boiling water (batter will be thin).
- Divide batter evenly between pans. Bake for 25–30 minutes or until a toothpick comes out clean.
- Cool cakes completely.
- Whip heavy cream, powdered sugar, and vanilla until stiff peaks form.
- Drain cherries (reserve juice). Mix juice with kirsch (if using).
- Slice each cake horizontally into two layers. Brush each layer with kirsch mixture.
- Place one cake layer on a plate. Spread with whipped cream and top with cherries.
- Repeat layers, finishing with cream on top and sides.
- Cover the cake with chocolate shavings and decorate with cherries.
- Chill for at least 3 hours before serving.
Notes
- Alcohol-free: Replace kirsch with cherry juice.
- Storage: Refrigerate for up to 3 days.
- For extra richness: Add chocolate ganache between layers.