

I’m excited to share my caramel cake recipe, a rich and moist treat that’s deeply rooted in Southern baking traditions. The combination of fluffy cake layers infused with caramel and topped with a velvety caramel frosting is simply irresistible. It’s perfect for special occasions or just to satisfy your sweet tooth. With simple ingredients and easy steps, you’ll love creating this delightful dessert. Stick around to discover more about its history, nutritional value, and baking tips!
History
When I think about the history of caramel cake, I can’t help but feel a sense of nostalgia for those warm, inviting kitchens where this delightful dessert first emerged. With its Southern origins, caramel cake reflects the rich culinary traditions of the American South, where home bakers sought to create something special for their families. Over time, this cake has undergone a fascinating dessert evolution, adapting to modern tastes while retaining its comforting essence. The velvety caramel frosting, once a simple blend of sugar and butter, has inspired countless variations, incorporating innovative flavors and techniques. Each bite tells a story, inviting us to explore the layers of history and creativity that make caramel cake a beloved classic in today’s culinary landscape.
Recipe
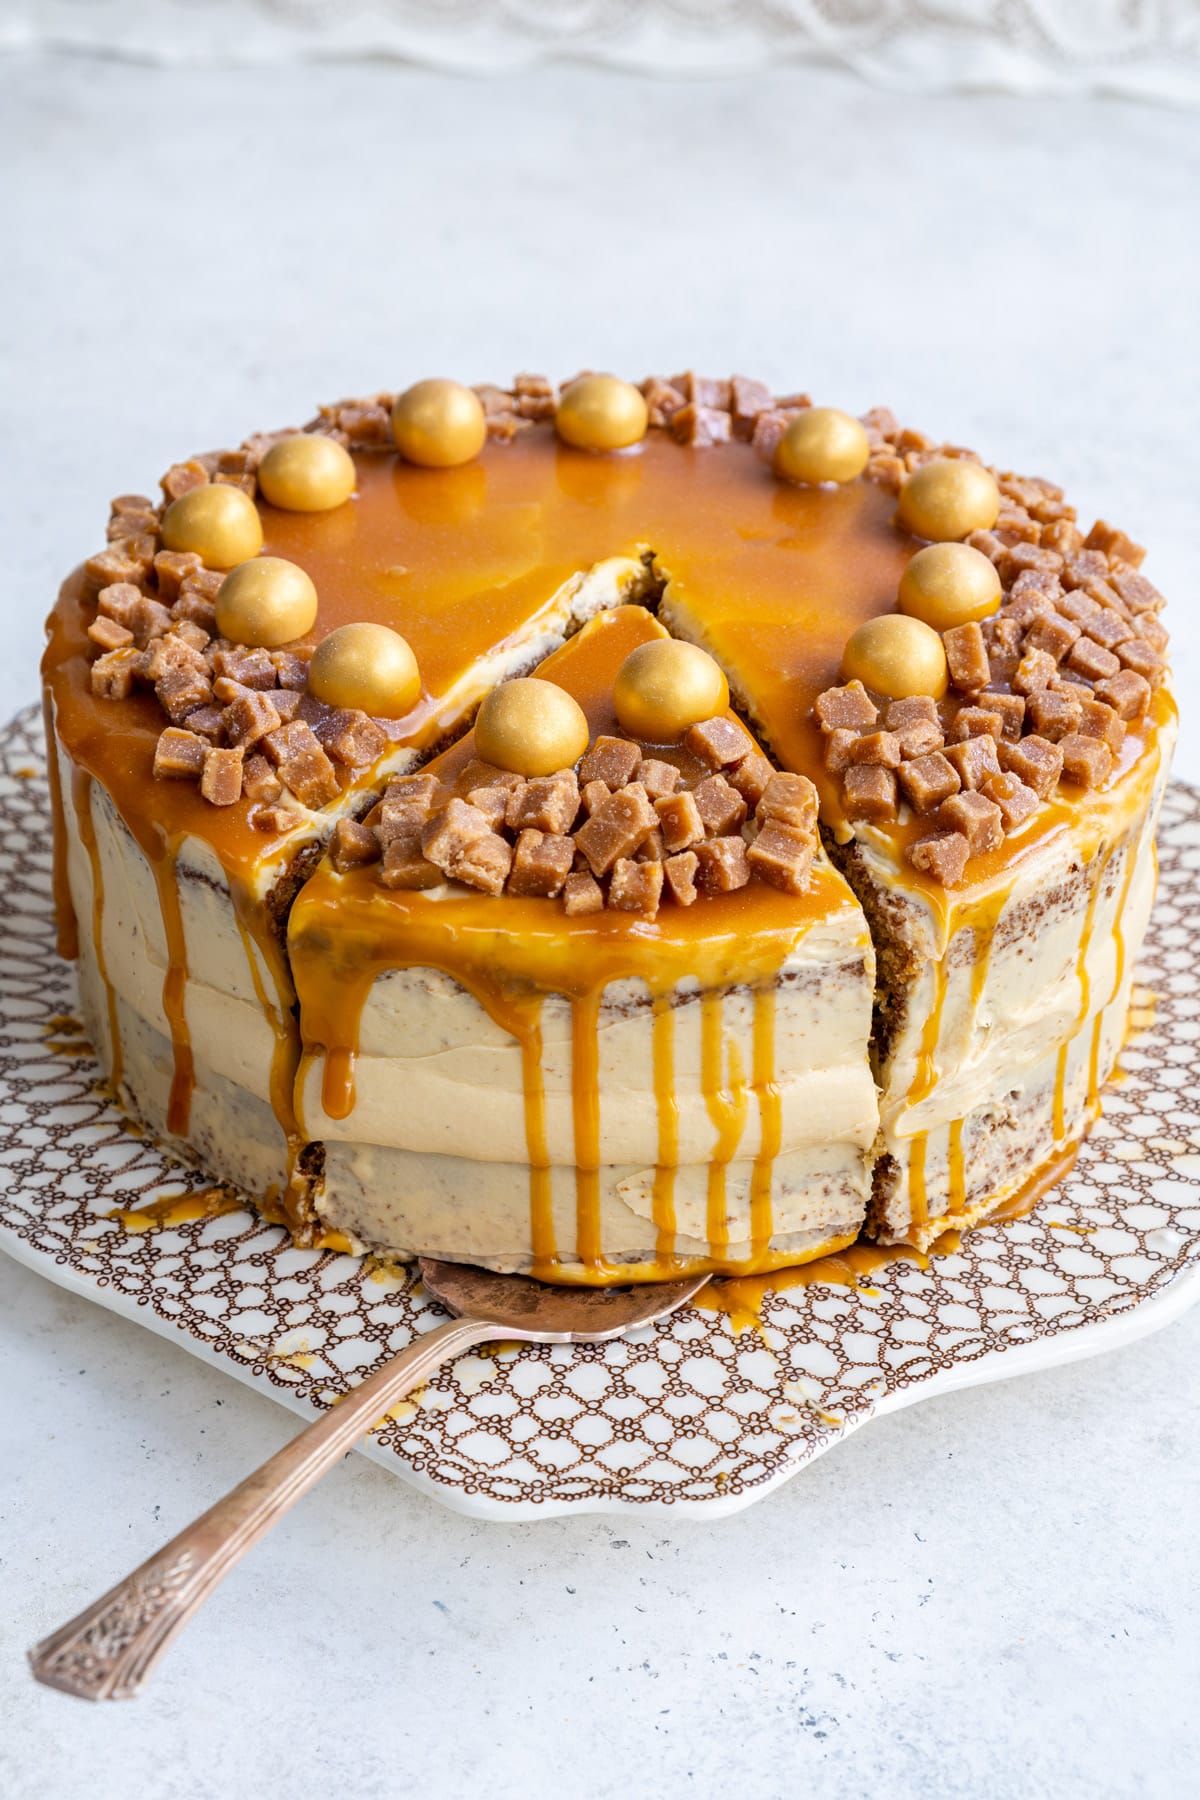
Caramel cake is a delightful dessert that combines the rich flavors of caramel with a moist, fluffy cake. This indulgent treat is perfect for special occasions or simply to satisfy your sweet tooth. The layers of caramel-infused cake are often topped with a luscious caramel frosting, creating a decadent experience in every bite. With a few simple ingredients and steps, you can create a homemade caramel cake that will impress your family and friends.
To obtain the perfect caramel taste, the key is to balance the sweetness of the cake with the rich buttery notes of caramel. This recipe guides you through the process of making both the cake and the frosting, guaranteeing a harmonious blend of flavors. Whether you’re a baking novice or a seasoned pro, this caramel cake will show you just how rewarding it is to create a beautiful dessert from scratch.
Ingredients:
- 2 cups all-purpose flour
- 1 ½ cups granulated sugar
- ½ cup unsalted butter, softened
- 1 cup buttermilk
- 3 large eggs
- 1 teaspoon vanilla extract
- 1 teaspoon baking powder
- ½ teaspoon baking soda
- ½ teaspoon salt
- 1 cup caramel sauce (store-bought or homemade)
Cooking Instructions:
Preheat your oven to 350°F (175°C). Grease and flour two 9-inch round cake pans. In a large mixing bowl, cream together the softened butter and granulated sugar until light and fluffy. Add the eggs one at a time, mixing well after each addition. Stir in the buttermilk and vanilla extract, then mix in the flour, baking powder, baking soda, and salt until just combined. Gently fold in the caramel sauce, being careful not to overmix. Divide the batter evenly between the prepared pans and bake for 25-30 minutes, or until a toothpick inserted in the center comes out clean. Allow the cakes to cool completely in the pans before transferring to a wire rack.
Extra Tips:
For an even richer flavor, consider adding a pinch of sea salt to your caramel sauce to enhance the sweetness. If you want to elevate your cake further, try layering it with a chocolate ganache or adding chopped nuts for added texture. Make sure your cakes are completely cool before frosting to guarantee the icing doesn’t melt. Additionally, if you have leftover caramel sauce, drizzle it on top of the finished cake for a beautiful presentation! Enjoy your baking adventure with this delightful caramel cake.
Cooking Steps
Now that we’ve got our ingredients ready, let’s jump into the cooking steps that bring this caramel cake to life. First, I always preheat my oven to 350°F to guarantee it’s perfectly warm when I’m ready to bake. Then, I mix the dry ingredients together before gradually adding the wet ingredients for a smooth, luscious batter.
Step 1. Preheat Oven to 350°F
Before diving into the delightful world of caramel cake, I always make certain to preheat my oven to 350°F. Getting the oven temperature just right is one of those baking essentials that can truly make or break your cake. I love the anticipation that builds as the oven warms up, filling the kitchen with a comforting warmth. Setting it to 350°F guarantees even baking, allowing the cake to rise perfectly and develop that golden, inviting crust. While it preheats, I get everything else ready, knowing that the right temperature is vital for achieving that luscious, gooey caramel flavor I crave. Trust me, starting with a properly preheated oven sets the stage for a baking masterpiece!
Step 2. Mix Dry Ingredients Together
Mixing the dry ingredients is an essential step that sets the foundation for a delicious caramel cake. I start by choosing the right flour types, typically all-purpose and cake flour, to achieve that perfect balance of texture and fluffiness. I sift them together with baking powder, baking soda, and a pinch of salt, ensuring an even distribution of leavening agents. This step is vital, as it prevents clumping and promotes a uniform rise. I use a whisk, employing gentle mixing techniques to aerate the mixture, allowing for a lighter cake. The aroma of the dry ingredients mingling is simply delightful, hinting at the sweet masterpiece to come. With everything blended, I’m ready to move on to the next exciting phase!
Step 3. Add Wet Ingredients Gradually
As I begin to incorporate the wet ingredients, I like to do it gradually to maintain a smooth and cohesive batter. This method allows me to control the wet ingredient ratios, ensuring that each component blends seamlessly without clumps. I start by adding a small amount of the liquid mixture, then mix gently using a whisk or spatula, allowing the dry ingredients to absorb the moisture. I repeat this process, adding the wet ingredients in stages, which not only enhances the texture but also prevents overmixing. Gradual mixing techniques help create a tender crumb, elevating the cake’s overall quality. Trust me, taking this extra time pays off when you savor that luscious, caramel-infused slice!
Step 4. Fold in Caramel Sauce
With the batter perfectly blended, it’s time to introduce that star ingredient: caramel sauce. I gently pour in the warm, velvety sauce, watching it swirl through the batter like liquid gold. Using a spatula, I carefully fold the caramel into the mixture, ensuring it integrates without losing the airiness we’ve worked hard to achieve. This step is essential; it not only infuses the cake with rich flavor but also enhances the cake texture, creating a moist, decadent crumb. I take my time, feeling the weight of the sauce as it enriches the batter. The goal is to maintain that lightness while achieving a delightful caramel swirl throughout. Trust me, this is where the magic begins!
Step 5. Pour Batter Into Pans
Now that the batter is beautifully swirled with caramel, it’s time to pour it into the prepared pans. I grab my trusty measuring cup, making sure the batter consistency is just right—smooth and luscious, without being too runny. Carefully, I pour the batter into the pans, adjusting the amount for different pan sizes to guarantee even baking. For a classic layer cake, I prefer two 9-inch pans, while a bundt pan offers a delightful twist. As I watch the batter settle, I can’t help but feel excited. Each pan gets a gentle tap on the counter, releasing any air bubbles. With this step complete, I’m one step closer to savoring that rich, caramel-infused goodness!
Nutritional Guide
Understanding the nutritional aspects of your caramel cake can enhance your baking experience and help you make informed choices. By exploring the caloric content and ingredient benefits, you can enjoy your indulgence while staying mindful of your health. Here’s a quick glance at what makes this cake both delicious and nutritious:
| Ingredient | Benefits |
|---|---|
| Flour | Provides energy and fiber |
| Sugar | Quick energy source |
| Butter | Rich in healthy fats |
| Eggs | Packed with protein |
| Milk | Supports bone health |
Each element contributes to the overall flavor and texture of the cake while offering unique nutritional advantages. So, as you bake, remember that every ingredient plays a crucial role in both taste and health. Enjoy!
Final Thoughts
As you savor the last bite of your homemade caramel cake, it’s clear that baking is more than just a culinary task; it’s an art form that blends flavors, textures, and emotions. I find joy in experimenting with flavor variations, from adding a hint of sea salt to infusing spices like cinnamon or nutmeg. These small tweaks can elevate your cake to new heights. Don’t forget some baking tips, like ensuring your ingredients are at room temperature for a smooth batter, or using a cake tester to achieve that perfect bake. Embracing these techniques not only enhances your baking skills but also allows you to share something truly special with loved ones. So, let your creativity shine and make each bake uniquely yours!
Frequently Asked Questions
Can I Use a Different Type of Sugar for Caramel Cake?
I’ve experimented with sugar substitutes like coconut sugar and agave nectar. They can give your dish a unique twist, enhancing the caramel flavoring while offering a healthier alternative. It’s all about creativity in the kitchen!
How Can I Make My Caramel Sauce Less Sticky?
To lighten my caramel sauce, I’ve learned that a splash of cream or butter does wonders, creating silkiness. Using these caramel consistency tips, I can reduce stickiness and achieve that perfect pour every time.
What Is the Best Way to Store Leftover Caramel Cake?
When I store leftover cake, I wrap it tightly in plastic wrap or aluminum foil to maintain freshness. For ideal cake preservation, I recommend refrigerating it, ensuring those delicious flavors stay intact for future enjoyment!
Can I Freeze Caramel Cake for Later Use?
Can I freeze caramel cake for later delight? Absolutely! Using proper freezing techniques, I preserve its luscious flavor and texture beautifully. Just wrap it well, and you’ll savor every bite like it’s freshly baked!
How Do I Prevent My Cake From Sinking in the Middle?
To prevent my cake from sinking in the middle, I always guarantee the oven temperature’s just right and avoid overmixing. A properly preheated oven helps create that perfect rise, keeping my cake beautifully fluffy and stable.
Conclusion
Baking a caramel cake is like wrapping a warm hug around your taste buds. Each bite delivers a delightful blend of sweetness and richness that’s simply irresistible. As you create this delicious treat, you’ll not only impress your friends and family but also enjoy the process of bringing something special to the table. So, roll up your sleeves and plunge into this delightful journey—your taste buds are in for a memorable adventure!
Caramel Cake Recipe
Ingredients
Equipment
Method
- Preheat oven to 350°F (175°C). Grease and line cake pans with parchment.
- Whisk flour, baking powder, and salt in a bowl. Set aside.
- Cream butter and brown sugar until fluffy. Add eggs one at a time, then vanilla.
- Alternate adding dry ingredients and milk, mixing until smooth.
- Divide batter evenly into pans. Bake 30–35 minutes (toothpick test). Cool completely.
- Melt butter in a saucepan over medium heat. Add brown sugar and cream; boil 2 minutes.
- Remove from heat, stir in vanilla and salt. Gradually mix in powdered sugar until smooth.
- Cool slightly (frosting will thicken as it cools).
- Level cake layers if needed. Spread frosting between layers and over the top/sides.
- Optional: Drizzle extra caramel sauce on top.
Notes
- Storage: Keep covered at room temperature for 2 days or refrigerate for up to 5 days.
- Substitutions: Use light brown sugar for milder caramel flavor. For a darker cake, add 1 tbsp molasses.
- Tip: Warm the frosting slightly if it hardens while spreading.