

If you’re looking to impress your guests this Christmas, I’ve got some delicious recipes for you! Start with an herb-crusted prime rib or honey-glazed ham as your show-stopping main dishes. Pair them with sides like creamy garlic mashed potatoes, stuffed acorn squash, or sweet potato casserole. Don’t forget a revitalizing cranberry orange relish to balance the flavors! For dessert, serve a rich pecan pie or a festive chocolate yule log. Stick around, and I’ll share the full details!
Herb-Crusted Prime Rib
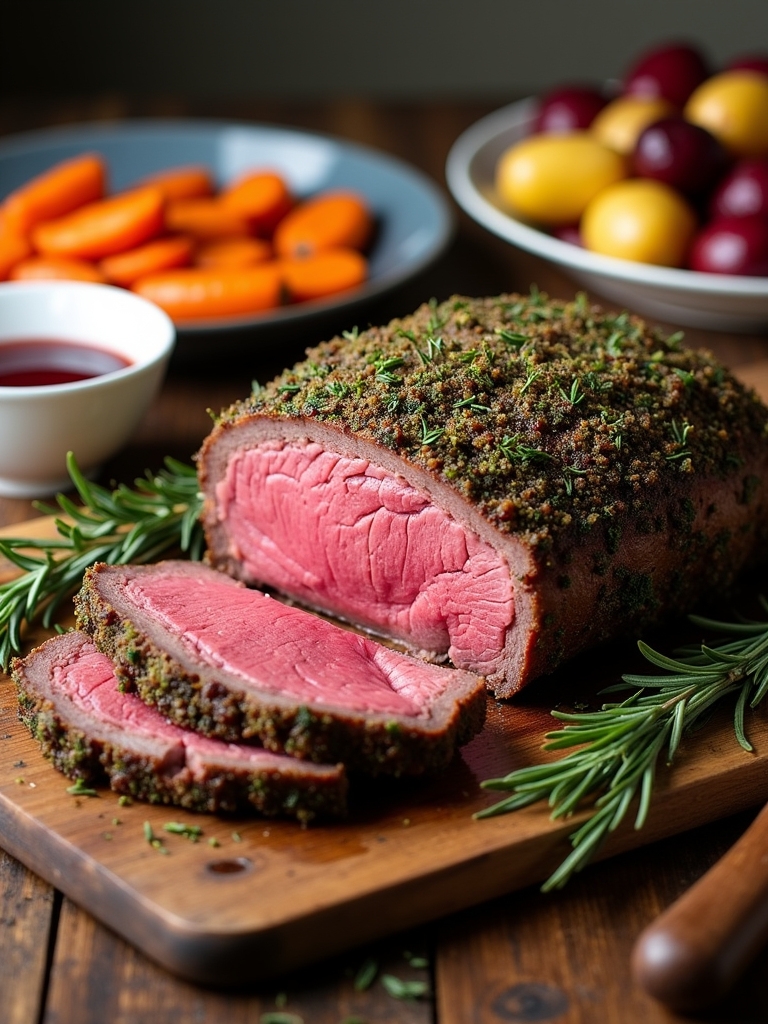
Herb-Crusted Prime Rib is a show-stopping centerpiece for your Christmas dinner that combines rich flavors with an impressive presentation. The prime rib, known for its tenderness and marbling, is enhanced by a flavorful herb crust that includes fresh rosemary, thyme, and garlic. This dish is not only a feast for the eyes but also a treat for the palate, making it the perfect choice for special occasions.
Cooking prime rib may seem intimidating, but with the right technique and a bit of patience, you can achieve a succulent roast that will have your guests raving. The key to a successful herb-crusted prime rib lies in the quality of the meat, the seasoning, and the cooking method. Let’s explore the ingredients and instructions to create this mouthwatering dish.
Ingredients:
- 1 bone-in prime rib roast (5-7 pounds)
- 2 tablespoons olive oil
- 4 cloves garlic, minced
- 2 tablespoons fresh rosemary, chopped
- 2 tablespoons fresh thyme, chopped
- 2 tablespoons kosher salt
- 1 tablespoon black pepper
- 1 tablespoon Dijon mustard
- Optional: 1 cup beef broth (for au jus)
To prepare the herb-crusted prime rib, start by preheating your oven to 450°F (232°C). In a small bowl, mix the olive oil, minced garlic, rosemary, thyme, salt, black pepper, and Dijon mustard to form a paste. Pat the prime rib dry with paper towels and rub the herb mixture all over the roast, ensuring it’s well-coated. Place the prime rib on a roasting rack in a baking pan, bone side down. Roast in the preheated oven for 15 minutes, then reduce the temperature to 325°F (163°C) and continue cooking for approximately 1.5 to 2 hours, or until the internal temperature reaches 130°F (54°C) for medium-rare. Remove the roast from the oven and let it rest for at least 20-30 minutes before slicing.
When cooking herb-crusted prime rib, remember that resting the meat is essential for a juicy result, as it allows the juices to redistribute throughout the roast. It’s also advisable to use a meat thermometer for accuracy, ensuring you achieve your desired doneness without overcooking. If you want to elevate the dish further, you can make a simple au jus by deglazing the roasting pan with beef broth and scraping up the flavorful bits from the bottom. Enjoy your delicious prime rib with your favorite sides for a truly festive meal!
Honey-Glazed Ham
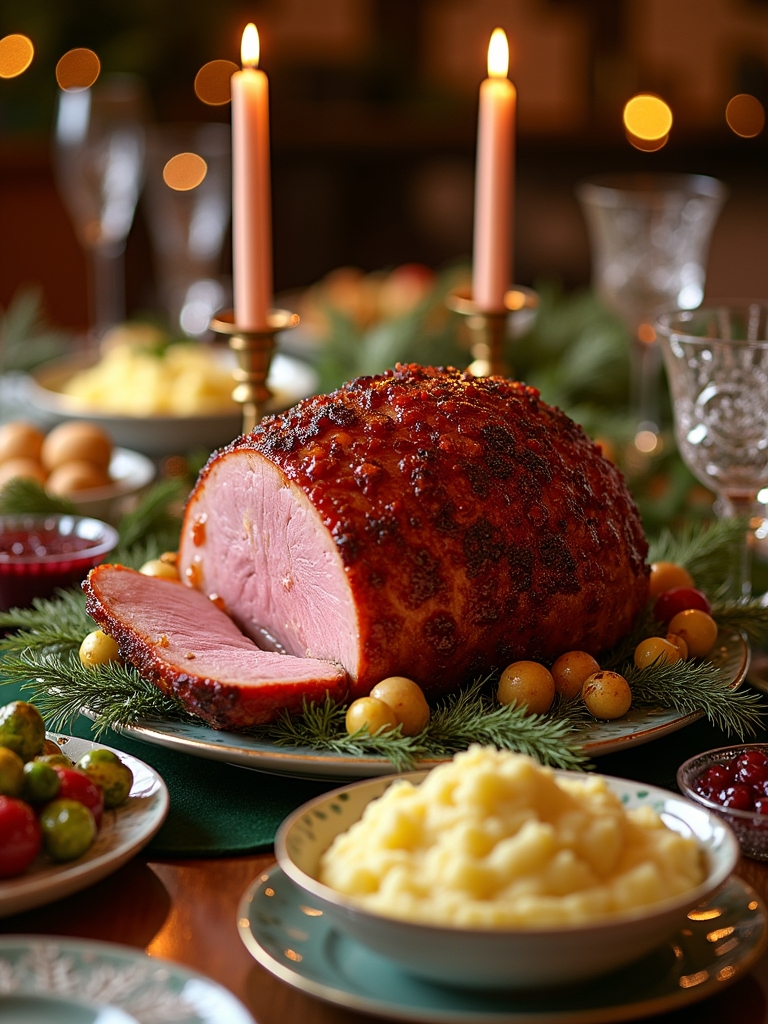
Honey-glazed ham is a delightful centerpiece for any Christmas dinner, combining savory and sweet flavors that are sure to impress your guests. The rich, smoky taste of the ham complements the sticky, caramelized honey glaze, creating a dish that is not only delicious but visually appealing as well. As the ham bakes, the glaze forms a beautiful crust that adds texture to each bite, making it a festive favorite during the holiday season.
A honey-glazed ham is the perfect blend of savory and sweet, creating an impressive centerpiece for your holiday feast.
To achieve the perfect honey-glazed ham, it’s essential to start with a high-quality ham. Whether you choose a bone-in or boneless option, the key to a great glaze is balancing the sweetness of the honey with the tang of mustard and the warmth of spices. This recipe is straightforward, allowing you to enjoy the process of cooking while preparing a dish that will become a cherished tradition in your family.
Ingredients:
- 1 fully cooked bone-in ham (about 8-10 pounds)
- 1 cup honey
- 1/2 cup brown sugar
- 1/4 cup Dijon mustard
- 1/4 teaspoon ground cloves
- 1/4 teaspoon ground cinnamon
- 1 tablespoon apple cider vinegar
- Whole cloves (for studding the ham, optional)
To prepare the honey-glazed ham, preheat your oven to 325°F (160°C). Score the surface of the ham in a diamond pattern and place it in a roasting pan. In a saucepan, combine honey, brown sugar, Dijon mustard, ground cloves, ground cinnamon, and apple cider vinegar. Heat over medium-low until the sugar dissolves and the glaze is smooth. Brush half of the glaze over the ham, making sure to get it into the scored areas. Cover the ham loosely with foil and bake for about 1.5 to 2 hours, basting with the remaining glaze every 30 minutes. Remove the foil during the last 30 minutes of cooking to allow the glaze to caramelize and form a beautiful crust.
When cooking a honey-glazed ham, it’s important to monitor the internal temperature, which should reach 140°F (60°C) for fully cooked ham. If you want to add a touch of elegance, consider studding the scored sections with whole cloves before baking for added flavor and a decorative look. Leftovers can be stored in the refrigerator and used for sandwiches or salads, making this dish not only a showstopper for your Christmas dinner but also a versatile option for meals throughout the week.
Roasted Turkey With Cranberry Sauce

Roasted turkey is the centerpiece of many Christmas dinners, renowned for its succulent meat and golden-brown skin. Pairing it with a homemade cranberry sauce not only enhances the flavor but also adds a vibrant splash of color to your holiday table. This dish is a celebration of both tradition and flavor, making it a must-have for your festive feast.
To achieve the perfect roasted turkey, it’s vital to start with a quality bird and allow ample time for seasoning. Brining the turkey beforehand will help keep the meat moist and flavorful. The combination of aromatic herbs, butter, and the tartness of cranberry sauce creates a harmony of tastes that will leave your guests raving about your culinary skills.
Ingredients:
- 1 whole turkey (12-14 pounds)
- 1 cup unsalted butter, softened
- 2 tablespoons salt
- 1 tablespoon black pepper
- 2 teaspoons garlic powder
- 2 teaspoons onion powder
- 1 tablespoon fresh rosemary, chopped
- 1 tablespoon fresh thyme, chopped
- 1 tablespoon fresh sage, chopped
- 4 cups chicken broth
- 1 cup cranberry sauce (homemade or store-bought)
- Fresh cranberries for garnish (optional)
To prepare the roasted turkey, preheat your oven to 325°F (165°C). Remove the turkey giblets and pat the turkey dry with paper towels. In a bowl, mix the softened butter with salt, pepper, garlic powder, onion powder, rosemary, thyme, and sage. Gently loosen the skin over the turkey breast and rub half of the herb butter mixture underneath the skin; rub the remaining butter all over the surface of the turkey. Place the turkey on a roasting rack in a large roasting pan and pour the chicken broth into the bottom of the pan. Roast the turkey in the preheated oven, basting every 30 minutes, until the internal temperature reaches 165°F (75°C) when a meat thermometer is inserted into the thickest part of the thigh. This should take about 3 to 4 hours. In the last 30 minutes of roasting, spread the cranberry sauce over the turkey for added flavor and a beautiful glaze. Let the turkey rest for at least 20 minutes before carving.
When preparing your roasted turkey, remember that timing is significant. Always use a meat thermometer to verify the turkey is cooked through, as overcooking can lead to dry meat. If you have time, consider brining the turkey overnight for the best flavor and moisture retention. Additionally, feel free to customize your cranberry sauce with spices like cinnamon or nutmeg to complement the dish. Finally, don’t forget to save the drippings to make a delicious gravy to accompany your turkey on the side!
Stuffed Acorn Squash
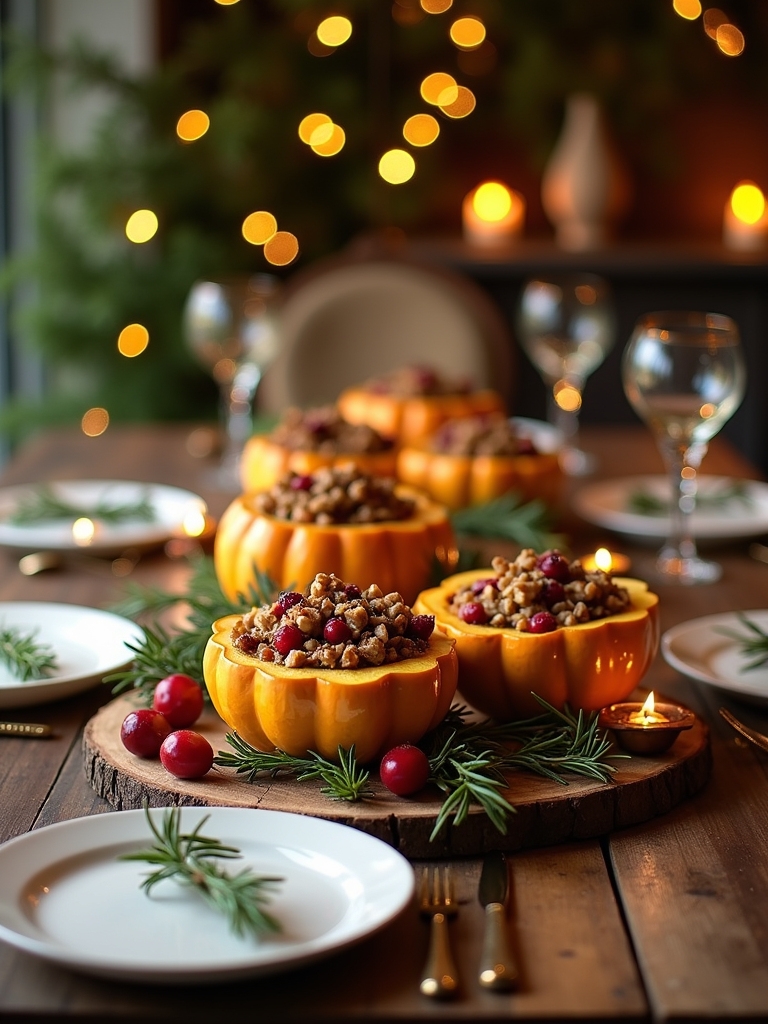
Stuffed acorn squash is a delightful and festive dish that can be a centerpiece for your Christmas dinner table. The natural sweetness of the acorn squash pairs beautifully with a savory stuffing, making it a comforting and satisfying option for both vegetarians and meat-lovers alike. This recipe combines earthy flavors and colorful ingredients, ensuring that your stuffed acorn squash not only tastes amazing but also looks stunning on the plate.
To prepare this dish, you will begin by roasting the acorn squash until tender, allowing it to develop a rich flavor. The stuffing typically includes a mix of grains, nuts, herbs, and vegetables, which can be easily customized to suit your taste preferences. Whether you’re serving this as a main dish or a side, it’s sure to impress your guests and add a touch of holiday cheer to your meal.
Ingredients
- 2 acorn squashes
- 1 cup quinoa or rice
- 2 cups vegetable broth or water
- 1 small onion, diced
- 2 cloves garlic, minced
- 1 cup spinach, chopped
- 1 cup mushrooms, diced
- 1/2 cup walnuts or pecans, chopped
- 1 teaspoon dried thyme
- 1 teaspoon dried rosemary
- Salt and pepper to taste
- Olive oil
Instructions
Preheat your oven to 400°F (200°C). Cut the acorn squashes in half lengthwise and scoop out the seeds. Brush the cut sides with olive oil and season with salt and pepper. Place the squash halves cut-side down on a baking sheet and roast for about 30-35 minutes until tender. Meanwhile, in a saucepan, cook the quinoa or rice in vegetable broth or water according to package instructions. In a skillet, heat olive oil over medium heat, add the onion and garlic, and sauté until translucent. Add the mushrooms and spinach, cooking until the spinach wilts. Combine the cooked quinoa or rice with the sautéed vegetables and nuts, seasoning with thyme, rosemary, salt, and pepper. Stuff the squash halves with the mixture, return them to the oven, and bake for an additional 10-15 minutes until heated through.
Extra Tips
When selecting acorn squash, look for ones that feel heavy for their size and have a deep green color with minimal blemishes. To make the dish even more festive, consider adding dried cranberries or feta cheese to the stuffing for a pop of color and flavor. If you have leftovers, the stuffed acorn squash can be stored in the refrigerator for up to three days, making it a great option for meal prep or a quick lunch!
Garlic Mashed Potatoes
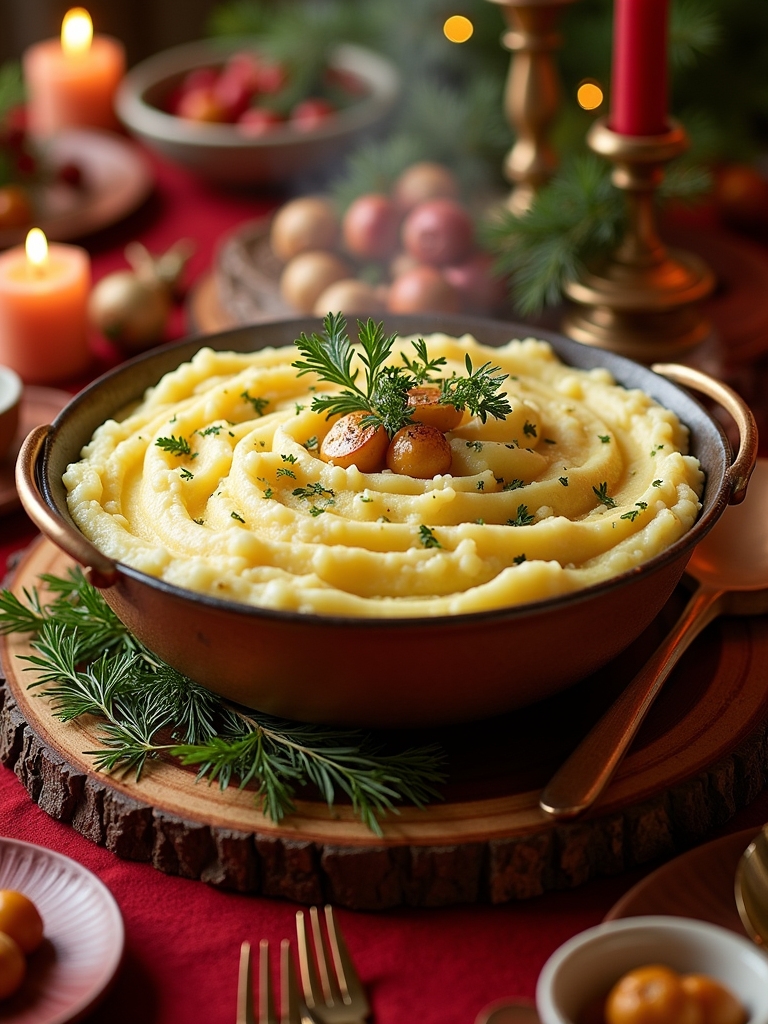
Garlic mashed potatoes are a delightful twist on the classic comfort food, perfect for any holiday dinner or special occasion. The creamy texture and savory flavor of roasted garlic elevate the dish, making it a favorite among family and friends. With just a few simple ingredients, you can create a dish that not only complements your Christmas meal but also impresses your guests.
To achieve the best flavor and consistency, choosing the right type of potato is essential. Yukon Gold or Russet potatoes are ideal for mashing, as they provide a fluffy texture and absorb the buttery goodness beautifully. This recipe includes roasted garlic, which adds a sweet and aromatic touch, creating a more complex flavor than regular mashed potatoes.
Ingredients:
- 2 pounds Yukon Gold or Russet potatoes
- 1 head of garlic
- 1/2 cup unsalted butter
- 1/2 cup heavy cream
- Salt, to taste
- Black pepper, to taste
- Fresh parsley, chopped (for garnish)
To start, preheat your oven to 400°F (200°C). Cut the top off the head of garlic, drizzle with a bit of olive oil, and wrap it in aluminum foil. Roast the garlic in the oven for about 30-35 minutes, or until the cloves are soft and golden. While the garlic is roasting, peel and chop the potatoes into even chunks. Place them in a large pot of cold salted water, bring to a boil, and cook until fork-tender, about 15-20 minutes. Drain the potatoes and return them to the pot. Squeeze the roasted garlic cloves into the potatoes, add the butter and heavy cream, and mash until smooth. Season with salt and black pepper to taste, and garnish with chopped parsley before serving.
When making garlic mashed potatoes, it’s important to taste and adjust the seasonings as you go. If you prefer a stronger garlic flavor, you can increase the amount of roasted garlic or even add a bit of minced fresh garlic for a more pungent kick. Additionally, for a creamier texture, consider using more heavy cream or even a splash of sour cream. Always remember to serve the mashed potatoes warm, and they can be prepared in advance and reheated, making them a convenient side dish for your Christmas dinner.
Green Bean Casserole
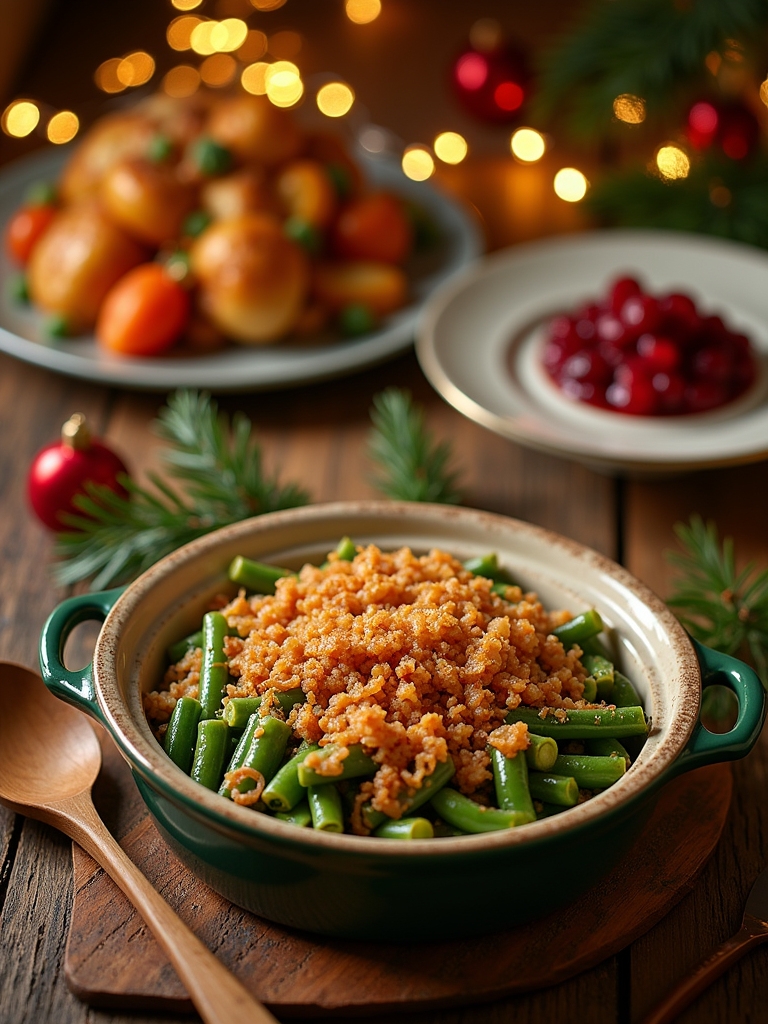
Green Bean Casserole is a classic dish that graces many holiday tables, especially during Christmas dinner. This creamy and savory side dish combines tender green beans with a rich mushroom and cream sauce, topped off with crispy fried onions for that perfect crunch. It’s an easy-to-make recipe that can be prepared ahead of time, allowing you to enjoy more time with family and friends during the festivities.
The origins of Green Bean Casserole trace back to the 1950s when it was first introduced by the Campbell Soup Company. Since then, it has become a staple in many households, bringing warmth and comfort to the holiday meal. The combination of flavors and textures in this dish makes it not only delicious but also a visual delight on your dining table. Whether you’re serving it to a crowd or just your immediate family, this casserole is sure to be a hit.
Ingredients:
- 1 pound fresh green beans, trimmed and cut into 1-inch pieces
- 1 can (10.5 oz) cream of mushroom soup
- ½ cup milk
- 1 teaspoon soy sauce
- 1 cup shredded cheddar cheese
- 1 cup crispy fried onions
- Salt and pepper to taste
Cooking Instructions:
Preheat your oven to 350°F (175°C). In a large pot of boiling salted water, blanch the green beans for about 5 minutes until they are bright green and slightly tender. Drain and transfer them to a mixing bowl. In a separate bowl, combine the cream of mushroom soup, milk, soy sauce, salt, and pepper, mixing well. Add the blanched green beans to the mixture and fold in half of the crispy fried onions and the shredded cheddar cheese. Pour the mixture into a greased 2-quart baking dish and spread it evenly. Bake in the preheated oven for 25-30 minutes until the casserole is bubbly and golden on top. In the last 5 minutes, sprinkle the remaining fried onions over the casserole and return to the oven until crispy.
Extra Tips:
For an extra flavor boost, consider sautéing some diced onions or garlic in a bit of butter before adding them to the casserole mixture. You can also substitute fresh green beans with frozen ones if you’re short on time, but make sure to thaw and drain them well. If you’re looking for a lighter version, you can use low-fat cream of mushroom soup and reduced-fat cheese. Finally, feel free to add other ingredients like cooked mushrooms or crispy bacon to customize your casserole to your taste!
Brussels Sprouts With Bacon
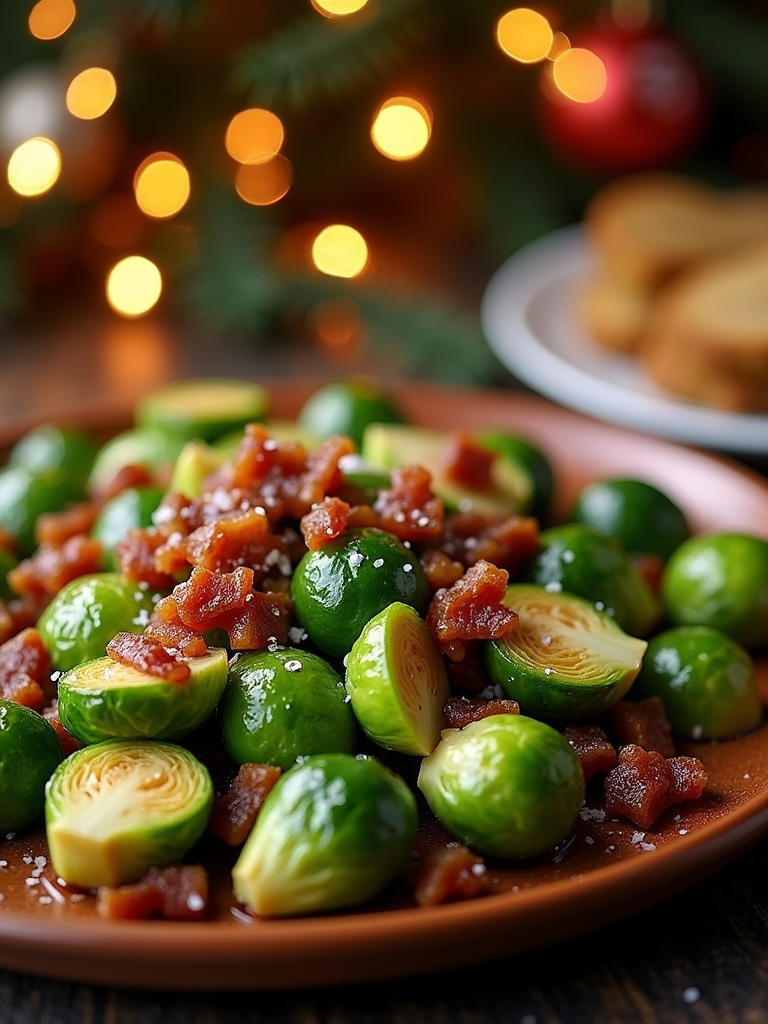
Brussels sprouts with bacon is a delightful dish that elevates your holiday dinner table with its savory flavors and appealing presentation. This recipe combines the earthy taste of Brussels sprouts with the rich, smoky flavor of crispy bacon, creating a perfect balance that will leave your guests asking for seconds. Not only is this dish a fantastic side, but it’s also packed with nutrients, making it a wholesome addition to your Christmas feast.
Preparing Brussels sprouts with bacon is incredibly simple and can be done in under 30 minutes, making it a great option for busy holiday cooks. The key to this dish is to achieve the right level of crispiness in the bacon while guaranteeing the Brussels sprouts are tender and caramelized. With just a few straightforward ingredients, you can create a side dish that is both comforting and festive, sure to impress even the pickiest eaters at your holiday gathering.
Ingredients:
- 1 pound Brussels sprouts, trimmed and halved
- 6 slices of bacon, chopped
- 2 tablespoons olive oil
- Salt, to taste
- Pepper, to taste
- 1 tablespoon balsamic vinegar (optional)
- 2 cloves garlic, minced (optional)
Instructions:
In a large skillet over medium heat, add the chopped bacon and cook until it becomes crispy, about 5-7 minutes. Remove the bacon with a slotted spoon and set aside, leaving the rendered fat in the pan. Add the halved Brussels sprouts to the skillet, cut side down, and sauté for about 5 minutes until they start to brown. Stir in the olive oil, salt, pepper, and optional garlic, cooking for an additional 5-7 minutes until the sprouts are tender and nicely caramelized. Return the crispy bacon to the pan, toss to combine, and drizzle with balsamic vinegar if desired before serving.
Extra Tips:
To guarantee your Brussels sprouts are evenly cooked and achieve that beautiful caramelization, make sure they are not overcrowded in the skillet. If necessary, cook them in batches. You can also try roasting them in the oven for a different texture; simply toss the Brussels sprouts and bacon with olive oil, salt, and pepper, and roast at 400°F (200°C) for about 20-25 minutes, stirring halfway through. For added flavor, consider mixing in some grated Parmesan cheese before serving or sprinkling with crushed red pepper flakes for a touch of heat!
Classic Stuffing
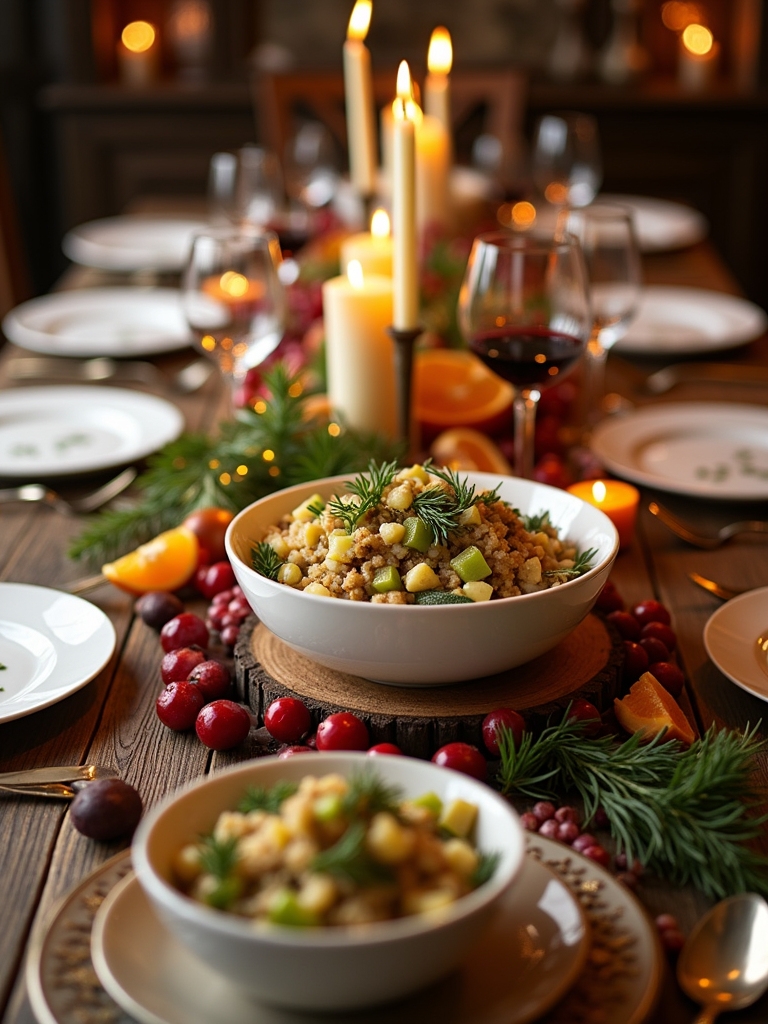
Classic stuffing is a beloved holiday dish that brings warmth and comfort to any Christmas dinner. With its aromatic blend of herbs, savory vegetables, and hearty bread, stuffing perfectly complements the main course, whether it’s turkey, ham, or a vegetarian centerpiece. This classic recipe is versatile, allowing you to customize it with your favorite ingredients, making it a family tradition that can be passed down through generations.
Classic stuffing offers warmth and comfort, enhancing any holiday meal with its flavorful blend of herbs, vegetables, and bread.
To create the ultimate classic stuffing, you’ll want to start with quality bread. Stale or day-old bread works best, as it absorbs the flavors of the broth and seasonings. Don’t shy away from adding your personal touch, be it sautéed mushrooms, dried cranberries, or even nuts for added texture. The key is to achieve a balance of flavors and moisture, ensuring each bite is packed with deliciousness.
Ingredients:
- 1 loaf of day-old bread (about 12 cups, cubed)
- 1 cup unsalted butter
- 1 large onion, diced
- 3 celery stalks, diced
- 4 cloves garlic, minced
- 1 tablespoon fresh sage, chopped (or 1 teaspoon dried)
- 1 tablespoon fresh thyme, chopped (or 1 teaspoon dried)
- 1 tablespoon fresh parsley, chopped
- 2-3 cups chicken or vegetable broth
- Salt and pepper to taste
- 2 large eggs, beaten (optional)
In a large skillet, melt the butter over medium heat. Add the diced onion and celery, and sauté until they are softened, about 5-7 minutes. Stir in the minced garlic, sage, thyme, and parsley, cooking for another minute until fragrant. In a large mixing bowl, combine the cubed bread with the sautéed mixture. Gradually add the broth, mixing until the bread is moist but not soggy. If using, fold in the beaten eggs for extra binding. Transfer the stuffing to a greased baking dish, cover with foil, and bake at 350°F (175°C) for about 30 minutes. Remove the foil and bake for an additional 15-20 minutes until the top is golden and crispy.
For the best results, it’s important to let the stuffing sit for a few minutes before serving to allow the flavors to meld. You can also prepare the stuffing a day in advance and store it in the refrigerator, then simply bake it before serving. Feel free to experiment with different herbs or add-ins like sausage or nuts to make this classic stuffing your own. Always taste your mixture before baking to adjust the seasoning, ensuring every bite is bursting with flavor.
Cranberry Orange Relish

Cranberry Orange Relish is a vibrant and zesty addition to any Christmas dinner table. This invigorating dish combines the tartness of fresh cranberries with the bright, citrusy flavor of oranges, creating a perfect balance that complements savory holiday dishes beautifully. It’s not only easy to prepare but also a great make-ahead option, allowing you to save time on the big day. Served chilled or at room temperature, this relish adds a festive pop of color and flavor to your meal.
To make this relish even more delightful, consider adding some chopped nuts or a hint of spice for an extra layer of complexity. The sweet and tangy notes of the cranberries and oranges harmonize perfectly, making it a crowd-pleaser. Whether you’re hosting a large gathering or an intimate family dinner, this Cranberry Orange Relish is sure to be a hit and can be enjoyed as a side or condiment.
Ingredients:
- 12 ounces fresh cranberries
- 1 medium orange, zested and juiced
- 1 cup sugar
- 1/2 cup water
- 1/2 teaspoon ground cinnamon (optional)
- 1/4 cup chopped walnuts or pecans (optional)
Instructions:
In a medium saucepan, combine the fresh cranberries, orange juice, sugar, and water. Bring the mixture to a boil over medium heat, stirring occasionally. Once boiling, reduce the heat to a simmer and cook for about 10 minutes, or until the cranberries burst and the mixture thickens slightly. Stir in the orange zest and ground cinnamon, if using, then remove from heat. Allow the relish to cool to room temperature before transferring it to a serving dish or airtight container. Refrigerate for at least 2 hours to allow the flavors to meld.
Extra Tips:
For the best flavor, use fresh cranberries, as frozen ones can alter the texture and taste. Feel free to experiment with additional ingredients like ginger or jalapeño for a spicy kick. This relish can be made up to a week in advance, making it a convenient option for holiday meal planning. If you prefer a smoother consistency, you can pulse the relish in a food processor after it’s cooled. Enjoy this festive side with turkey, ham, or even as a topping for cream cheese on crackers!
Sweet Potato Casserole
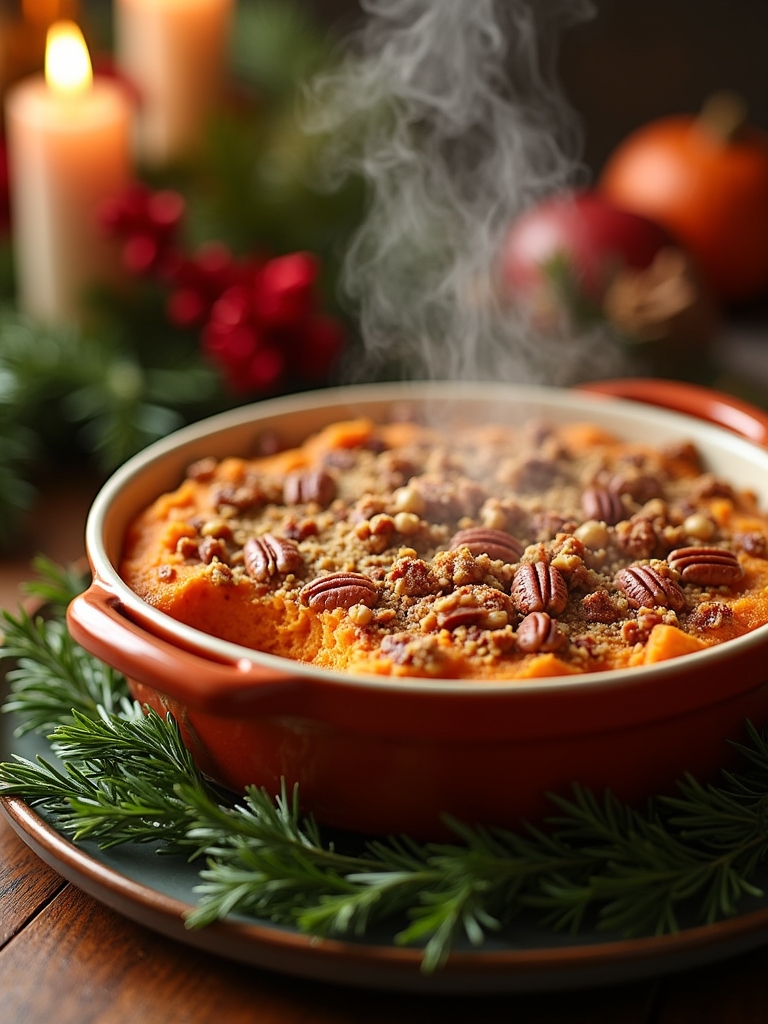
Sweet potato casserole is a classic dish that adds a delightful sweetness and creamy texture to any Christmas dinner table. The combination of rich sweet potatoes, buttery pecans, and a hint of cinnamon creates a warm and comforting dish that everyone will love. Not only is it delicious, but it also brings a festive touch of color to your holiday spread.
Making sweet potato casserole is a wonderful way to showcase the natural sweetness of the potatoes while incorporating various toppings that complement their flavor. This dish is perfect for sharing, as it can serve a crowd and is often a favorite among both kids and adults. With a few simple ingredients, you can create a mouthwatering casserole that will have your guests asking for seconds.
Ingredients:
- 4 large sweet potatoes
- 1/2 cup brown sugar
- 1/4 cup milk
- 1/4 cup unsalted butter, melted
- 1 teaspoon vanilla extract
- 1/2 teaspoon ground cinnamon
- 1/4 teaspoon ground nutmeg
- 1/4 teaspoon salt
- 1 cup pecans, chopped
- 1/2 cup mini marshmallows (optional)
To prepare the sweet potato casserole, preheat your oven to 350°F (175°C). Peel and chop the sweet potatoes into chunks, then boil them in a large pot of salted water until tender, about 15-20 minutes. Drain and mash the sweet potatoes in a large mixing bowl, then add brown sugar, milk, melted butter, vanilla extract, cinnamon, nutmeg, and salt. Mix until well combined and smooth. Transfer the mixture to a greased baking dish and spread evenly. If desired, top with chopped pecans and mini marshmallows. Bake for 25-30 minutes until heated through and the topping is golden brown.
When making sweet potato casserole, you can customize it to suit your taste preferences. For an even richer flavor, consider adding a splash of maple syrup or a hint of orange zest to the sweet potato mixture. If you’re preparing the dish ahead of time, you can assemble it and store it in the refrigerator, then simply pop it in the oven before serving. This dish can also be made gluten-free by ensuring that all ingredients are certified gluten-free. Enjoy your holiday meal!
Pecan Pie
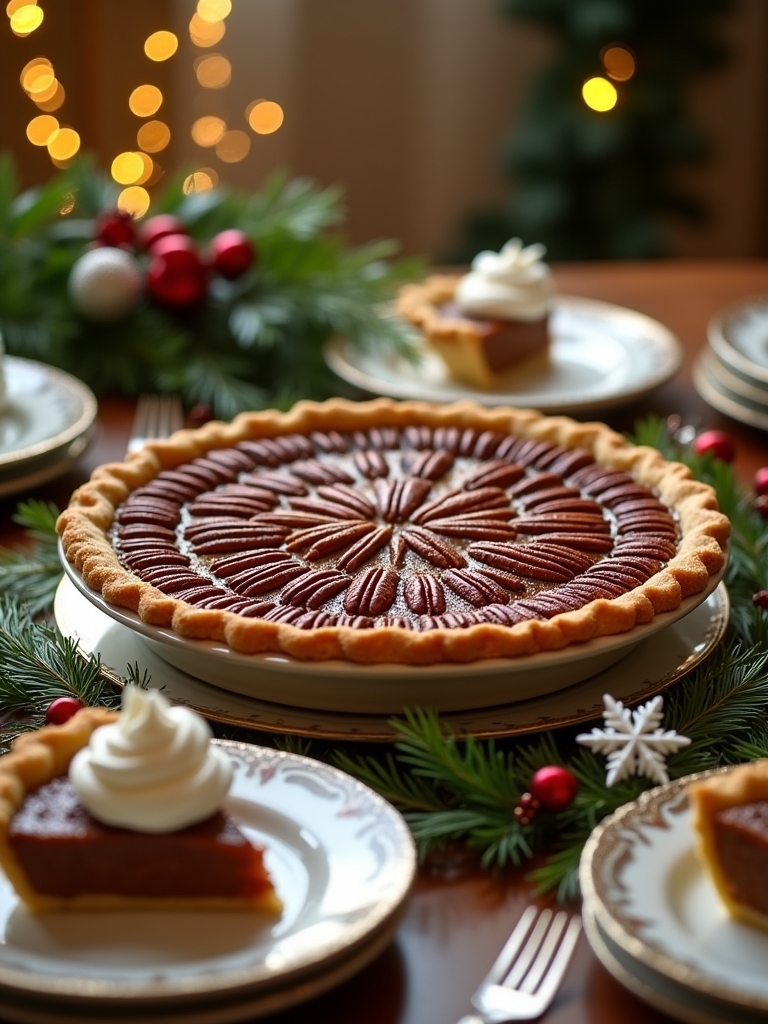
Pecan pie is a classic dessert that often graces holiday tables, particularly during Christmas. This deliciously rich pie features a gooey filling made from pecans, eggs, and a sweet syrup, all nestled in a flaky pie crust. The combination of sweet and nutty flavors makes pecan pie a favorite among many, and its texture provides a delightful contrast that is sure to please your guests. Whether you’re an experienced baker or a novice, this recipe will guide you through creating a perfect pecan pie that will leave everyone wanting more.
Making pecan pie is not only about mastering the filling; it’s also about choosing the right crust and ensuring that your baking process brings out the best flavors. While you can use a store-bought pie crust for convenience, making your own from scratch can elevate the pie to a whole new level. The key to a great pecan pie lies in balancing sweetness with the natural nuttiness of the pecans. Once you have your ingredients ready, you’ll find that assembling this dessert is quite straightforward, leaving you with a stunning pie that can be served warm or chilled.
Master the art of pecan pie by perfecting both the filling and crust, balancing sweetness with the rich nuttiness of pecans.
Ingredients:
- 1 unbaked pie crust (store-bought or homemade)
- 1 cup light corn syrup
- 1 cup brown sugar, packed
- 4 large eggs
- 1/4 cup unsalted butter, melted
- 1 teaspoon vanilla extract
- 1/4 teaspoon salt
- 1 1/2 cups pecan halves
Instructions:
Preheat your oven to 350°F (175°C). In a large mixing bowl, whisk together the corn syrup, brown sugar, eggs, melted butter, vanilla extract, and salt until well combined. Stir in the pecan halves, ensuring they are evenly coated with the mixture. Pour the filling into the unbaked pie crust, spreading the pecans evenly across the surface. Bake in the preheated oven for 60 to 70 minutes or until the filling is set and the top is golden brown. Allow the pie to cool on a wire rack before serving.
Extra Tips:
For an added depth of flavor, consider toasting the pecans lightly before incorporating them into the pie filling. This will enhance their nutty aroma and taste. Additionally, if you notice the crust browning too quickly during baking, cover the edges with aluminum foil to prevent burning. Pecan pie can also be made a day in advance, allowing the flavors to meld beautifully overnight. Serve it with a dollop of whipped cream or a scoop of vanilla ice cream for a delightful contrast to the rich filling!
Chocolate Yule Log

The Chocolate Yule Log, or Bûche de Noël, is a classic dessert that symbolizes the warmth and joy of the holiday season. This delightful treat consists of a light chocolate sponge cake rolled with a rich chocolate ganache filling, resembling a log. It’s not only delicious but also a stunning centerpiece for your Christmas dinner table. With its festive appearance and indulgent flavors, the Yule Log is sure to impress your family and friends.
Making a Chocolate Yule Log may seem intimidating at first, but with a little patience and practice, you can create this impressive dessert. The key is to guarantee that the sponge cake is baked perfectly and rolled while it’s still warm, making it easier to handle. Once you master the technique, you can customize the decoration to reflect your personal style, whether that’s a rustic look with powdered sugar or a more elaborate finish with chocolate shavings and marzipan decorations.
Ingredients
- 4 large eggs
- 100g granulated sugar
- 100g all-purpose flour
- 40g unsweetened cocoa powder
- 1 tsp baking powder
- 1/4 tsp salt
- 50g unsalted butter, melted
- 200ml heavy cream
- 200g dark chocolate, chopped
- 50g powdered sugar
- 1 tsp vanilla extract
- Extra cocoa powder or powdered sugar for dusting
Instructions
Preheat your oven to 180°C (350°F) and line a baking tray (approximately 10×15 inches) with parchment paper. In a large mixing bowl, whisk together the eggs and granulated sugar until the mixture is pale and fluffy. Sift the flour, cocoa powder, baking powder, and salt together before gently folding them into the egg mixture. Finally, fold in the melted butter until smooth. Pour the batter into the prepared tray, spreading it evenly, and bake for 12-15 minutes or until the cake springs back when lightly pressed. Once baked, immediately turn the cake out onto a clean kitchen towel dusted with cocoa powder or powdered sugar, and carefully roll it up with the towel. Allow it to cool completely while rolled.
Extra Tips
To guarantee your Chocolate Yule Log has the perfect texture, make sure to fold the dry ingredients gently into the egg mixture to avoid deflating the batter. When rolling the cake, be cautious not to apply too much pressure; a gentle roll will help maintain the cake’s structure. If you’re feeling creative, consider adding a layer of raspberry jam or fresh berries between the cake and ganache for an extra burst of flavor. Finally, don’t hesitate to let your artistic side shine when decorating; a sprinkle of powdered sugar can mimic snow, while chocolate shavings or edible decorations can add a festive touch. Enjoy your holiday baking!
Frequently Asked Questions
How Do I Accommodate Dietary Restrictions for My Guests?
I always ask about dietary preferences beforehand. I love experimenting with flavor substitutions—like using cauliflower for mashed potatoes or coconut milk for creamy sauces. It keeps my menu exciting and guarantees everyone enjoys the meal together!
What Drinks Pair Well With These Christmas Dinner Recipes?
What’s a meal without the perfect drink? I love pairing bold red wines with hearty dishes and serving festive cocktails like cranberry mimosas. They elevate the experience, adding a touch of excitement and joy.
How Can I Make My Dinner More Festive Without Spending Too Much?
I always add holiday decorations and use festive tableware to create a cheerful atmosphere. Simple touches like colorful napkins or homemade centerpieces can transform the vibe without breaking the bank. It’s all about creativity!
What’s the Best Way to Reheat Leftovers After the Dinner?
I love using the oven for reheating leftovers; it keeps everything crispy! I’ll cover dishes with foil and set it at 350°F. For quick meals, I use microwave tips like lower power settings to avoid drying out food.
How Far in Advance Can I Prepare These Dishes?
I usually prepare my dishes up to three days in advance. For ideal meal prep and food storage, I store them in airtight containers, ensuring freshness while freeing up time for last-minute details.
Conclusion
As we wrap up our holiday feast, remember that these recipes are more than just dishes; they’re the heart of your gathering. Each bite brings warmth, laughter, and cherished memories, just like the twinkling lights on your Christmas tree. So, gather your loved ones, share stories, and savor the flavors of the season. With these 12 recipes, you’ll create moments that shine brighter than any ornament, ensuring your Christmas dinner is truly unforgettable. Happy cooking!