

This holiday season, I’ve got just the recipes to impress your guests without breaking a sweat. Try my classic Herb-Roasted Prime Rib or the sweet and savory Honey-Glazed Ham for the main event. For lighter options, Garlic Butter Shrimp Pasta and Stuffed Acorn Squash shine on the table. Don’t forget creamy sides like Mushroom Risotto and Cheesy Scalloped Potatoes. Top it off with a festive Winter Green Salad and some delightful Decadent Chocolate Yule Log. You’ll find more tips to make your dinner truly special.
Herb-Roasted Prime Rib
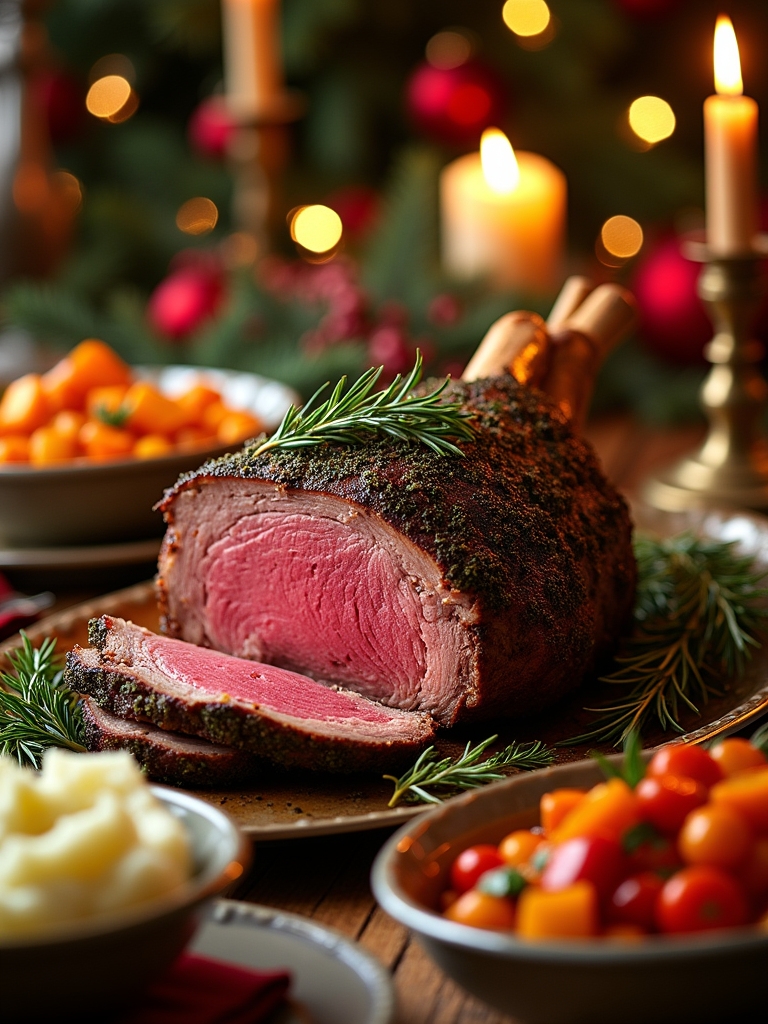
Herb-roasted prime rib is a show-stopping centerpiece for any Christmas dinner, providing a luxurious and flavorful experience that pleases both the eyes and the palate. This cut of meat is known for its tenderness and rich taste, which can be elevated with a savory herb crust. The blend of fresh herbs, garlic, and spices creates a fragrant and mouthwatering aroma that will fill your home, making it feel festive and inviting.
Preparing herb-roasted prime rib is a straightforward process that requires minimal ingredients and time, allowing you to focus on enjoying the company of your family and friends during the holiday season. With a little patience and attention to detail, you can achieve a beautifully roasted prime rib with a perfect crust and a juicy, succulent interior. Follow this recipe to create a memorable dish that will leave your guests raving about your culinary skills.
Ingredients
- 1 (5-7 pound) prime rib roast
- 4 cloves garlic, minced
- 2 tablespoons fresh rosemary, chopped
- 2 tablespoons fresh thyme, chopped
- 2 tablespoons fresh parsley, chopped
- 2 teaspoons salt
- 1 teaspoon black pepper
- 2 tablespoons olive oil
- 1 cup beef broth (optional, for au jus)
Cooking Instructions
Preheat your oven to 450°F (230°C). In a small bowl, mix the minced garlic, rosemary, thyme, parsley, salt, black pepper, and olive oil to form a paste. Rub this herb mixture generously over the entire surface of the prime rib. Place the roast bone-side down in a roasting pan, then roast in the preheated oven for 20 minutes to develop a crust. After 20 minutes, reduce the oven temperature to 325°F (160°C) and continue roasting until the internal temperature reaches your desired doneness (about 130°F for medium-rare), which can take approximately 1.5 to 2 hours, depending on the size of the roast. Let the meat rest for at least 20 minutes before carving.
Extra Tips
For the best results, allow the prime rib to come to room temperature before cooking, which helps it cook more evenly. Use a meat thermometer to monitor the internal temperature accurately, as every oven can vary. For added flavor, consider making an au jus by deglazing the roasting pan with beef broth and scraping up the browned bits after removing the roast. Finally, remember that the roast will continue to cook slightly while it rests, so factor that into your timing for serving. Enjoy your holiday feast!
Honey-Glazed Ham
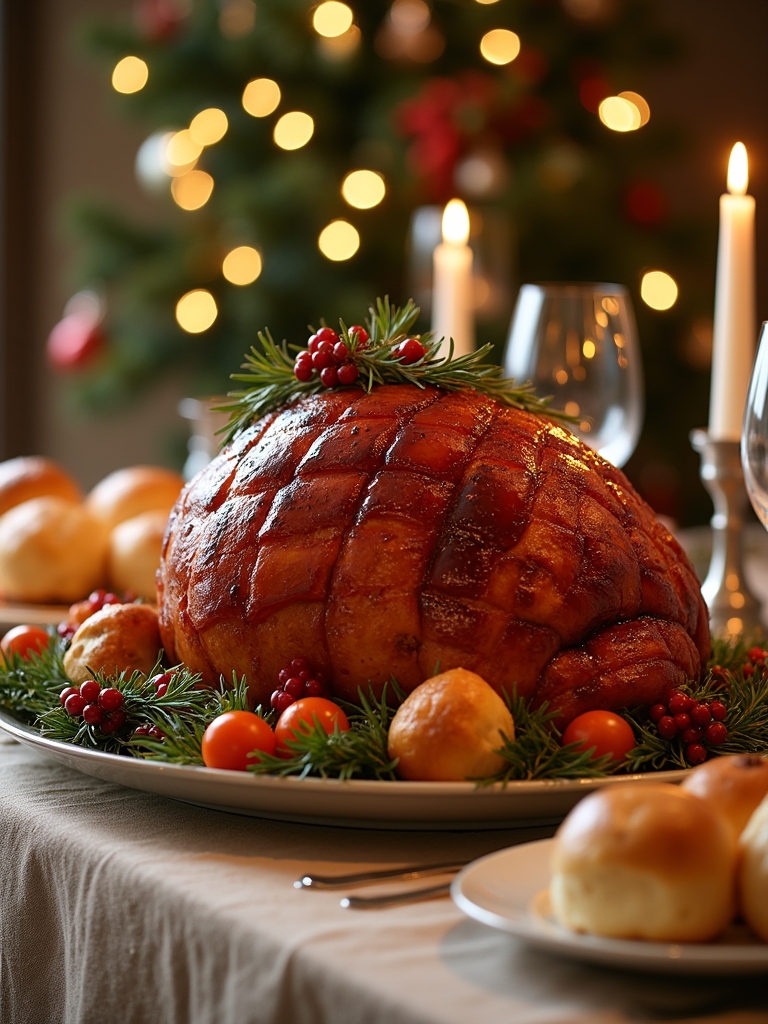
Honey-Glazed Ham is a classic centerpiece for any Christmas dinner, combining sweet and savory flavors that delight everyone at the table. The rich taste of the ham pairs beautifully with the sticky honey glaze, which caramelizes as it bakes, creating a mouthwatering crust. This dish not only looks impressive but also fills your home with an irresistible aroma that signals the start of the festive season.
Preparing Honey-Glazed Ham is simpler than it may seem, making it an excellent choice for both seasoned cooks and beginners. With a few quality ingredients and some patience, you can create a tender, flavorful ham that will leave your guests raving about your culinary skills. This recipe guarantees that each slice is juicy and infused with the sweet taste of honey, balanced with the warmth of spices.
Ingredients:
- 1 fully cooked bone-in ham (about 8-10 pounds)
- 1 cup honey
- 1/2 cup brown sugar
- 1/4 cup Dijon mustard
- 1/4 cup apple cider vinegar
- 1 teaspoon ground cinnamon
- 1/2 teaspoon ground cloves
- 1/2 teaspoon black pepper
- Whole cloves (for studding the ham)
- Fresh parsley (for garnish, optional)
To prepare the Honey-Glazed Ham, preheat your oven to 325°F (165°C). Score the surface of the ham in a diamond pattern and stud it with whole cloves for added flavor and presentation. In a saucepan, combine honey, brown sugar, Dijon mustard, apple cider vinegar, ground cinnamon, ground cloves, and black pepper. Heat over medium heat until the sugar dissolves. Place the ham in a roasting pan and brush half of the glaze over the ham. Bake uncovered for approximately 15-18 minutes per pound, basting with the remaining glaze every 20 minutes until heated through and caramelized, approximately 1.5 to 2.5 hours. Remove from the oven and let rest for 15 minutes before slicing.
When cooking Honey-Glazed Ham, remember to choose a quality ham, preferably one that is labeled “natural” or “organic” for the best flavor. Make certain to allow the ham to rest after removing it from the oven; this helps the juices redistribute, guaranteeing each slice remains moist. Experiment with the glaze by adding your favorite spices or even a splash of orange juice for a citrus twist. Finally, serve the ham with your favorite sides, and don’t forget to save the leftovers for delicious sandwiches the next day!
Garlic Butter Shrimp Pasta
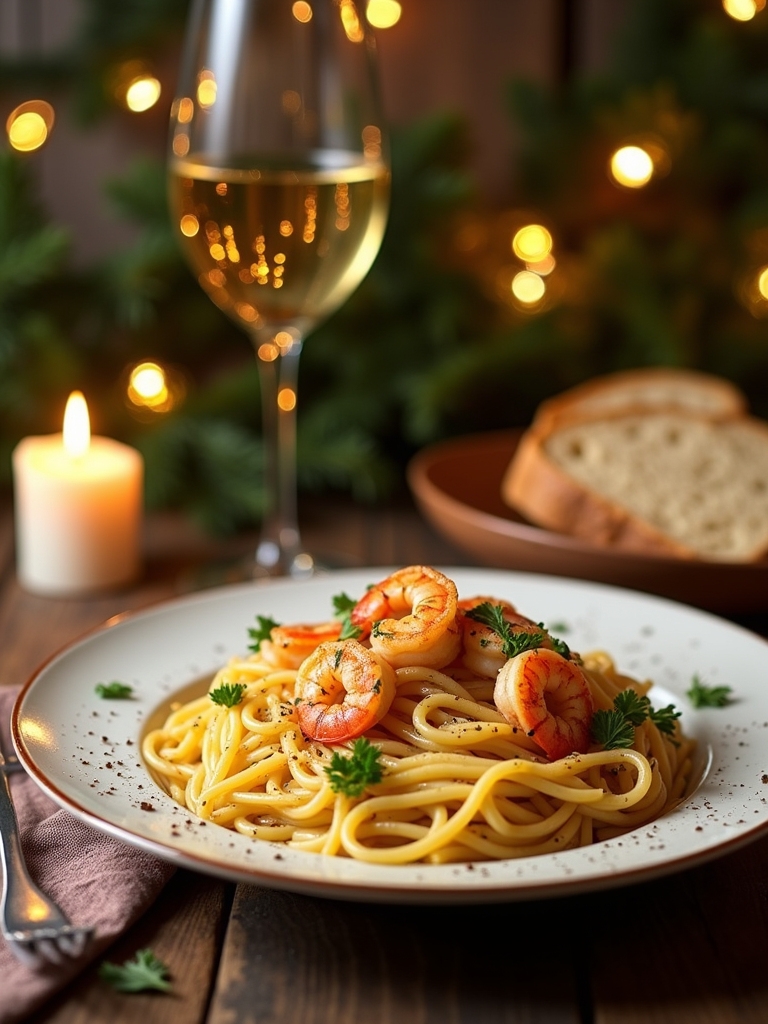
Garlic Butter Shrimp Pasta is a delightful dish that combines succulent shrimp with a rich garlic butter sauce, perfectly coating al dente pasta. This recipe is not only easy to prepare but also elevates any dinner table, making it an excellent choice for a festive Christmas dinner. The combination of garlic, butter, and a hint of lemon creates a symphony of flavors that harmonize beautifully with the shrimp, while the pasta serves as a comforting base for this delectable sauce.
Garlic Butter Shrimp Pasta offers a delicious blend of flavors, perfect for elevating your festive Christmas dinner.
In addition to being delicious, Garlic Butter Shrimp Pasta is versatile and can be customized to suit your tastes. You can add vegetables like spinach, cherry tomatoes, or asparagus for extra color and nutrition. Pair it with a glass of white wine, and you have a dish that feels both indulgent and comforting—perfect for celebrating the holiday season with loved ones.
Ingredients:
- 8 oz spaghetti or linguine
- 1 lb large shrimp, peeled and deveined
- 4 tablespoons unsalted butter
- 4 cloves garlic, minced
- 1/4 teaspoon red pepper flakes (optional)
- Salt and pepper, to taste
- Juice of 1 lemon
- 1/4 cup fresh parsley, chopped
- Grated Parmesan cheese, for serving
To prepare Garlic Butter Shrimp Pasta, start by cooking the spaghetti or linguine according to package instructions in a large pot of salted boiling water until al dente. While the pasta cooks, melt the butter in a large skillet over medium heat. Add the minced garlic and red pepper flakes, sautéing for about 1 minute until fragrant. Then, add the shrimp, seasoning them with salt and pepper, and cook for 2-3 minutes on each side until they turn pink and opaque. Once the pasta is done, reserve a cup of pasta water, then drain the pasta and add it to the skillet with the shrimp. Toss everything together, adding lemon juice and a splash of reserved pasta water to create a silky sauce. Garnish with fresh parsley and serve with grated Parmesan cheese on top.
When cooking Garlic Butter Shrimp Pasta, make certain not to overcook the shrimp, as they can become rubbery. Fresh shrimp is always a great choice, but if using frozen, ascertain they are fully thawed and dried before cooking. You can also adjust the levels of garlic and lemon to suit your preference; adding more can enhance the dish’s brightness. For an added touch, consider serving with crusty bread to soak up any delicious remaining sauce. Enjoy your festive meal!
Stuffed Acorn Squash
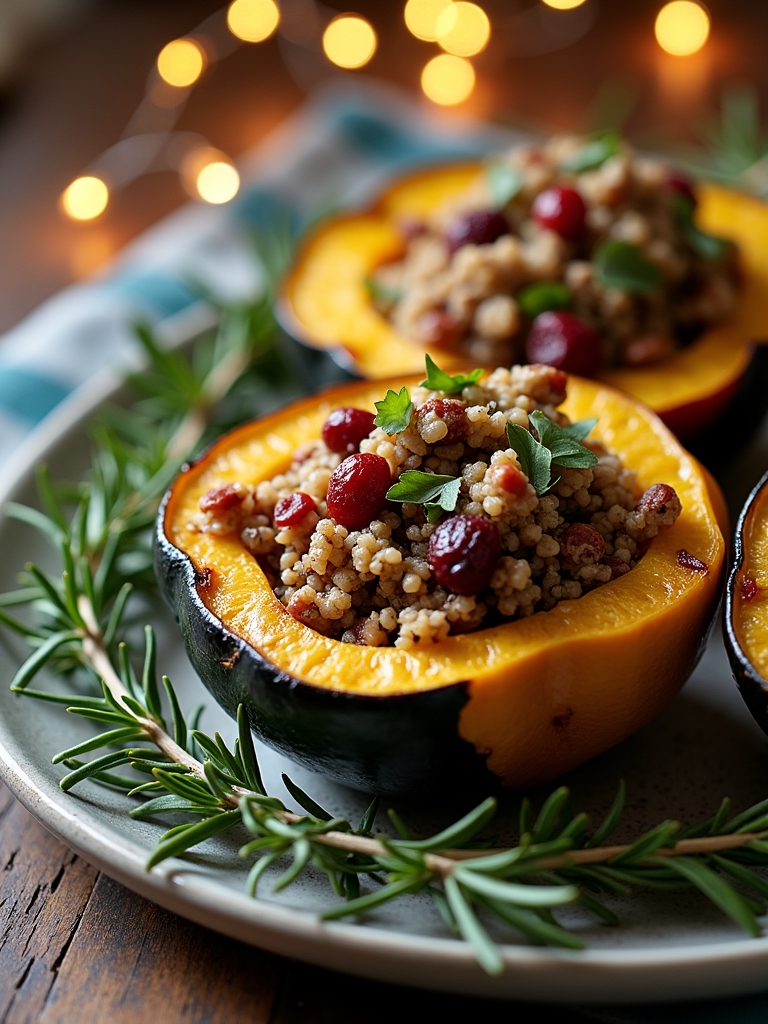
Stuffed acorn squash is a delightful and nutritious dish perfect for a festive Christmas dinner. The natural sweetness of the acorn squash pairs beautifully with a savory stuffing, making it a wonderful centerpiece for your holiday table. This dish not only looks stunning but is also versatile; you can adapt the stuffing based on your preferences, whether you prefer a meat-based filling or a vegetarian option.
To prepare stuffed acorn squash, choose fresh, firm squashes that have a deep green color. Cutting them in half and roasting them brings out their natural flavors and makes them tender. The stuffing can include a variety of ingredients such as grains, nuts, vegetables, and spices that complement the squash’s sweetness. This recipe will guide you through creating a delicious stuffed acorn squash that’s sure to impress your family and friends during the holiday season.
Ingredients:
- 2 medium acorn squashes
- 1 cup cooked quinoa
- 1/2 cup chopped walnuts
- 1/2 cup dried cranberries
- 1 small onion, diced
- 2 cloves garlic, minced
- 1 teaspoon dried thyme
- 1 teaspoon ground cinnamon
- Salt and pepper to taste
- Olive oil for drizzling
- Fresh parsley for garnish (optional)
Instructions:
Preheat your oven to 400°F (200°C). Cut the acorn squashes in half and scoop out the seeds. Lightly brush the cut sides with olive oil, sprinkle with salt and pepper, and place them cut-side down on a baking sheet. Roast for about 25-30 minutes until tender. While the squash is roasting, heat a skillet over medium heat and sauté the onion and garlic until fragrant. Add the cooked quinoa, walnuts, cranberries, thyme, cinnamon, salt, and pepper to the skillet, stirring to combine. Once the squash is done, flip them over, fill each half generously with the stuffing mixture, and return to the oven for an additional 10 minutes.
Extra Tips:
When selecting your acorn squash, look for ones that are heavy for their size and have a uniform color without blemishes. You can easily customize the stuffing by adding other ingredients such as cooked sausage for a heartier option or swapping out quinoa for rice or farro. For an extra layer of flavor, consider adding some grated cheese on top before the final baking stage. Finally, allow the stuffed squash to cool slightly before serving; this will help the flavors meld together beautifully. Enjoy your festive and delicious stuffed acorn squash!
Creamy Mushroom Risotto
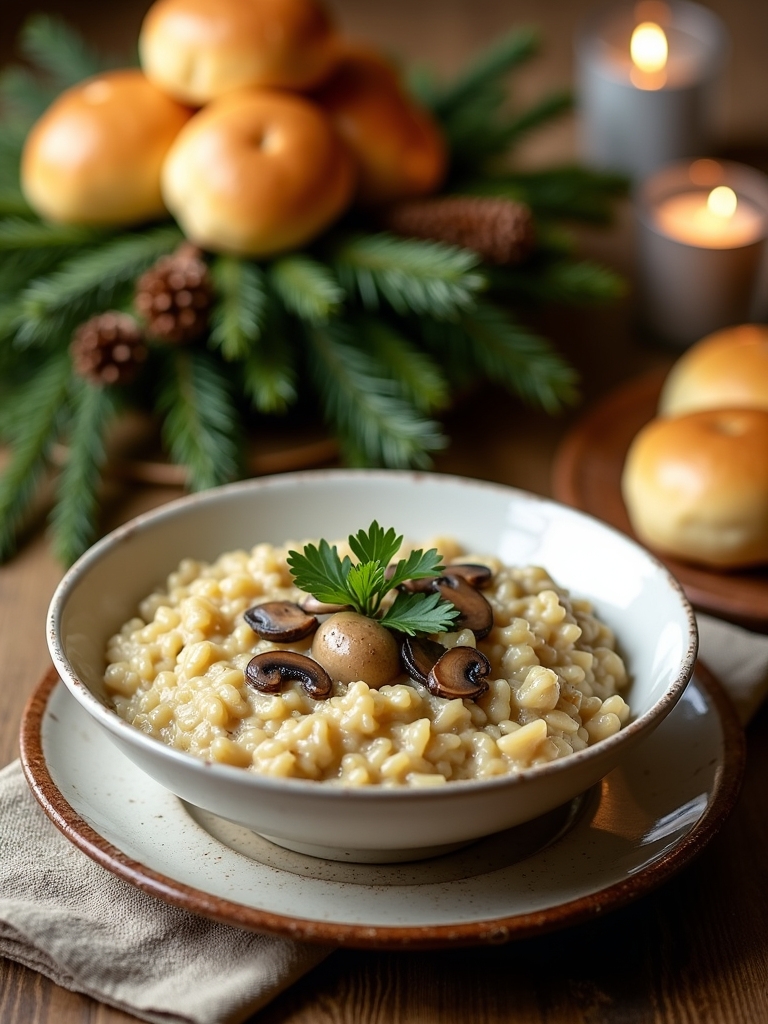
Creamy Mushroom Risotto is a delightful and comforting dish that brings warmth to any holiday table. This Italian classic is known for its creamy texture and rich flavor, making it a perfect accompaniment to a festive Christmas dinner. The combination of Arborio rice, sautéed mushrooms, and a splash of white wine creates a luxurious dish that is surprisingly easy to prepare. With just a few simple ingredients, you can impress your guests with this gourmet treat.
Making risotto is all about patience and attention, as the rice needs to be cooked slowly while gradually absorbing the broth to achieve its signature creaminess. The earthy flavor of the mushrooms adds depth to the dish, while a sprinkle of Parmesan cheese at the end enhances the overall taste. Serve this risotto as a side dish or as a main course for a vegetarian meal, and watch your guests rave about its deliciousness.
Making risotto requires patience, allowing the rice to absorb broth for a creamy texture, enhanced by earthy mushrooms and Parmesan.
Ingredients:
- 1 cup Arborio rice
- 4 cups vegetable or chicken broth
- 1 cup mushrooms, sliced (such as cremini or shiitake)
- 1 small onion, finely chopped
- 3 cloves garlic, minced
- 1/2 cup dry white wine
- 1/2 cup grated Parmesan cheese
- 2 tablespoons olive oil
- 2 tablespoons unsalted butter
- Salt and pepper to taste
- Fresh parsley, chopped (for garnish)
To cook the creamy mushroom risotto, start by heating the broth in a saucepan and keeping it warm over low heat. In a separate large skillet, heat the olive oil and 1 tablespoon of butter over medium heat. Add the chopped onion and garlic, cooking until the onion is translucent. Stir in the sliced mushrooms and cook until they are browned. Add the Arborio rice to the skillet, stirring for about 2 minutes until the rice is well-coated and slightly toasted. Pour in the white wine, stirring until it’s mostly absorbed. Then, begin adding the warm broth one ladle at a time, stirring frequently and allowing the liquid to be absorbed before adding more. Continue this process for about 18-20 minutes until the rice is creamy and al dente. Ultimately, remove from heat and stir in the remaining butter and grated Parmesan cheese. Season with salt and pepper, and serve garnished with fresh parsley.
When cooking risotto, patience is key. Stirring frequently helps release the starch from the rice, which contributes to the creaminess of the dish. If you find the risotto too thick, you can always add a little more broth or water to reach your desired consistency. For an extra layer of flavor, consider adding some fresh herbs like thyme or rosemary during the cooking process. Finally, don’t hesitate to customize your risotto by incorporating other ingredients such as peas or spinach, which can add color and additional nutrients to your festive dish.
Roasted Brussels Sprouts With Bacon
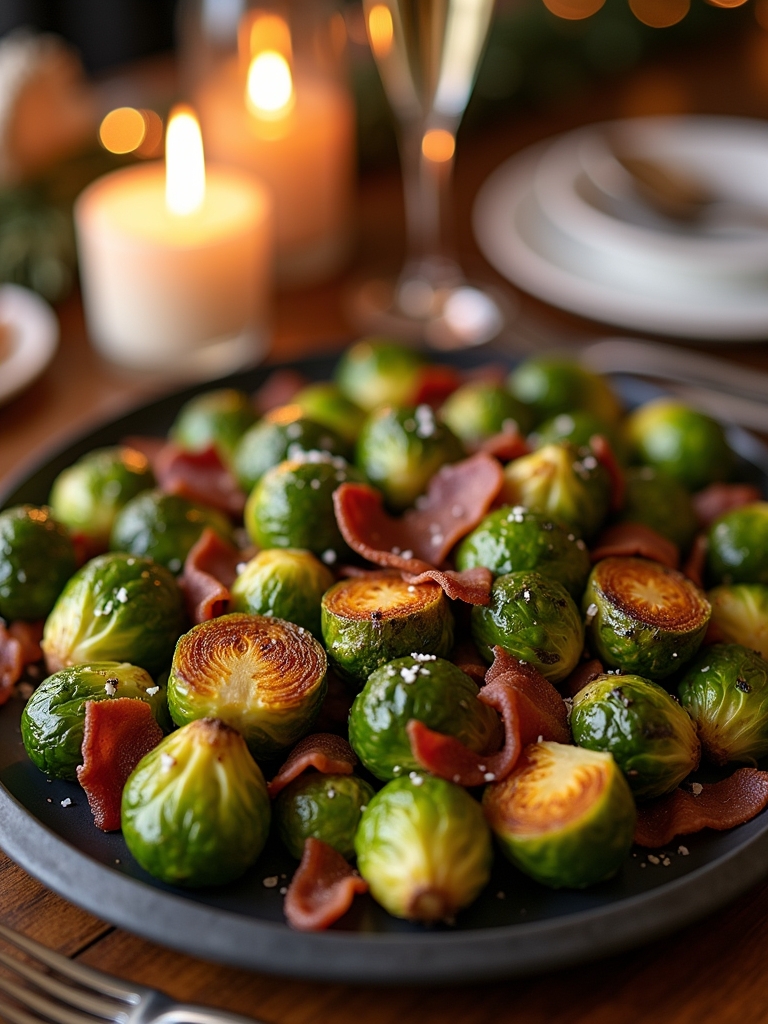
Roasted Brussels sprouts with bacon is a delightful side dish that perfectly complements any Christmas dinner table. The combination of crispy, caramelized Brussels sprouts and savory, smoky bacon creates a flavor profile that is both comforting and sophisticated. This dish not only adds a pop of color to your holiday spread, but it also offers a delicious way to enjoy this nutrient-packed vegetable. The simplicity of the ingredients allows the natural flavors to shine, making it a favorite among both kids and adults alike.
To prepare this dish, you only need a handful of ingredients and a little bit of time. The key to achieving perfectly roasted Brussels sprouts is to guarantee they are evenly coated with oil and seasoning before they go into the oven. As they roast, the edges become crispy while the insides remain tender, resulting in a delightful texture. Pairing them with crispy bacon adds a rich, savory element that elevates the dish from ordinary to extraordinary.
Ingredients:
- 1 pound Brussels sprouts, trimmed and halved
- 6 slices of bacon, chopped
- 3 tablespoons olive oil
- 1 teaspoon garlic powder
- Salt and pepper to taste
- Optional: balsamic glaze for drizzling
Cooking Instructions:
Preheat your oven to 400°F (200°C). In a large mixing bowl, combine the halved Brussels sprouts, chopped bacon, olive oil, garlic powder, salt, and pepper. Toss everything together until the Brussels sprouts are well coated in the mixture. Spread the mixture evenly on a baking sheet in a single layer. Roast in the preheated oven for 25-30 minutes, stirring halfway through, until the Brussels sprouts are golden brown and crispy, and the bacon is cooked through.
Extra Tips:
For added flavor, consider adding a sprinkle of grated Parmesan cheese during the last five minutes of roasting for a cheesy finish. If you prefer a bit of sweetness, a drizzle of balsamic glaze after roasting can enhance the flavors beautifully. Make sure to watch the Brussels sprouts closely towards the end of cooking to prevent them from burning. Enjoy experimenting with seasonings, as a dash of chili flakes can bring a nice kick to the dish!
Maple-Glazed Carrots
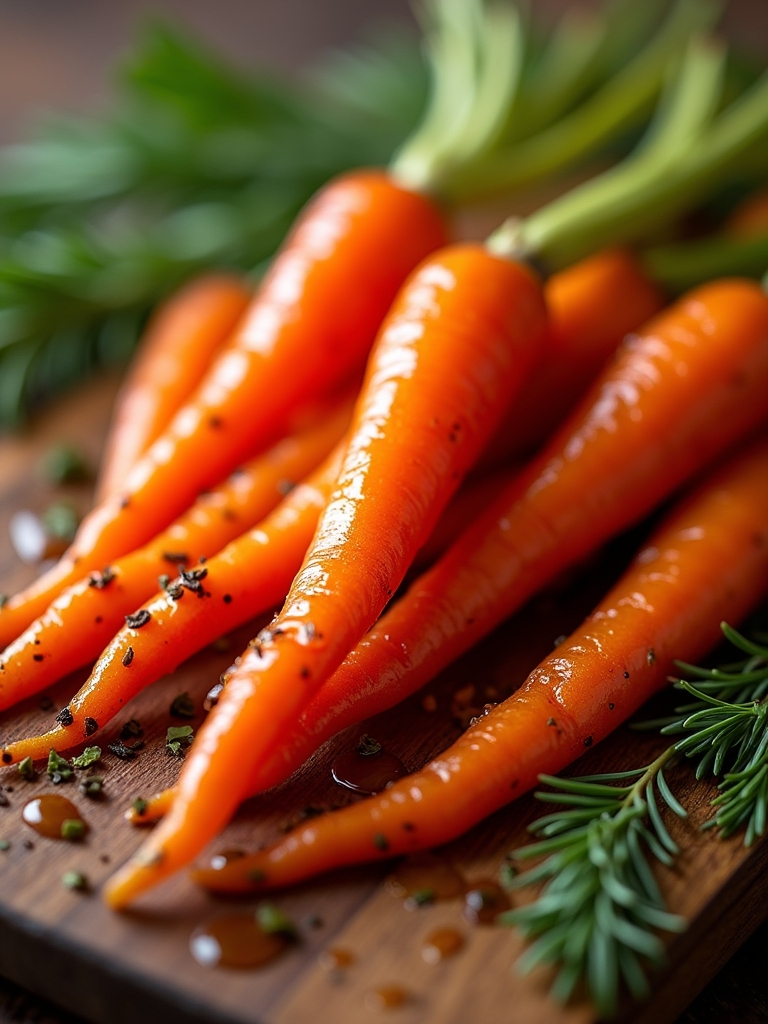
Maple-glazed carrots are a delightful side dish that brings a touch of sweetness to your Christmas dinner. The natural sweetness of the carrots pairs beautifully with the rich, caramelized flavor of pure maple syrup, creating a dish that is both simple and elegant. This recipe is not only easy to prepare but also adds a vibrant splash of color to your holiday table, making it a favorite among guests of all ages.
Maple-glazed carrots bring a sweet touch to your Christmas feast, combining elegance and simplicity for a colorful holiday table.
To elevate the flavor profile, you can incorporate a hint of cinnamon or nutmeg, which complements the maple syrup wonderfully. This dish can be prepared in just a matter of minutes, allowing you to focus on other elements of your Christmas feast. Whether you’re serving a traditional meal or a contemporary spread, maple-glazed carrots are sure to be a hit.
Ingredients:
- 1 pound of baby carrots or peeled, sliced carrots
- 2 tablespoons of unsalted butter
- 1/4 cup of pure maple syrup
- Salt, to taste
- Freshly ground black pepper, to taste
- Optional: a pinch of cinnamon or nutmeg
- Fresh parsley, for garnish
To prepare the maple-glazed carrots, start by boiling a pot of salted water. Add the carrots and cook for about 5-7 minutes until they are just tender but still crisp. Drain the carrots and set them aside. In a large skillet over medium heat, melt the butter and then stir in the maple syrup. Once the mixture is bubbling, add the cooked carrots and toss to coat them evenly in the glaze. Season with salt, pepper, and a pinch of cinnamon or nutmeg if desired. Cook for an additional 3-4 minutes, stirring occasionally, until the carrots are heated through and well-glazed. Garnish with fresh parsley before serving.
When making maple-glazed carrots, consider using fresh, high-quality maple syrup for the best flavor. If you prefer a more caramelized texture, you can sauté the carrots longer in the maple syrup mixture, allowing for a slightly thicker glaze. Additionally, feel free to experiment with adding other vegetables, such as parsnips or sweet potatoes, for a colorful medley. Enjoy this delicious side dish that will surely impress your family and friends during the holiday season!
Festive Cranberry Sauce
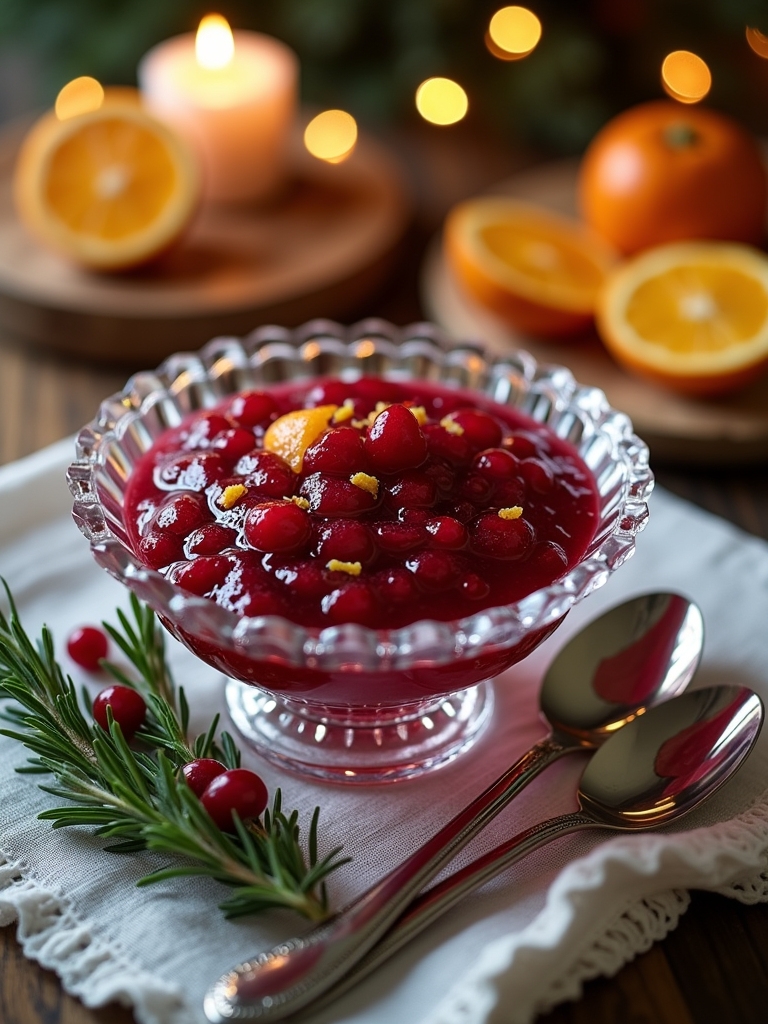
Festive cranberry sauce is a classic addition to any Christmas dinner, bringing a burst of color and flavor to the table. This tangy and sweet condiment perfectly complements roasted meats, stuffing, and various side dishes, making it an essential element of your holiday feast. The beauty of homemade cranberry sauce lies in its simplicity and the ability to customize the flavors according to your preferences, whether you prefer a hint of spice or an extra touch of sweetness.
Making cranberry sauce from scratch is not only easy but also allows you to control the ingredients, ensuring a fresh and vibrant taste. This recipe combines fresh cranberries with sugar, orange zest, and a hint of cinnamon to create a delightful balance of flavors. Serve it chilled or at room temperature, and watch as your guests rave about this delightful addition to their plates.
Ingredients:
- 12 ounces fresh cranberries
- 1 cup granulated sugar
- 1 cup orange juice
- 1 tablespoon orange zest
- 1/2 teaspoon ground cinnamon
- 1/4 teaspoon salt
- 1/2 cup chopped walnuts (optional)
Instructions:
In a medium saucepan, combine the fresh cranberries, sugar, orange juice, orange zest, ground cinnamon, and salt. Bring the mixture to a boil over medium heat, stirring occasionally. Once boiling, reduce the heat to low and let it simmer for about 10-15 minutes, or until the cranberries burst and the sauce thickens to your desired consistency. If using, stir in the chopped walnuts for added texture. Remove from heat and let it cool before transferring to a serving dish.
Extra Tips:
For an added depth of flavor, consider incorporating additional spices such as nutmeg or allspice. You can also experiment with different types of citrus, like lemon or lime, to vary the flavor profile. If you prefer a smoother texture, blend the sauce with an immersion blender after cooking. Remember that the sauce will thicken further as it cools, so don’t worry if it seems a bit runny at first. Store any leftovers in an airtight container in the refrigerator for up to a week, and feel free to use it as a topping for desserts or yogurt beyond the holiday season.
Classic Stuffing With Sage
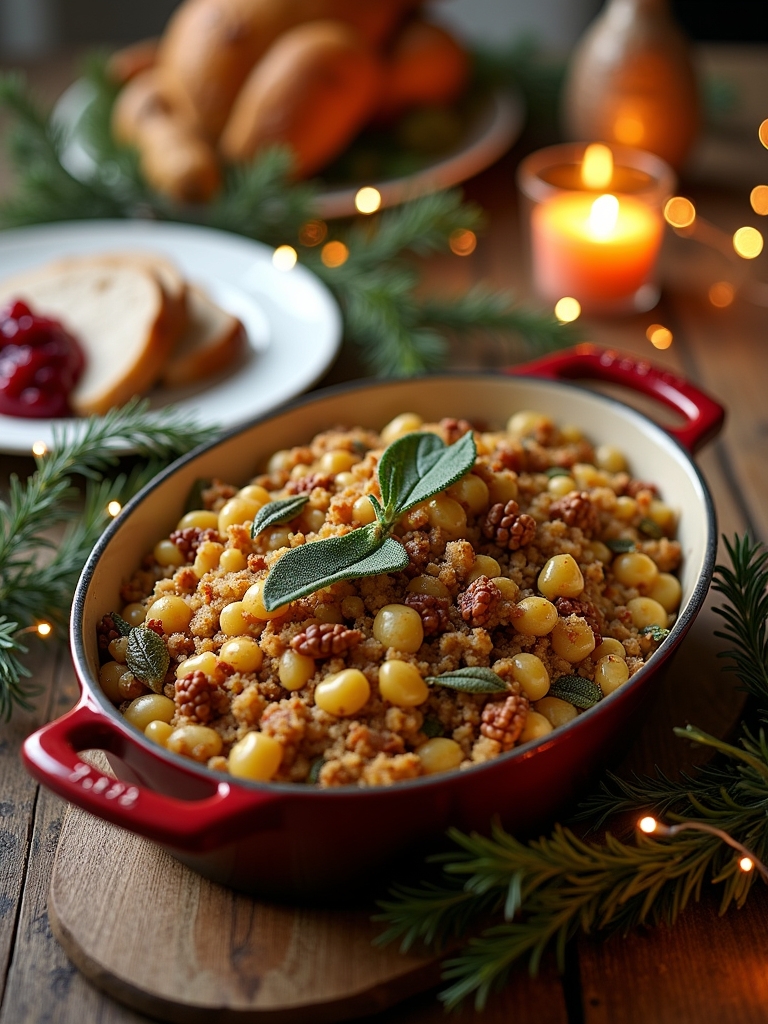
Classic Stuffing with Sage is a quintessential part of many holiday feasts, especially during Christmas. This hearty dish is perfect for complementing roasted turkey or chicken, and its savory flavors are sure to please even the pickiest of eaters. The combination of fresh sage, aromatic vegetables, and crusty bread creates a delightful texture and taste that embodies the spirit of the season.
Making stuffing from scratch allows you to customize the flavors according to your preference. While sage is the star of this dish, feel free to incorporate additional herbs such as thyme or rosemary for an extra layer of depth. The key to a successful stuffing lies in the quality of the bread you use; a good crusty loaf will provide the best texture and flavor. Let’s plunge into this classic recipe that will surely become a holiday favorite in your home.
Ingredients:
- 1 loaf of crusty bread (about 1 pound), cut into cubes
- 1 cup unsalted butter
- 1 onion, diced
- 2 celery stalks, diced
- 3 cloves garlic, minced
- 2 teaspoons dried sage
- 1 teaspoon dried thyme
- Salt and pepper to taste
- 2 to 3 cups chicken or vegetable broth
- 2 large eggs, beaten
- Fresh sage leaves for garnish (optional)
In a large skillet, melt the butter over medium heat. Add the diced onion and celery, cooking until softened, about 5 minutes. Stir in the minced garlic, dried sage, thyme, salt, and pepper, and cook for an additional 2 minutes. In a large bowl, combine the bread cubes with the sautéed vegetable mixture. Gradually add the broth, mixing until the bread is moist but not soggy. Stir in the beaten eggs, making sure everything is well combined. Transfer the stuffing to a greased baking dish and cover with foil. Bake at 350°F (175°C) for 30 minutes, then remove the foil and bake for an additional 20 minutes or until the top is golden brown.
When preparing this classic stuffing, consider toasting the bread cubes in the oven for a few minutes before mixing them with the other ingredients. This not only enhances the flavor but also helps the bread maintain its structure during baking. Additionally, if you want to add a touch of sweetness, chopped dried cranberries or apples can be a lovely addition. Always taste and adjust the seasonings as you go to confirm your stuffing has the perfect flavor profile that suits your palate. Happy cooking!
Cheesy Scalloped Potatoes
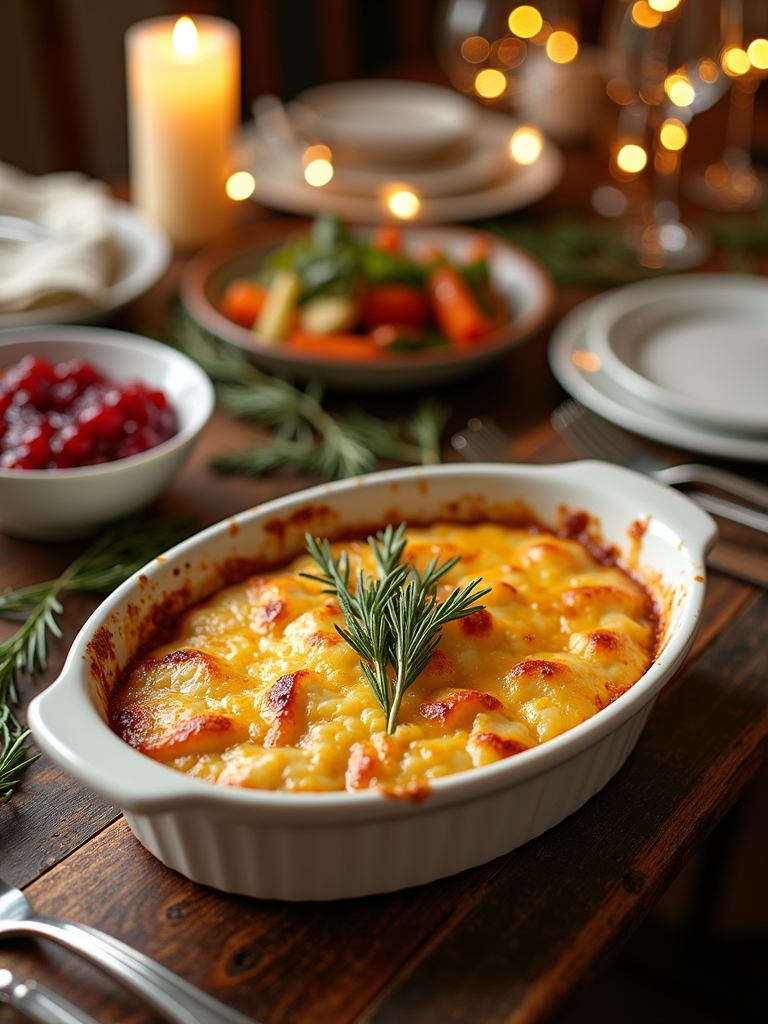
Cheesy scalloped potatoes are a classic comfort food that adds warmth and richness to any holiday dinner table. This creamy, cheesy dish features thinly sliced potatoes layered with a decadent cheese sauce, making it a crowd-pleaser for both kids and adults alike. Whether you’re hosting a festive gathering or simply enjoying a cozy meal at home, cheesy scalloped potatoes are sure to satisfy and impress your guests.
Cheesy scalloped potatoes bring warmth and indulgence to any holiday gathering, delighting both young and old alike.
Preparing cheesy scalloped potatoes is straightforward, requiring minimal ingredients and effort. The key to achieving the perfect texture lies in the balance of creaminess and flavor. You can customize this recipe by using different cheeses, such as cheddar or Gruyère, and adding seasonings to enhance the taste. Serve this delightful dish alongside your holiday roast, and watch as it disappears from the table!
Ingredients:
- 4 large russet potatoes, peeled and thinly sliced
- 2 cups shredded cheddar cheese
- 2 cups heavy cream
- 1 cup milk
- 1 small onion, finely chopped
- 2 cloves garlic, minced
- 4 tablespoons butter
- 1 teaspoon salt
- 1/2 teaspoon black pepper
- 1/2 teaspoon paprika (optional)
- Fresh parsley, chopped (for garnish)
To prepare the cheesy scalloped potatoes, preheat your oven to 350°F (175°C). In a large saucepan, melt the butter over medium heat, then add the chopped onion and minced garlic, sautéing until the onion is translucent. Stir in the heavy cream, milk, salt, pepper, and paprika, allowing the mixture to heat through but not boil. In a greased baking dish, layer half of the sliced potatoes, followed by half of the cheese, and half of the cream mixture. Repeat the layers, finishing with the remaining cheese on top. Cover with aluminum foil and bake for 45 minutes, then remove the foil and bake for an additional 15-20 minutes until the top is golden and bubbly.
When making cheesy scalloped potatoes, it is crucial to slice the potatoes evenly for uniform cooking. Using a mandoline slicer can help achieve thin and consistent slices. Additionally, letting the dish rest for about 10 minutes after baking allows the layers to set, making it easier to serve. You can also experiment with different types of cheese or add ingredients like cooked bacon or sautéed mushrooms for added flavor. Enjoy your cheesy scalloped potatoes!
Winter Green Salad With Pomegranate
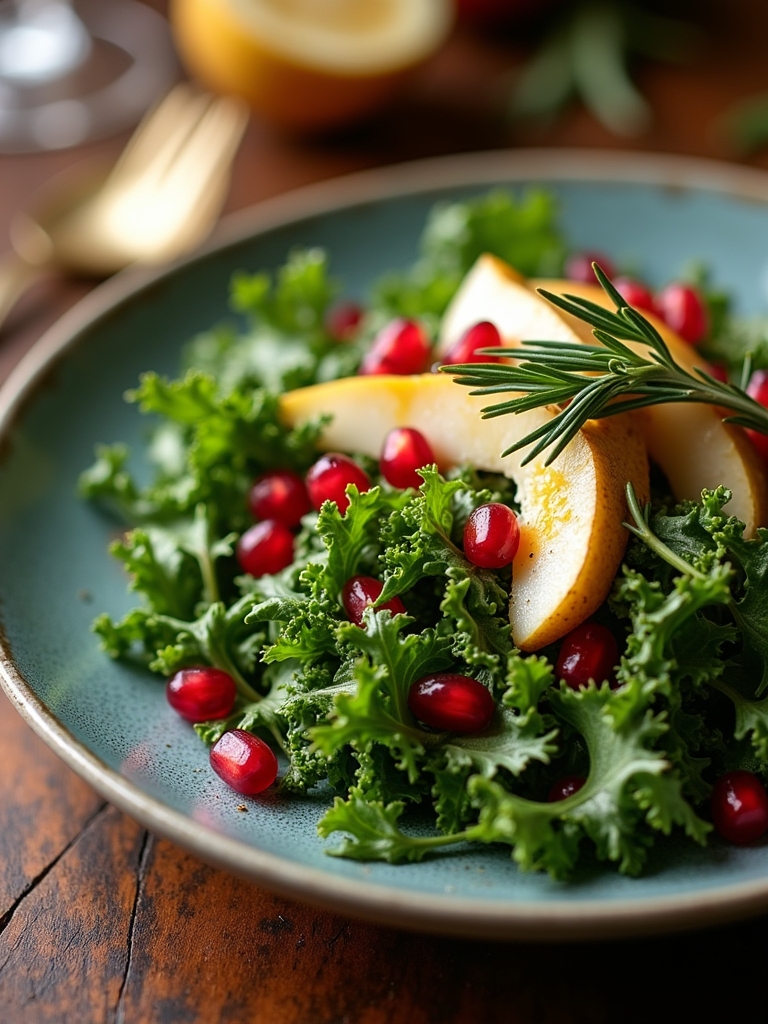
The Winter Green Salad with Pomegranate is a vibrant and invigorating dish perfect for festive gatherings. Combining hearty greens with the tart sweetness of pomegranate, this salad not only brings a pop of color to your Christmas dinner table but also packs a nutritious punch. The combination of textures – from crisp greens to juicy pomegranate seeds – creates a delightful eating experience that complements any holiday meal.
To elevate the flavors, this salad is drizzled with a zesty vinaigrette that brings all the ingredients together. It’s an incredibly versatile dish; you can easily adjust the ingredients based on your preferences or what you have on hand. Serve it as a starter or alongside your main course for a complete holiday feast that is sure to impress your guests.
Ingredients:
- 4 cups mixed greens (such as spinach, arugula, and kale)
- 1 cup pomegranate seeds
- 1/2 cup crumbled feta cheese
- 1/4 cup walnuts, chopped
- 1/4 cup red onion, thinly sliced
- 3 tablespoons olive oil
- 1 tablespoon balsamic vinegar
- 1 teaspoon honey
- Salt and pepper to taste
To prepare the Winter Green Salad with Pomegranate, start by rinsing and drying the mixed greens thoroughly. In a large bowl, combine the greens, pomegranate seeds, crumbled feta cheese, chopped walnuts, and sliced red onion. In a separate small bowl, whisk together the olive oil, balsamic vinegar, honey, and a pinch of salt and pepper until well combined. Drizzle the dressing over the salad just before serving and toss gently to coat all the ingredients evenly.
For the best flavor experience, prepare the salad dressing in advance to allow the flavors to meld together. Additionally, you can add ingredients like sliced apples or pears for extra sweetness or swap out feta for goat cheese for a different taste. If you’re making the salad ahead of time, keep the dressing separate until serving to prevent the greens from wilting. Enjoy this festive dish that not only looks stunning but also tastes incredible!
Decadent Chocolate Yule Log
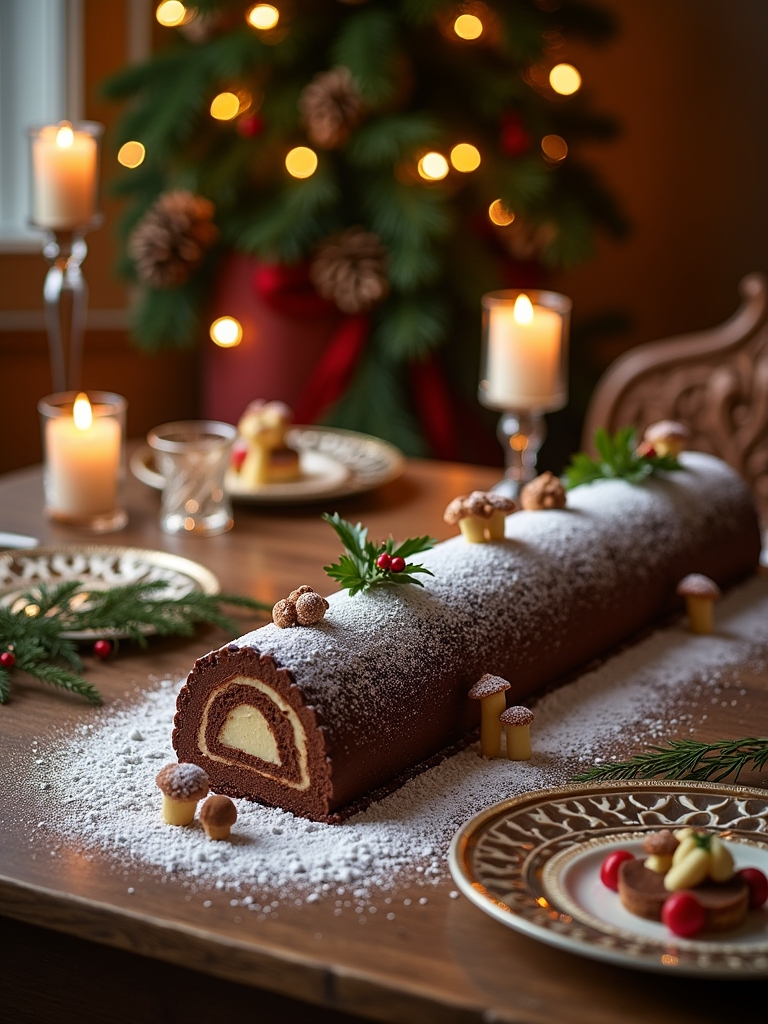
The Decadent Chocolate Yule Log, also known as “Bûche de Noël,” is a traditional French dessert that adds a festive touch to your Christmas dinner. This delightful treat features a rich chocolate sponge cake rolled with a luscious chocolate ganache filling, resembling a log from a winter forest. Not only is it visually stunning, but the combination of flavors and textures makes it a favorite during the holiday season. Preparing a Yule Log may sound intimidating, but with the right approach, it can be a fun and rewarding experience.
The Decadent Chocolate Yule Log is a stunning and delicious centerpiece for your Christmas celebration, combining rich flavors and festive charm.
To achieve the perfect Yule Log, it’s crucial to focus on the quality of your ingredients and the technique of rolling the cake. The sponge should be light and airy, while the ganache should be smooth and creamy, creating a harmonious balance. After mastering the basics, you can get creative with your decorations, using marzipan mushrooms, powdered sugar, or even edible glitter to make your log look enchanting. Gather your loved ones and share the joy of baking this festive dessert, which is sure to impress everyone at your Christmas dinner.
Ingredients:
- 4 large eggs
- ½ cup granulated sugar
- 1 teaspoon vanilla extract
- ½ cup all-purpose flour
- ¼ cup unsweetened cocoa powder
- ½ teaspoon baking powder
- ¼ teaspoon salt
- 1 cup heavy cream
- 8 oz bittersweet chocolate, chopped
- 2 tablespoons unsweetened cocoa powder (for dusting)
- Powdered sugar (for decoration)
Instructions:
Preheat the oven to 350°F (175°C) and line a 15×10-inch jelly roll pan with parchment paper. In a large bowl, beat the eggs and granulated sugar together until pale and thick. Stir in the vanilla extract. Sift together the flour, cocoa powder, baking powder, and salt, then gently fold the dry ingredients into the egg mixture until fully combined. Pour the batter into the prepared pan, spreading it evenly, and bake for 12-15 minutes, or until the cake springs back when touched. Once baked, turn the cake out onto a clean kitchen towel dusted with cocoa powder, peel off the parchment paper, and roll the cake tightly in the towel. Allow it to cool completely. In the meantime, prepare the ganache by heating the heavy cream until it just begins to simmer, then pour it over the chopped chocolate. Let it sit for a minute before stirring until smooth. Unroll the cooled cake, spread half of the ganache over the surface, and roll it up again. Place the log seam-side down on a serving platter and frost the outside with the remaining ganache.
Extra Tips:
To guarantee a successful Yule Log, remember to roll the cake while it is still warm but not hot to prevent cracking. When making the ganache, use high-quality chocolate for the best flavor and texture. If you’re feeling adventurous, consider adding a splash of flavored liqueur, such as Grand Marnier or coffee, to the ganache for an extra layer of richness. Finally, refrigerate the log for at least an hour before serving to allow the ganache to set; it will make slicing much easier and more aesthetically pleasing. Enjoy your festive masterpiece!
Gingerbread Cookies

Gingerbread cookies are a delightful and festive treat that captures the essence of the holiday season. Their warm spices and sweet, molasses flavor create a comforting aroma that fills your home, making them a perfect addition to your Christmas celebrations. Whether you’re decorating them with icing or enjoying them plain with a cup of hot cocoa, these cookies are sure to bring joy to both young and old alike. Baking gingerbread cookies can also become a fun family activity, as everyone can join in the decorating process.
To make the best gingerbread cookies, it’s important to use high-quality ingredients and to follow the recipe closely. The dough may need some time to chill, allowing the flavors to meld perfectly. You can get creative with your cookie shapes, using cookie cutters to make festive designs, or simply roll them into balls for a more rustic look. No matter how you choose to present them, these cookies are sure to be a hit at your Christmas gatherings.
Ingredients:
- 3 cups all-purpose flour
- 1 teaspoon baking soda
- 1 tablespoon ground ginger
- 1 tablespoon ground cinnamon
- 1 teaspoon ground cloves
- ½ teaspoon salt
- ¾ cup unsalted butter, softened
- ¾ cup brown sugar, packed
- 1 large egg
- ½ cup unsulfured molasses
- 1 teaspoon vanilla extract
- Royal icing (for decorating, optional)
Instructions:
In a large mixing bowl, whisk together the flour, baking soda, ginger, cinnamon, cloves, and salt. In another bowl, cream the softened butter and brown sugar until light and fluffy. Beat in the egg, molasses, and vanilla until well combined. Gradually add the flour mixture to the wet ingredients, mixing until a soft dough forms. Divide the dough into two portions, wrap them in plastic wrap, and refrigerate for at least 2 hours or until firm. Preheat your oven to 350°F (175°C). Roll out the chilled dough to about ¼ inch thick on a floured surface and cut into desired shapes using cookie cutters. Place the cookies on a baking sheet lined with parchment paper and bake for 8-10 minutes. Let them cool completely before decorating with royal icing if desired.
Extra Tips:
When making gingerbread cookies, make certain your butter is at room temperature for easier creaming with the sugar. Don’t skip the chilling step, as it helps the cookies maintain their shape while baking. If you prefer a softer cookie, bake them for just a minute or two less. For added flavor, consider incorporating finely chopped candied ginger or a pinch of black pepper into the dough. Finally, store your gingerbread cookies in an airtight container to keep them fresh and chewy for longer!
Frequently Asked Questions
How Can I Prepare Dishes Ahead of Time?
I prep meals ahead by organizing ingredients and cooking in batches. Good time management’s key; I label everything and use my freezer wisely. This way, I can focus on creating an innovative dining experience for guests.
What Beverages Pair Well With These Recipes?
I love a crisp Sauvignon Blanc or a rich Merlot for wine pairings. For cocktails, I suggest a spiced gin fizz or a pomegranate mule—it’s all about elevating the experience with innovative, delicious choices!
Are There Vegetarian Alternatives for the Meat Dishes?
I’ve found that vegetarian substitutions can be just as satisfying. Think hearty lentil loaf or mushroom steaks—who knew meat alternatives could steal the show? Embrace innovation and impress your guests with these creative dishes!
How Can I Modify Recipes for Food Allergies?
I modify recipes by using ingredient substitutions, like almond flour instead of wheat or coconut milk instead of dairy. I always explore allergy-friendly options to guarantee everyone enjoys the meal without worry. It’s creatively rewarding!
What Is the Best Way to Set a Festive Table?
Did you know that 80% of guests remember the table setting? I love using bold colors for festive centerpieces and layering textures in my table settings; it truly elevates the dining experience and sparks conversation.
Conclusion
As you gather around the table this Christmas, remember that the meal is more than just food; it’s a symbol of love and togetherness. Each dish, from the herb-roasted prime rib to the gingerbread cookies, tells a story of warmth and joy. So, let these effortless recipes be the stars of your holiday celebration, inviting laughter and connection. Embrace the spirit of the season, and create memories that will linger long after the last bite is taken.