

If you’re craving a delightful coconut cake, I’ve got just the recipe for you! It features a moist, fluffy texture, blending coconut milk and shredded coconut for rich flavor. You’ll start by mixing dry ingredients, then add the wet ones to create a smooth batter. Once baked, the heavenly aroma will fill your kitchen, making it irresistible. Top it off with toasted coconut for crunch. Stick around, and I’ll share more tips and tricks for baking perfection!
History
When I plunge into the history of coconut cake, I’m always fascinated by how this delightful dessert has traveled through time and cultures. The roots of coconut cake intertwine with the rich history of coconut cultivation, which flourished in tropical regions. As I explore its cake origins, I discover that this sweet treat emerged in the 19th century, inspired by the abundance of coconuts in Caribbean and Southeast Asian cuisine. Innovative bakers began experimenting, incorporating grated coconut and creamy textures, which elevated traditional cakes into something extraordinary. Each evolution tells a story of creativity, blending flavors and techniques from diverse culinary traditions. This journey not only showcases the versatility of coconut but also highlights the enduring love for this unique cake across generations.
Recipe
Coconut cake is a delightful dessert that brings the tropical flavors of coconut to your table. With its moist and fluffy texture, this cake is perfect for any celebration or simply as a sweet treat for yourself. The combination of coconut milk, shredded coconut, and a light frosting makes this cake a favorite for those who love the taste of coconut. Whether you’re hosting a party or enjoying a quiet afternoon at home, this coconut cake will surely impress your guests and family alike.
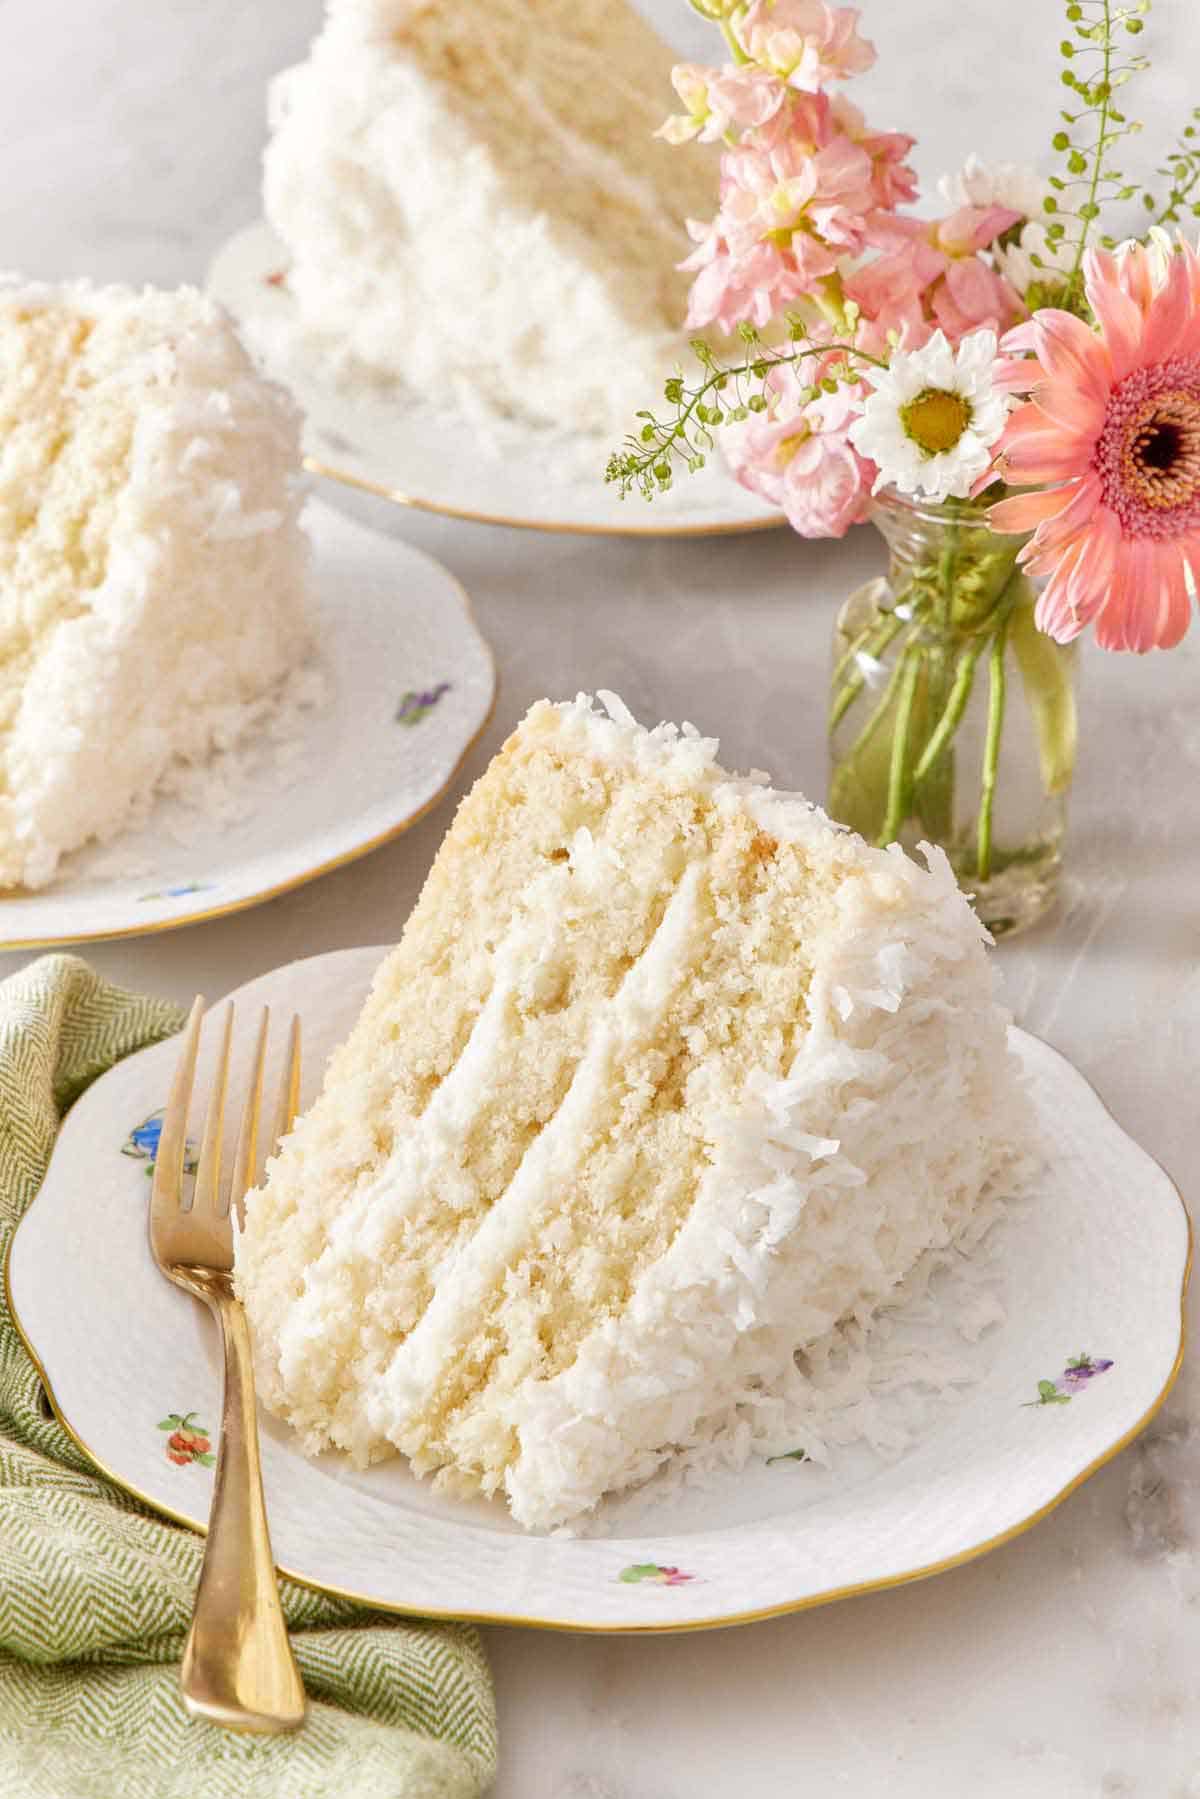
Indulge in a moist coconut cake that brings tropical flavors to any occasion, delighting guests and family alike.
To create the perfect coconut cake, you’ll need to focus on the quality of your ingredients and make certain to follow each step carefully. The cake can be made from scratch or you can choose to use a box mix for convenience. Either way, the end result will be a moist cake that is bursting with coconut flavor. Don’t forget to add a sprinkle of toasted coconut on top for a beautiful presentation and an extra crunch.
Ingredients:
- 1 ½ cups all-purpose flour
- 1 cup granulated sugar
- 1 teaspoon baking powder
- ½ teaspoon baking soda
- ¼ teaspoon salt
- ½ cup unsalted butter, softened
- 1 cup coconut milk
- 2 large eggs
- 1 teaspoon vanilla extract
- 1 cup shredded coconut
- For frosting: 1 cup unsweetened whipped cream
- For topping: Toasted coconut flakes
In a large mixing bowl, combine the flour, sugar, baking powder, baking soda, and salt. Next, add in the softened butter, coconut milk, eggs, and vanilla extract. Beat the mixture with an electric mixer on medium speed for about 2-3 minutes until fully combined and smooth. Gently fold in the shredded coconut. Pour the batter into a greased 9-inch round cake pan and bake in a preheated oven at 350°F (175°C) for 25-30 minutes or until a toothpick inserted in the center comes out clean. Allow the cake to cool in the pan for 10 minutes before transferring it to a wire rack to cool completely. Once cooled, frost the cake with whipped cream and sprinkle toasted coconut flakes on top.
For the best results, make certain all your ingredients are at room temperature before you start mixing. This helps create a smooth batter and guarantees even baking. If you want an extra coconut flavor, consider adding coconut extract to the batter. You can also experiment with different frostings, such as cream cheese or buttercream, to find your favorite combination. Finally, for added moisture, you can brush the layers with a coconut syrup made from coconut water and sugar before frosting. Enjoy your delicious coconut cake!
Cooking Steps
Now that we’ve gathered all our ingredients, it’s time to bring this coconut cake to life! First, I preheat the oven to 350°F, setting the stage for that perfect bake. Let’s mix those dry ingredients together before gradually adding our wet components, creating a luscious batter that’ll soon be filled with lovely coconut flakes.
Step 1. Preheat the Oven to 350°F
To guarantee your coconut cake bakes evenly and rises perfectly, I always preheat my oven to 350°F before diving into the mixing process. This step is important because the right baking temperatures guarantee that your cake achieves that delightful, fluffy texture we all crave. While the oven warms up, I take a moment to gather my ingredients, making sure everything’s fresh and ready. Remember, oven safety is fundamental; always double-check that your oven’s racks are properly positioned and that there are no flammable items nearby. Once the oven reaches the desired temperature, I can confidently proceed, knowing that my cake will bake to perfection. Preheating is a small but essential step that sets the stage for delicious results!
Step 2. Mix Dry Ingredients Together
Before I plunge into mixing the wet ingredients, I always take care to combine the dry ingredients first, as this guarantees an even distribution of flavors and textures throughout the cake. I start by measuring out my flour, sugar, baking powder, and a pinch of salt, paying close attention to the dry ingredient ratios. Using a whisk, I gently incorporate these elements, ensuring no lumps remain. This mixing technique not only aerates the flour but also allows the leavening agents to blend seamlessly. I often add shredded coconut at this stage, elevating the cake’s texture. By mastering these initial steps, I set the stage for a beautifully balanced coconut cake that’ll delight anyone lucky enough to have a slice.
Step 3. Add Wet Ingredients Gradually
As I prepare to add the wet ingredients, I make sure to incorporate them gradually into the dry mixture, which helps maintain the cake’s light texture. Using innovative wet ingredient techniques, I pour the mixture in a slow, steady stream while mixing gently. This gradual incorporation allows the dry ingredients to hydrate evenly, ensuring that no clumps form. I can feel the batter transforming into a smooth, luxurious blend, and I’m careful not to overmix, as that can lead to a dense cake. Each addition of liquid reveals the flavors, creating a delightful coconut aroma that fills the kitchen. This step is essential, setting the stage for a cake that’s both airy and indulgent.
Step 4. Fold in Coconut Flakes
With the wet ingredients seamlessly integrated into the dry mixture, it’s time to fold in the coconut flakes. I grab a spatula, ensuring it’s gentle yet effective, as I aim for that perfect coconut texture. Carefully, I scoop the flakes from the bag, letting them cascade into the batter like snowflakes. As I fold, I’m mindful not to overmix; this step preserves the lightness of the cake. The coconut flakes should be evenly distributed, offering delightful bites of flavor throughout. Here’s a baking tip: using sweetened coconut enhances the cake’s richness, while unsweetened provides a more subtle taste. This innovative twist will elevate your coconut cake, making each slice a tropical delight!
Step 5. Bake for 25-30 Minutes
Now it’s time to slide the cake into the preheated oven, where it will bake for 25 to 30 minutes. This is where the magic happens! As the cake bakes, the aromas of coconut and vanilla will fill your kitchen, tantalizing your senses. To achieve that perfect cake texture, I recommend using the toothpick test—insert it into the center; if it comes out clean, you’re good to go! During baking, the heat transforms your batter, creating a light, fluffy masterpiece. I love experimenting with different baking techniques, like adjusting oven temperatures slightly, which can enhance the cake’s rise and moisture. Keep an eye on it, and you’ll soon have a stunning coconut cake ready to impress!
Nutritional Guide
Coconut cake isn’t just a delightful treat; it also offers a range of nutritional benefits that can enhance your baking experience. I love how this cake combines flavor with healthful ingredients. The caloric content is balanced with healthy fats from coconut and protein from eggs, making it a satisfying dessert.
Here’s a quick nutritional guide to help you appreciate those ingredient benefits:
| Ingredient | Calories (per serving) | Key Benefits |
|---|---|---|
| Coconut flour | 60 | High in fiber, gluten-free |
| Eggs | 70 | Rich in protein and healthy fats |
| Sugar (coconut) | 45 | Lower glycemic index |
| Butter | 100 | Source of vitamins A, D, E |
| Milk (coconut) | 50 | Lactose-free, hydrating |
With these insights, you can enjoy your coconut cake guilt-free!
Final Thoughts
Baking a coconut cake is more than just following a recipe; it’s about creating a memorable experience that combines flavor and nutrition. Each layer brings a tropical essence that dances on your palate, making every bite a delight. To elevate your creation, consider incorporating baking tips like using fresh coconut for a richer taste or adding a hint of lime zest for brightness. Don’t hesitate to explore flavor variations; infuse your cake with almond extract or even a dash of rum for an adult twist. Whether it’s for a celebration or a simple gathering, a coconut cake will surely impress. So, roll up your sleeves, embrace your creativity, and let your culinary adventure begin!
Frequently Asked Questions
Can I Substitute Coconut Milk for Regular Milk?
Absolutely, I love substituting coconut milk for regular milk! It adds a creamy texture and a hint of sweetness. Plus, the coconut milk benefits include healthy fats. If you need alternatives, almond or oat milk work well too!
How Long Does Coconut Cake Last at Room Temperature?
Coconut cake’s like a fleeting summer breeze; it’s best enjoyed fresh. At room temperature, I find it stays delightful for about two days. For ideal coconut cake freshness, consider refrigerating any leftovers after that.
Can I Freeze Leftover Coconut Cake?
Absolutely, you can freeze leftover cake! I recommend wrapping it tightly in plastic wrap and using aluminum foil for extra protection. This storage method keeps it fresh. Trust me, these freezing tips make a world of difference!
What Type of Coconut Is Best for Decoration?
When decorating, I love using toasted coconut for its rich flavor and crunch. Shredded coconut adds a beautiful texture and softness, making my desserts visually appealing and delicious. Both elevate any cake to a new level!
Is Coconut Cake Gluten-Free if Made With Almond Flour?
When I plunge into gluten-free baking, almond flour’s like a superhero cape! Yes, if I use almond flour, my coconut cake’s gluten-free. Plus, coconut flour benefits add a delightful twist to the flavor and texture.
Conclusion
As I take a final bite of this luscious coconut cake, I can’t help but feel like I’ve stepped into a tropical paradise, where the sun kisses the waves and the scent of coconut lingers in the air. This delightful recipe not only celebrates the rich history of coconut in baking but also invites you to create sweet memories in your kitchen. So, grab those ingredients, and let your taste buds begin a delicious adventure that’s worth every crumb!
Coconut Cake Recipe
Ingredients
Equipment
Method
- Preheat oven to 350°F (175°C).
- Grease cake pans and line with parchment paper.
- Whisk together flour, baking powder, and salt in a bowl. Set aside.
- In another bowl, beat butter and sugar until light and fluffy (~3 mins).
- Add eggs one at a time, mixing well after each. Stir in vanilla and coconut extract.
- Alternate adding dry ingredients and coconut milk, mixing until just combined.
- Fold in shredded coconut (if using).
- Divide batter evenly between pans.
- Bake for 30-35 mins or until a toothpick comes out clean.
- Cool in pans for 10 mins, then transfer to a wire rack.
- Beat butter until creamy (~2 mins).
- Gradually add powdered sugar, then coconut milk, vanilla, and coconut extract. Beat until smooth.
- Place one cake layer on a plate. Spread a layer of frosting.
- Add the second layer and frost the entire cake.
- Press toasted coconut flakes onto the sides and top.