

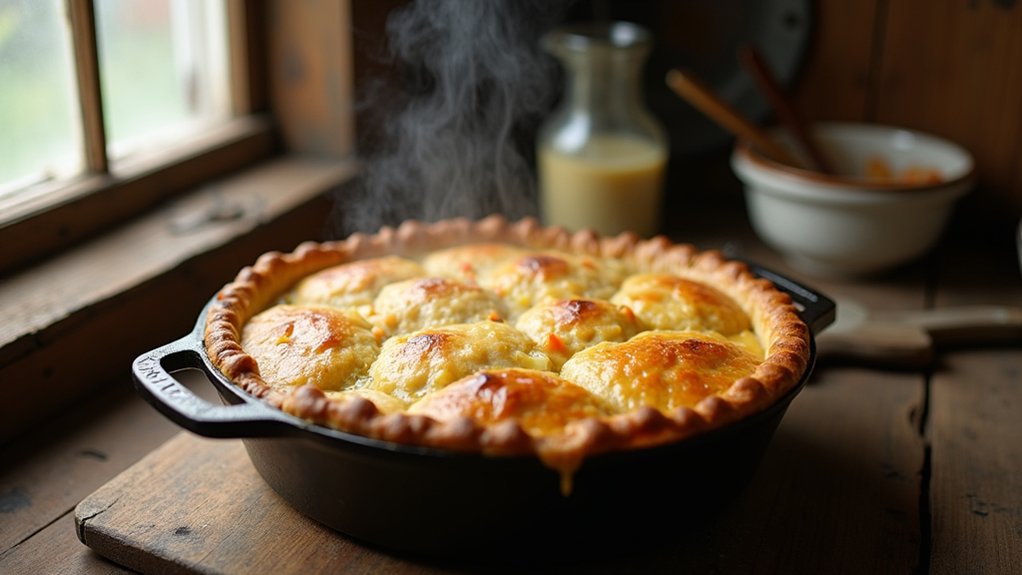
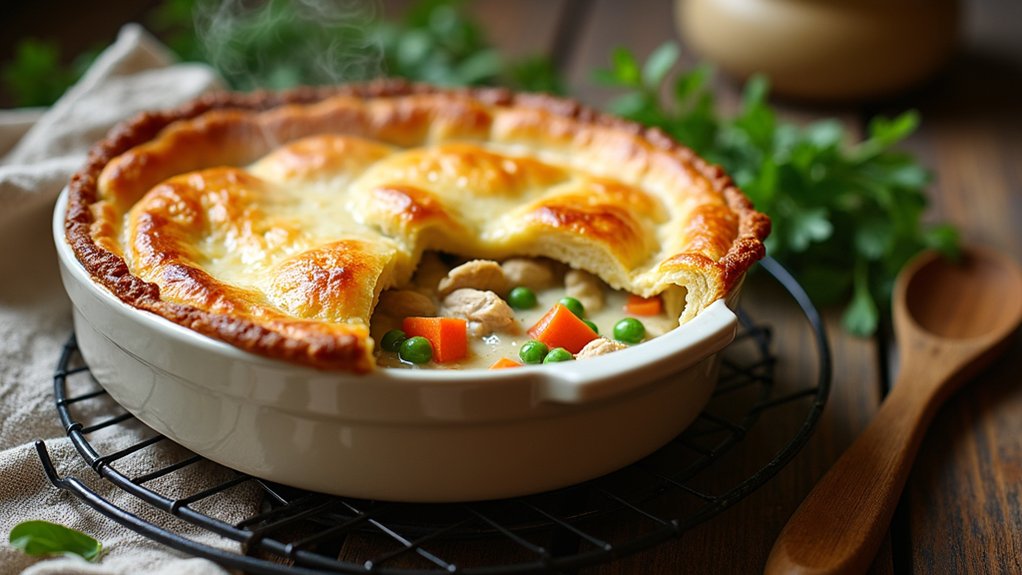
If you’re looking for a cozy meal, Easy Bisquick Chicken Pot Pie is a must-try! It features a flaky crust and a creamy filling loaded with chicken and veggies. To make it, mix cooked chicken with frozen veggies and cream of chicken soup, then top with a Bisquick biscuit mixture. Bake it until golden, and let it cool before serving. You’ll love how it fills your home with warmth and nostalgia, and you’ll find even more tips to make it perfect!
History
When it comes to comfort food, chicken pot pie has a special place in many of our hearts, and its history is just as warm and inviting. This dish traces its cooking origins back to ancient times when savory pies were filled with meat and herbs. Over the years, its culinary evolution reflects a blend of cultures, from the British meat pie to the American classic that is familiar to us today. As I explore different variations, I’m always excited to see how fresh ingredients and modern techniques breathe new life into this beloved dish. Each bite carries a story, connecting me to family gatherings and cozy nights. It’s amazing how chicken pot pie continues to adapt while still feeling like home.
Recipe
This Easy Bisquick Chicken Pot Pie is a comforting and satisfying meal that brings the flavors of home cooking to your table in no time. With a flaky crust and a creamy filling packed with tender chicken and vegetables, this dish is perfect for busy weeknights or cozy family dinners. The use of Bisquick mix for the crust simplifies the process, making it accessible even for novice cooks.
In just a few simple steps, you can whip up this delicious pot pie that’s sure to please everyone in the family. You can customize the filling based on your preferences or what you have on hand, making it a versatile option. Serve it hot from the oven, and watch as everyone digs into this hearty classic.
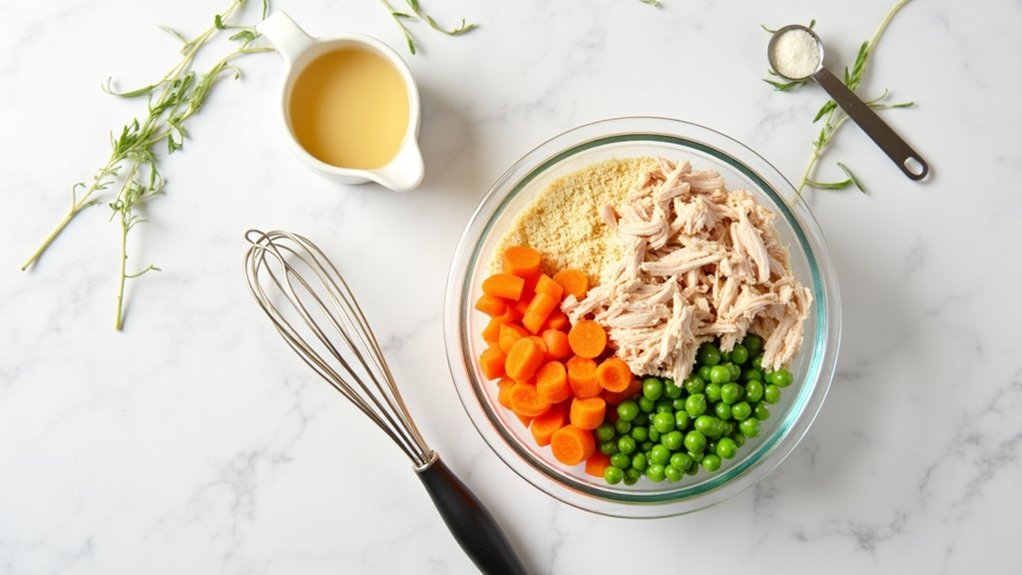
Ingredients:
- 2 cups cooked chicken, diced
- 1 cup frozen mixed vegetables (peas, carrots, corn)
- 1 can (10.5 oz) cream of chicken soup
- 1 cup milk
- 1 cup Bisquick mix
- 2 large eggs
- Salt and pepper to taste
To cook the dish, preheat your oven to 400°F (200°C). In a mixing bowl, combine the cooked chicken, frozen vegetables, cream of chicken soup, and milk. Stir until well blended, then pour the mixture into a greased 9-inch pie plate. In another bowl, whisk together the Bisquick mix, eggs, salt, and pepper until smooth. Pour this batter over the chicken and vegetable mixture in the pie plate. Bake for 30-35 minutes, or until the top is golden brown and a toothpick inserted in the center comes out clean.
When cooking this dish, you can easily switch up the flavors by adding herbs or spices such as thyme, rosemary, or garlic powder to the filling. For an extra touch, consider topping the pie with shredded cheese before baking for a cheesy twist. If you have leftover rotisserie chicken, this recipe is a great way to use it up. Finally, remember to let the pot pie cool for a few minutes after baking to prevent burns and allow the filling to set a bit before serving.
Cooking Steps
Let’s get cooking! First, I’ll preheat my oven to 425°F, which sets the stage for that golden crust we all love. Then, I’ll mix the filling ingredients together, creating a comforting blend that’s just waiting to be topped with our delicious biscuit mixture.
Step 1. Preheat Oven to 425°F
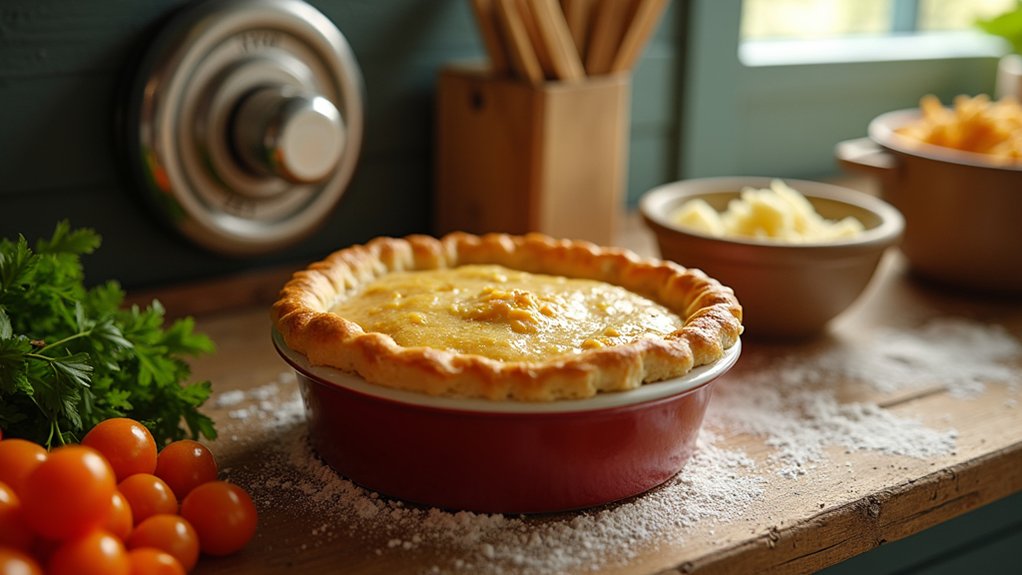
Before diving into the deliciousness of your Bisquick chicken pot pie, it’s vital to preheat your oven to 425°F. This oven temperature is essential for achieving that perfect golden crust that we all crave. While waiting for the oven to heat up, I like to gather my ingredients and mentally prepare for the magic ahead. Remember, baking safety is key, so don’t forget to check that your oven rack is in the right position. A well-preheated oven not only guarantees even cooking but also enhances the flavors of your filling. Plus, it builds the anticipation as the aroma begins to fill your kitchen. So, let’s get that oven roaring, and soon, you’ll be on your way to a comforting chicken pot pie!
Step 2. Mix Filling Ingredients Together
With the oven preheated and ready to go, it’s time to mix the filling ingredients together. I start by grabbing a large bowl, where I combine cooked chicken, frozen mixed veggies, and a can of cream of chicken soup. If you want to get creative, consider ingredient substitutions like using leftover turkey or even sautéed mushrooms for a twist. Next, I add a splash of milk to lighten the mixture, stirring it until everything’s well blended. I love using different cooking techniques, like steaming the veggies beforehand for added flavor. This not only enhances the taste but also gives my pot pie a unique flair. Once everything’s combined, I can’t wait to see how it all comes together in the oven!
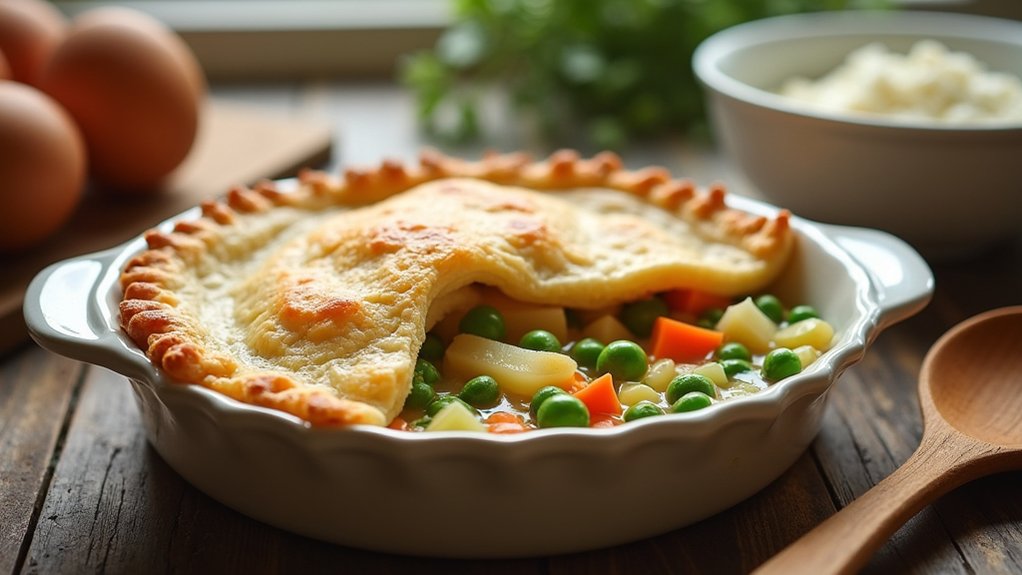
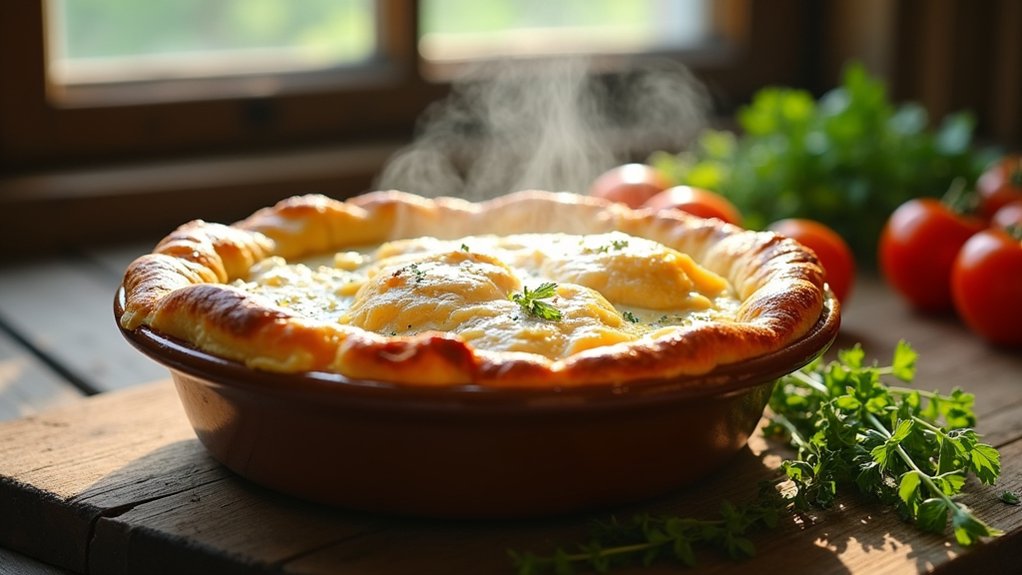
Step 3. Add Biscuit Topping Mixture
Now that the filling is all set, it’s time to whip up the biscuit topping that’ll crown this delicious pot pie. I usually reach for Bisquick, but feel free to experiment with different biscuit types like buttermilk or even cheddar for a fun twist. To create the topping, mix the Bisquick with milk and a touch of melted butter until it’s smooth. You can play with topping variations, like adding herbs or spices for that extra flavor kick! Spoon the mixture over the chicken and veggie filling, making sure it’s evenly distributed. This topping is what makes the pot pie truly special, so don’t skimp on that layer of goodness. Get ready for a comforting bite of nostalgia!
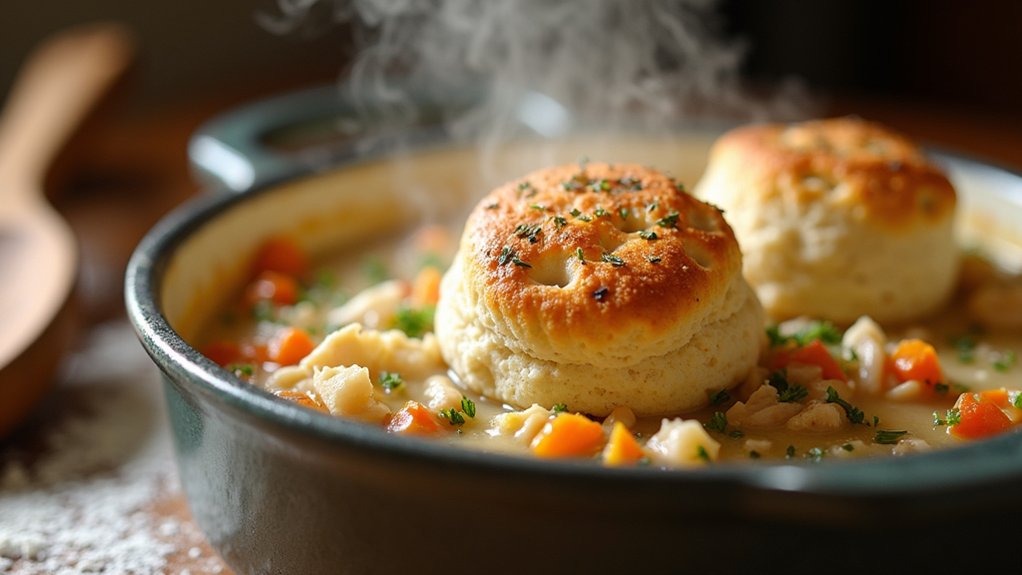
Step 4. Bake for 30 Minutes

After you’ve spooned that delicious biscuit topping over the chicken and veggie filling, it’s time to bring everything together in the oven. Preheat your oven to 400°F, if you haven’t already. I like to use a timer for precise baking—30 minutes is just the right amount of time for that perfect golden crust. As the pie bakes, I recommend checking it a few minutes before the timer goes off; different ovens can vary, and you want to guarantee that crust isn’t overdone. Using these baking techniques, you’ll achieve a flaky topping that complements the savory filling beautifully. Trust me, the aroma wafting from your oven will have everyone gathering in the kitchen, keen to dig in!
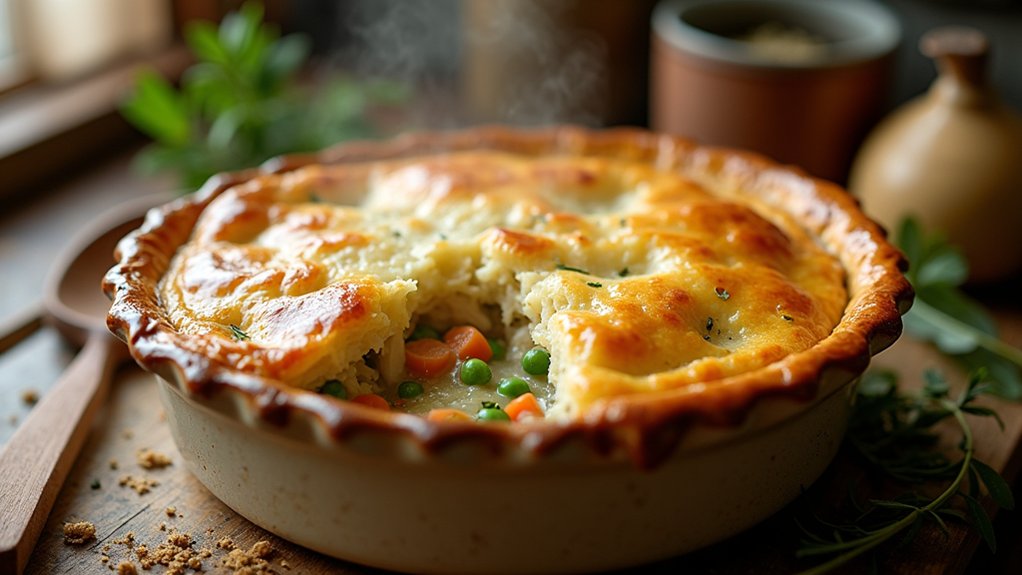
Step 5. Cool Before Serving
Once the timer dings and your chicken pot pie is baked to a gorgeous golden brown, it’s tempting to dive right in, but patience is key! Allowing your pot pie to cool for about 10-15 minutes not only helps avoid burns, but it also enhances the flavor. This brief cooling period allows the filling to set, ensuring each scoop is packed with rich, savory goodness. Plus, the serving temperature will be just right, making every bite a delightful experience. Trust me, it’s worth the wait! As you gather around the table, your perfectly cooled chicken pot pie will be ready to impress, with flavors that have melded beautifully during that short pause. Enjoy the anticipation!
Nutritional Guide

When you’re diving into a comforting dish like chicken pot pie, it’s natural to wonder about its nutritional value. I find that understanding the caloric content and ingredient benefits helps me enjoy my meals even more. Here’s a quick guide to what you’re savoring:
| Ingredient | Calories per Serving | Benefits |
|---|---|---|
| Bisquick | 150 | Quick and easy base |
| Chicken (cooked) | 200 | Lean protein source |
| Mixed Vegetables | 50 | Vitamins and fiber |
| Milk | 100 | Calcium for strong bones |
| Butter | 100 | Flavor enhancer |
Final Thoughts
Cooking a chicken pot pie is more than just preparing a meal; it’s about creating a warm memory that you can share with loved ones. This Easy Bisquick Chicken Pot Pie recipe brings that comfort food feeling right to your kitchen, making it perfect for family dinners. With its flaky crust and savory filling, it’s sure to become a favorite in your household. I love how easy it is to whip up, letting me spend more quality time with my family instead of slaving away in the kitchen. Plus, you can easily customize it with different veggies or spices to keep things fresh and exciting. So, why not gather your loved ones, and let’s make some delicious memories together?
Frequently Asked Questions
Can I Use Frozen Vegetables Instead of Fresh Ones?
I love using frozen vegetables for their convenience and longer shelf life. Just remember to adjust the cooking time slightly, as they may cook faster, ensuring a deliciously innovative meal every time!
How Can I Store Leftover Chicken Pot Pie?
I store leftover chicken pot pie in an airtight container, keeping it fresh. For reheating options, I love using the oven for crispiness, but the microwave works too for quick indulgence. Enjoy your leftovers!
Is There a Gluten-Free Bisquick Option Available?
Yes, there is a gluten-free Bisquick option available! I love using gluten-free alternatives like almond flour or chickpea flour as Bisquick substitutes. They add unique flavors and textures to my favorite recipes. Give them a try!
Can I Add Other Proteins Besides Chicken?
I once swapped chicken for seasoned beef options and it was a hit. You can even try seafood alternatives like shrimp or crab—both add a delicious twist that keeps your meals exciting and innovative!
What Side Dishes Pair Well With Chicken Pot Pie?
I love pairing chicken pot pie with creamy mashed potatoes and a fresh green salad. The rich flavors balance perfectly, and adding some innovative dressings or toppings can elevate the meal even more!
Conclusion
Making this easy Bisquick chicken pot pie is like wrapping your loved ones in a warm hug on a chilly day. Each bite is a reminder of cozy family dinners, where stories and laughter flow as freely as the gravy. I hope you enjoy this recipe as much as I do and that it brings a little warmth to your table. So roll up your sleeves, gather your ingredients, and let’s create some delicious memories together!