

If you’re looking for festive Christmas dinner recipes that spark holiday spirit, let me share some delightful options with you! I love the Herb-Crusted Prime Rib and Honey Glazed Ham, which are perfect centerpiece dishes. Don’t forget the classic Roast Turkey with Cranberry Sauce or the cheerful Fluffy Mashed Potatoes. For dessert, I can’t resist the Chocolate Peppermint Cake and Eggnog Cheesecake. These recipes will surely make your holiday gathering memorable, and there’s so much more to explore!
Herb-Crusted Prime Rib
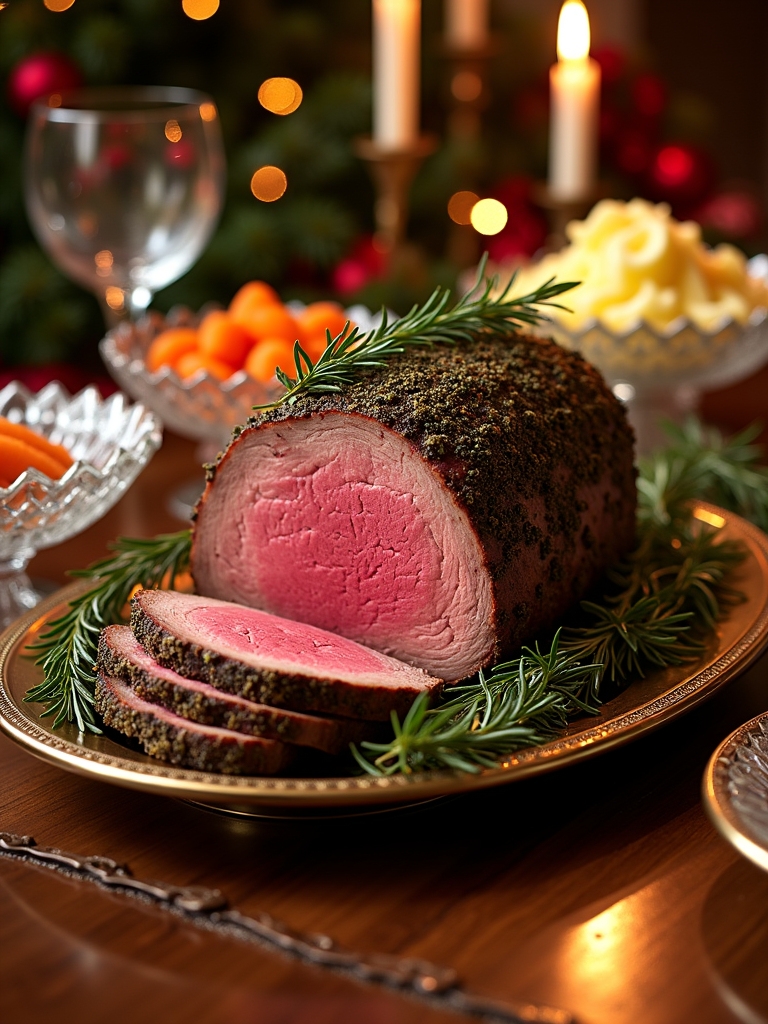
Herb-Crusted Prime Rib is the epitome of holiday indulgence, making it a perfect centerpiece for your Christmas dinner. This flavorful roast is seasoned with a delightful blend of fresh herbs, garlic, and spices that not only enhance its natural richness but also create a beautiful crust when cooked to perfection. The succulent meat, paired with a savory au jus, will have your guests raving about your culinary skills long after the last bite is taken.
Cooking a prime rib may seem intimidating, but with the right preparation and a few simple techniques, you can achieve a restaurant-quality dish right in your own kitchen. The key to a successful herb-crusted prime rib is to start with a high-quality cut of meat and allow it to come to room temperature before roasting. The combination of herbs and garlic not only adds depth of flavor but also creates an aromatic experience that fills your home with the warm scents of the holiday season.
Ingredients:
- 1 (5-7 pound) prime rib roast, bone-in
- 4 tablespoons olive oil
- 4 cloves garlic, minced
- 2 tablespoons fresh rosemary, chopped
- 2 tablespoons fresh thyme, chopped
- 2 tablespoons fresh parsley, chopped
- 2 tablespoons Dijon mustard
- Salt and pepper, to taste
- 2 cups beef broth (for au jus)
Cooking Instructions:
Preheat your oven to 450°F (232°C). In a small bowl, mix together the olive oil, minced garlic, rosemary, thyme, parsley, Dijon mustard, salt, and pepper to form a paste. Rub this mixture all over the prime rib, making sure it’s well coated on all sides. Place the roast, bone side down, on a rack in a roasting pan. Roast in the preheated oven for 20 minutes to develop a crust, then reduce the temperature to 325°F (163°C) and continue cooking until the internal temperature reaches your desired doneness (about 130°F for medium-rare), typically 1.5 to 2 hours. Remove from the oven and let it rest for 20-30 minutes before slicing to allow the juices to redistribute.
Extra Tips:
When cooking prime rib, it’s important to invest in a reliable meat thermometer to confirm you hit the perfect internal temperature without overcooking. Always allow the roast to rest after cooking; this step is vital as it helps retain the juices and enhances the tenderness of the meat. Additionally, consider making a simple au jus by deglazing the roasting pan with beef broth after the roast is done, scraping up any flavorful bits stuck to the bottom for added richness. Enjoy your herb-crusted prime rib with sides that complement its bold flavors, such as garlic mashed potatoes or roasted vegetables.
Honey Glazed Ham
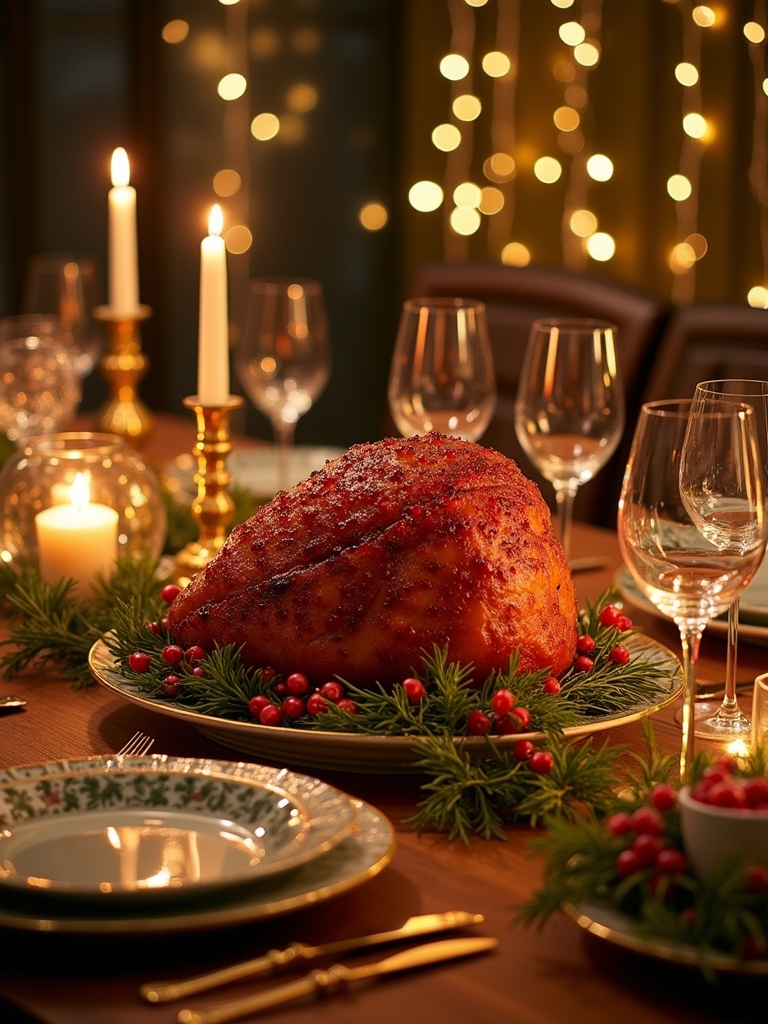
Honey glazed ham is a classic centerpiece for any Christmas dinner, bringing a sweet and savory flavor that delights guests of all ages. The combination of honey, brown sugar, and warm spices creates a beautiful glaze that caramelizes during cooking, resulting in a beautifully golden exterior and a tender, juicy interior. This dish not only fills your home with an irresistible aroma but also provides a wonderful contrast to traditional holiday sides, making it a must-have for festive feasts.
Preparing honey glazed ham is simpler than you might think, and it can be made ahead of time to reduce stress on the big day. Whether you choose to use a pre-cooked ham or a raw one, the key to success lies in the slow cooking process and the application of the glaze. With just a few ingredients and a little patience, you’ll have a show-stopping main dish that will be the highlight of your holiday table.
Ingredients:
- 1 fully cooked bone-in ham (about 8-10 pounds)
- 1 cup honey
- 1 cup brown sugar
- 1 teaspoon ground cinnamon
- 1 teaspoon ground cloves
- 1 teaspoon ground ginger
- 1/4 teaspoon black pepper
- 1/4 cup Dijon mustard
- 1/4 cup apple cider vinegar
- Whole cloves (optional, for garnishing)
Cooking Instructions:
Preheat your oven to 325°F (165°C). Place the ham in a roasting pan and score the surface in a diamond pattern, making shallow cuts about 1 inch apart. In a medium bowl, combine honey, brown sugar, cinnamon, cloves, ginger, black pepper, Dijon mustard, and apple cider vinegar to create the glaze. Brush about half of the glaze over the ham, making sure to get it into the scored cuts for maximum flavor. Cover the ham loosely with aluminum foil and bake for about 1.5 to 2 hours, basting with the remaining glaze every 30 minutes. Remove the foil for the final 30 minutes of cooking to allow the glaze to caramelize. The internal temperature should reach 140°F (60°C) when done.
Extra Tips:
For an even more flavorful ham, consider adding a few whole cloves into the scored sections of the meat before glazing. This will infuse the ham with additional aromatic flavors. If you want to make it a day ahead, you can prepare the glaze and score the ham, then refrigerate it overnight. Just make sure to bring it back to room temperature before baking. Ultimately, if you have leftovers, honey glazed ham makes delicious sandwiches or can be used in soups and salads, ensuring none of that delightful flavor goes to waste!
Roast Turkey With Cranberry Sauce
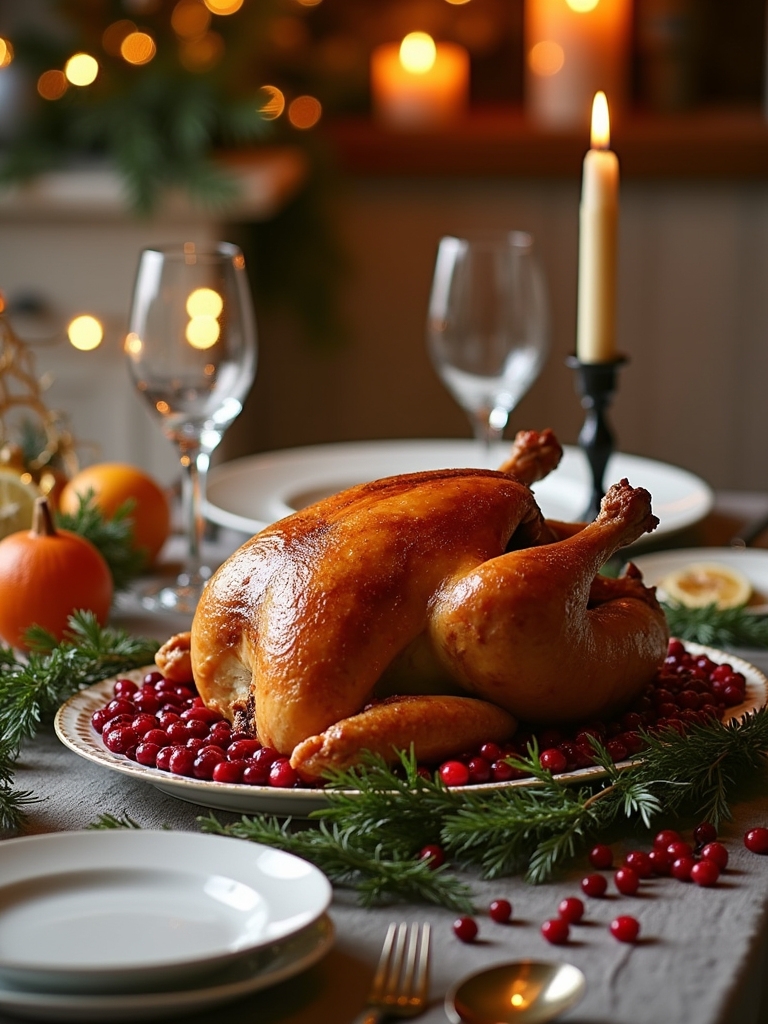
Roast turkey with cranberry sauce is a classic centerpiece for any Christmas dinner, bringing warmth and festivity to your holiday table. The succulent turkey, seasoned to perfection, pairs beautifully with the tart and sweet cranberry sauce, creating an unforgettable combination of flavors that delight the senses. Whether you are hosting a large gathering or simply enjoying a cozy meal with family, this dish is sure to impress and satisfy.
To achieve the perfect roast turkey, it is crucial to start with high-quality ingredients and allow ample time for cooking. Brining the turkey overnight can enhance its moisture and flavor, ensuring that each bite is juicy and tender. As the turkey roasts, the aroma will fill your home, evoking the spirit of the season and creating lasting memories around the dinner table.
Ingredients:
- 1 whole turkey (12-14 pounds)
- 1 cup unsalted butter, softened
- 2 tablespoons salt
- 1 tablespoon black pepper
- 1 tablespoon garlic powder
- 1 tablespoon onion powder
- 1 tablespoon dried thyme
- 1 tablespoon dried rosemary
- 1 tablespoon dried sage
- 4 cups chicken broth
- 2 cups fresh cranberries
- 1 cup sugar
- 1 cup orange juice
- Zest of 1 orange
- 1/2 cup water
Cooking Instructions:
Preheat your oven to 325°F (165°C). Rinse the turkey under cold water and pat it dry with paper towels. In a bowl, mix the softened butter with salt, pepper, garlic powder, onion powder, thyme, rosemary, and sage. Carefully loosen the skin of the turkey and spread the butter mixture underneath to keep the meat moist during cooking. Place the turkey in a roasting pan, breast side up, and pour the chicken broth into the bottom of the pan. Roast the turkey for about 13-15 minutes per pound, or until the internal temperature reaches 165°F (74°C) in the thickest part of the breast. Meanwhile, in a saucepan, combine the cranberries, sugar, orange juice, zest, and water. Bring to a boil, then simmer for 10-15 minutes until the cranberries burst and the sauce thickens. Serve the turkey with the homemade cranberry sauce on the side.
Extra Tips:
For an even more flavorful turkey, consider brining it overnight in a mixture of water, salt, sugar, and your favorite herbs. This will help to infuse moisture and flavor into the meat. Additionally, allow the turkey to rest for at least 30 minutes after roasting before carving; this will help the juices redistribute and result in a more succulent turkey. Don’t forget to save the pan drippings to make a delicious gravy!
Garlic Butter Roasted Chicken
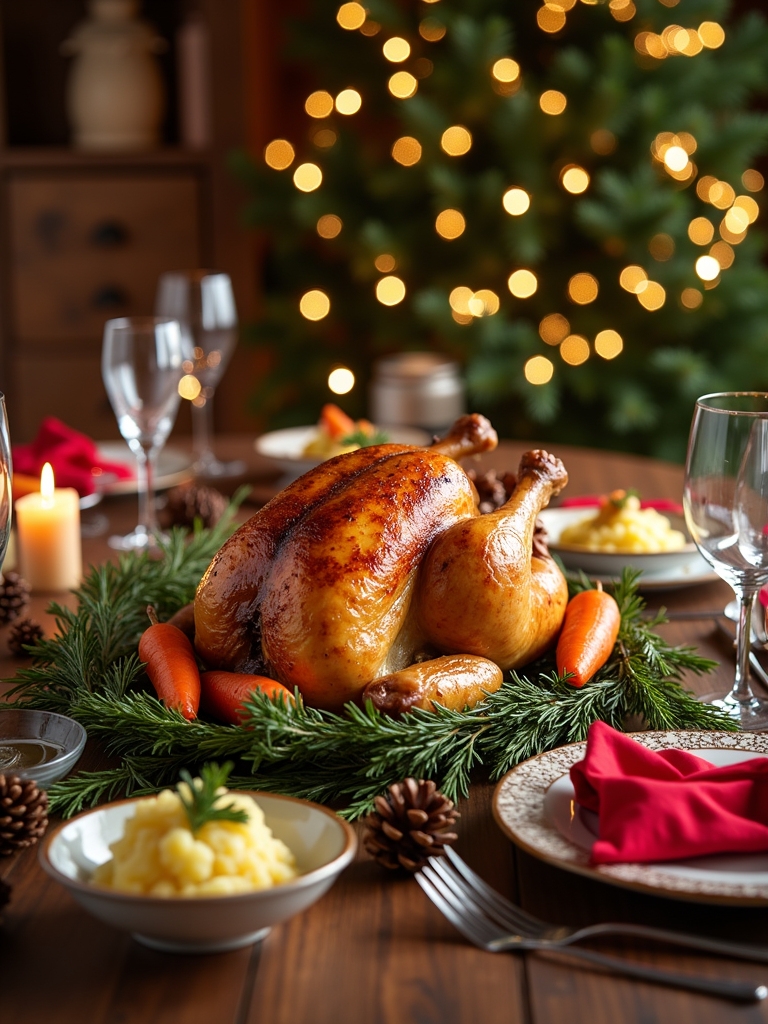
Garlic Butter Roasted Chicken is a classic dish that embodies the warmth and joy of the holiday season. This succulent chicken, infused with aromatic garlic and rich butter, makes for an impressive centerpiece at any Christmas dinner. The combination of crispy skin and moist, flavorful meat is sure to delight your family and guests, leaving them keen for more. With a few simple ingredients and steps, you can create a meal that not only tastes incredible but also fills your home with enticing aromas.
To achieve the perfect Garlic Butter Roasted Chicken, it’s vital to select a high-quality bird. Look for a free-range or organic chicken for the best flavor. The key to this dish is the garlic butter, which not only enhances the chicken’s taste but also helps to achieve a beautiful golden-brown finish. Paired with seasonal sides like roasted vegetables or mashed potatoes, this dish will surely elevate your Christmas dinner to a memorable feast.
Ingredients:
- 1 whole chicken (about 4-5 pounds)
- 1/2 cup unsalted butter, softened
- 1 head of garlic, cloves separated and peeled
- 2 tablespoons fresh rosemary, chopped
- 2 tablespoons fresh thyme, chopped
- 1 lemon, halved
- Salt and pepper to taste
- Olive oil (for drizzling)
- Fresh parsley (for garnish)
To prepare the Garlic Butter Roasted Chicken, preheat your oven to 425°F (220°C). In a bowl, mix the softened butter with the chopped rosemary, thyme, minced garlic (reserve a few cloves for inside the chicken), salt, and pepper. Pat the chicken dry with paper towels and season the cavity generously with salt and pepper. Stuff the cavity with the halved lemon, reserved garlic cloves, and any leftover herbs. Gently loosen the skin of the chicken and spread the garlic butter mixture under the skin and all over the outside. Place the chicken in a roasting pan and drizzle with olive oil. Roast in the preheated oven for about 1 hour and 15 minutes, or until the internal temperature reaches 165°F (75°C) and the juices run clear. Let the chicken rest for 10-15 minutes before carving and serving.
When cooking Garlic Butter Roasted Chicken, it’s important to let the chicken rest after roasting to allow the juices to redistribute, ensuring a juicy result. You can also experiment with different herbs or add vegetables like potatoes and carrots to the roasting pan for a complete one-pan meal. Additionally, using a meat thermometer is the best way to guarantee perfect doneness without overcooking. Finally, don’t forget to save the leftover carcass for making a rich homemade chicken stock! Enjoy your festive feast!
Beef Wellington
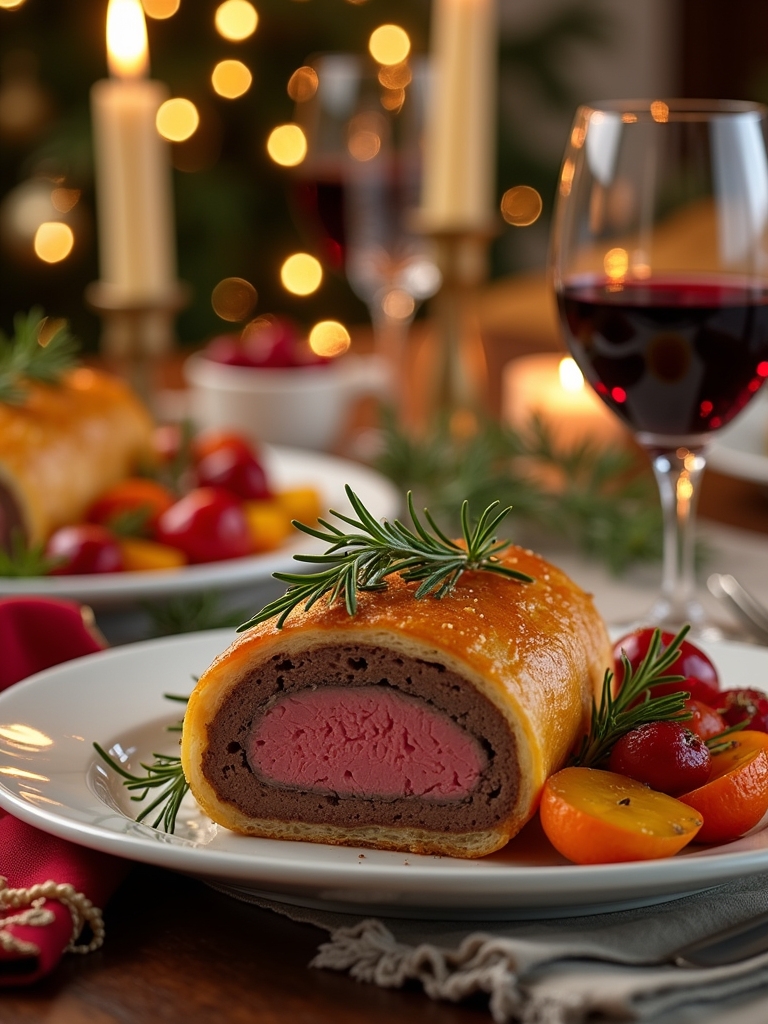
Beef Wellington is a classic dish that embodies the spirit of holiday feasting, often served as the centerpiece of Christmas dinner. This luxurious dish features a tender beef fillet coated in a rich mushroom duxelles and wrapped in flaky puff pastry. The combination of flavors and textures creates a memorable meal that is sure to impress your guests. Although it may seem intimidating to prepare, with a bit of care and attention, you can create a show-stopping Beef Wellington that will elevate your festive gathering.
The key to a successful Beef Wellington lies in the quality of the beef and the preparation of the duxelles. Choosing a well-marbled cut of beef, such as filet mignon, guarantees tenderness and flavor, while the mushroom mixture adds depth and richness. The pastry shell should be golden and crisp to contrast the succulent meat inside. Preparing each component with precision and assembling them properly will result in a beautifully cooked dish with a stunning presentation.
The secret to Beef Wellington’s success is high-quality beef and expertly prepared duxelles, ensuring a stunning and flavorful dish.
Ingredients:
- 2 lb beef tenderloin (filet mignon)
- Salt and pepper, to taste
- 2 tablespoons olive oil
- 8 oz cremini or button mushrooms, finely chopped
- 2 tablespoons Dijon mustard
- 8 slices prosciutto
- 1 sheet of puff pastry (thawed if frozen)
- 1 egg, beaten (for egg wash)
- Fresh thyme leaves (optional, for garnish)
Instructions:
Begin by preheating your oven to 400°F (200°C). Season the beef tenderloin generously with salt and pepper. In a large skillet, heat the olive oil over medium-high heat and sear the beef on all sides until browned, about 2-3 minutes per side. Remove from heat and let it cool. In the same skillet, add the chopped mushrooms and sauté until the moisture has evaporated and the mixture is dry. Stir in the Dijon mustard and allow it to cool before proceeding. Lay out the prosciutto slices on a sheet of plastic wrap, slightly overlapping, and spread the mushroom mixture over the prosciutto. Place the beef on top of the mushrooms and roll tightly using the plastic wrap to form a log. Chill in the refrigerator for 15-20 minutes. Roll out the puff pastry on a floured surface and wrap it around the beef, sealing the edges. Brush with egg wash and cut a few slits on top for steam to escape. Bake for 25-30 minutes or until the pastry is golden brown and an internal temperature of 125°F (52°C) is reached for medium-rare. Let rest for 10 minutes before slicing.
Extra Tips:
When preparing Beef Wellington, it’s essential to confirm that your mushroom duxelles is as dry as possible to prevent soggy pastry. Additionally, consider using a meat thermometer to verify accurate cooking temperatures and achieve your desired doneness. If you want to add more flavor, you can incorporate other herbs or spices into the mushroom mixture. Finally, let the Beef Wellington rest before slicing to allow the juices to redistribute, guaranteeing a tender and juicy serving.
Vegan Stuffed Butternut Squash

Vegan stuffed butternut squash is a delightful and hearty dish that perfectly embodies the flavors of the holiday season. This recipe showcases the natural sweetness of roasted butternut squash, complemented by a savory filling of quinoa, cranberries, nuts, and aromatic spices. Not only is it visually stunning when served, but it is also a nutritious option that is sure to satisfy both vegans and non-vegans alike at your Christmas dinner.
Preparing this dish is straightforward and requires minimal ingredients, making it an excellent choice for both novice cooks and seasoned chefs. The butternut squash serves as the edible vessel, while the stuffing is packed with protein, fiber, and an array of flavors. This vegan stuffed butternut squash is not only a healthy alternative but also a festive centerpiece that adds warmth and color to your holiday table.
Ingredients:
- 2 medium butternut squashes
- 1 cup quinoa, rinsed
- 2 cups vegetable broth or water
- 1 cup cooked chickpeas (canned or freshly cooked)
- 1/2 cup dried cranberries
- 1/2 cup chopped walnuts or pecans
- 1 small onion, diced
- 2 cloves garlic, minced
- 1 teaspoon ground cinnamon
- 1 teaspoon ground nutmeg
- Salt and pepper to taste
- Olive oil for drizzling
- Fresh parsley for garnish (optional)
To begin, preheat your oven to 400°F (200°C). Cut the butternut squashes in half lengthwise and scoop out the seeds. Drizzle the insides with olive oil and season with salt and pepper. Place the squash halves cut-side down on a baking sheet and roast for about 30-35 minutes, or until tender. While the squash is roasting, cook the quinoa in vegetable broth or water according to package instructions. In a skillet, sauté the onion and garlic until translucent, then add the cooked quinoa, chickpeas, cranberries, nuts, cinnamon, nutmeg, salt, and pepper. Mix well to combine and heat through. Once the squash is done, flip them over and fill each half with the quinoa mixture. Return to the oven for another 10-15 minutes to warm everything through.
When preparing vegan stuffed butternut squash, consider using different grains or nuts to customize the flavor profile. For added richness, you can include sautéed mushrooms or spinach in the filling. Additionally, feel free to experiment with herbs and spices—adding fresh thyme or rosemary can elevate the dish further. Don’t forget to let the stuffed squash cool slightly before serving, ensuring that the flavors meld beautifully. Enjoy this comforting and festive dish as part of your Christmas feast!
Creamy Mushroom Risotto
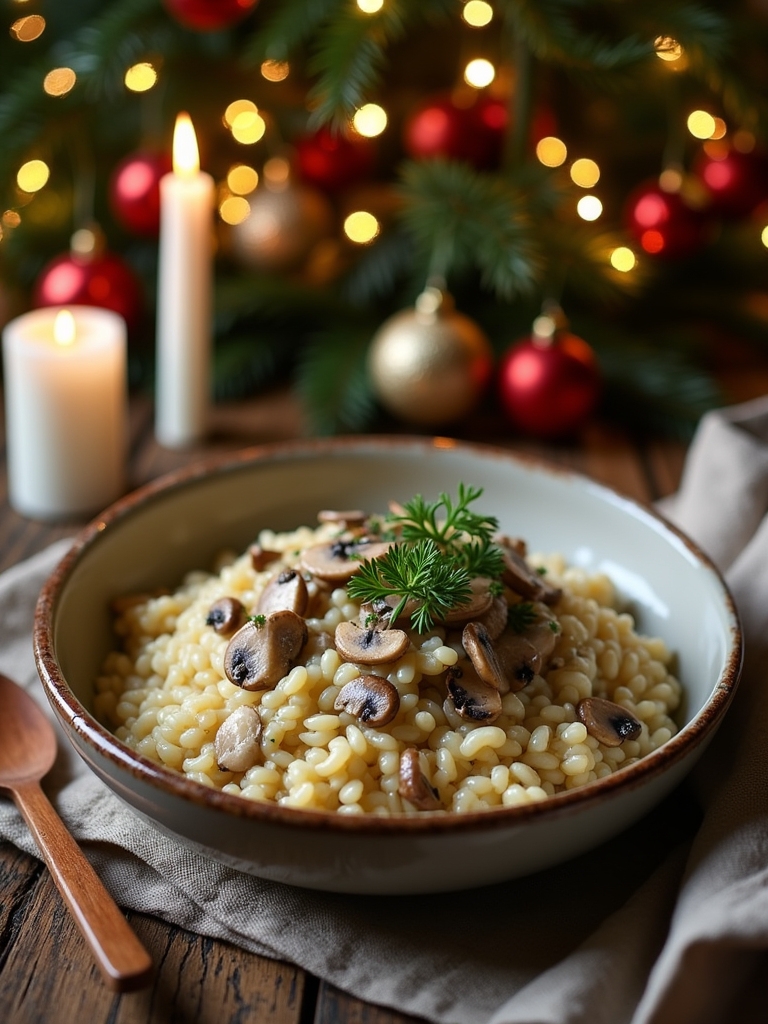
Creamy Mushroom Risotto is a delightful dish that brings warmth and comfort to any Christmas dinner table. This Italian classic features creamy Arborio rice cooked slowly to perfection with a medley of earthy mushrooms, creating a rich and satisfying flavor profile. The slow cooking process allows the rice to absorb all the fragrant broth, resulting in a dish that is both creamy and delicious, perfect for impressing your guests.
To elevate this risotto, you can use a variety of mushrooms such as cremini, shiitake, or even wild mushrooms for an added depth of flavor. The combination of garlic, onion, and freshly grated Parmesan cheese brings everything together, making this dish a luxurious addition to your holiday feast. Serve it as a side dish or as a main course for a vegetarian option that everyone will love.
Elevate your risotto with a medley of mushrooms and fresh herbs for a luxurious, crowd-pleasing holiday dish.
Ingredients:
- 1 cup Arborio rice
- 4 cups vegetable or chicken broth
- 1 cup sliced mushrooms (such as cremini or shiitake)
- 1 small onion, finely chopped
- 2 cloves garlic, minced
- 1/2 cup dry white wine
- 1/2 cup grated Parmesan cheese
- 2 tablespoons olive oil
- 2 tablespoons unsalted butter
- Salt and pepper to taste
- Fresh parsley, chopped (for garnish)
To prepare the Creamy Mushroom Risotto, begin by heating the vegetable or chicken broth in a saucepan and keep it warm on low heat. In a large skillet, heat the olive oil and 1 tablespoon of butter over medium heat. Add the chopped onion and sauté until translucent, about 5 minutes. Stir in the garlic and mushrooms, cooking until the mushrooms are tender. Add the Arborio rice to the skillet, stirring to coat the rice with the oil and sauté for about 2 minutes. Pour in the white wine and cook until it is mostly absorbed. Begin adding the warm broth one ladle at a time, stirring continuously, until each addition is absorbed before adding the next. This process should take about 20-25 minutes, until the rice is creamy and al dente. Ultimately, stir in the remaining butter and grated Parmesan cheese, seasoning with salt and pepper to taste.
When making Creamy Mushroom Risotto, patience is key. Stirring continuously helps release the starches from the rice, creating that coveted creamy texture. If you prefer a thicker risotto, feel free to add a bit more broth until you reach your desired consistency. For added flavor, consider incorporating fresh herbs like thyme or rosemary. Finally, serving the risotto immediately after cooking guarantees that it retains its creamy texture, so plan to have your guests ready to enjoy it as soon as it’s done!
Maple-Glazed Brussels Sprouts
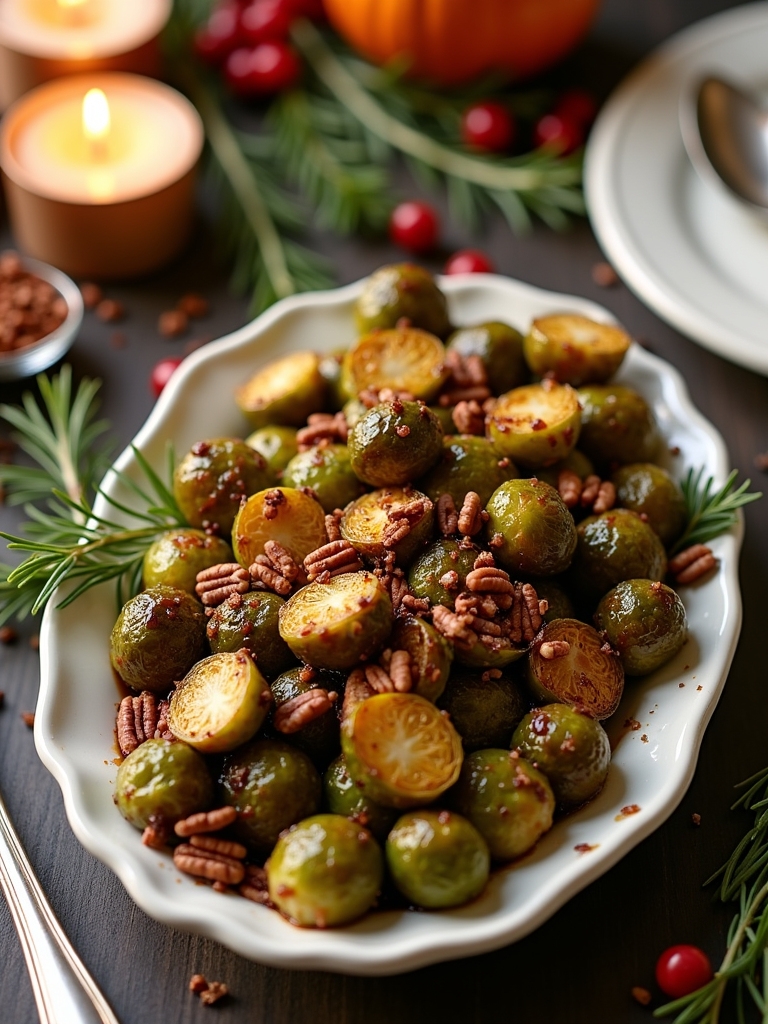
Maple-glazed Brussels sprouts are a delightful side dish that can elevate any Christmas dinner table. The combination of the earthy, nutty flavor of Brussels sprouts with the sweetness of maple syrup creates a perfect balance that will have everyone asking for seconds. This recipe offers a simple yet delicious way to prepare Brussels sprouts, making them appealing to both veggie lovers and skeptics alike.
To achieve the best results, it’s essential to select fresh Brussels sprouts. Look for firm, bright green sprouts that are tightly packed. This dish is not only easy to prepare but also provides a nutritious addition to your holiday meal. The maple glaze adds a festive touch and enhances the natural flavors of the sprouts, ensuring they are a hit with family and friends.
Ingredients:
- 1 pound Brussels sprouts
- 2 tablespoons olive oil
- Salt and pepper, to taste
- 1/4 cup pure maple syrup
- 1 tablespoon balsamic vinegar
- 1/4 teaspoon red pepper flakes (optional)
- 1/4 cup chopped pecans (optional)
Instructions:
Preheat your oven to 400°F (200°C). Begin by trimming the ends of the Brussels sprouts and removing any damaged leaves. Cut the sprouts in half and place them in a large bowl. Drizzle with olive oil, and season with salt and pepper, tossing to coat evenly. Spread the Brussels sprouts out on a baking sheet in a single layer and roast in the preheated oven for about 20-25 minutes, until they are tender and caramelized. While they are roasting, whisk together the maple syrup, balsamic vinegar, and red pepper flakes in a small bowl. Once the Brussels sprouts are done, remove them from the oven and drizzle the maple mixture over the top, tossing to combine. If desired, sprinkle with chopped pecans before serving.
Extra Tips:
For an added layer of flavor, consider roasting the Brussels sprouts with some minced garlic or shallots for the last 10 minutes of cooking. You can also adjust the sweetness of the glaze by adding more or less maple syrup, depending on your taste preferences. If you prefer a crunchier texture, roast the sprouts a bit longer or give them a quick broil at the end to achieve that perfect golden-brown finish. Enjoy this dish warm, as it pairs beautifully with a variety of main courses, enhancing your festive dining experience.
Classic Green Bean Casserole
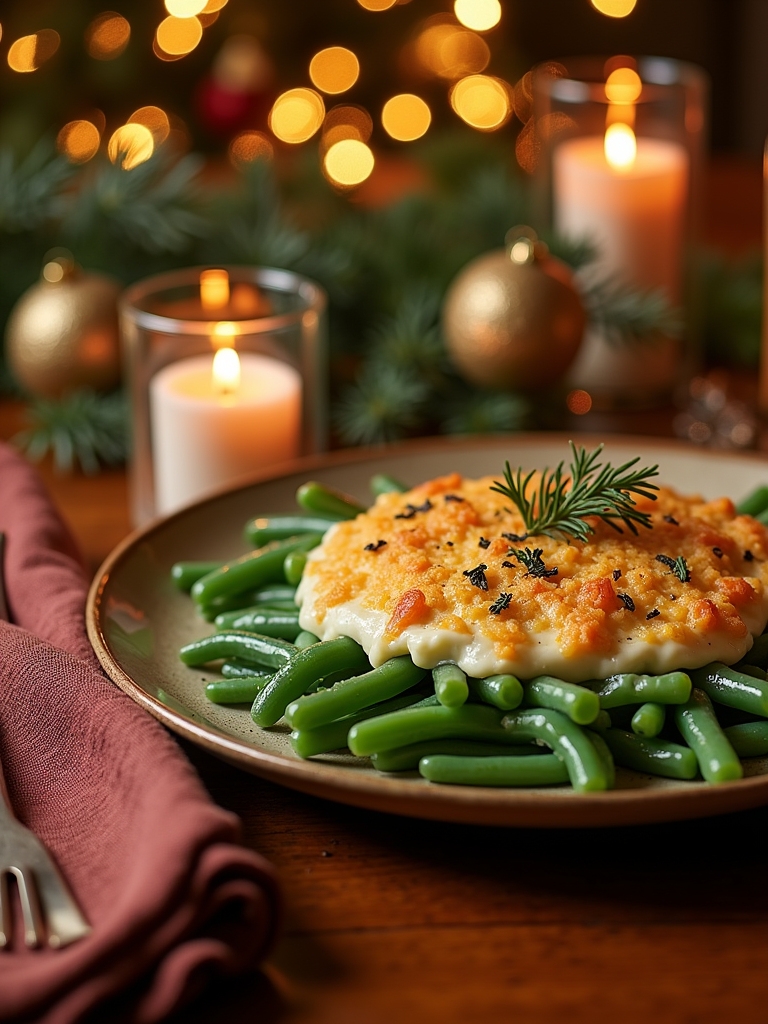
Classic Green Bean Casserole is a beloved holiday dish that has become a staple at Christmas dinner tables across the country. This creamy, savory casserole features tender green beans mixed with a rich mushroom sauce and topped with crispy fried onions. The combination of textures and flavors makes it the perfect side dish to accompany your holiday feast, bringing warmth and comfort to your gathering.
Making this dish is not only simple but also a great way to incorporate some green vegetables into your holiday spread. With its easy preparation, you can focus your energy on other festive preparations while still impressing your guests with a classic recipe that never goes out of style. This green bean casserole can be made ahead of time and baked just before serving, making it a convenient option for busy holiday cooks.
Ingredients:
- 4 cups fresh green beans, trimmed and cut into 2-inch pieces
- 1 can (10.5 oz) cream of mushroom soup
- ½ cup milk
- 1 teaspoon soy sauce
- 1 cup French fried onions, divided
- 1 cup shredded cheddar cheese (optional)
- Salt and pepper to taste
To prepare the casserole, preheat your oven to 350°F (175°C). In a large pot of boiling water, blanch the green beans for about 5 minutes until they are bright green and slightly tender, then drain and set aside. In a mixing bowl, combine the cream of mushroom soup, milk, soy sauce, and half of the French fried onions. Stir in the blanched green beans and, if desired, the shredded cheddar cheese. Season with salt and pepper to taste. Pour the mixture into a greased 1.5-quart baking dish and bake uncovered for approximately 25 minutes. In the last 5 minutes of cooking, sprinkle the remaining French fried onions on top and return to the oven until they are golden brown.
When making Classic Green Bean Casserole, it’s important to be mindful of the texture of the green beans. Blanching them briefly before adding them to the casserole helps retain their vibrant color and crunch. If you prefer a healthier version, you can substitute the cream of mushroom soup with a homemade sauce made from sautéed mushrooms, garlic, and cream. Additionally, feel free to experiment with different toppings such as crispy bacon or panko breadcrumbs for added flavor and crunch. Enjoy your holiday meal!
Sweet Potato Casserole With Marshmallows
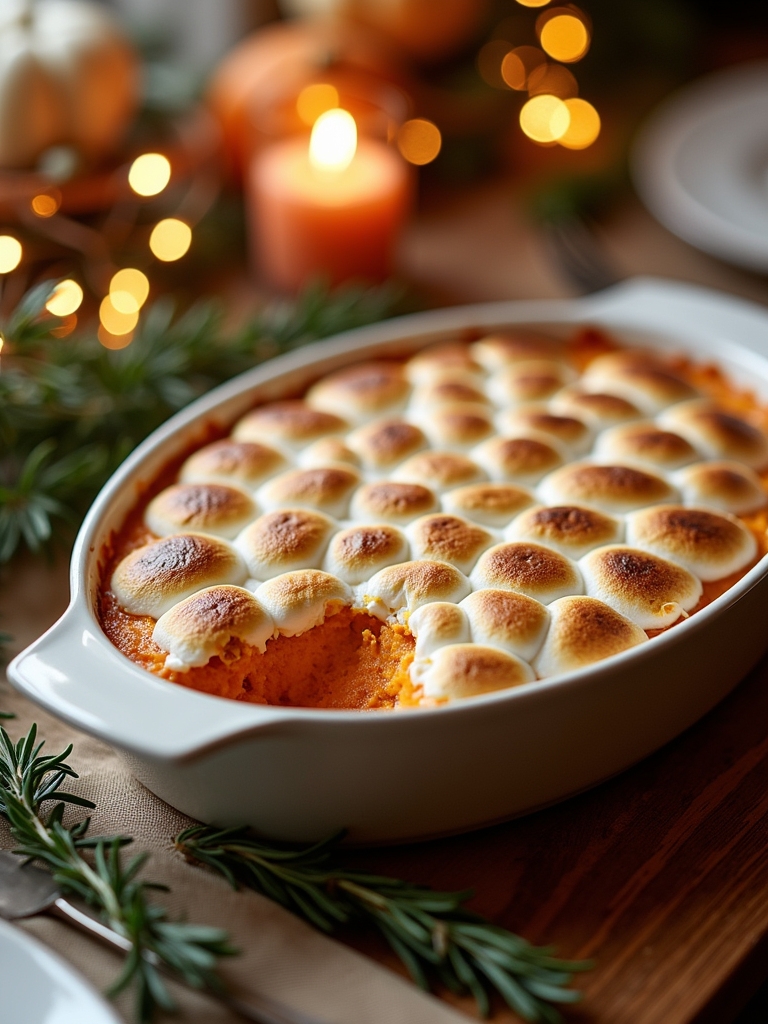
Sweet Potato Casserole with Marshmallows is a delightful dish that brings a touch of sweetness to your holiday table. This classic recipe combines the natural flavors of sweet potatoes with a creamy, buttery mixture and is topped with fluffy marshmallows that melt into a gooey layer of sweetness. It’s a comforting side that pairs perfectly with savory proteins like turkey or ham, making it a staple during Christmas dinner.
Preparing this casserole is a breeze, and it’s a great way to incorporate a nutritious vegetable into your festive spread. The vibrant orange color of sweet potatoes not only adds visual appeal but also packs a nutritional punch, being rich in vitamins and minerals. Whether you’re making this for a family gathering or a potluck, it’s sure to impress your guests and leave them asking for seconds.
This easy casserole showcases the vibrant orange sweet potatoes, adding both nutrition and visual appeal to your holiday spread.
Ingredients:
- 4 large sweet potatoes
- 1/2 cup granulated sugar
- 1/2 cup milk
- 1/4 cup unsalted butter, melted
- 1 teaspoon vanilla extract
- 1/2 teaspoon ground cinnamon
- 1/4 teaspoon salt
- 2 cups mini marshmallows
Cooking Instructions:
First, preheat your oven to 350°F (175°C). Begin by peeling and cubing the sweet potatoes, then place them in a large pot of boiling water. Cook until tender, about 15-20 minutes, then drain and mash the sweet potatoes in a large mixing bowl. Add in the sugar, milk, melted butter, vanilla extract, cinnamon, and salt, mixing until smooth and well-combined. Transfer the sweet potato mixture to a greased baking dish, smoothing the top with a spatula. Bake in the preheated oven for 25 minutes, then remove and evenly spread the mini marshmallows on top. Return to the oven and bake for an additional 10-15 minutes, or until the marshmallows are golden brown and bubbly.
Extra Tips:
For an added layer of flavor, consider adding chopped pecans or walnuts to the sweet potato mixture before baking, which will give it a nice crunch. If you prefer a less sugary version, you can reduce the amount of sugar or use a sugar substitute. Additionally, make sure to watch the marshmallows closely during the final baking stage, as they can burn quickly. Enjoy your Sweet Potato Casserole with Marshmallows warm, and don’t hesitate to make it ahead of time; it can be assembled a day before and baked just before serving!
Cranberry-Orange Relish
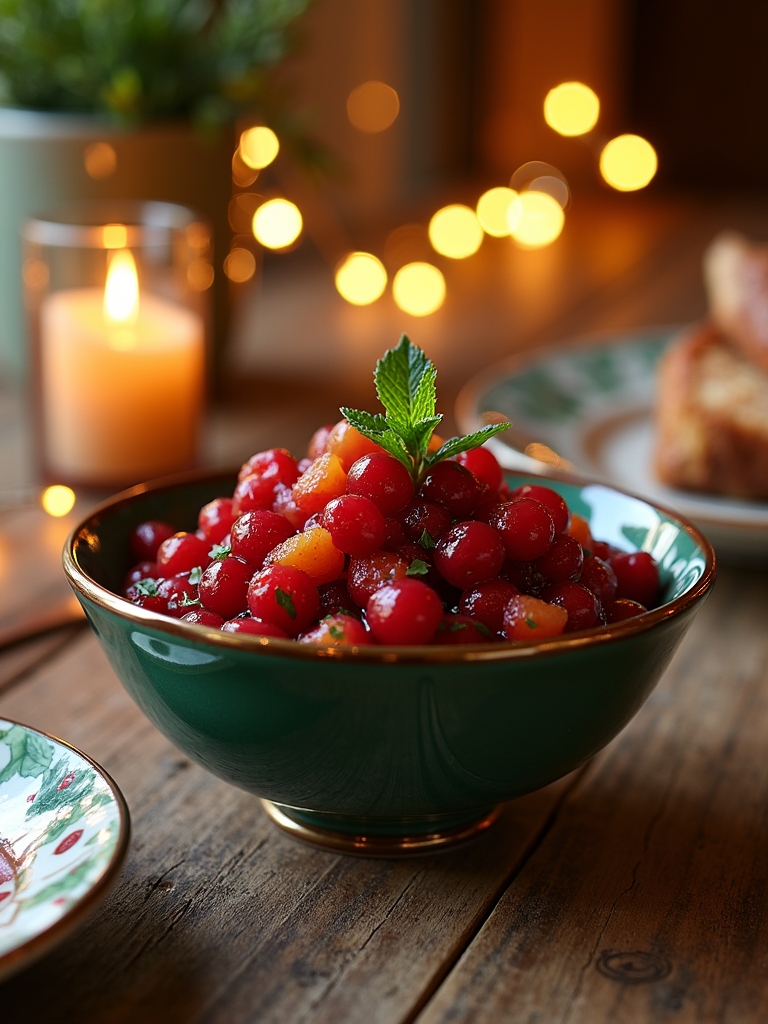
Cranberry-Orange Relish is a vibrant and invigorating addition to your Christmas dinner table. This zesty side dish beautifully balances the tartness of fresh cranberries with the sweet and citrusy notes of orange, creating a delightful contrast that enhances any holiday meal. It not only adds a pop of color to your spread but also provides a bright flavor that can cut through the richness of traditional holiday dishes.
Making cranberry-orange relish is incredibly simple and can be prepared in advance, allowing you to save time on the day of your festive gathering. This no-cook recipe requires just a few ingredients and a food processor or blender to achieve a chunky texture that bursts with flavor. Serve it chilled or at room temperature, and watch as it becomes a favorite among family and guests alike!
Ingredients:
- 12 ounces fresh cranberries
- 1 medium orange (with peel, cut into quarters)
- 1 cup granulated sugar
- 1/2 cup chopped walnuts (optional)
- 1/4 teaspoon ground cinnamon (optional)
Cooking Instructions:
In a food processor, combine the fresh cranberries and orange quarters, ensuring to include the peel for added flavor. Pulse until the mixture is coarsely chopped but not puréed. Transfer the mixture to a mixing bowl and stir in the granulated sugar, mixing well to incorporate. If desired, fold in the chopped walnuts and ground cinnamon for added texture and warmth. Cover and refrigerate the relish for at least an hour before serving to allow the flavors to meld.
Extra Tips:
For a unique twist, consider adding a splash of fresh lemon juice or a hint of ginger to the relish for extra zing. If you prefer a sweeter relish, feel free to adjust the sugar to your taste. This dish can be made up to a week in advance, making it a perfect make-ahead option for your holiday festivities. Just remember to give it a good stir before serving, as the flavors will continue to develop while it sits in the refrigerator!
Festive Winter Salad
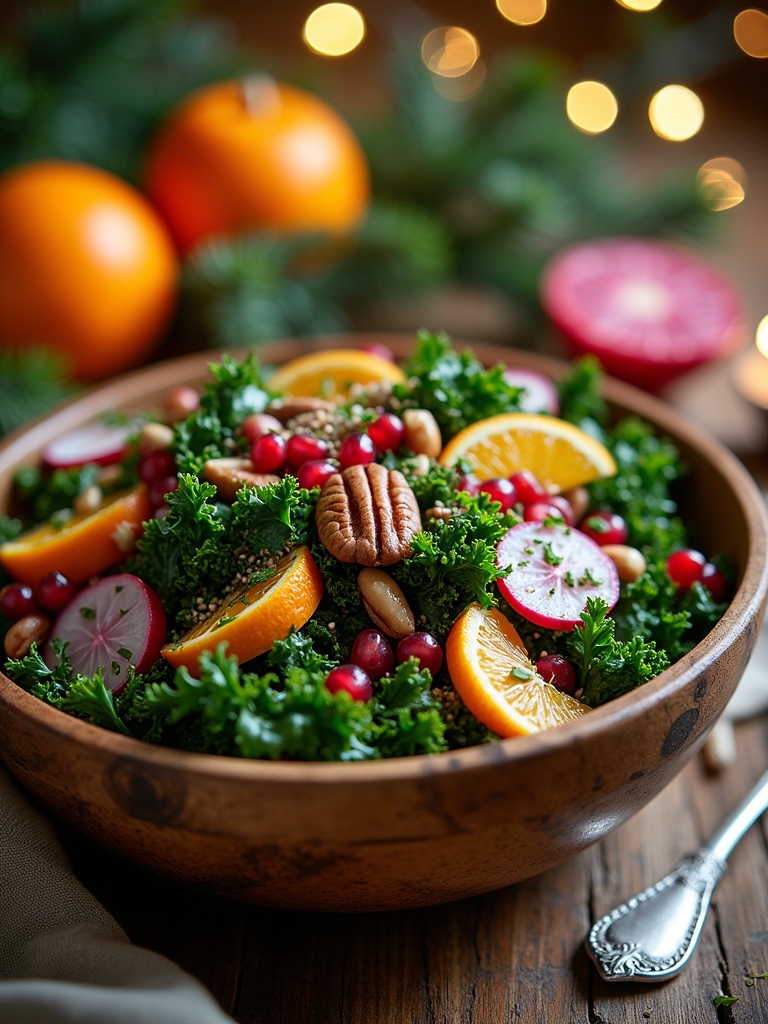
As the holiday season approaches, there’s nothing quite like a vibrant, new salad to brighten up your Christmas dinner table. A Festive Winter Salad combines seasonal ingredients that not only look stunning but also pack a punch of flavor. Crisp greens serve as the base, while roasted nuts, dried fruits, and a zesty dressing elevate this dish, making it a perfect complement to heavier holiday fare like turkey and stuffing.
This salad is not only beautiful but also versatile; you can easily adjust the ingredients based on what you have on hand or your personal preferences. The combination of textures and flavors, from the crunchy nuts to the sweet-tart cranberries, creates a revitalizing contrast that will have your guests coming back for more. It’s an ideal dish to prepare ahead of time, allowing you to enjoy the festivities without being stuck in the kitchen.
Ingredients
- 4 cups mixed salad greens (such as arugula, spinach, and kale)
- 1 cup roasted butternut squash, cubed
- ½ cup dried cranberries
- ½ cup crumbled feta cheese
- ½ cup candied pecans or walnuts
- 1 small red onion, thinly sliced
- ¼ cup pomegranate seeds
- 3 tablespoons olive oil
- 2 tablespoons balsamic vinegar
- 1 tablespoon honey
- Salt and pepper to taste
In a large bowl, combine the mixed salad greens, roasted butternut squash, dried cranberries, feta cheese, candied pecans, red onion, and pomegranate seeds. In a small bowl, whisk together the olive oil, balsamic vinegar, honey, salt, and pepper until well combined. Drizzle the dressing over the salad and toss gently to coat all the ingredients evenly. Serve immediately or chill for up to an hour to let the flavors meld.
When preparing your Festive Winter Salad, consider that the newness of your ingredients is key to achieving vibrant flavors. You can roast the butternut squash a day in advance to save time, and feel free to substitute other seasonal ingredients like apple slices or citrus segments for a different twist. To maintain the best texture, keep the dressing separate until just before serving, and toss the salad gently to avoid bruising the greens. Enjoy your festive feast!
Fluffy Mashed Potatoes
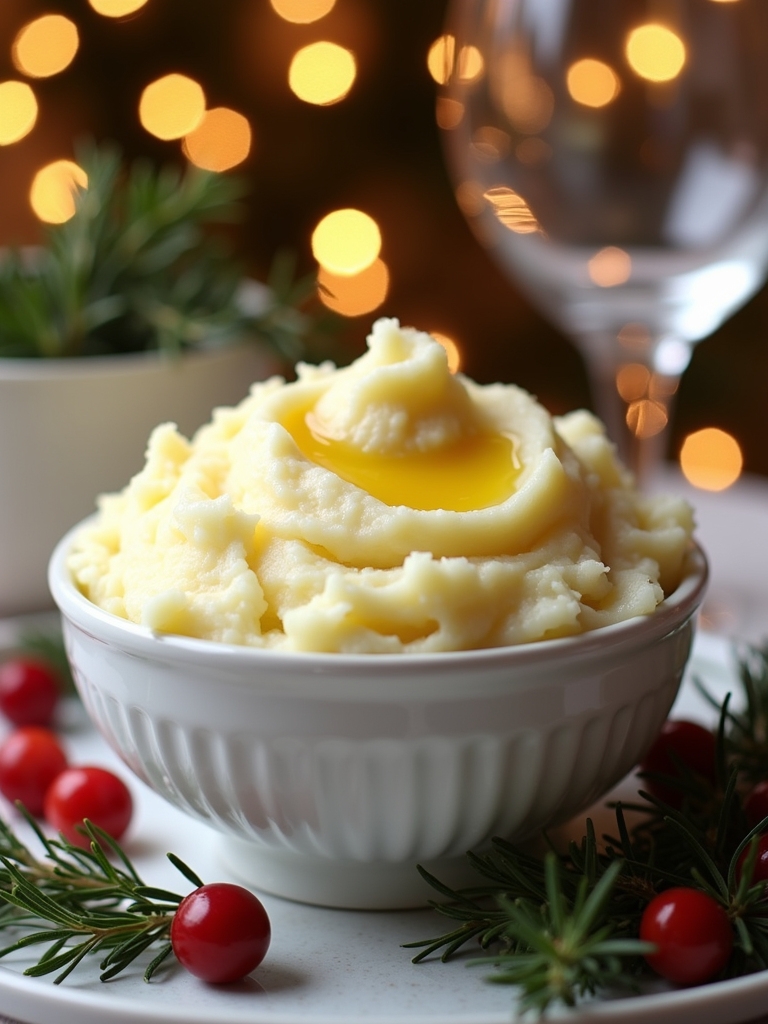
Fluffy mashed potatoes are a classic side dish that can elevate any Christmas dinner. The secret to achieving that light, airy texture lies in the proper cooking and mashing techniques. Using the right type of potatoes and ensuring they are cooked just right will lead to the perfect fluffy consistency that everyone loves. Whether you serve them with rich gravy or enjoy them simply with butter, these mashed potatoes are sure to be a hit at your holiday table.
Fluffy mashed potatoes are the ultimate side dish that can transform any Christmas dinner into a memorable feast.
To make the fluffiest mashed potatoes, it’s essential to choose starchy potatoes like Russets or Yukon Golds. These varieties break down easily when cooked and produce a creamy texture. For added flavor, you can incorporate ingredients such as garlic or cream, but the key is to avoid overworking the potatoes during the mashing process. Follow this recipe for an irresistible side dish that will have everyone coming back for seconds.
Ingredients:
- 2 pounds russet potatoes
- 1/2 cup unsalted butter, softened
- 1/2 cup heavy cream
- Salt, to taste
- Pepper, to taste
- Optional: minced garlic, chives, or sour cream for added flavor
To prepare the fluffy mashed potatoes, start by peeling and cutting the russet potatoes into evenly sized chunks. Place them in a large pot and cover with cold water, adding a generous pinch of salt. Bring the pot to a boil, then reduce the heat and simmer for about 15-20 minutes, or until the potatoes are fork-tender. Drain the potatoes and return them to the pot. Over low heat, add the softened butter and heavy cream, and mash the potatoes using a potato masher or ricer until smooth and fluffy. Season with salt and pepper to taste, and mix in any optional ingredients if desired.
When making fluffy mashed potatoes, be careful not to over-mash or use a food processor, as this can result in a gluey texture. If you want to enhance the flavor, consider roasting garlic beforehand and mixing it in for a delicious twist. Additionally, using warm cream and butter rather than cold will help keep the potatoes fluffy. For a festive touch, top with fresh chives or parsley before serving, adding a pop of color and flavor to your Christmas dinner spread.
Chocolate Peppermint Cake
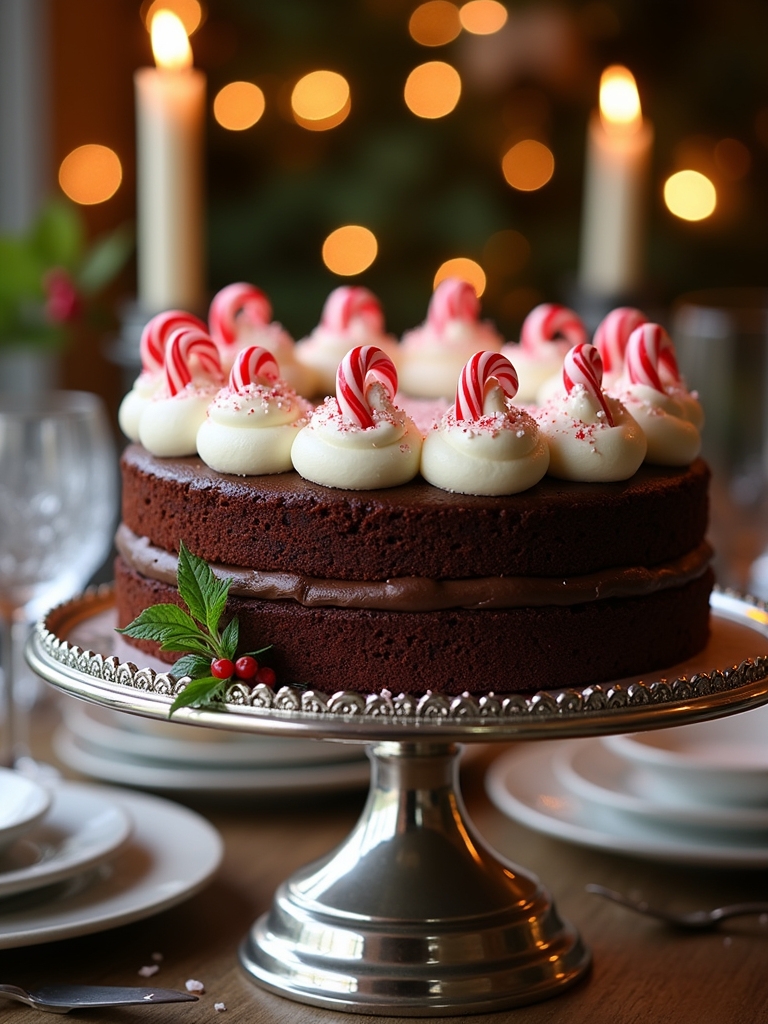
Indulging in a rich, moist chocolate peppermint cake is a delightful way to celebrate the festive season. This cake combines the deep flavors of chocolate with a rejuvenating hint of peppermint, making it an ideal dessert for Christmas dinner. The soft, velvety texture of the cake is complemented by a creamy peppermint frosting, creating a perfect balance of flavors that will impress your guests and leave them wanting more.
Making this cake is not only simple but also allows for a fun baking experience. The recipe calls for basic ingredients that you likely have in your pantry, along with a few seasonal touches that elevate this cake to holiday status. Whether you’re baking for family or hosting a gathering, this chocolate peppermint cake is sure to be the star of the dessert table.
Ingredients:
- 1 ¾ cups all-purpose flour
- 1 ¾ cups granulated sugar
- ¾ cup unsweetened cocoa powder
- 1 ½ teaspoons baking powder
- 1 ½ teaspoons baking soda
- 1 teaspoon salt
- 2 large eggs
- 1 cup whole milk
- ½ cup vegetable oil
- 2 teaspoons vanilla extract
- 1 cup boiling water
- 1 teaspoon peppermint extract
- 2 cups heavy whipping cream
- 1 cup powdered sugar
- Crushed peppermint candies (for garnish)
Instructions:
Preheat your oven to 350°F (175°C) and grease two 9-inch round cake pans. In a large mixing bowl, combine the flour, granulated sugar, cocoa powder, baking powder, baking soda, and salt. Mix well. In another bowl, whisk together the eggs, milk, vegetable oil, and vanilla extract. Gradually add the wet ingredients to the dry ingredients, mixing until well combined. Carefully stir in the boiling water and peppermint extract until the batter is smooth. Pour the batter evenly into the prepared cake pans and bake for 30-35 minutes, or until a toothpick inserted in the center comes out clean. Allow the cakes to cool in the pans for 10 minutes before transferring them to a wire rack to cool completely.
Extra Tips:
For an extra festive touch, consider adding a layer of crushed peppermint candies between the cake layers or as a topping. When whipping the cream for the frosting, make sure your bowl and beaters are chilled to achieve maximum fluffiness. If you want a more intense peppermint flavor, feel free to adjust the amount of peppermint extract in the frosting to suit your taste. Additionally, this cake can be made a day in advance; just make sure you store it in an airtight container to maintain its moisture. Happy baking!
Eggnog Cheesecake
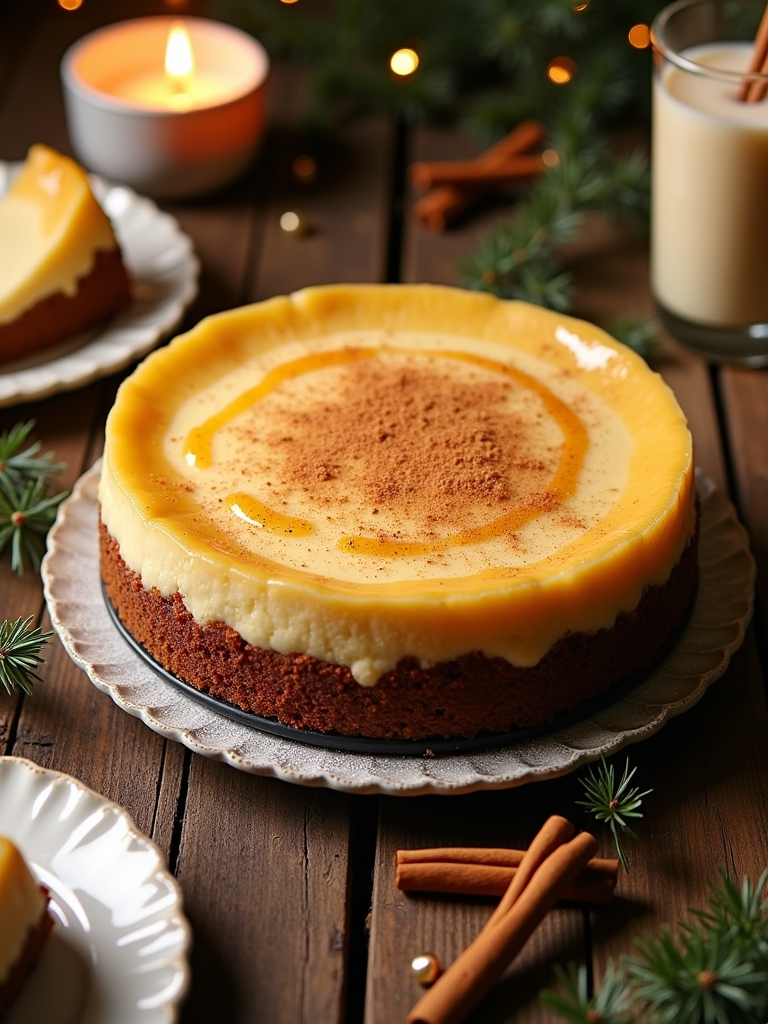
Eggnog cheesecake is a festive twist on the classic dessert that brings the holiday spirit right to your table. With its creamy texture and rich flavor infused with traditional eggnog spices, this cheesecake is the perfect way to celebrate Christmas dinner. Whether you’re hosting a large gathering or enjoying a quiet evening with family, this dessert is sure to impress and satisfy everyone’s sweet tooth.
Experience the holiday spirit with a creamy eggnog cheesecake that delights everyone at your Christmas gathering.
The combination of smooth cream cheese and the distinctive taste of eggnog creates a delightful flavor that pairs wonderfully with a buttery graham cracker crust. Topped with a hint of whipped cream and a sprinkle of nutmeg, this cheesecake not only looks beautiful but also tastes like a slice of holiday bliss. Prepare to indulge in a dessert that captures the essence of the season!
Ingredients:
- 1 ½ cups graham cracker crumbs
- ½ cup unsalted butter, melted
- 2 cups cream cheese, softened
- 1 cup granulated sugar
- 1 cup eggnog
- 3 large eggs
- 2 teaspoons vanilla extract
- 1 teaspoon ground nutmeg
- ½ teaspoon ground cinnamon
- Whipped cream (for topping)
- Additional nutmeg (for garnish)
Instructions:
Preheat your oven to 325°F (160°C). In a medium bowl, combine the graham cracker crumbs with the melted butter and mix until well combined. Press the mixture into the bottom of a 9-inch springform pan to form the crust. In a large mixing bowl, beat the cream cheese and sugar until smooth. Gradually add the eggnog, mixing until incorporated. Add the eggs one at a time, then mix in the vanilla extract, nutmeg, and cinnamon until smooth. Pour the filling over the crust in the springform pan and bake for 50-60 minutes or until the center is set and only slightly jiggly. Remove from the oven and let cool before refrigerating for at least four hours or overnight.
Extra Tips:
For best results, be sure to let your cream cheese come to room temperature before mixing; this will help achieve a smoother texture. If you want to enhance the eggnog flavor, consider adding an extra teaspoon of nutmeg and cinnamon to the filling. Additionally, for a more festive presentation, top your cheesecake with a generous dollop of whipped cream and a sprinkle of nutmeg right before serving. If you have any leftovers, store them in the refrigerator, where they will stay fresh for up to five days!
Frequently Asked Questions
What Are Some Traditional Christmas Dinner Customs I Should Know About?
I’ve found that Christmas traditions often include festive storytelling, sharing meals with loved ones, and exchanging gifts. Engaging in these customs brings warmth and connection, making the holiday spirit truly come alive for everyone involved.
How Can I Accommodate Dietary Restrictions in My Holiday Meal?
I always start by asking guests about their dietary needs. For gluten-free options, I love using quinoa. For vegan substitutions, I often swap out dairy with cashew cream. It keeps everyone happy and the meal innovative!
What Drinks Pair Well With Festive Holiday Dinners?
For my festive holiday dinners, I love serving innovative holiday cocktails like cranberry mimosas and spiced sangria. I also whip up delicious festive mocktails, ensuring everyone enjoys a creative drink, regardless of their preferences!
How Can I Make My Christmas Dinner More Environmentally Friendly?
I focus on sustainable sourcing for ingredients and embrace zero waste cooking. Using seasonal produce and composting scraps not only minimizes waste but also creates a delicious, innovative Christmas dinner that’s kind to our planet.
What Are Some Easy Appetizers to Serve Before the Main Meal?
You won’t believe how easy it is to impress with a stunning cheese platter and colorful veggie skewers! I love adding dips, too, for a fresh twist that’ll leave your guests craving more.
Conclusion
As you gather around the table this holiday season, picture the joy these dishes will bring to your loved ones. From the savory aroma of herb-crusted prime rib to the sweet delight of chocolate peppermint cake, each recipe is a chance to create unforgettable memories. So, are you ready to let the festive spirit take over your kitchen? Your holiday feast awaits, filled with warmth, laughter, and the delicious flavors that celebrate the season. Happy cooking!