

If you’re looking to create a Christmas dinner that’s truly special, I’ve got 13 delicious homemade recipes for you! Start with a succulent Roast Prime Rib or a Honey-Glazed Baked Ham. Don’t forget the Herb-Crusted Rack of Lamb and the classic Roast Turkey with Stuffing. For sides, Creamy Garlic Mashed Potatoes and warm Homemade Dinner Rolls will delight your guests. And for dessert, a Decadent Chocolate Yule Log will finish the meal perfectly. Stick around to discover all these incredible recipes!
Roast Prime Rib With Herb Crust
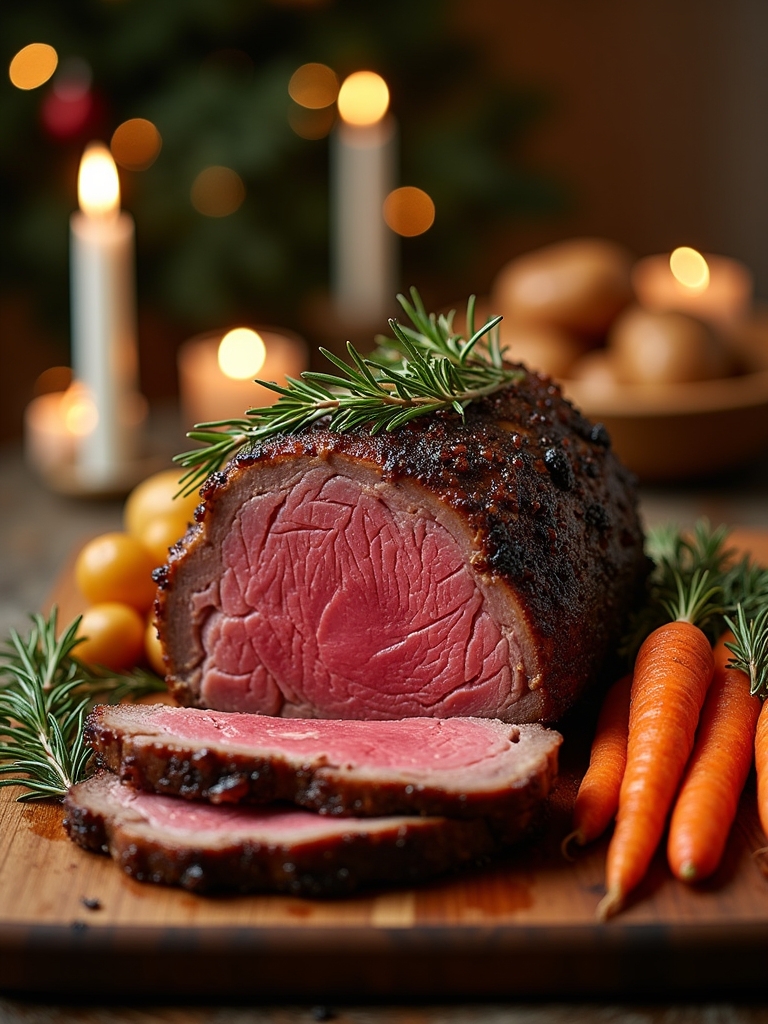
Roast prime rib with herb crust is a classic centerpiece for any holiday feast, offering a blend of rich flavors and succulent tenderness that is sure to impress your guests. This sumptuous cut of beef is not only a luxurious choice but also surprisingly simple to prepare. The herb crust adds a beautiful texture and aromatic flavor that elevates the roast to new heights, making it a perfect dish for your homemade Christmas dinner.
To achieve the perfect roast, it’s vital to start with a high-quality prime rib. The marbling of fat within the meat will keep it juicy and flavorful, while the herb crust will create a delightful contrast. As you prepare this dish, be certain to allow adequate time for the roast to come to room temperature before cooking, and don’t forget to let it rest after roasting to guarantee all those delicious juices stay locked in.
Ingredients
- 1 (5-7 pound) prime rib roast
- 2 tablespoons olive oil
- 4 cloves garlic, minced
- 2 tablespoons fresh rosemary, chopped
- 2 tablespoons fresh thyme, chopped
- 1 tablespoon fresh parsley, chopped
- 1 tablespoon Dijon mustard
- Salt and pepper to taste
- 1 cup beef broth
Cooking Instructions
Preheat your oven to 450°F (232°C). In a small bowl, combine the minced garlic, rosemary, thyme, parsley, olive oil, Dijon mustard, salt, and pepper to create the herb paste. Rub this mixture generously all over the prime rib roast. Place the roast bone-side down in a roasting pan and pour the beef broth into the bottom of the pan. Roast in the preheated oven for 20 minutes, then reduce the temperature to 325°F (163°C) and continue roasting until the internal temperature reaches your desired doneness (about 120°F for rare, 130°F for medium-rare, and 140°F for medium). Remove the roast from the oven and let it rest for at least 20 minutes before slicing.
Extra Tips
For the best results, consider using a meat thermometer to monitor the internal temperature of the roast as it cooks. This will guarantee that you achieve the perfect level of doneness without overcooking. Additionally, letting the roast rest is vital—it allows the juices to redistribute throughout the meat, resulting in a more flavorful and tender roast. Finally, don’t forget to serve the roast with the delicious drippings from the pan; they make an excellent base for gravy or au jus to accompany your prime rib. Enjoy your festive feast!
Honey-Glazed Baked Ham
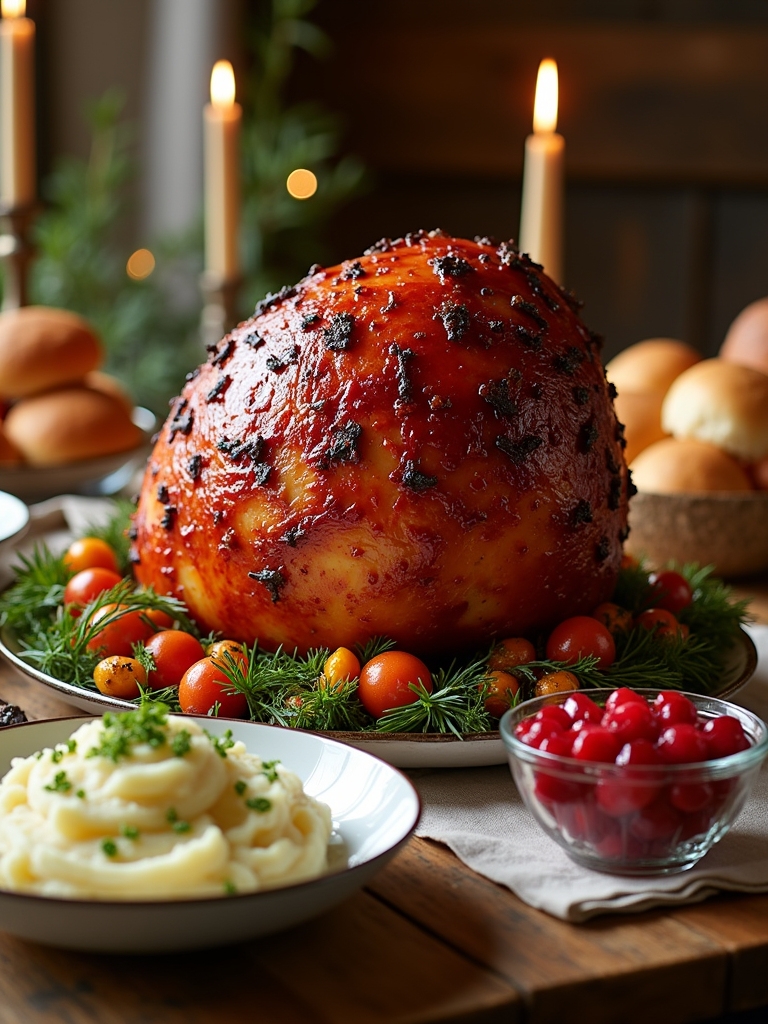
When it comes to a festive Christmas dinner, few dishes can beat the succulent delight of a honey-glazed baked ham. This classic centerpiece not only looks impressive but also fills your home with an irresistible aroma that captures the essence of the holiday season. The sweet and savory glaze caramelizes beautifully in the oven, creating a mouthwatering crust that complements the tender meat beneath. Whether you’re hosting a large family gathering or an intimate celebration, this dish is bound to impress your guests and leave them asking for seconds.
Preparing a honey-glazed baked ham is simpler than it may seem. With just a few key ingredients and straightforward steps, you can create a dish that is both flavorful and visually stunning. The combination of honey, brown sugar, and Dijon mustard creates a rich glaze that seeps into the ham, enhancing its natural flavors. Serve it alongside traditional sides such as mashed potatoes, green beans, and cranberry sauce for a meal that embodies the spirit of Christmas.
Ingredients:
- 1 fully cooked bone-in ham (about 8-10 pounds)
- 1 cup honey
- 1 cup brown sugar, packed
- 1/4 cup Dijon mustard
- 1/4 cup apple cider vinegar
- 1 teaspoon ground cinnamon
- 1/2 teaspoon ground cloves
- Whole cloves (optional, for studding the ham)
Instructions:
Preheat your oven to 325°F (165°C). Score the surface of the ham in a diamond pattern, about 1/4 inch deep, and stud with whole cloves if desired. In a bowl, combine honey, brown sugar, Dijon mustard, apple cider vinegar, ground cinnamon, and ground cloves. Place the ham in a roasting pan and brush half of the glaze over the surface. Cover the ham loosely with aluminum foil, and bake for about 1.5 to 2 hours, basting with the remaining glaze every 30 minutes. Remove the foil during the last 30 minutes of cooking to allow the glaze to caramelize and the ham to develop a beautiful golden crust.
Extra Tips:
For the best flavor, consider letting the ham sit at room temperature for about an hour before baking to guarantee even cooking. If you have leftovers, slice the ham and store it in an airtight container in the refrigerator; it can be used in sandwiches, soups, or casseroles. Additionally, feel free to experiment with the glaze by adding your favorite spices or even a splash of whiskey for an adult twist. Remember to let the ham rest for about 15 minutes after removing it from the oven before slicing to allow the juices to redistribute for maximum tenderness. Enjoy your festive feast!
Herb-Crusted Rack of Lamb
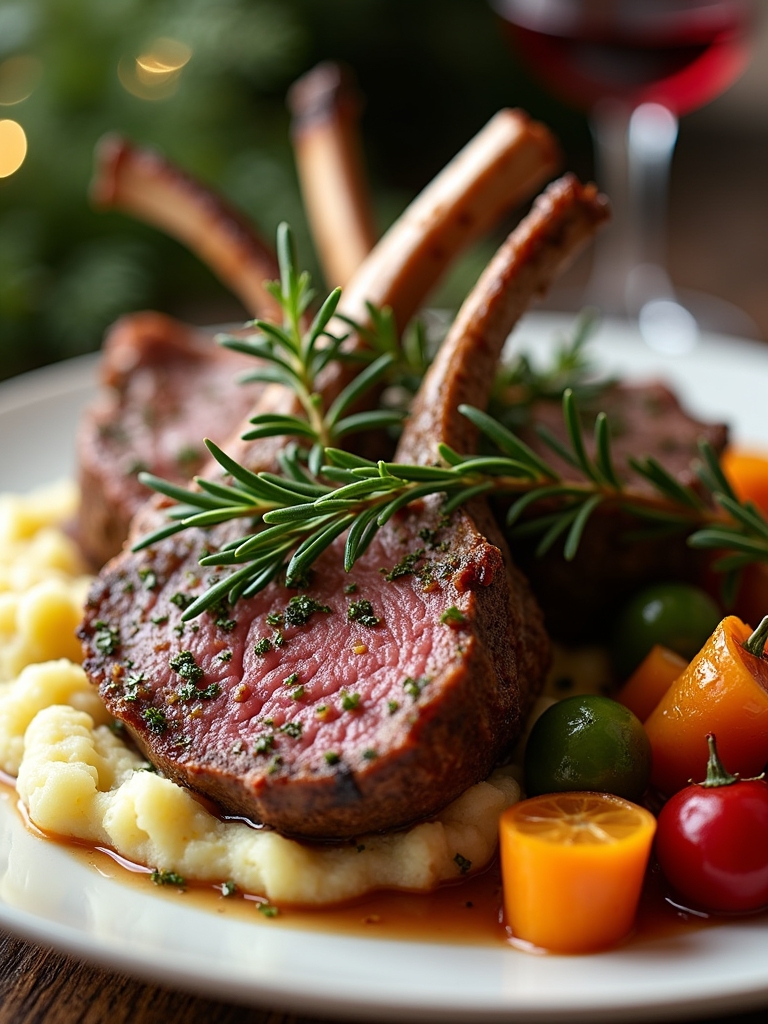
The Herb-Crusted Rack of Lamb is a stunning centerpiece for any Christmas dinner, combining elegance with robust flavors that are certain to impress your guests. This dish features tender racks of lamb coated with a savory herb mixture, creating a delightful crust that enhances the natural richness of the meat. The combination of garlic, fresh herbs, and breadcrumbs not only adds texture but also infuses the lamb with aromatic notes that evoke the warmth of the holiday season.
A beautiful herb-crusted rack of lamb that elevates your Christmas dinner with its rich flavors and elegant presentation.
Preparing this dish is simpler than it might appear, making it an excellent choice for both seasoned cooks and those trying their hand at gourmet cooking. The key to achieving the perfect herb crust is to guarantee that the lamb is well-seasoned and that the mixture adheres properly. As it cooks, the lamb will develop a beautiful golden crust while remaining juicy and succulent inside. Serve it alongside roasted vegetables and creamy mashed potatoes for a complete festive feast.
Ingredients:
- 1 rack of lamb (about 1.5 to 2 pounds)
- 2 tablespoons Dijon mustard
- 2 cups fresh breadcrumbs
- 3 cloves garlic, minced
- 1 tablespoon fresh rosemary, chopped
- 1 tablespoon fresh thyme, chopped
- 1 tablespoon fresh parsley, chopped
- Salt and pepper to taste
- 2 tablespoons olive oil
- 1 tablespoon balsamic vinegar (optional)
Cooking Instructions:
Preheat your oven to 400°F (200°C). Start by trimming any excess fat from the rack of lamb and seasoning it generously with salt and pepper. Heat the olive oil in a large oven-safe skillet over medium-high heat. Sear the lamb for 2-3 minutes on each side until browned. Remove from heat and brush the Dijon mustard all over the meat. In a bowl, combine the breadcrumbs, garlic, rosemary, thyme, parsley, and a pinch of salt and pepper. Press this herb mixture onto the mustard-coated lamb to create a thick crust. Transfer the skillet to the preheated oven and roast for about 20-25 minutes for medium-rare, or until it reaches your desired doneness. Let the lamb rest for 5-10 minutes before slicing.
Extra Tips:
For the best flavor, allow the lamb to come to room temperature before cooking, as this helps it cook more evenly. When making the herb crust, feel free to customize the herbs based on your preference or what you have on hand. For a deeper flavor profile, consider adding grated Parmesan cheese to the breadcrumb mixture. Finally, using a meat thermometer can help you achieve the perfect doneness; aim for an internal temperature of 130°F (54°C) for medium-rare.
Traditional Roast Turkey With Stuffing
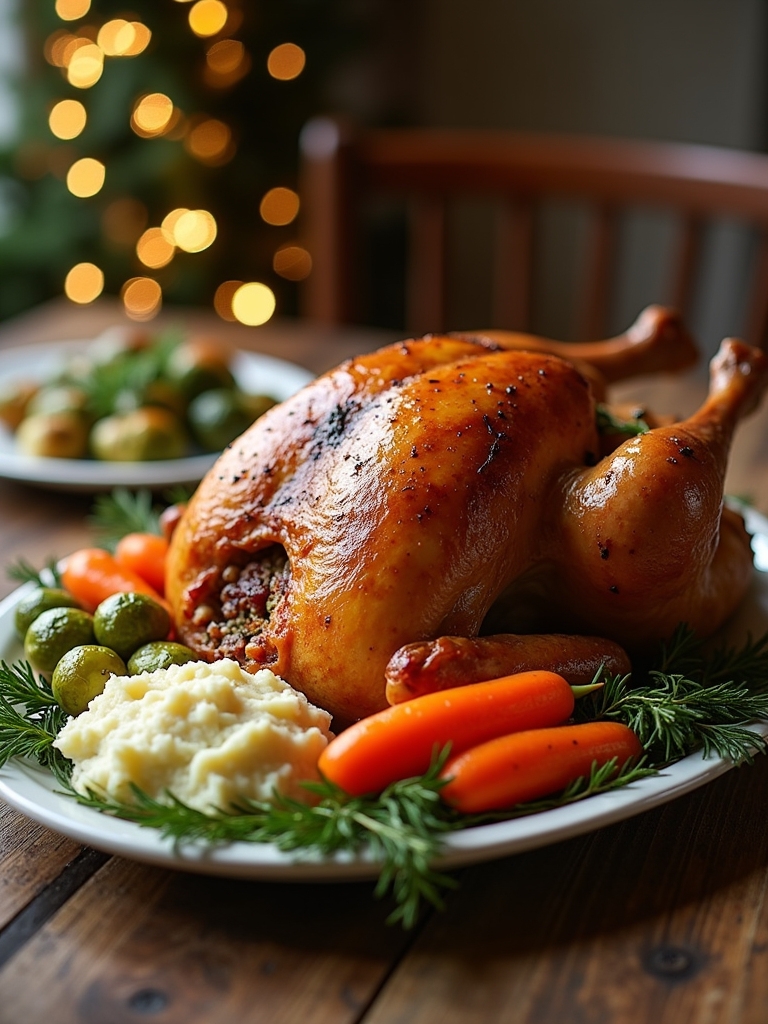
Roasting a turkey is a cherished tradition during the holiday season, and it’s often the centerpiece of a festive Christmas dinner. A perfectly cooked turkey is golden brown, juicy, and bursting with flavor, especially when stuffed with a savory stuffing made from bread, herbs, and other delicious ingredients. The aromas of a roasting turkey wafting through the house create an inviting atmosphere, bringing family and friends together to celebrate the joy of the season.
To achieve the best results, it’s crucial to choose a quality turkey and prepare it with care. Brining the turkey beforehand can enhance its juiciness and flavor. Additionally, using fresh herbs and high-quality ingredients for the stuffing can elevate the dish to new heights. Follow this recipe to create a traditional roast turkey with stuffing that will impress your guests and make your holiday dinner unforgettable.
Ingredients:
- 1 whole turkey (12-14 pounds)
- 1 cup unsalted butter, softened
- 2 cups onion, chopped
- 2 cups celery, chopped
- 1 tablespoon fresh sage, chopped
- 1 tablespoon fresh thyme, chopped
- 1 tablespoon fresh rosemary, chopped
- 1 teaspoon salt
- ½ teaspoon black pepper
- 10 cups bread cubes (stale or toasted)
- 2 cups chicken broth
- 2 large eggs, beaten
- 1 cup dried cranberries (optional)
Cooking Instructions:
Preheat your oven to 325°F (165°C). Remove the turkey giblets and pat the turkey dry with paper towels. In a large skillet over medium heat, melt half of the butter and sauté the onions and celery until softened, about 5-7 minutes. Stir in the fresh herbs, salt, and pepper. In a large bowl, combine the sautéed mixture with the bread cubes, chicken broth, and beaten eggs, mixing well. Stuff the turkey cavity with the stuffing, then tie the legs together with kitchen twine and tuck the wings under the bird. Rub the remaining butter over the turkey, season with additional salt and pepper, and place it in a roasting pan. Roast the turkey in the preheated oven for about 13-15 minutes per pound, or until the internal temperature reaches 165°F (74°C). Let the turkey rest for 20-30 minutes before carving.
Extra Tips:
To make sure your turkey remains juicy and flavorful, consider brining it overnight in a saltwater solution or a store-bought brine kit. Additionally, basting the turkey every 30-45 minutes with the pan juices will help develop a beautiful golden skin. If the turkey starts browning too quickly, cover it loosely with aluminum foil. Finally, remember to let the turkey rest after cooking; this allows the juices to redistribute, resulting in a more succulent meat. Enjoy your delicious homemade Christmas dinner!
Creamy Garlic Mashed Potatoes
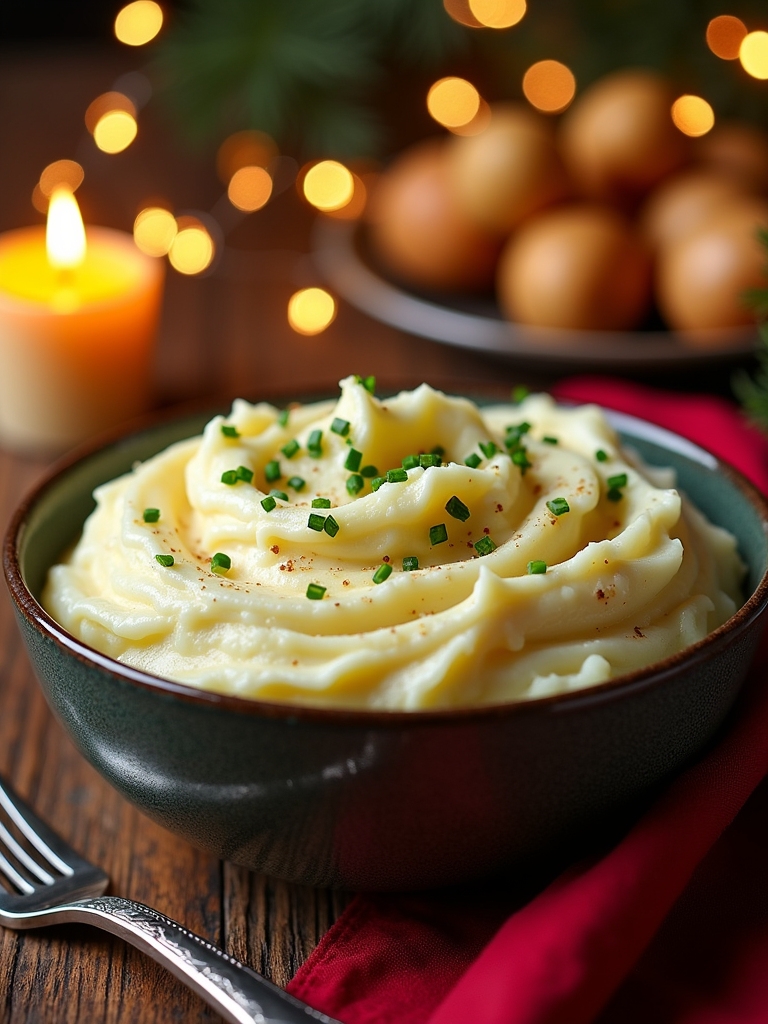
Creamy Garlic Mashed Potatoes are the perfect side dish for your homemade Christmas dinner, bringing warmth and comfort to the table. With their rich, buttery flavor and the delightful kick of garlic, these mashed potatoes are sure to be a hit with family and friends. They pair wonderfully with a variety of main dishes, from succulent roasts to glazed hams, making them a versatile addition to your holiday feast.
To achieve the ultimate creamy texture, it is crucial to use the right type of potatoes. Russet potatoes are ideal due to their high starch content, which creates a fluffy consistency when mashed. Combining them with heavy cream, butter, and garlic elevates the dish to a whole new level of deliciousness. Once you serve these mashed potatoes, they will quickly become a beloved staple in your holiday traditions.
Ingredients:
- 2 pounds of Russet potatoes
- 4 cloves of garlic, minced
- 1/2 cup of unsalted butter
- 1 cup of heavy cream
- Salt, to taste
- Black pepper, to taste
- Chives or parsley, for garnish (optional)
To make the creamy garlic mashed potatoes, start by peeling and chopping the Russet potatoes into evenly-sized chunks. Place them in a large pot, cover with cold water, and add a pinch of salt. Bring the water to a boil and cook the potatoes until fork-tender, approximately 15-20 minutes. In the meantime, melt the butter in a small saucepan over low heat and add the minced garlic, cooking until fragrant but not browned, about 2-3 minutes. Drain the potatoes and return them to the pot. Mash the potatoes using a potato masher or ricer, then stir in the garlic butter and heavy cream until smooth and creamy. Season with salt and black pepper to taste, and serve warm, garnished with chopped chives or parsley if desired.
When making creamy garlic mashed potatoes, it is important to choose the right tools. A potato ricer will give you the smoothest texture, while a traditional masher can create a bit more chunkiness. If you prefer a lower-fat option, you can substitute some of the heavy cream with chicken or vegetable broth. For an extra burst of flavor, consider roasting the garlic ahead of time before mixing it into the potatoes. Finally, remember that mashed potatoes can be made ahead of time and reheated; just add a splash of milk or cream to bring back their creaminess. Enjoy your holiday cooking!
Maple-Balsamic Brussels Sprouts
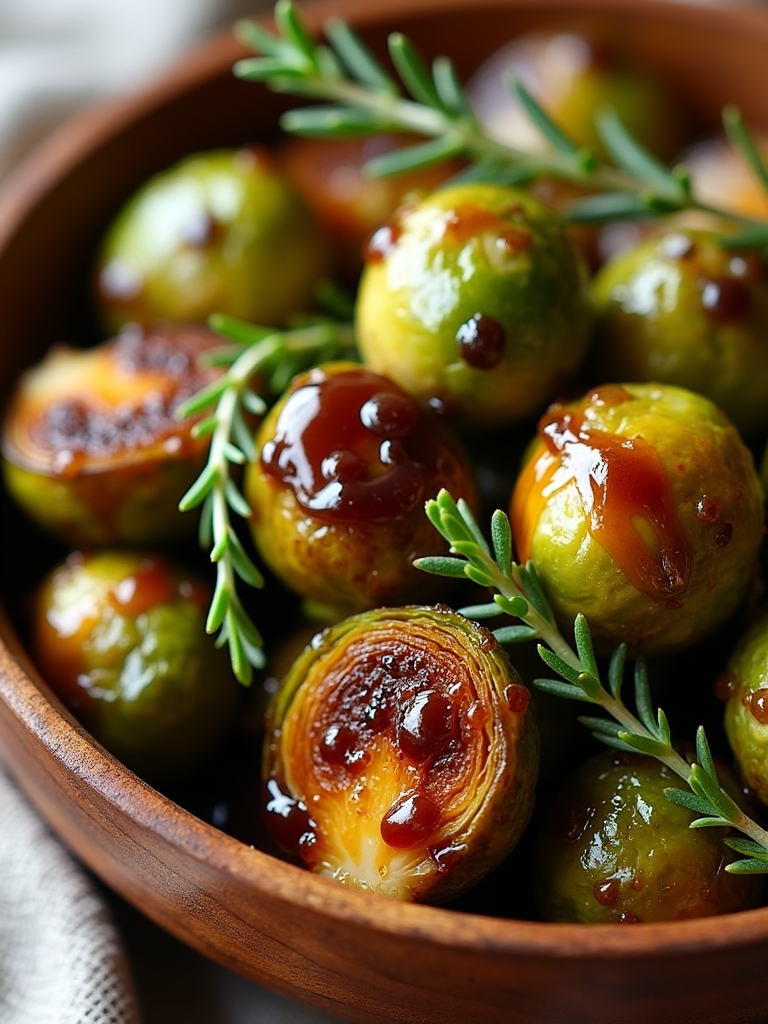
Maple-Balsamic Brussels Sprouts make for a delicious and festive side dish that can elevate any holiday dinner table. The combination of the sweetness from the maple syrup and the tanginess of the balsamic vinegar creates a perfectly balanced flavor that complements the earthiness of the Brussels sprouts. This dish is not only easy to prepare, but it also brings a vibrant color and a delightful aroma to your kitchen, making it an ideal choice for your homemade Christmas dinner.
To achieve the best texture and taste, selecting fresh Brussels sprouts is key. Look for firm, bright-green sprouts with tightly packed leaves. In this recipe, roasting them in the oven enhances their natural sweetness and allows the flavors to meld beautifully together. Pair these Maple-Balsamic Brussels Sprouts with your favorite main course, and watch your family and friends delight in this seasonal treat.
Ingredients:
- 1 pound Brussels sprouts, trimmed and halved
- 3 tablespoons olive oil
- 2 tablespoons maple syrup
- 2 tablespoons balsamic vinegar
- Salt and pepper to taste
- 1/4 cup pecans or walnuts, chopped (optional)
- 1/4 cup dried cranberries (optional)
Instructions:
Preheat your oven to 400°F (200°C) and line a baking sheet with parchment paper. In a large mixing bowl, toss the halved Brussels sprouts with olive oil, maple syrup, balsamic vinegar, salt, and pepper until well coated. Spread the Brussels sprouts in a single layer on the prepared baking sheet and roast in the preheated oven for about 20-25 minutes, or until they are tender and caramelized, stirring halfway through. If desired, add the chopped nuts and dried cranberries during the final 5 minutes of roasting for added texture and flavor.
Extra Tips:
For an even richer flavor, consider adding minced garlic or shallots to the Brussels sprouts before roasting. Make sure not to overcrowd the baking sheet, as this can cause the sprouts to steam rather than roast, leading to less crispy results. You can also adjust the sweetness by modifying the amount of maple syrup based on your personal preference. Finally, this dish can easily be made ahead of time; simply reheat in the oven before serving for a warm, freshly roasted side dish. Enjoy your festive meal!
Sweet Potato Casserole With Marshmallow Topping
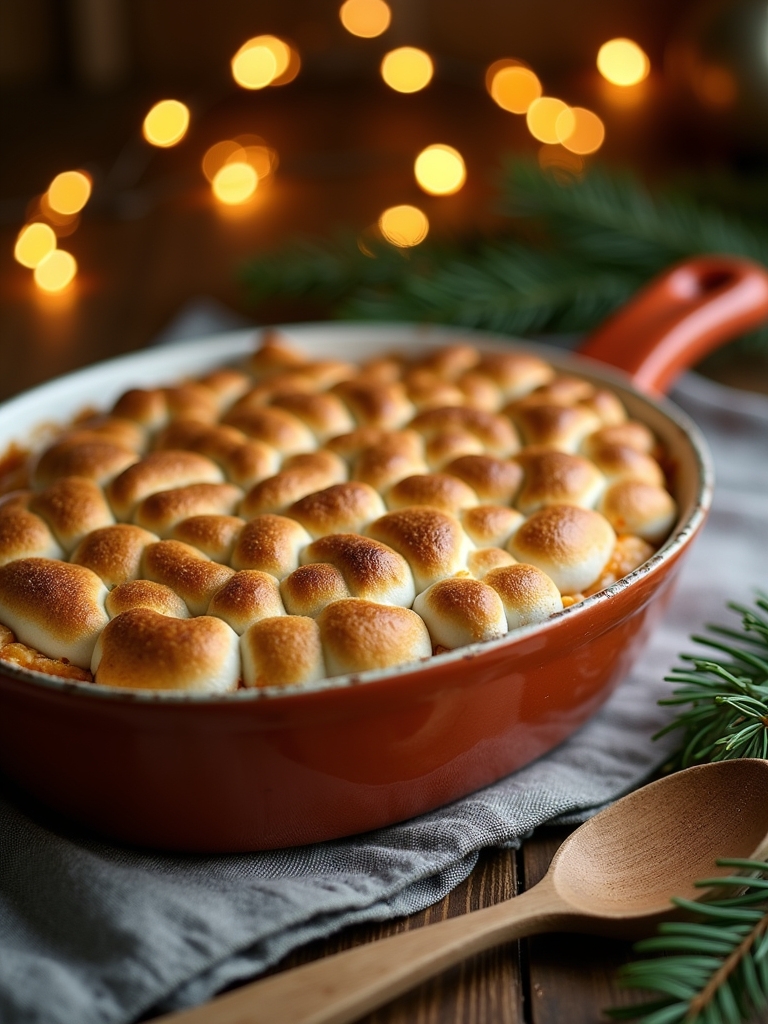
Sweet potato casserole with marshmallow topping is a delightful dish that brings both comfort and festivity to your holiday table. This recipe combines the natural sweetness of sweet potatoes with a creamy, buttery mixture, topped with fluffy marshmallows that caramelize beautifully in the oven. It’s a perfect side dish that complements the savory flavors of your holiday meal while also satisfying those with a sweet tooth.
Making this casserole is not only straightforward but also a great opportunity to involve the whole family in the cooking process. You can prepare the sweet potatoes ahead of time and assemble the casserole just before baking, which makes it an excellent choice for busy holiday gatherings. With its vibrant orange color and deliciously sweet topping, this dish is sure to be a hit among both kids and adults alike.
Ingredients:
- 4 cups sweet potatoes, peeled and cubed
- 1/2 cup brown sugar
- 1/4 cup unsalted butter, melted
- 1/2 cup milk
- 1 teaspoon vanilla extract
- 1/2 teaspoon cinnamon
- 1/4 teaspoon nutmeg
- 1 1/2 cups mini marshmallows
Instructions:
Begin by preheating your oven to 350°F (175°C). In a large pot, bring salted water to a boil and add the cubed sweet potatoes. Cook until tender, about 15-20 minutes. Drain the sweet potatoes and transfer them to a mixing bowl. Mash the sweet potatoes until smooth, then stir in the brown sugar, melted butter, milk, vanilla extract, cinnamon, and nutmeg until well combined. Spread the mixture into a greased 9×13 inch baking dish and top evenly with mini marshmallows. Bake in the preheated oven for 25-30 minutes, or until the marshmallows are golden brown and the casserole is heated through.
Extra Tips:
For an added layer of flavor, consider mixing in some chopped pecans or walnuts with the sweet potato mixture before baking. This will give your casserole a delightful crunch and a nutty taste that pairs wonderfully with the sweetness of the marshmallows. Additionally, if you prefer a less sweet dish, you can reduce the amount of brown sugar or use a sugar substitute. Make sure to keep an eye on the marshmallows while baking, as they can go from perfectly toasted to burnt quite quickly!
Green Bean Almondine
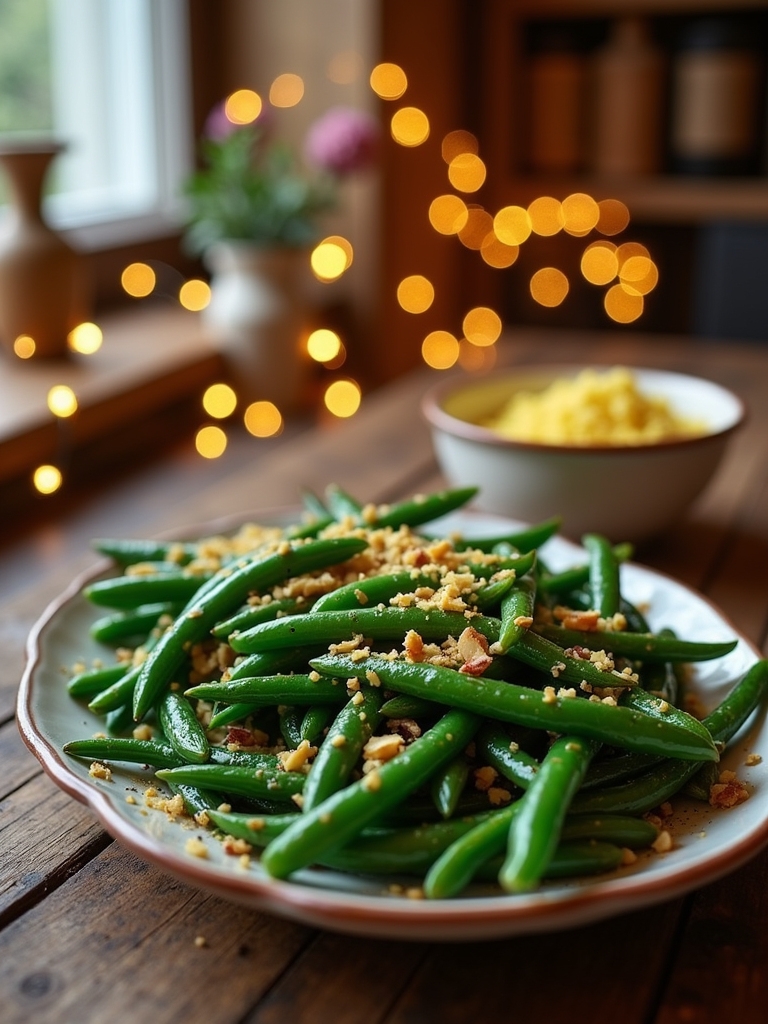
Green Bean Almondine is a classic side dish that adds a touch of elegance to any Christmas dinner. With its vibrant green color and delightful crunch, this dish features fresh green beans sautéed with slivered almonds and a hint of lemon. Not only is it visually appealing, but it also offers a revitalizing contrast to richer holiday fare, making it a perfect accompaniment to roasted meats or hearty casseroles.
Preparing Green Bean Almondine is quick and simple, allowing you to focus on other elements of your holiday meal. The combination of tender green beans and toasted almonds creates a harmonious blend of textures and flavors. This dish can be made in just a matter of minutes, making it an efficient choice for busy cooks during the festive season. Plus, it’s a fantastic way to incorporate a healthy vegetable into your holiday spread!
Preparing Green Bean Almondine is quick and simple, allowing you to impress guests with minimal effort during the festive season.
Ingredients:
- 1 pound fresh green beans, trimmed
- 1/2 cup slivered almonds
- 3 tablespoons unsalted butter
- 2 tablespoons olive oil
- 1-2 cloves garlic, minced
- Juice of 1 lemon
- Salt and pepper to taste
To prepare the Green Bean Almondine, start by bringing a large pot of salted water to a boil. Add the green beans and blanch them for about 3-4 minutes until they are bright green and tender-crisp. Drain the beans and immediately transfer them to a bowl of ice water to stop the cooking process. In a large skillet, heat the butter and olive oil over medium heat. Add the slivered almonds and sauté until they are golden brown, about 2-3 minutes. Add the minced garlic and cook for an additional minute, then stir in the blanched green beans. Squeeze the lemon juice over the mixture, season with salt and pepper, and toss everything together until the beans are well coated and heated through.
When making Green Bean Almondine, it’s essential to not overcook the green beans; they should maintain a slight crunch for the best texture. You can also experiment by adding other ingredients like shallots or crispy bacon for added flavor. If you want to prepare this dish in advance, simply blanch the green beans and store them in the refrigerator until you’re ready to sauté them with the almonds. This way, you can save time and still impress your guests with a fresh and flavorful side dish.
Cranberry Sauce With Orange Zest
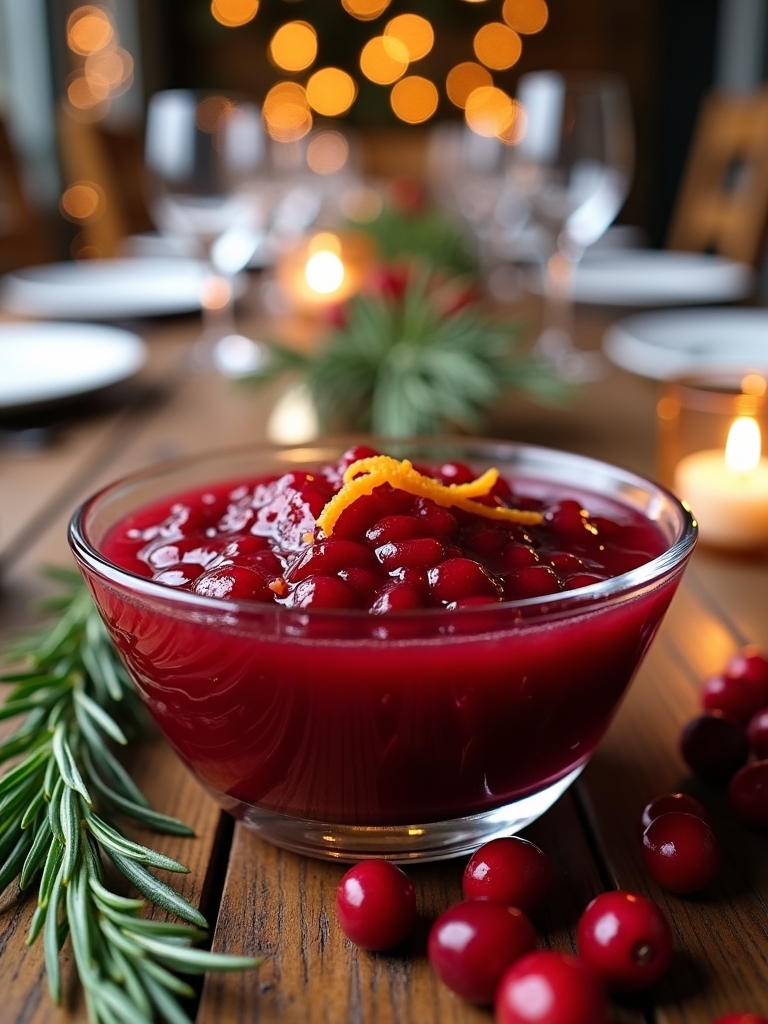
Cranberry sauce is a quintessential accompaniment to any Christmas dinner, adding a burst of tangy flavor that perfectly complements savory dishes. This homemade cranberry sauce with orange zest elevates the traditional recipe by infusing it with a revitalizing citrus aroma and flavor. The bright notes of orange not only enhance the taste but also add a festive touch to your holiday table, making it a delightful addition to your feast.
Making cranberry sauce from scratch is not only easy, but it also allows you to control the sweetness and flavor balance to suit your preferences. With just a handful of ingredients, you can create a vibrant and delicious sauce that will impress your family and guests. This recipe will yield a perfect blend of tartness from the cranberries and sweetness from the sugar, rounded out by the zesty brightness from the orange.
Ingredients:
- 12 ounces fresh cranberries
- 1 cup granulated sugar
- 1 cup water
- Zest of 1 orange
- Juice of 1 orange
- 1/2 teaspoon cinnamon (optional)
Instructions:
In a medium saucepan, combine the cranberries, sugar, and water over medium heat. Stir occasionally until the mixture comes to a boil and the cranberries begin to pop, which should take about 5 minutes. Once boiling, reduce the heat and let it simmer for an additional 10 minutes. Stir in the orange zest, orange juice, and cinnamon (if using), and continue to cook for another 5 minutes until the sauce thickens. Remove from heat and let it cool; the sauce will thicken further as it cools.
Extra Tips:
To enhance the flavor even more, consider adding a pinch of nutmeg or a splash of vanilla extract during cooking. If you prefer a smoother sauce, feel free to blend it with an immersion blender after it cools slightly. This sauce can be made ahead of time and stored in the refrigerator for up to two weeks, allowing the flavors to meld beautifully. Serve it chilled or at room temperature alongside your holiday main dishes for an irresistible pairing!
Homemade Dinner Rolls
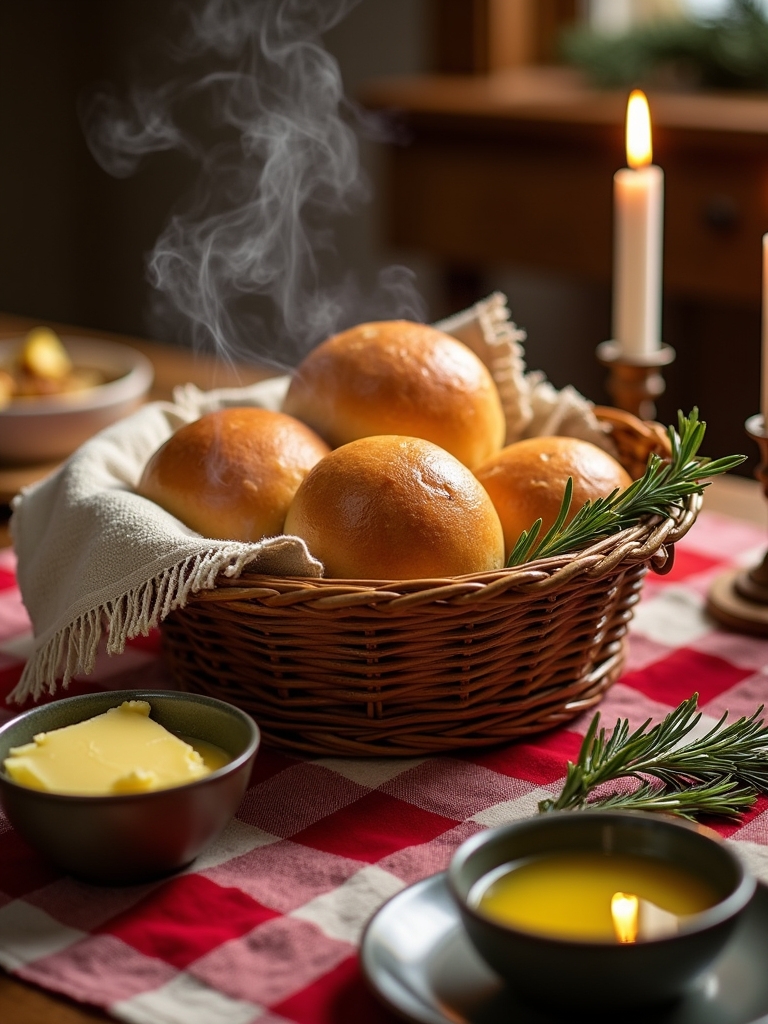
Homemade dinner rolls are a cherished addition to any Christmas dinner, offering warmth and comfort at the table. These fluffy, buttery rolls are perfect for mopping up gravy, pairing with a variety of dishes, or simply enjoyed on their own with a smear of butter. The aroma of freshly baked bread wafting through the house creates a cozy atmosphere, making it an essential element of holiday gatherings.
Making your own dinner rolls from scratch might seem intimidating, but with the right ingredients and a little patience, you’ll be rewarded with soft, pillowy rolls that are sure to impress your family and friends. The process involves a few key steps: mixing the dough, allowing it to rise, shaping the rolls, and finally baking them to golden perfection. With a little bit of practice, you’ll master homemade dinner rolls that rival any bakery.
Ingredients:
- 4 cups all-purpose flour
- 2 tablespoons granulated sugar
- 1 packet (2 ¼ teaspoons) active dry yeast
- 1 teaspoon salt
- 1 cup warm milk (about 110°F)
- 1/4 cup unsalted butter, melted
- 1 large egg
- Additional melted butter for brushing on top
Instructions:
In a large mixing bowl, combine the warm milk, sugar, and yeast, allowing it to activate for about 5 minutes until frothy. Then add in the melted butter, egg, salt, and gradually incorporate the flour, mixing until a dough forms. Knead the dough on a floured surface for about 8-10 minutes until smooth and elastic. Place the dough in a greased bowl, cover it with a damp cloth, and let it rise in a warm area for about 1-2 hours or until it has doubled in size. Once risen, punch down the dough, divide it into small equal pieces, and shape them into balls. Place the rolls onto a greased baking pan, cover, and let them rise again for about 30-45 minutes. Preheat your oven to 375°F (190°C) and bake the rolls for 15-20 minutes until golden brown. Brush with melted butter before serving.
Tips:
For best results, verify your yeast is fresh, as expired yeast can lead to dense rolls. If your kitchen is cool, you can create a warm environment for the dough to rise by preheating your oven slightly and then turning it off before placing the dough inside. Be careful not to over-knead the dough; it should be soft and slightly tacky to the touch. Additionally, if you want to add extra flavor, consider mixing in herbs or garlic powder into the dough before kneading. Enjoy your delicious homemade dinner rolls alongside your festive spread!
Classic Stuffing With Sausage and Sage
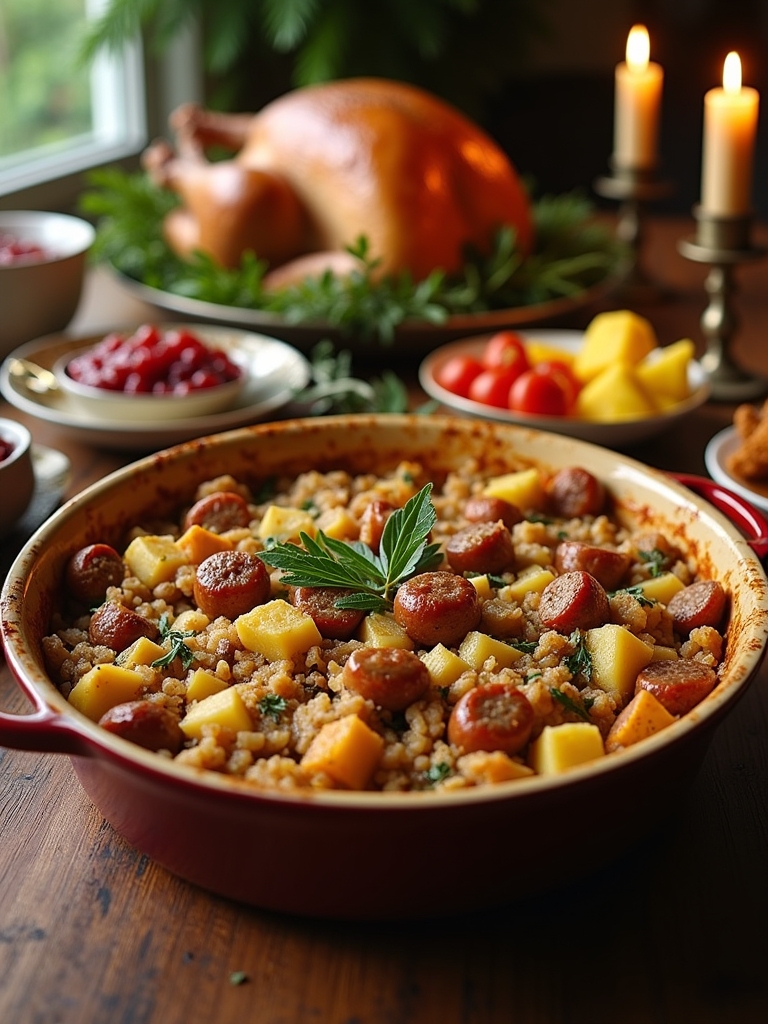
Classic Stuffing With Sausage and Sage is a timeless dish that often graces the tables of holiday feasts. This comforting side dish is a perfect blend of flavors and textures, combining savory sausage, fragrant sage, and hearty bread. Whether served alongside a beautifully roasted turkey or enjoyed as a standalone dish, this stuffing is guaranteed to delight your guests and become a cherished part of your holiday traditions.
Making this stuffing from scratch allows you to customize it to your liking while also filling your kitchen with the enticing aromas of the holiday season. The combination of fresh herbs and the richness of sausage creates a flavor profile that is both robust and inviting. This recipe is not only delicious but also easy to prepare, making it a great choice for both novice and experienced cooks alike.
Ingredients:
- 1 pound Italian sausage (mild or spicy, according to preference)
- 1 loaf of rustic bread (about 1 pound), cut into cubes
- 1 large onion, diced
- 3 celery stalks, diced
- 1/2 cup unsalted butter
- 1/4 cup fresh sage leaves, chopped
- 1 teaspoon dried thyme
- 1 teaspoon salt
- 1/2 teaspoon black pepper
- 2 to 3 cups chicken or vegetable broth
- 2 large eggs, beaten
- Optional: 1 cup of chopped apples or cranberries for added sweetness
In a large skillet over medium heat, cook the sausage until browned and crumbly, about 8-10 minutes. Remove the sausage and set aside, retaining some drippings in the pan. Add the butter, onion, and celery to the skillet, cooking until softened, about 5-7 minutes. In a large mixing bowl, combine the bread cubes, cooked sausage, sautéed vegetables, sage, thyme, salt, pepper, and optional fruits. Mix well. Gradually stir in the broth until the mixture is moistened but not soggy. Finally, fold in the beaten eggs. Transfer the stuffing to a greased baking dish, cover with foil, and bake at 350°F (175°C) for 30 minutes. Remove the foil and bake for an additional 15-20 minutes until the top is golden brown and crispy.
When preparing your Classic Stuffing With Sausage and Sage, consider using day-old bread for the best texture. It’s also recommended to let the stuffing rest for a few minutes after baking; this allows the flavors to meld together beautifully. If you prefer a gluten-free option, substitute the bread with gluten-free bread and verify that your sausage and broth are also gluten-free. Additionally, feel free to experiment with different herbs or add-ins, such as nuts or dried fruits, to make the dish uniquely yours.
Decadent Chocolate Yule Log
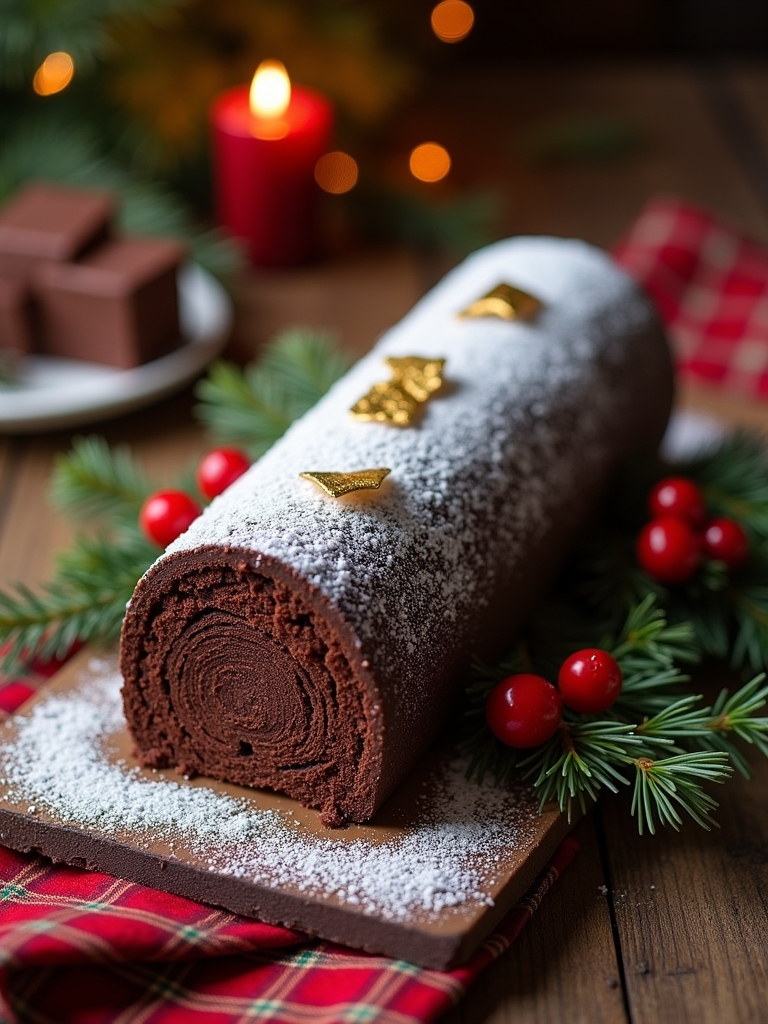
The Decadent Chocolate Yule Log, or Bûche de Noël, is a traditional French dessert that captures the spirit of the holiday season. This delightful cake resembles a wooden log, symbolizing the Yule log that was burned during Christmas celebrations. With its rich chocolate flavor, creamy filling, and beautiful presentation, it’s sure to impress your family and guests at your homemade Christmas dinner. Making a Yule log may seem intimidating, but with the right ingredients and a bit of patience, you can create a stunning centerpiece for your holiday table.
The key to a successful Yule log is a light and airy chocolate sponge cake, rolled with a luscious filling and covered in a decadent chocolate ganache. This recipe will guide you through each step, ensuring that your Yule log not only tastes delicious but also looks festive and inviting. Once you master the technique, you can even experiment with different fillings and decorations to make this dessert your own.
Ingredients:
- 4 large eggs
- 1 cup granulated sugar
- 1/2 cup all-purpose flour
- 1/3 cup unsweetened cocoa powder
- 1/4 teaspoon salt
- 1/2 teaspoon baking powder
- 1 cup heavy cream
- 1/2 cup powdered sugar
- 1 teaspoon vanilla extract
- 8 oz bittersweet chocolate, chopped
- 1/2 cup unsalted butter, room temperature
- 1 cup chocolate shavings or powdered sugar for decoration
Instructions:
Preheat your oven to 350°F (175°C) and line a 15×10 inch jelly roll pan with parchment paper. In a large bowl, whisk together the eggs and granulated sugar until pale and fluffy. In another bowl, sift together the flour, cocoa powder, salt, and baking powder. Gently fold the dry ingredients into the egg mixture until just combined. Pour the batter into the prepared pan, spreading it evenly. Bake for 12-15 minutes or until the cake springs back when touched. Once baked, immediately turn the cake out onto a clean kitchen towel sprinkled with powdered sugar. Carefully peel away the parchment paper and roll the cake up with the towel, starting from the short end. Let it cool completely.
For the filling, whip the heavy cream with powdered sugar and vanilla extract until stiff peaks form. In a separate bowl, melt the chopped chocolate and butter together until smooth, then let it cool slightly. Unroll the cooled cake and spread the whipped cream filling evenly over the surface. Carefully re-roll the cake without the towel and place it seam-side down on a serving platter. To make the ganache, melt the remaining chocolate and butter together, stirring until smooth. Pour and spread the ganache over the rolled cake, creating a bark-like texture with a fork or spatula. Decorate with chocolate shavings or a dusting of powdered sugar for a festive touch.
Extra Tips:
When preparing your Yule log, it’s essential to work quickly but gently to avoid breaking the delicate sponge cake. If the cake starts to crack while rolling, don’t panic; it can be covered with ganache later. Make sure to let your cake cool completely before adding the filling, as a warm cake can cause the filling to melt. Feel free to personalize your Yule log by adding seasonal flavors like peppermint extract or incorporating nuts into the filling. And finally, don’t be afraid to get creative with your decorations—edible flowers, berries, or even meringue mushrooms can add a whimsical touch to your holiday dessert!
Festive Eggnog Cheesecake
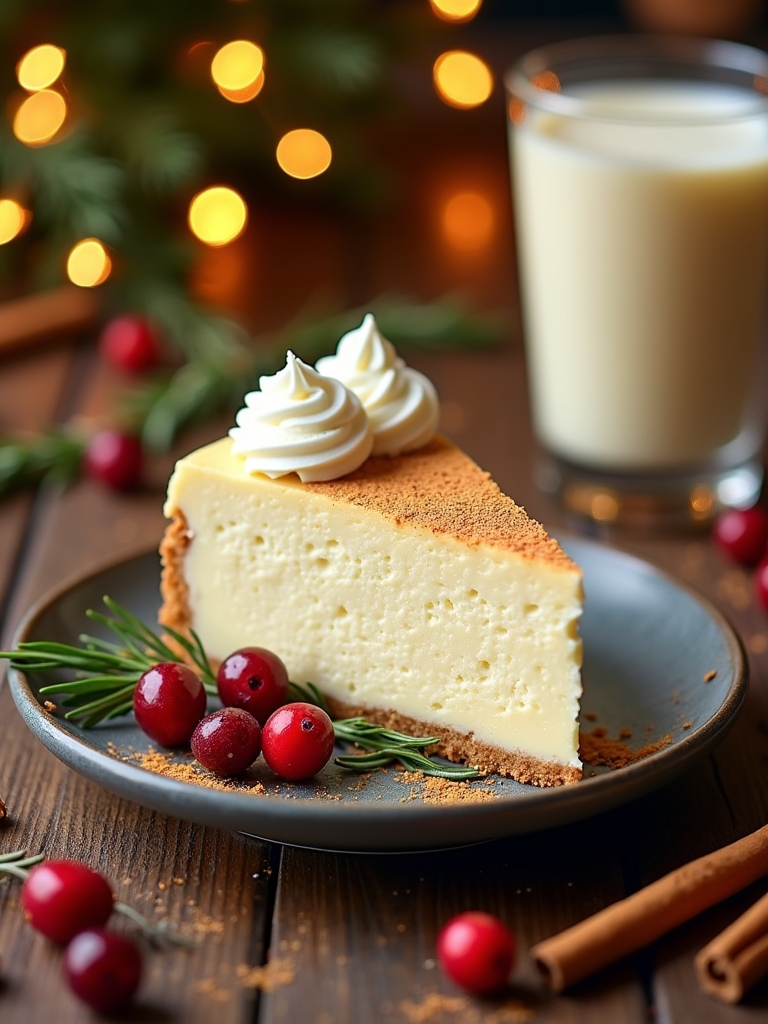
Indulging in a Festive Eggnog Cheesecake is a delightful way to celebrate the holiday season. This creamy, rich dessert combines the traditional flavors of eggnog with the velvety texture of cheesecake, making it a perfect centerpiece for your Christmas dinner table. With hints of nutmeg, cinnamon, and a touch of rum, this cheesecake is not only delicious but also embodies the spirit of the holidays. Whether you’re hosting a gathering or simply treating yourself, this recipe will undoubtedly impress your guests and become a cherished family favorite.
Experience the joy of the holiday season with our Festive Eggnog Cheesecake, a delightful blend of rich flavors and creamy texture.
Making this cheesecake is a straightforward process that involves creating a buttery graham cracker crust, a luscious filling, and a festive topping. The combination of cream cheese and eggnog creates a creamy, dreamy texture that’s hard to resist. Don’t forget to garnish your cheesecake with whipped cream and a sprinkle of nutmeg for an extra festive touch! Prepare to savor every slice as you spread holiday cheer with this delectable dessert.
Ingredients:
- 1 ½ cups graham cracker crumbs
- ½ cup unsalted butter, melted
- 2 cups cream cheese, softened
- 1 cup granulated sugar
- 1 cup eggnog
- 3 large eggs
- 1 teaspoon vanilla extract
- 1 teaspoon ground nutmeg
- 1 teaspoon ground cinnamon
- Whipped cream, for topping
- Additional nutmeg, for garnish
Instructions:
Preheat your oven to 325°F (163°C). In a mixing bowl, combine graham cracker crumbs and melted butter until well mixed, then press this mixture firmly into the bottom of a 9-inch springform pan to form the crust. Bake for 10 minutes, then allow to cool. In another bowl, beat the softened cream cheese with sugar until smooth. Gradually add the eggnog, mixing well, then incorporate eggs one at a time, followed by vanilla, nutmeg, and cinnamon. Pour the filling over the cooled crust and bake for about 60 minutes, or until the center is set but still slightly jiggly. Turn off the oven and let the cheesecake cool inside for an hour before removing it and refrigerating for at least 4 hours, preferably overnight.
Extra Tips:
For the best results, make sure all ingredients are at room temperature before mixing, as this helps create a smoother filling. When baking, avoid overmixing the batter to prevent excess air, which can cause cracks on the surface of your cheesecake. If you want a more pronounced eggnog flavor, consider adding a splash of rum or bourbon to the filling. Finally, remember to allow the cheesecake to chill completely before serving to guarantee it holds its shape and flavor beautifully. Enjoy your festive treat and happy holidays!
Frequently Asked Questions
Can I Prepare These Dishes Ahead of Time?
I love using make-ahead tips and freezer-friendly options. I often prep dishes in advance, freezing them for later. It saves time and allows me to enjoy the celebration without stress.
What Are Good Wine Pairings for These Recipes?
I love pairing a bold red wine with hearty dishes and a crisp white wine for lighter ones. Experimenting with a spicy Zinfandel or a invigorating Sauvignon Blanc can elevate your meal’s flavors beautifully.
How Can I Adapt These Recipes for Dietary Restrictions?
I adapt recipes by exploring gluten-free options, like almond flour for baking, and using vegan substitutions, such as cashew cream instead of dairy. It’s fun to innovate and still create delicious, inclusive dishes everyone can enjoy!
What Kitchen Tools Do I Need for These Recipes?
Imagine a kitchen bustling with creativity! For these recipes, I’ve found essential gadgets like a sharp chef’s knife, a reliable whisk, and a sturdy roasting pan. Trust me, these cooking tips elevate every dish to perfection!
How Do I Store Leftovers Properly After Dinner?
I store leftovers in airtight containers, ensuring I cool them quickly to maintain food safety. Label them with dates, and I’m always excited to reinvent meals later. It’s a fun challenge to create something new!
Conclusion
As you gather around the table this Christmas, let these homemade recipes transform your meal into a feast of warmth and joy. Each dish, from the succulent roast to the sweet desserts, holds the magic of the season. You’ll create not just flavors, but memories that will linger long after the last bite. So, roll up your sleeves and immerse yourself in the spirit of cooking—it’s a delicious way to share love with family and friends this holiday!