

I love making ice cream cake because it’s such a fun dessert! Start by baking your favorite cake mix at 350°F. Once it cools, layer it with soft ice cream and whipped cream for that creamy texture. Add chocolate syrup and sprinkles for a touch of sweetness. The key is to freeze it well before serving, making it perfect for any celebration. Stick around for more tips on flavors and customizations that’ll elevate your creation!
History
When I think about the history of ice cream cake, I can’t help but feel a sense of nostalgia. The delightful combination of creamy ice cream and soft cake has roots that trace back to ancient times, where ice cream origins began with frozen desserts enjoyed by nobility. Fast forward through cake evolution, and we see the marriage of these two indulgences become a staple at celebrations. It’s fascinating how innovative chefs started layering flavors, incorporating vibrant fruits, and experimenting with textures, transforming a simple dessert into a canvas of creativity. Each bite tells a story of tradition and modernity, reflecting our ever-evolving palate. The ice cream cake is not just a treat; it’s a delicious symbol of our culinary journey.
Recipe
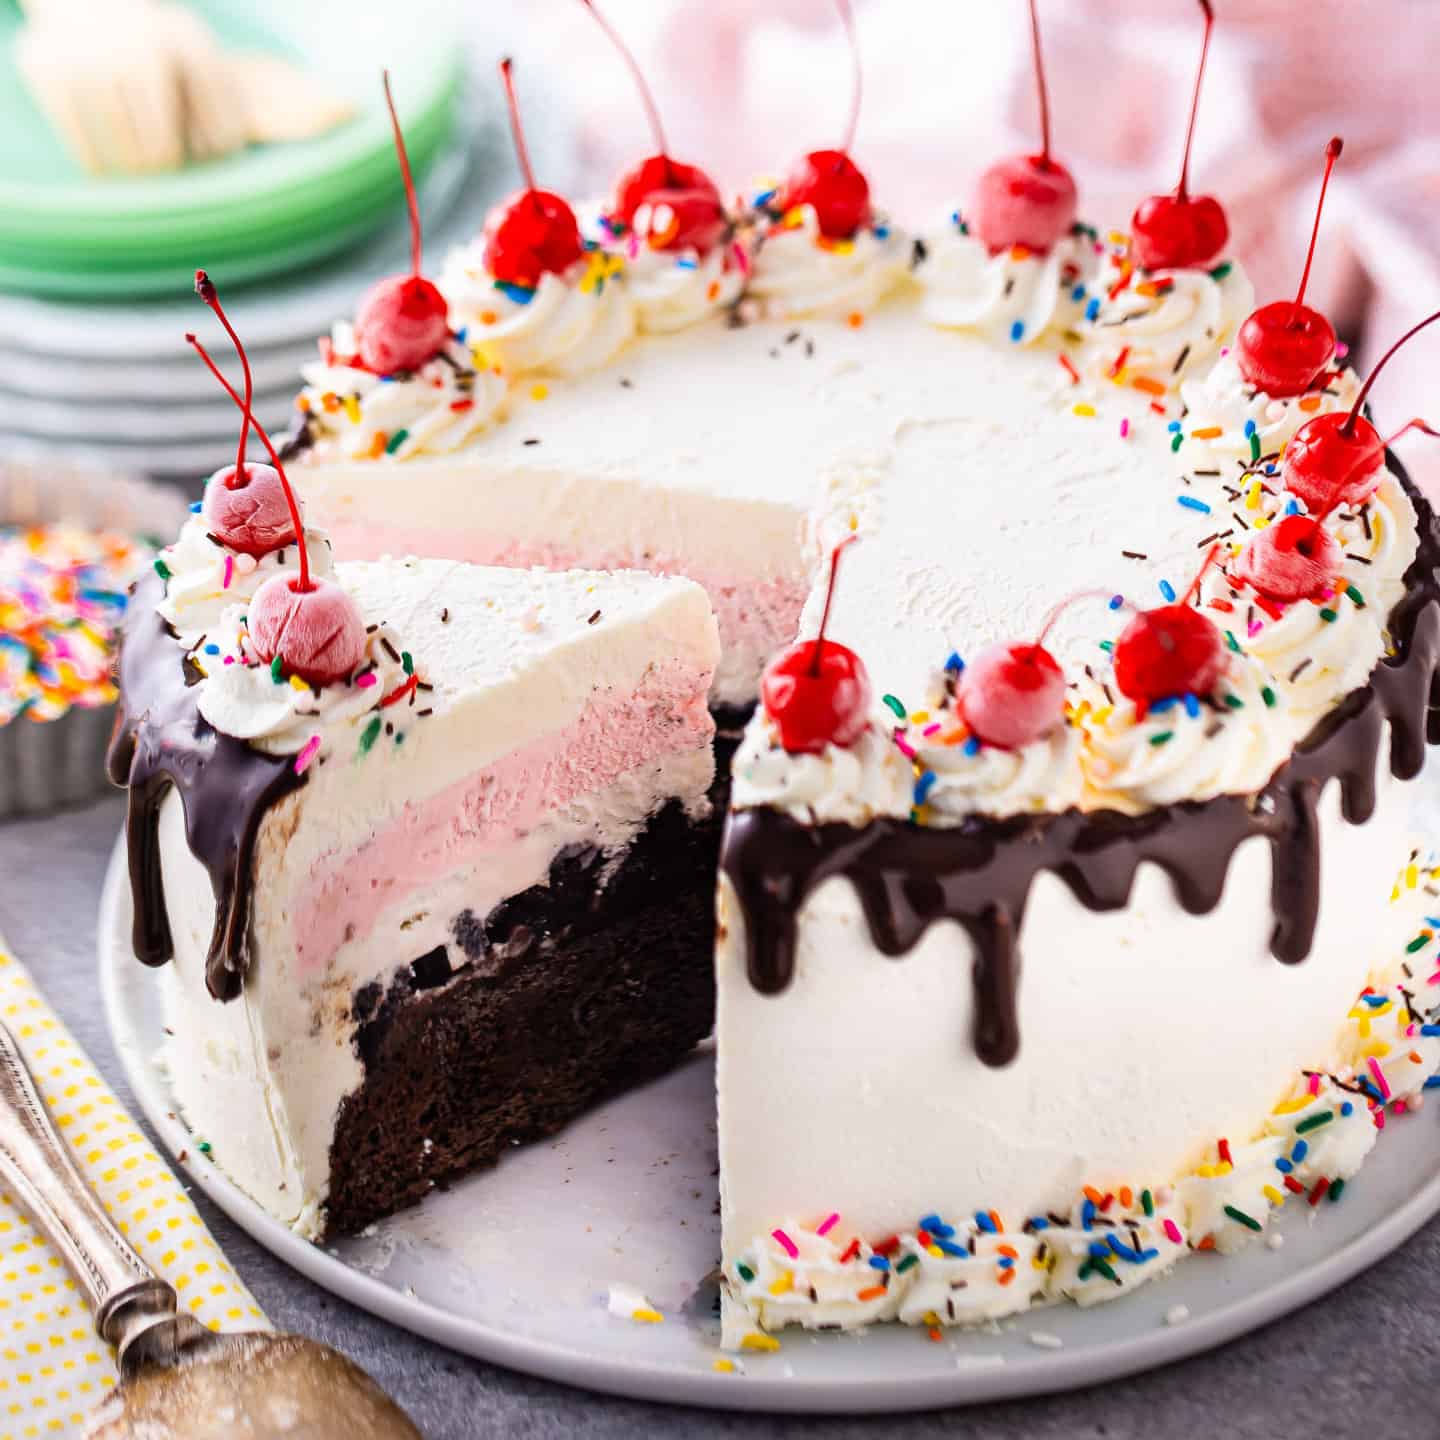
Ice cream cake is a delightful dessert that combines the creamy goodness of ice cream with the indulgence of cake. It’s perfect for birthdays, celebrations, or simply as a sweet treat to cool down on a hot day. The beauty of an ice cream cake is its versatility; you can customize the flavors and toppings to suit your preferences. With layers of cake and ice cream, it’s a showstopper that’s sure to impress family and friends alike.
Making an ice cream cake may sound intimidating, but it’s quite simple, and the reward is well worth the effort. You can use store-bought cake and ice cream or make your components from scratch for a more personal touch. The key to a successful ice cream cake is to verify that the layers are frozen solid before serving, so take your time with the freezing process to achieve the perfect texture.
Ingredients:
- 1 box of cake mix (any flavor)
- 3 cups of ice cream (any flavor)
- 1 cup of whipped cream
- 1 cup of chocolate syrup (or your favorite topping)
- 1/2 cup of sprinkles (optional)
- 1/2 cup of crushed cookies or candy (optional)
Instructions:
Begin by preparing the cake mix according to the package instructions and bake it in a round cake pan. Once the cake is baked, allow it to cool completely. Once cooled, slice the cake horizontally into two layers. Take one layer and place it at the bottom of a springform pan. Spread a layer of softened ice cream over the cake, followed by a layer of whipped cream. If desired, add a drizzle of chocolate syrup and some sprinkles or crushed cookies for added texture and flavor. Place the second layer of cake on top and repeat the process, finishing with a layer of whipped cream and your choice of toppings. Cover the pan with plastic wrap and freeze for at least 4 hours, or until firm.
Extra Tips:
To make cutting the cake easier when it’s time to serve, let it sit at room temperature for about 5-10 minutes before slicing. This allows the ice cream to soften slightly, making it easier to cut through. If using homemade cake or ice cream, verify both are well-cooled before assembling to maintain the integrity of the layers. Experiment with different flavors of ice cream and cake to create a unique and personalized dessert that suits your taste.
Cooking Steps
Now that we’ve got our ingredients ready, it’s time to bring this delicious ice cream cake to life. I’ll guide you through each step, from mixing the cake batter to that satisfying moment when we frost it with ice cream. Let’s get started and create something truly special!
Step 1. Gather Cake Ingredients
To create a delicious ice cream cake, you’ll need to gather a few essential ingredients that will form the base of this delightful dessert. Start with the cake flavors—consider rich chocolate or light vanilla, both of which pair beautifully with ice cream. Next, grab some all-purpose flour, sugar, eggs, and butter to achieve that perfect texture. Don’t forget baking powder to help it rise and stay fluffy! If you’re feeling adventurous, think about adding unique flavorings like almond extract or espresso powder. These small touches will elevate your cake. Finally, gather any mix-ins you’d like, such as chocolate chips or sprinkles, to add an exciting twist. With these ingredients, you’re well on your way to mastering innovative baking techniques!
Step 2. Mix Cake Batter Thoroughly
Whisking the ingredients together creates a smooth and cohesive cake batter, which is the foundation of a great ice cream cake. I start by using a handheld mixer on low speed, gradually increasing to medium, ensuring all the dry and wet ingredients blend seamlessly. This mixing technique not only aerates the batter but also achieves the perfect consistency. I look for a thick yet pourable texture—ideal for accommodating the ice cream layers I’ll add later. Don’t rush this step; it’s essential for a light, fluffy cake. If I notice any lumps, I’ll gently fold in the mixture with a spatula, ensuring everything is combined without overmixing. Trust me, nailing the batter consistency makes all the difference in your delightful creation!
Step 3. Bake at 350°F
After mixing the cake batter to perfection, it’s time to bake it at 350°F. This baking temperature is essential for achieving that delightful balance of moisture and fluffiness. As I pour the batter into my prepared pan, I can already envision the cake’s golden crust forming beautifully.
Setting the timer for about 25 to 30 minutes, I resist the urge to peek too soon; a closed oven is key to a consistent cake texture. The aroma fills my kitchen, promising a scrumptious treat. When the timer dings, I’ll know I’ve created a cake that’s not too dense or too airy, just right for layering with ice cream. Patience is important; this innovative dessert’s success begins here!
Step 4. Cool the Cake Completely
Once the cake comes out of the oven, I know it’s essential to let it cool completely before moving on to the next steps. To speed up the process, I often use a few cooling techniques. First, I transfer the cake to a wire rack, allowing air to circulate around it, which helps it cool evenly. If I’m in a hurry, I might even place the rack in a slightly cooler room. Once it’s cool to the touch, I store the cake in an airtight container to prevent it from drying out. Proper cake storage at this stage is vital—trust me, you don’t want a stale cake when it’s time to layer it with ice cream!
Step 5. Frost With Ice Cream
With the cake cooled and ready, the fun part begins—frosting it with ice cream! I love to experiment with different ice cream flavors, like rich chocolate or tangy raspberry, to create a unique cake experience. First, I soften the ice cream slightly, making it easier to spread. Using various frosting techniques, I apply a generous layer on top and around the sides. A spatula works wonders for smoothing it out, while a piping bag adds flair for decorative touches. I often combine flavors, like vanilla swirled with mint chocolate chip, to surprise the taste buds. Once frosted, I pop the cake back in the freezer to set. Trust me, this is where the magic happens!
Nutritional Guide
While indulging in a slice of ice cream cake can feel like a joyful treat, it’s essential to understand its nutritional profile. Knowing the caloric content and serving sizes can help you make informed choices while enjoying this delightful dessert.
| Nutrient | Per Serving (1 slice) |
|---|---|
| Calories | 350 |
| Total Fat | 20g |
| Sugar | 25g |
This table reveals the balance between pleasure and nutrition. The caloric content can vary based on the ingredients used, so if you’re conscious about your intake, consider smaller serving sizes or a lighter version. By understanding the nutritional guide, you can savor your ice cream cake without compromising your health goals!
Final Thoughts
As I reflect on the joy of making and sharing ice cream cake, it’s clear that this dessert is more than just a sweet treat; it’s a celebration of flavors and textures. The beauty of ice cream cake lies in its delicious variations—whether you opt for rich chocolate layers, fruity sorbet, or a mix of both, the possibilities are endless. I love experimenting with different fillings and toppings, like crushed cookies or fresh fruit, to elevate each creation. When it comes to serving suggestions, consider pairing slices with a drizzle of chocolate sauce or a dollop of whipped cream for added indulgence. Ultimately, ice cream cake invites us to get creative, making every occasion a little more special.
Frequently Asked Questions
Can I Use Non-Dairy Ice Cream for This Recipe?
I’ve used non-dairy options in my treats, and they’re fantastic. Ice cream substitutes can be creamy and flavorful, making your dessert just as delightful. Don’t hesitate to experiment with your favorite non-dairy varieties!
How Long Can I Store an Ice Cream Cake?
You can store an ice cream cake for up to two weeks in the freezer. I’ve found that proper wrapping and airtight containers are key storage tips, ensuring it retains flavor and texture. Enjoy innovating!
Can I Customize the Flavors Used in the Cake?
I love experimenting with flavor combinations. You can mix my favorite toppings—like crushed cookies, fresh fruits, or chocolate swirls—for a unique twist. Let your creativity shine; the possibilities are endless and delicious!
What Tools Do I Need to Make an Ice Cream Cake?
I know you might think making an ice cream cake requires fancy tools, but it doesn’t! You’ll just need ice cream molds, cake pans, and a whisk. Let’s get creative and have fun with it!
Is There a Gluten-Free Option for the Cake Base?
I love experimenting with gluten-free flours like almond or coconut for the cake base. These options create a delightful cake texture, ensuring everyone can enjoy a delicious treat without compromise. Give it a try!
Conclusion
As I reflect on the joy of creating this ice cream cake, I can’t help but wonder: what sweeter way is there to celebrate life’s moments than with a homemade treat? Each layer, rich with flavor and memories, invites you to share and indulge. Whether it’s a birthday, a simple gathering, or just because, this cake brings smiles to faces and warmth to hearts. So, why not whip up your own masterpiece and make some unforgettable memories?
Ice Cream Cake Recipe
Ingredients
Equipment
Method
- Crush the chocolate cookies into fine crumbs.
- Mix with melted butter until well combined.
- Press the mixture into the bottom of a 9-inch springform pan to form an even crust.
- Freeze for 15 minutes to set.
- Spread the softened vanilla ice cream over the crust in an even layer.
- Drizzle hot fudge sauce on top.
- Freeze for 1 hour to firm up.
- Add the softened chocolate ice cream as the next layer.
- Smooth the top with a spatula.
- Cover with plastic wrap and freeze for at least 4-6 hours (or overnight).
- Once fully set, remove from the springform pan.
- Top with whipped cream and sprinkles (if using).
- Slice and enjoy!