

If you’re like me and find yourself scrambling for quick yet delicious Christmas dinner ideas, I’ve got some fantastic recipes for you! From an Easy Herb-Crusted Roast Chicken to a One-Pan Honey Glazed Ham, these meals are not only delightful but also simple. You’ll also love the Quick Beef Wellington Bites and a speedy 15-Minute Cranberry Sauce. For dessert, try the No-Bake Chocolate Mint Cheesecake. Stick around, and I’ll share even more time-saving favorites!
Easy Herb-Crusted Roast Chicken
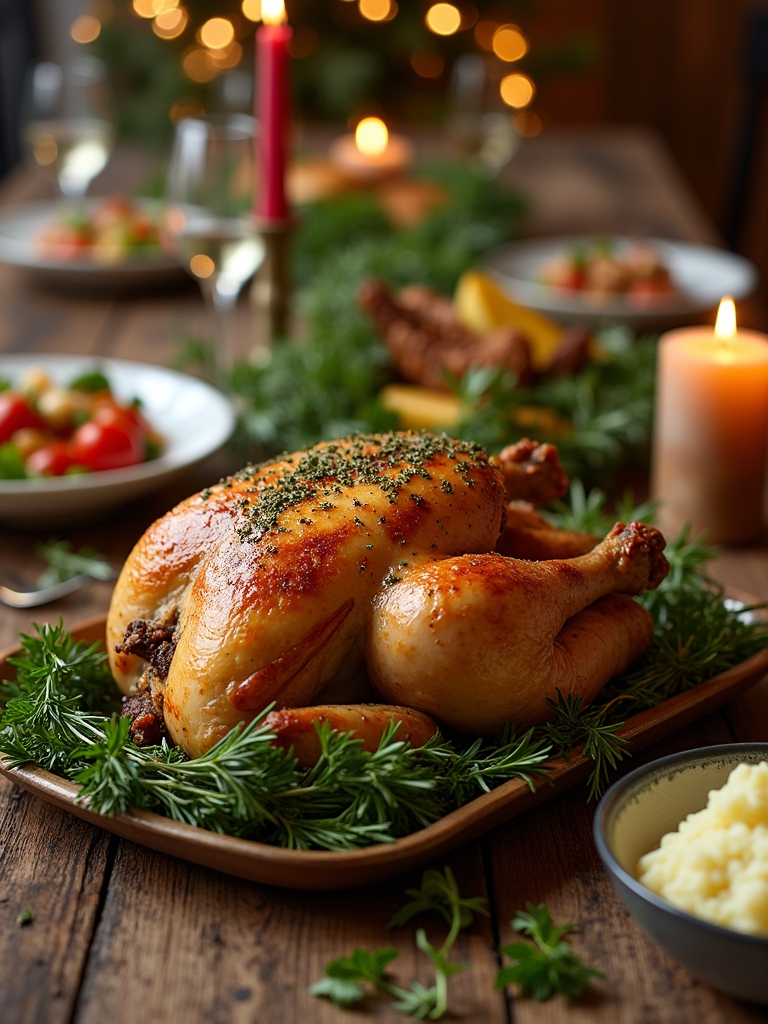
When it comes to preparing a festive meal that impresses without overwhelming, an Easy Herb-Crusted Roast Chicken is a perfect choice. This dish not only brings a beautiful centerpiece to your Christmas dinner table but also fills your home with an irresistible aroma. The simplicity of the recipe allows for a focus on quality ingredients, making it achievable even for novice cooks. With a blend of fresh herbs and a crispy, golden skin, this roast chicken is sure to delight your family and guests alike.
An Easy Herb-Crusted Roast Chicken makes for a stunning, aromatic centerpiece that will impress your holiday guests effortlessly.
To elevate the dish, consider using a free-range or organic chicken for enhanced flavor and tenderness. The herb crust, made from a medley of rosemary, thyme, and parsley, adds a fresh and vibrant touch to the rich, juicy meat. Pair this roast chicken with seasonal sides like roasted vegetables or creamy mashed potatoes, and you’ll have a well-rounded Christmas dinner that everyone will rave about.
Ingredients:
- 1 whole chicken (about 4-5 pounds)
- 4 tablespoons olive oil
- 2 tablespoons fresh rosemary, chopped
- 2 tablespoons fresh thyme, chopped
- 2 tablespoons fresh parsley, chopped
- 4 cloves garlic, minced
- Salt and pepper to taste
- 1 lemon, halved
- 1 onion, quartered
Instructions:
Preheat your oven to 425°F (220°C). In a small bowl, mix the olive oil, rosemary, thyme, parsley, minced garlic, salt, and pepper to create a herb paste. Pat the chicken dry with paper towels, then rub the herb paste all over the chicken, including under the skin and inside the cavity. Stuff the cavity with the halved lemon and quartered onion for added flavor. Place the chicken breast-side up on a roasting pan and roast in the preheated oven for about 1 hour and 15 minutes, or until the internal temperature reaches 165°F (75°C) and the skin is golden brown. Let it rest for 10-15 minutes before carving.
Extra Tips:
For an even more flavorful roast, consider brining the chicken in a saltwater solution for a few hours prior to cooking. This will help keep the meat juicy and tender. Additionally, if you have any leftover herbs, sprinkle them over your vegetable sides or use them in a salad to complement the chicken. Always allow the chicken to rest after cooking; this helps the juices redistribute, resulting in a more succulent dish. Finally, don’t forget to save the bones for a delicious homemade stock after the feast!
One-Pan Honey Glazed Ham
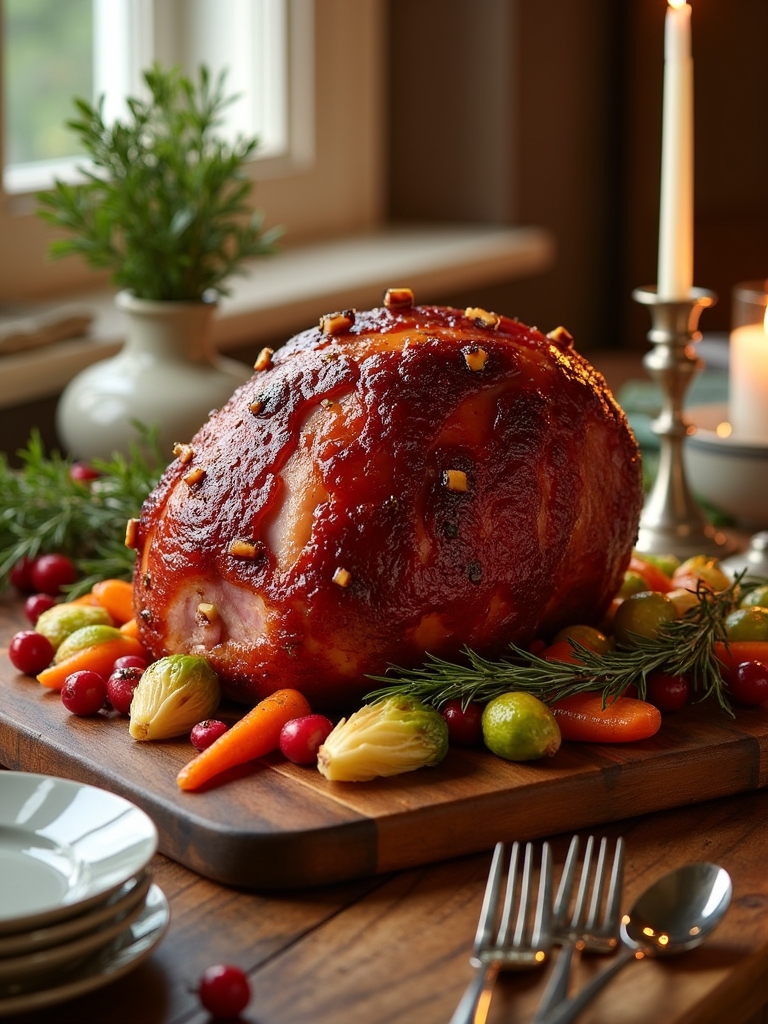
This One-Pan Honey Glazed Ham is the perfect centerpiece for your last-minute Christmas dinner. Not only is it simple to prepare, but it also delivers an impressive presentation and mouthwatering flavor that will delight your guests. The combination of honey, brown sugar, and mustard creates a sweet and tangy glaze that caramelizes beautifully on the ham, while the one-pan method makes cleanup a breeze. You can toss in some seasonal vegetables to roast alongside the ham, making this dish a complete meal in one.
To guarantee your ham is succulent and flavorful, it’s best to start with a pre-cooked ham, which will save you time and assure that it’s thoroughly heated through. As it cooks, the glaze will form a delicious crust, while the juices from the ham will keep it moist and tender. This dish is not only a time-saver; it also allows you to focus on other aspects of your holiday meal, so you can spend more time with family and friends.
Ingredients:
- 1 fully cooked bone-in ham (about 5-7 pounds)
- 1 cup honey
- 1/2 cup brown sugar
- 1/4 cup Dijon mustard
- 1/4 cup apple cider vinegar
- 1 teaspoon ground cinnamon
- 1/2 teaspoon ground cloves
- Fresh rosemary and thyme sprigs (optional, for garnish)
- Seasonal vegetables (such as carrots, Brussels sprouts, or sweet potatoes)
Instructions:
Preheat your oven to 325°F (165°C). In a small bowl, whisk together honey, brown sugar, Dijon mustard, apple cider vinegar, cinnamon, and cloves to create the glaze. Place the ham, cut side down, in a large roasting pan. Brush the glaze generously over the surface of the ham, making sure to get it into the scored sections if applicable. Arrange your chosen seasonal vegetables around the ham, drizzling them with a little olive oil, salt, and pepper. Cover the pan with aluminum foil and bake for about 1.5 to 2 hours, basting the ham with the glaze every 30 minutes. Remove the foil during the last 30 minutes of cooking to allow the ham to caramelize.
Extra Tips:
When selecting your ham, opt for one that is labeled “spiral cut” if you want easy serving; this will save you the trouble of carving. Additionally, make sure to let the ham rest for about 15-20 minutes before slicing to allow the juices to redistribute, ensuring that each slice is juicy and flavorful. If you have any leftover glaze, feel free to drizzle it over the sliced ham for an extra touch of sweetness. And remember, the vegetables can be swapped out for whatever you have on hand; just keep an eye on their cooking time to guarantee they don’t overcook. Enjoy your stress-free holiday feast!
Quick Beef Wellington Bites

If you’re looking to impress your guests this holiday season without spending all day in the kitchen, Quick Beef Wellington Bites are the perfect solution. These delightful bites combine the classic flavors of beef Wellington into a bite-sized treat that’s perfect for holiday gatherings. With flaky pastry, savory beef, and a rich mushroom duxelles, these hors d’oeuvres are sure to be a hit at your Christmas dinner.
Making Beef Wellington Bites is not only quick but also a great way to showcase your culinary skills. The key is to use pre-made puff pastry, which cuts down on prep time considerably while still delivering that signature buttery, flaky texture. Serve these elegant little bites with a side of horseradish or a balsamic reduction for dipping, and watch them disappear from the platter in no time.
Impress your guests effortlessly with these quick Beef Wellington Bites, featuring flaky pastry and savory flavors that will vanish in no time.
Ingredients:
- 1 lb beef tenderloin, cut into small cubes
- 1 sheet of puff pastry, thawed
- 8 oz mushrooms, finely chopped
- 2 cloves garlic, minced
- 1 shallot, minced
- 2 tbsp Dijon mustard
- 1 egg, beaten (for egg wash)
- Salt and pepper, to taste
- Olive oil, for cooking
- Fresh thyme, for garnish
Instructions:
In a skillet over medium heat, add a drizzle of olive oil and sauté the shallots and garlic until fragrant. Add the finely chopped mushrooms and cook until the moisture evaporates, about 5-7 minutes. Season the mixture with salt, pepper, and fresh thyme. Remove from heat and let it cool slightly. Meanwhile, preheat your oven to 400°F (200°C). Roll out the puff pastry and cut it into small squares. Place a cube of the beef tenderloin on each square, top with a spoonful of the mushroom mixture, and brush the edges with Dijon mustard. Fold the pastry over the filling and seal the edges, then brush the tops with the beaten egg. Place the bites on a baking sheet lined with parchment paper and bake for 15-20 minutes or until golden brown.
Extra Tips:
For best flavor, let the beef tenderloin come to room temperature before cooking, as this will help it sear quickly and evenly. You can also prepare the mushroom duxelles a day in advance and store it in the refrigerator to save time on the day of your event. If you want to add an extra layer of flavor, consider incorporating some pâté into the mushroom mixture. Finally, make sure that you don’t overfill your pastry bites to prevent them from bursting during baking. Enjoy your festive cooking!
Sheet Pan Lemon Garlic Salmon

For a delightful and hassle-free Christmas dinner, Sheet Pan Lemon Garlic Salmon is an exceptional choice that combines simplicity with vibrant flavors. This dish not only looks stunning on the table but also allows you to cook the main protein and vegetables simultaneously, minimizing cleanup and maximizing enjoyment. The combination of zesty lemon, aromatic garlic, and fresh herbs elevates the salmon, making it a dish that even the pickiest eaters will love.
This recipe is perfect for those last-minute holiday gatherings or intimate family dinners. The versatility of the sheet pan method means you can customize the vegetables according to your preference or whatever you have on hand. Just pop everything in the oven, and while it bakes, you can focus on other tasks or simply enjoy the festive atmosphere of your home.
Ingredients:
- 4 salmon fillets
- 2 tablespoons olive oil
- 3 cloves garlic, minced
- 1 lemon, sliced
- 1 teaspoon dried oregano
- 1 teaspoon dried thyme
- Salt and pepper to taste
- 1 cup cherry tomatoes, halved
- 1 cup asparagus, trimmed
- Fresh parsley, chopped (for garnish)
Instructions:
Preheat your oven to 400°F (200°C) and line a large baking sheet with parchment paper. In a small bowl, mix the olive oil, minced garlic, oregano, thyme, salt, and pepper. Place the salmon fillets on the sheet pan and brush them generously with the garlic oil mixture. Arrange the lemon slices on top of the salmon. On one side of the salmon, spread out the cherry tomatoes and asparagus, drizzling them with any remaining garlic oil. Bake in the preheated oven for 15-20 minutes or until the salmon is cooked through and flakes easily with a fork, and the vegetables are tender.
Extra Tips:
To enhance the flavor of your Sheet Pan Lemon Garlic Salmon, consider marinating the salmon in the garlic oil mixture for 30 minutes before cooking, allowing the flavors to penetrate the fish. You can also experiment with seasonal vegetables like Brussels sprouts or bell peppers for added color and taste. Finally, keep an eye on the cooking time, as thinner fillets may require less time in the oven; you want the salmon to be perfectly moist and tender, not overcooked. Enjoy your festive meal and the compliments that are sure to follow!
Simple Stuffed Bell Peppers

Stuffed bell peppers are a delightful and colorful addition to any Christmas dinner table, offering a perfect blend of flavor and nutrition. They can be made in advance and baked just before serving, making them a convenient choice for those last-minute preparations. The vibrant colors of the peppers not only bring a festive touch to your meal but also provide a delicious way to incorporate vegetables into your holiday feast.
This simple yet satisfying dish can be customized to suit your taste preferences and dietary needs. You can fill the peppers with a variety of ingredients, such as rice, quinoa, or even ground meat, mixed with herbs and spices to create layers of flavor. Whether you’re hosting a large gathering or preparing a cozy dinner for two, stuffed bell peppers are sure to impress your guests and leave them asking for seconds.
Ingredients:
- 4 large bell peppers (any color)
- 1 cup cooked rice (white or brown)
- 1 cup cooked ground meat (beef, turkey, or sausage)
- 1 cup diced tomatoes (fresh or canned)
- 1/2 cup onion, chopped
- 1 clove garlic, minced
- 1 teaspoon Italian seasoning
- Salt and pepper to taste
- 1 cup shredded cheese (cheddar or mozzarella)
- Olive oil for drizzling
- Fresh parsley for garnish (optional)
To prepare the stuffed bell peppers, preheat your oven to 375°F (190°C). Cut the tops off the bell peppers and remove the seeds and membranes. In a skillet over medium heat, sauté the chopped onions and garlic in a drizzle of olive oil until softened. Add the cooked rice, ground meat, diced tomatoes, Italian seasoning, salt, and pepper to the skillet, stirring to combine all ingredients well. Fill each bell pepper with the mixture, packing it tightly, and place them upright in a baking dish. Sprinkle shredded cheese on top of each stuffed pepper and cover the dish with aluminum foil. Bake in the preheated oven for about 30 minutes, then remove the foil and bake for an additional 10 minutes, or until the cheese is bubbly and golden.
When cooking stuffed bell peppers, feel free to get creative with your fillings. You can substitute ingredients based on what you have on hand or add extras like black beans, corn, or spinach for added nutrition. If you prefer a vegetarian option, omit the meat and use beans or lentils instead. Additionally, consider serving the stuffed peppers with a side salad or crusty bread to complete the meal. Remember to let the peppers cool for a few minutes before serving, as the filling will be hot. Enjoy your festive creation!
Creamy Mushroom Risotto
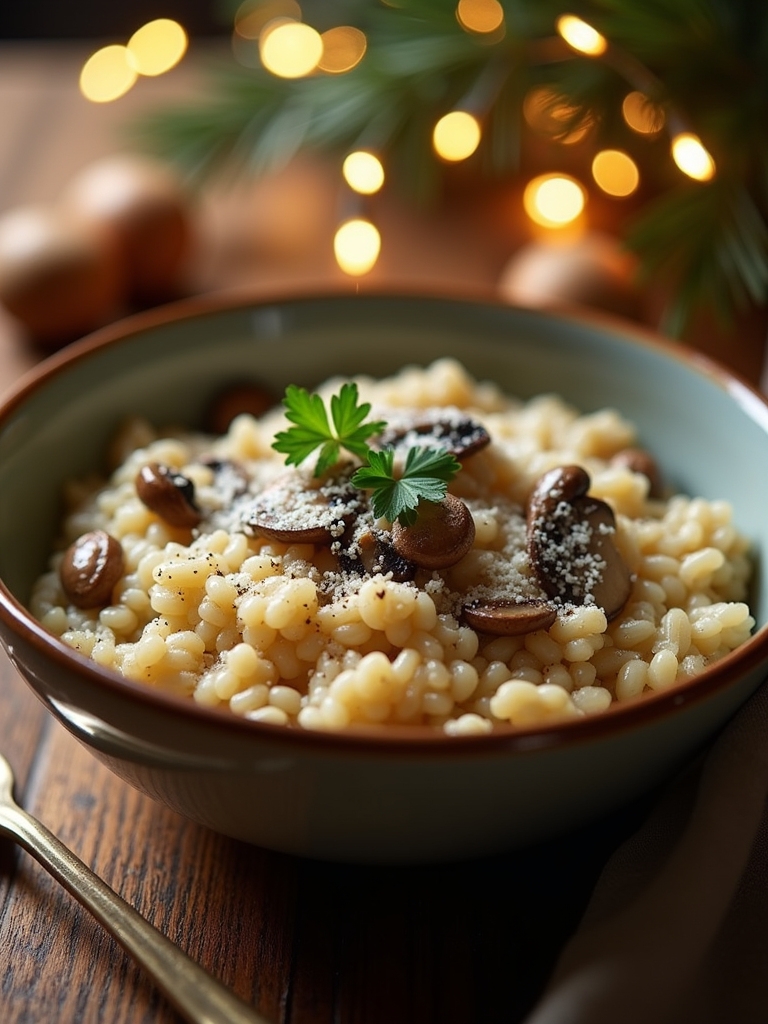
Creamy Mushroom Risotto is a luxurious yet simple dish that can elevate your Christmas dinner to new heights. With its rich and velvety texture, this risotto is made using arborio rice, which is known for its ability to absorb flavors while maintaining a creamy consistency. The addition of fresh mushrooms provides an earthy depth, making it a comforting and satisfying option for your holiday table.
Cooking risotto requires a little patience, as the rice needs to be stirred continuously to release its starches, resulting in that signature creaminess. This dish can be customized with various herbs and cheeses, but the classic combination of garlic, onions, and parmesan will always reign supreme. Whether you’re entertaining guests or enjoying a quiet evening at home, this creamy mushroom risotto is sure to impress.
Ingredients:
- 1 cup arborio rice
- 4 cups vegetable or chicken broth
- 1 cup mushrooms (cremini or shiitake), sliced
- 1 small onion, finely chopped
- 2 cloves garlic, minced
- 1/2 cup white wine (optional)
- 1/2 cup grated Parmesan cheese
- 2 tablespoons olive oil
- 2 tablespoons butter
- Salt and pepper to taste
- Fresh parsley, chopped (for garnish)
To prepare the creamy mushroom risotto, start by heating the vegetable or chicken broth in a saucepan and keep it warm over low heat. In a separate large pan, heat olive oil and butter over medium heat, then add the chopped onions and sauté until translucent, about 3-4 minutes. Stir in the minced garlic and sliced mushrooms, cooking until the mushrooms are softened. Next, add the arborio rice, stirring to coat the grains with oil and toasting them for about 1-2 minutes. If using, pour in the white wine and let it simmer until absorbed. Gradually add the warm broth, one ladle at a time, stirring continuously until each addition is absorbed before adding the next. This process should take about 18-20 minutes. Once the rice is al dente, stir in the Parmesan cheese, and season with salt and pepper to taste. Remove from heat and let it rest for a couple of minutes before serving.
When cooking risotto, remember that patience is key. Stirring frequently helps release the starches from the rice, contributing to the dish’s creamy texture. If you find that the risotto is too thick, you can always add a bit more broth to achieve your desired consistency. Feel free to experiment with different types of mushrooms, or even add peas or spinach for extra color and nutrition. Finally, be cautious with the salt, especially if your broth is already salted, as the Parmesan cheese will also add flavor. Enjoy your cooking!
Speedy Garlic Parmesan Roasted Potatoes
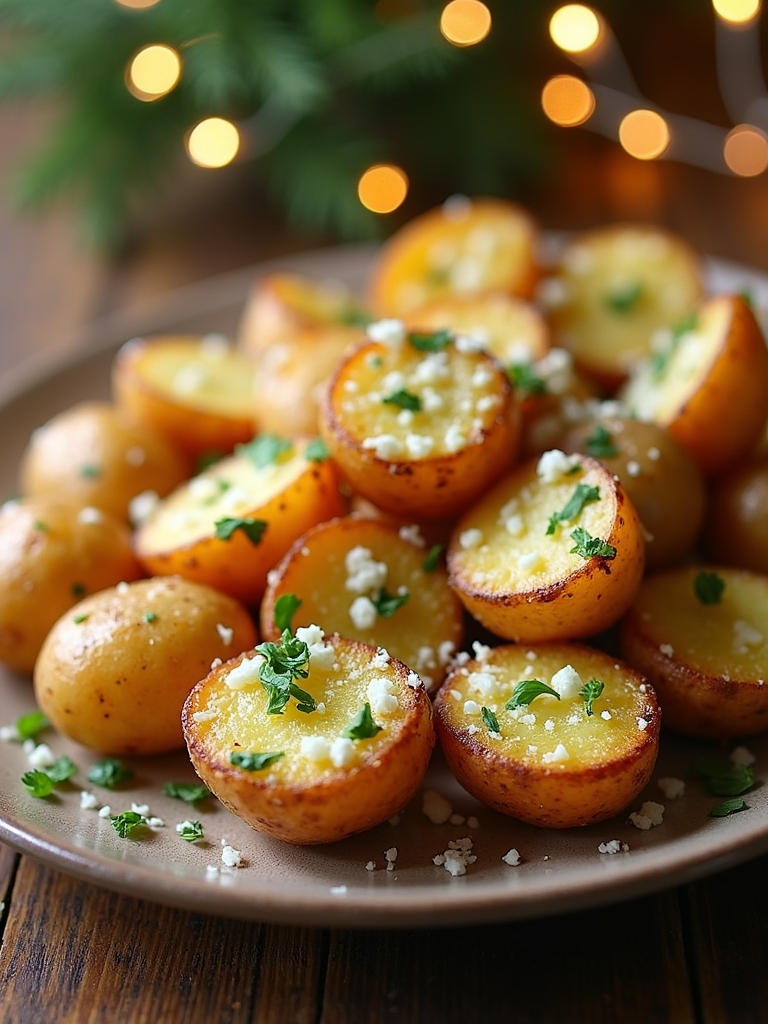
When it comes to last-minute Christmas dinner preparations, Speedy Garlic Parmesan Roasted Potatoes are a perfect choice. These crispy, flavorful potatoes are not only quick to prepare but also make an excellent side dish that pairs beautifully with a variety of festive entrees. The combination of garlic and Parmesan cheese brings out the natural sweetness of the potatoes, while the roasting process adds a satisfying crunch that will have your guests asking for seconds.
Speedy Garlic Parmesan Roasted Potatoes are a quick, delicious side that will impress your holiday guests.
This recipe requires minimal ingredients and can be made in under 30 minutes, making it an ideal option for those who are pressed for time. Plus, the aromatic blend of garlic and herbs fills your kitchen with a delightful scent, setting a warm and inviting atmosphere for your holiday gathering. With just a few simple steps, you’ll have a delicious side dish that looks as good as it tastes.
Ingredients:
- 2 pounds baby potatoes, halved
- 4 tablespoons olive oil
- 4 cloves garlic, minced
- 1 teaspoon dried Italian herbs (or your favorite herb blend)
- ½ cup grated Parmesan cheese
- Salt and pepper to taste
- Fresh parsley, chopped (for garnish)
To cook the Speedy Garlic Parmesan Roasted Potatoes, preheat your oven to 425°F (220°C). In a large mixing bowl, combine the halved baby potatoes, olive oil, minced garlic, Italian herbs, salt, and pepper. Toss everything together until the potatoes are well-coated in the mixture. Spread the potatoes out in a single layer on a baking sheet lined with parchment paper. Roast in the oven for about 20-25 minutes, or until the potatoes are golden brown and crispy. In the last 5 minutes of roasting, sprinkle the grated Parmesan cheese over the potatoes and return to the oven until melted and bubbly. Once done, remove from the oven, garnish with fresh parsley, and serve hot.
For the best results, make certain that your potatoes are cut into even-sized pieces to promote uniform cooking. If you want to add an extra layer of flavor, consider tossing in some chopped fresh rosemary or thyme along with the garlic and herbs. Additionally, be careful not to overcrowd the baking sheet, as this can lead to steaming instead of roasting. If you have more than 2 pounds of potatoes, it’s better to use two baking sheets to achieve that perfect crispy texture. Enjoy your delicious Speedy Garlic Parmesan Roasted Potatoes at your holiday dinner!
Festive Roasted Brussels Sprouts
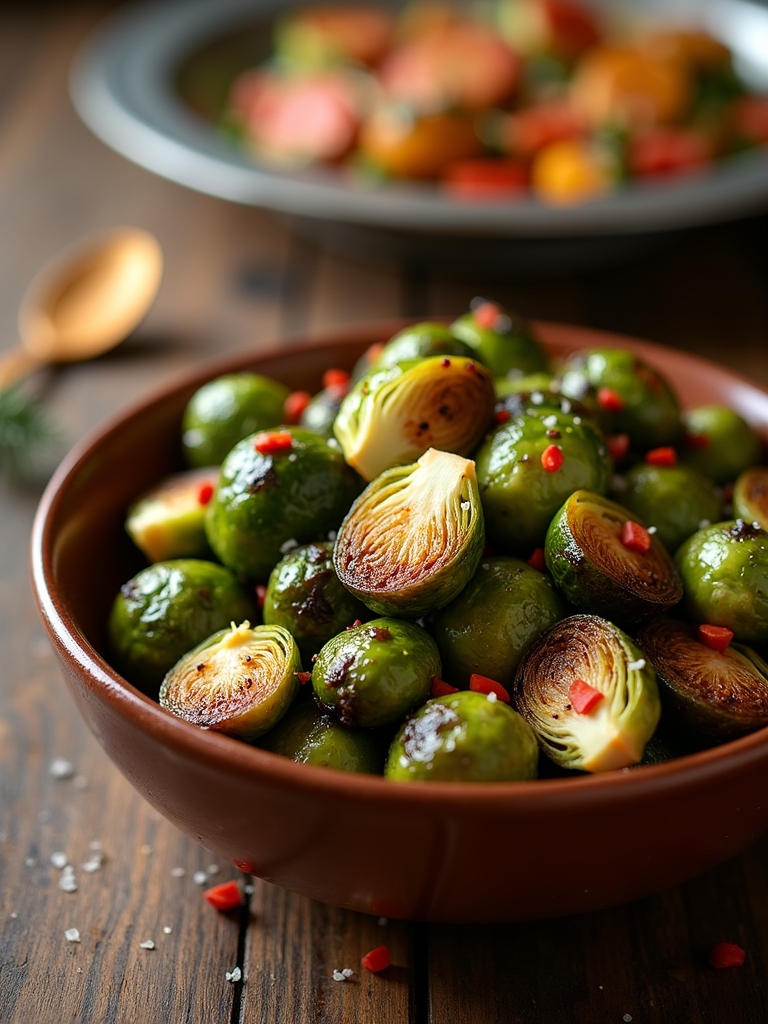
Brussels sprouts are a quintessential side dish during the festive season, bringing both flavor and a touch of elegance to your Christmas dinner table. Their slightly nutty taste and crispy texture when roasted make them a perfect complement to any holiday feast. With minimal prep and cooking time, these festive roasted Brussels sprouts can be easily whipped up at the last minute, allowing you to focus on other dishes and enjoy quality time with your loved ones.
To elevate the flavors, consider adding a drizzle of balsamic glaze or a sprinkle of parmesan cheese just before serving. The caramelization that occurs during roasting enhances the natural sweetness of the Brussels sprouts, making them a popular choice even among those who typically shy away from vegetables. With this simple recipe, you can impress your guests with a deliciously festive side that pairs well with turkey, ham, or any main course you have planned.
Ingredients:
- 1 lb Brussels sprouts, trimmed and halved
- 3 tablespoons olive oil
- 1 teaspoon salt
- 1/2 teaspoon black pepper
- 1/4 teaspoon garlic powder
- 1/4 teaspoon red pepper flakes (optional)
- 2 tablespoons balsamic vinegar
- 1/4 cup grated parmesan cheese (optional)
Cooking Instructions:
Preheat your oven to 425°F (220°C). In a large bowl, toss the halved Brussels sprouts with olive oil, salt, black pepper, garlic powder, and red pepper flakes until evenly coated. Spread the sprouts in a single layer on a baking sheet lined with parchment paper and roast in the preheated oven for about 20-25 minutes, or until they are golden brown and crispy on the outside, tossing halfway through for even cooking. Remove from the oven, drizzle with balsamic vinegar, and sprinkle with grated parmesan cheese if desired. Serve hot.
Extra Tips:
For an added layer of flavor, consider mixing in some chopped bacon or pancetta with the Brussels sprouts before roasting for a savory touch. If you prefer a sweeter variation, toss the sprouts with a bit of maple syrup before roasting. Also, be sure to keep an eye on them while they roast to prevent burning; every oven is a bit different, and you want to achieve that perfect crispy texture without losing their vibrant color. Enjoy experimenting with different seasonings and toppings to make this dish your own!
Whipped Sweet Potato Casserole
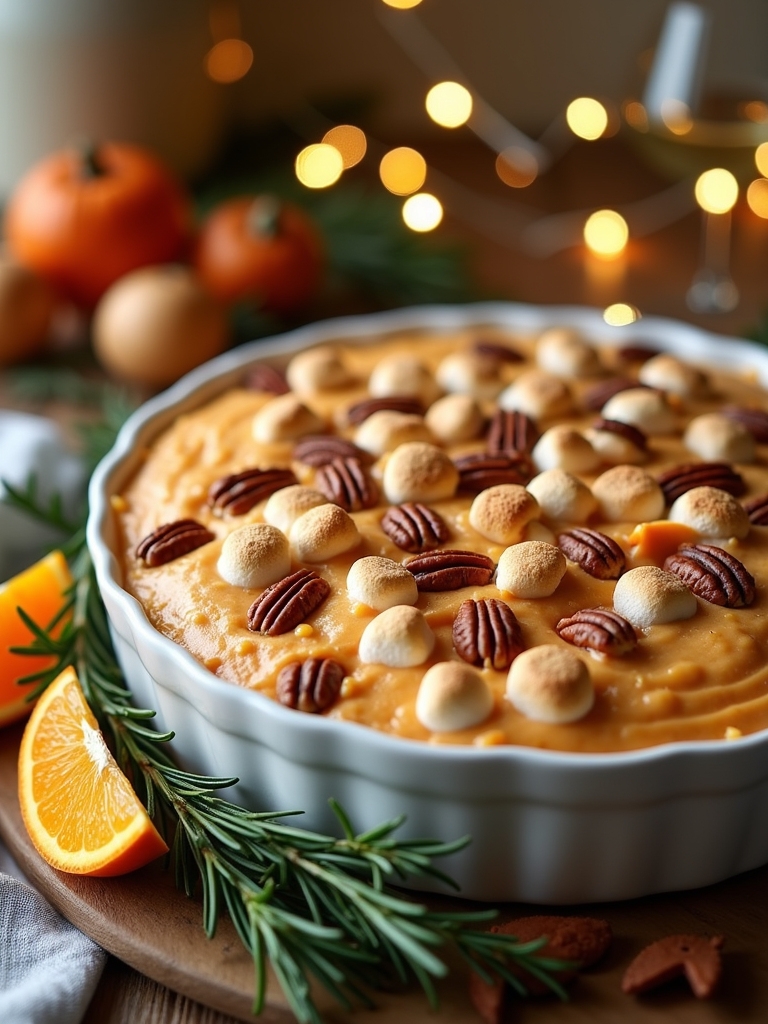
Whipped Sweet Potato Casserole is a delightful dish that brings a touch of sweetness and warmth to your holiday table. This creamy, fluffy casserole is not only a crowd-pleaser but also a fantastic way to incorporate the nutritious goodness of sweet potatoes into your Christmas dinner. By whipping the sweet potatoes, you create a light and airy texture that pairs beautifully with the crunchy topping. It’s a perfect balance of flavors that will have your guests coming back for seconds.
Preparing this dish is relatively simple and can be done in advance, making it a great option for busy holiday cooking. The base of the casserole is made from cooked sweet potatoes, which are blended with butter, sugar, and spices to create a smooth and velvety filling. Topped with a mixture of pecans and brown sugar, this casserole is baked until golden and bubbly, giving it an irresistible finish. Serve it alongside your main dishes, and watch it disappear!
Ingredients:
- 4 large sweet potatoes
- 1/2 cup unsalted butter, softened
- 1/2 cup brown sugar
- 1/4 cup milk
- 1 teaspoon vanilla extract
- 1/2 teaspoon cinnamon
- 1/4 teaspoon nutmeg
- 1/4 teaspoon salt
- 1 cup pecans, chopped
- 1/2 cup mini marshmallows (optional)
To begin, preheat your oven to 350°F (175°C). Peel and chop the sweet potatoes into large chunks, then boil them in salted water until tender, about 15-20 minutes. Drain the sweet potatoes and transfer them to a mixing bowl. Add the softened butter, brown sugar, milk, vanilla extract, cinnamon, nutmeg, and salt. Use a hand mixer or a potato masher to whip the mixture until smooth and fluffy. Spread the sweet potato mixture evenly into a greased 9×13 inch baking dish. In a separate bowl, combine the chopped pecans and a little brown sugar. Sprinkle this topping evenly over the sweet potato mixture. If desired, add mini marshmallows on top of the pecans for extra sweetness. Bake for 25-30 minutes, or until the topping is golden brown and the casserole is heated through.
When making Whipped Sweet Potato Casserole, you can prepare the sweet potato mixture a day in advance and store it in the refrigerator. Just remember to bring it to room temperature before baking. Additionally, feel free to experiment with the toppings—some people enjoy adding a streusel topping or even a drizzle of maple syrup for extra flavor. If you prefer a less sweet version, you can reduce the amount of brown sugar or substitute it with a natural sweetener. Enjoy this festive dish and make it your own!
Crunchy Winter Salad With Pomegranate
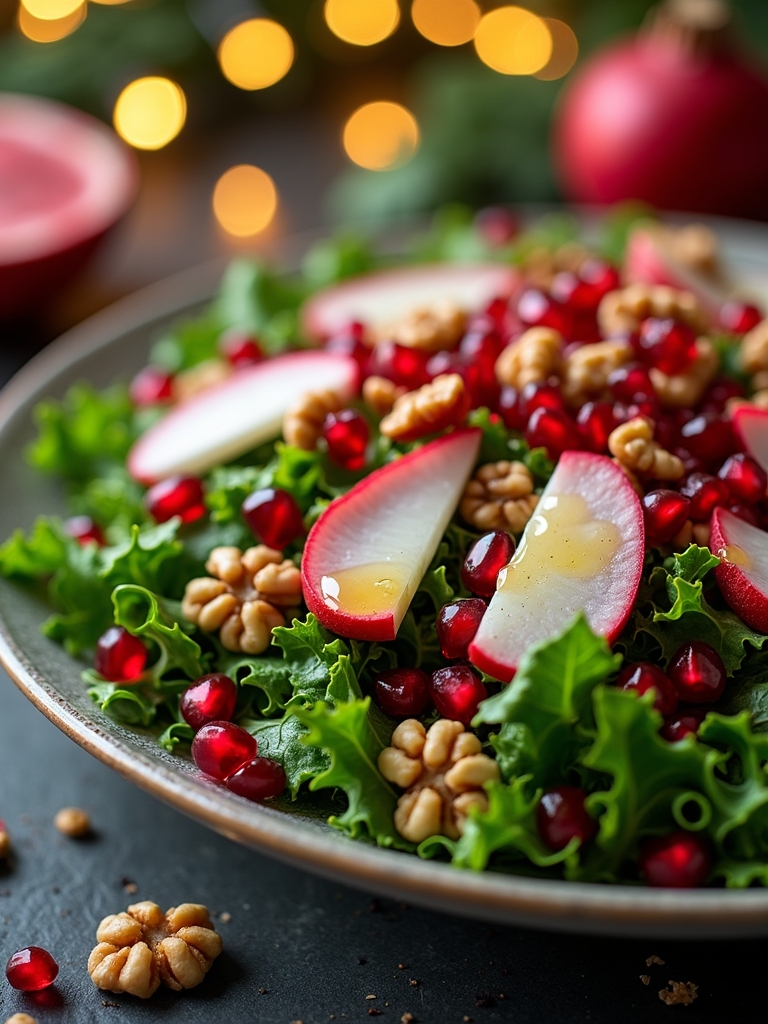
When the holiday season rolls around, it’s easy to get caught up in the hustle and bustle of preparing a feast. However, a rejuvenating Crunchy Winter Salad with Pomegranate can add a vibrant touch to your Christmas dinner table. This salad not only brings color and texture but also provides a delightful contrast to the heavier dishes that often dominate holiday meals. The combination of crunchy greens, juicy pomegranate seeds, and a zesty dressing makes this dish both delicious and nutritious.
This salad is incredibly versatile and can be made ahead of time, allowing you to focus on your main courses. The pomegranate adds a burst of sweetness and a pop of color, while the nuts provide a satisfying crunch. Whether you are hosting a large gathering or an intimate dinner, this winter salad is sure to impress and can be easily adjusted to suit your taste preferences.
Ingredients:
- 4 cups mixed salad greens (arugula, spinach, or kale)
- 1 cup pomegranate seeds
- 1/2 cup walnuts or pecans, chopped
- 1/2 cup crumbled feta cheese
- 1/4 cup red onion, thinly sliced
- 1/4 cup olive oil
- 2 tablespoons balsamic vinegar
- 1 teaspoon honey
- Salt and pepper to taste
In a large bowl, combine the mixed salad greens, pomegranate seeds, chopped nuts, crumbled feta cheese, and sliced red onion. In a small bowl, whisk together the olive oil, balsamic vinegar, honey, salt, and pepper to create the dressing. Drizzle the dressing over the salad and toss gently to combine, ensuring that the greens are well coated. Serve immediately for the freshest taste, or let it chill in the refrigerator for up to 30 minutes to allow the flavors to meld.
When preparing this Crunchy Winter Salad, it’s important to use fresh ingredients for the best flavor and texture. If you want to add a twist, consider incorporating other seasonal ingredients such as sliced apples, pear, or even roasted beets. The salad can also be made vegan by omitting the feta cheese and using maple syrup in place of honey. Remember to toss the salad just before serving to maintain the crispness of the greens and keep the pomegranate seeds vibrant. Enjoy this delightful dish as a rejuvenating complement to your holiday spread!
15-Minute Cranberry Sauce

When the holiday season rolls around, few things are as essential to a festive dinner as a vibrant, tangy cranberry sauce. This Minute Cranberry Sauce recipe is perfect for those who find themselves short on time yet still want to impress their guests with a homemade dish. With just a handful of ingredients and a quick cooking process, you can whip up a delightful sauce that complements turkey, ham, or any holiday feast in mere moments.
This recipe takes advantage of fresh or frozen cranberries, which are bursting with flavor and packed with antioxidants. The addition of sugar and a hint of orange zest balances the tartness of the berries, creating a wonderfully invigorating condiment. Whether you’re preparing for a large gathering or an intimate family dinner, this cranberry sauce will be a crowd-pleaser and can be made just moments before serving.
Ingredients:
- 2 cups fresh or frozen cranberries
- 1 cup granulated sugar
- 1 cup water
- Zest of 1 orange
- Juice of 1 orange
- 1 cinnamon stick (optional)
Instructions:
In a medium saucepan, combine the cranberries, sugar, and water. Bring the mixture to a boil over medium-high heat, stirring occasionally. Once boiling, reduce the heat and let it simmer for about 10 minutes, or until the cranberries burst and the sauce thickens. Stir in the orange zest, orange juice, and add the cinnamon stick if using. Remove from heat and let it cool slightly before serving; the sauce will thicken as it cools.
Extra Tips:
For a twist on the classic flavor, consider adding chopped walnuts or pecans for some crunch, or a splash of port wine for depth. If you prefer a smoother texture, you can blend the sauce after it cools. This cranberry sauce can be made ahead of time and stored in the refrigerator for up to a week, making it a perfect make-ahead option for your holiday meal.
No-Bake Chocolate Mint Cheesecake

Indulge in the festive flavors of the holiday season with this delightful No-Bake Chocolate Mint Cheesecake. Perfect for last-minute holiday gatherings, this dessert combines the rich taste of chocolate with a revitalizing hint of mint, making it a crowd-pleaser. The creamy texture and decadent flavor profile will leave your guests asking for more, and the best part is, it requires no baking, allowing you to focus on other elements of your Christmas dinner.
Experience the festive delight of No-Bake Chocolate Mint Cheesecake, a creamy, crowd-pleasing dessert perfect for holiday gatherings.
This cheesecake is not only easy to prepare but also requires minimal time and effort to create. With a simple crust made from crushed chocolate cookies and a luscious filling of cream cheese, whipped cream, and mint flavoring, you can whip up this dessert in no time. Let it chill in the refrigerator, and it will be ready to impress your family and friends by the time you’re ready to serve.
Ingredients:
- 2 cups chocolate cookie crumbs
- 1/2 cup unsalted butter, melted
- 16 oz cream cheese, softened
- 1 cup powdered sugar
- 1 teaspoon vanilla extract
- 1/2 teaspoon peppermint extract
- 1 cup heavy whipping cream
- 1/4 cup chocolate chips (for garnish)
- Fresh mint leaves (for garnish)
In a medium bowl, mix the chocolate cookie crumbs with melted butter until well combined. Press the mixture firmly into the bottom of a 9-inch springform pan to create the crust. In a large mixing bowl, beat the softened cream cheese, powdered sugar, vanilla extract, and peppermint extract until smooth and creamy. In a separate bowl, whip the heavy cream until stiff peaks form, and then gently fold it into the cream cheese mixture. Pour this filling over the crust and smooth the top. Cover the cheesecake with plastic wrap and refrigerate for at least 4 hours, or overnight if possible. Before serving, garnish with chocolate chips and fresh mint leaves.
Extra tips for this No-Bake Chocolate Mint Cheesecake include experimenting with different cookie types for the crust, such as Oreos or thin mints, to enhance the flavor. Make sure to allow enough time for the cheesecake to chill, as this is essential for setting the filling properly. Additionally, if you want to add a festive touch, consider drizzling some melted chocolate over the top before serving or adding crushed candy canes for a holiday crunch. Enjoy your deliciously easy dessert!
Classic Gingerbread Cookies

Classic Gingerbread Cookies are a beloved holiday treat that fill your kitchen with the warm, spicy aromas of cinnamon, ginger, and cloves. These cookies are not only delicious but also a fun activity for families to enjoy together during the festive season. With their unique shape and rich flavor, gingerbread cookies can be decorated in a variety of ways, making them perfect for gifting or simply sharing with loved ones.
Making gingerbread cookies is a straightforward process that requires basic baking skills and ingredients. Whether you choose to cut them into festive shapes or create a classic gingerbread house, these cookies are sure to delight both kids and adults alike. Once baked, you can decorate them with icing, candies, or simply enjoy them plain. Get ready to embrace the spirit of the season with this timeless recipe!
Ingredients:
- 3 cups all-purpose flour
- 1 teaspoon baking soda
- 1 tablespoon ground ginger
- 1 tablespoon ground cinnamon
- 1/2 teaspoon ground cloves
- 1/2 teaspoon salt
- 1/2 cup unsalted butter, softened
- 1/2 cup brown sugar, packed
- 1/2 cup molasses
- 1 large egg
- 1 teaspoon vanilla extract
To prepare the gingerbread cookies, begin by preheating your oven to 350°F (175°C). In a large bowl, whisk together the flour, baking soda, ginger, cinnamon, cloves, and salt. In another bowl, cream the softened butter and brown sugar until light and fluffy. Then, mix in the molasses, egg, and vanilla extract until well combined. Gradually add the dry ingredients to the wet mixture, stirring until a dough forms. Once the dough is ready, roll it out on a floured surface to about 1/4 inch thick and cut into your desired shapes. Place the cookies on a baking sheet lined with parchment paper and bake for 8-10 minutes. Let them cool completely before decorating.
When making gingerbread cookies, it’s important to guarantee that your dough is well-chilled before rolling it out; this prevents the cookies from spreading too much while baking. If you find the dough too sticky, you can add a little more flour as needed. Additionally, feel free to get creative with decorations! Use royal icing for intricate designs or let kids go wild with edible decorations. Storing the cookies in an airtight container will keep them fresh for days, making them perfect for enjoying throughout the holiday season.
Instant Pot Eggnog Rice Pudding
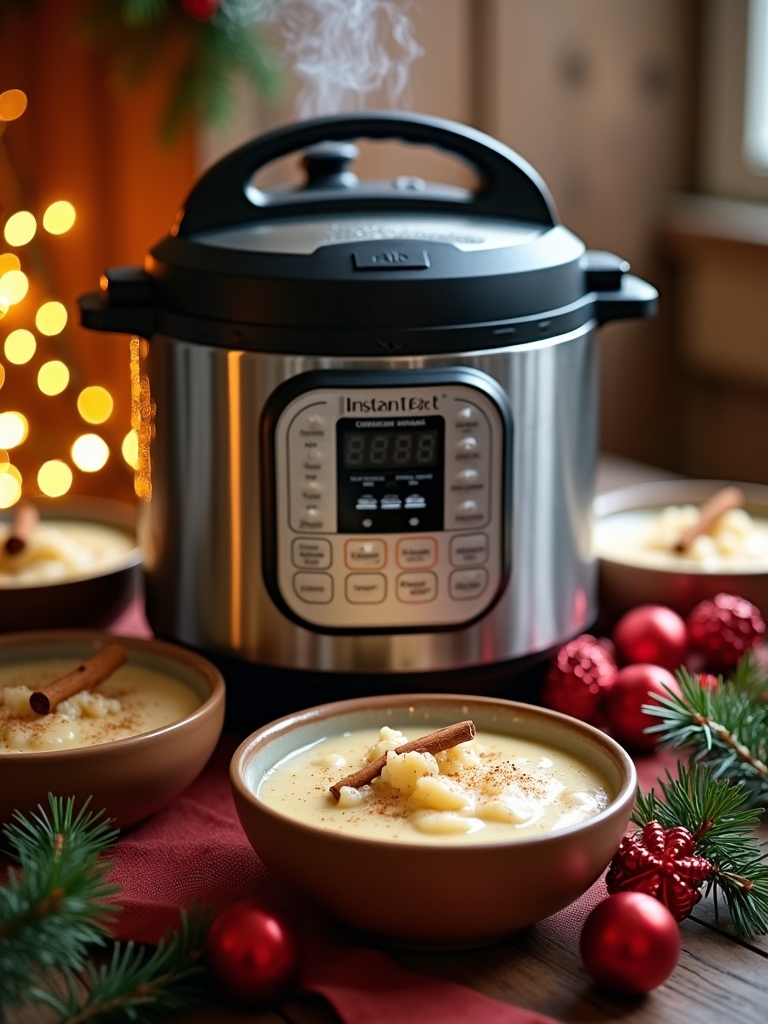
If you’re seeking a festive dessert that combines the creamy richness of rice pudding with the warm, spiced flavors of eggnog, search no further than this Instant Pot Eggnog Rice Pudding. This recipe is perfect for the holiday season, providing the comforting essence of eggnog in a delightful and easy-to-make dish. The Instant Pot allows for quick cooking, making it a stress-free addition to your Christmas dinner spread. Plus, it’s a great way to use leftover eggnog if you happen to have some on hand!
This rice pudding is not only simple to prepare but also customizable to suit your taste preferences. You can enhance the flavors by adding nutmeg or cinnamon, or you can top it with whipped cream and a sprinkle of holiday spices for a festive touch. Whether served warm or chilled, this delightful dessert is sure to be a hit with family and friends during the holiday celebrations.
Ingredients:
- 1 cup Arborio rice
- 4 cups eggnog
- 1 cup milk
- 1/2 cup granulated sugar
- 1 teaspoon vanilla extract
- 1/2 teaspoon ground nutmeg
- 1/2 teaspoon ground cinnamon
- 1/4 teaspoon salt
- Optional toppings: whipped cream, cinnamon, or nutmeg
To prepare your Instant Pot Eggnog Rice Pudding, start by rinsing the Arborio rice under cold water until the water runs clear. Then, combine the rinsed rice, eggnog, milk, granulated sugar, vanilla extract, nutmeg, cinnamon, and salt in the Instant Pot. Secure the lid and verify the pressure valve is set to sealing. Select the “Manual” or “Pressure Cook” setting and adjust the timer to 10 minutes. Once the cooking cycle is complete, allow for a natural release of pressure for about 10 minutes before carefully turning the valve to venting to release any remaining pressure. Stir the pudding well before serving, and add optional toppings as desired.
When making this eggnog rice pudding, keep in mind that the texture will continue to thicken as it cools, so you may want to adjust the consistency with more milk if you prefer it creamier. Additionally, feel free to experiment with different spices or add-ins like raisins or chopped nuts for added texture and flavor. If you’re making this in advance, store it in an airtight container in the refrigerator, and reheat gently in the microwave, adding a splash of milk if needed. Enjoy this festive treat as a comforting finish to your holiday meal!
Frequently Asked Questions
Can I Make These Recipes Ahead of Time?
Yes, you can definitely make these recipes ahead of time! I love using make ahead tips for convenience. Just guarantee you choose proper storage options to keep everything fresh and delicious for your special occasion.
What Are Some Alternative Ingredients for Common Allergens?
When I tackle common allergens, I love substituting dairy with almond or coconut milk and using gluten-free alternatives like almond flour or quinoa. These options not only cater to dietary needs but also inspire delicious innovation!
How Can I Adjust Serving Sizes for Larger Gatherings?
Isn’t it funny how portion control can transform gatherings? I scale recipes by multiplying ingredients, ensuring everyone enjoys their fill. Just keep an eye on cooking times, and you’ll impress your guests with innovative dishes!
Are There Vegetarian Options Among These Recipes?
I’ve created delicious vegetarian options that burst with festive flavors. You can easily swap meat with hearty vegetables or legumes, ensuring everyone enjoys a satisfying meal. Let’s make this gathering innovative and inclusive!
What Kitchen Tools Do I Need to Prepare These Dishes?
I’ve found that essential gadgets like a food processor, an instant pot, and a sharp knife set are my go-tos. These time-saving tools really help me whip up delicious meals quickly and effortlessly!
Conclusion
As you prepare for your Christmas dinner, remember that it’s the love and joy shared around the table that truly matter. With these last-minute recipes, you can impress your guests without the stress. Imagine the smiles as they savor each dish, and picture the laughter that fills your home. So, go ahead—try one (or all!) of these delightful recipes. You might just create a holiday memory that lasts a lifetime. Are you ready to make this Christmas unforgettable?