

I’ve created a delicious lava cake recipe that’s sure to impress! Originating in the 1980s, this molten chocolate dessert features a crispy exterior and a warm, gooey center. Simply melt butter and chocolate, mix in eggs and sugar, then bake to perfection. Just 12-14 minutes is all it takes for that mesmerizing lava effect! Serve it warm with vanilla ice cream for a heavenly contrast. Trust me, there’s a lot more to discover about this indulgent treat!
History
When I think about the history of lava cake, I can’t help but marvel at its delicious journey from a happy accident to a beloved dessert. Its French origins date back to the 1980s, attributed to renowned chef Michel Bras, who crafted a molten chocolate creation that redefined dessert evolution. This exquisite treat, with its gooey center and delicate outer shell, quickly captivated taste buds worldwide. Initially, the concept sparked curiosity and intrigue, leading inventive chefs to experiment and adapt the recipe, infusing it with unique flavors and textures. Today, lava cake stands as a symbol of culinary innovation, proving that sometimes, the most delightful creations emerge from unexpected moments. It’s a dessert that continues to inspire and tantalize our taste buds!
Recipe
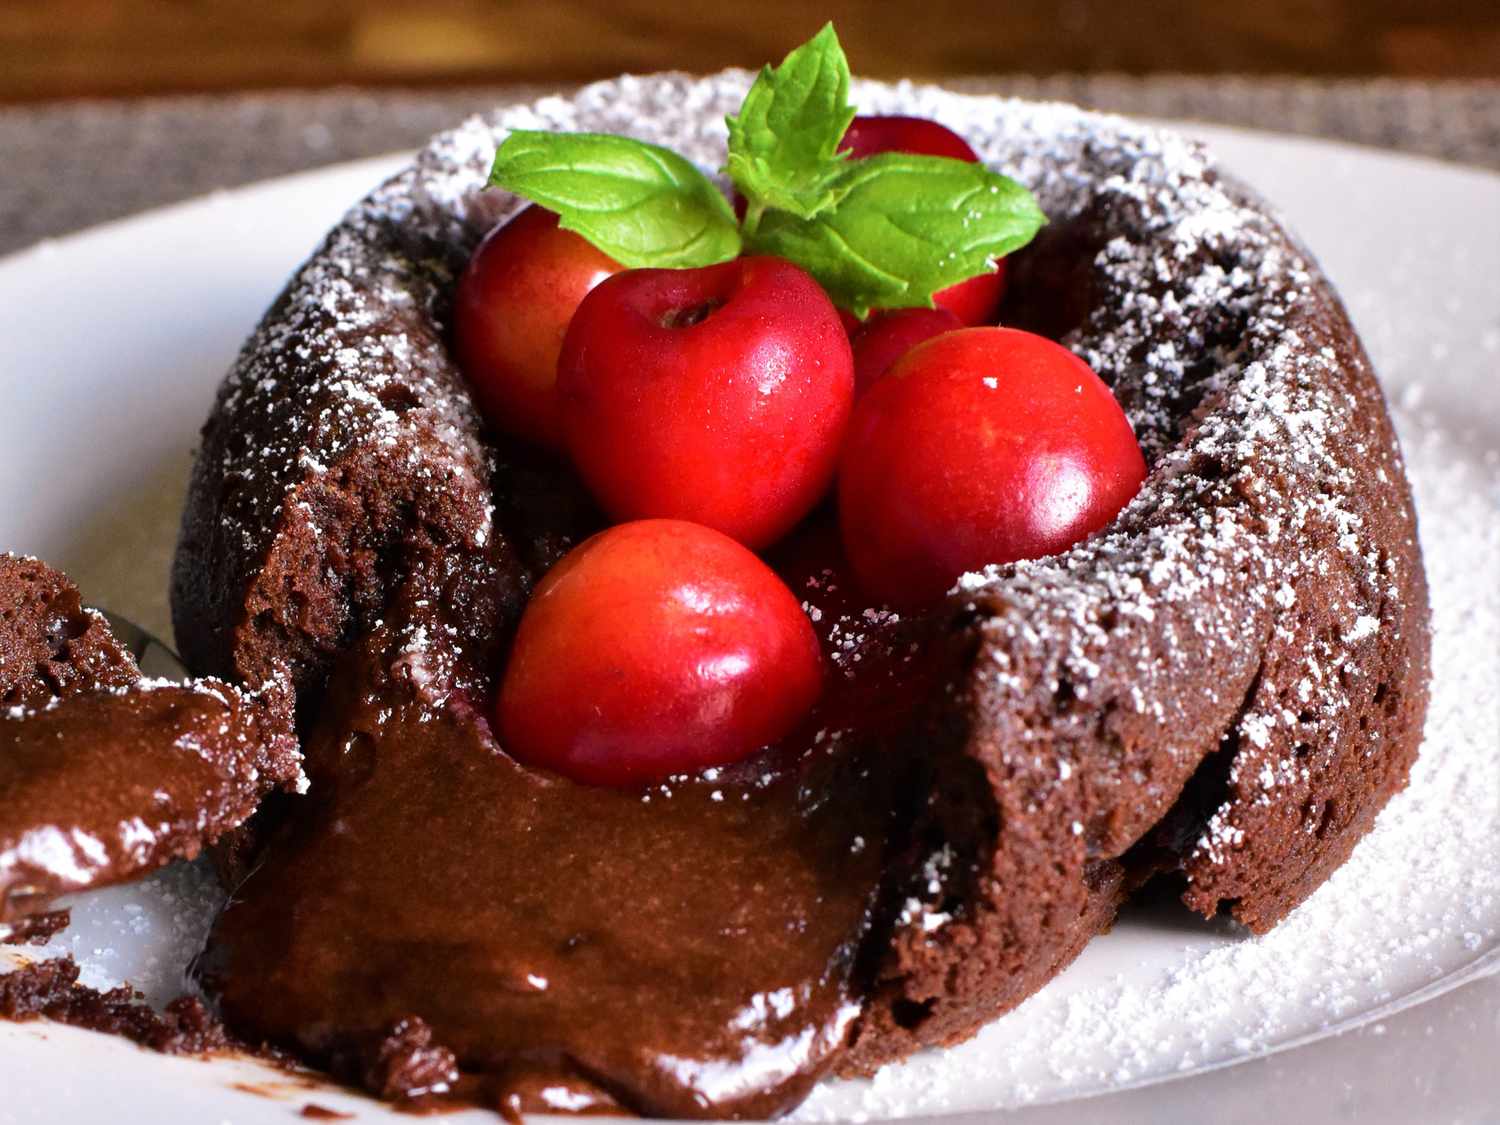
Lava cake, also known as molten chocolate cake, is a delightful dessert that combines the rich flavors of chocolate with a gooey, molten center that flows out when you cut into it. This indulgent treat is perfect for special occasions or when you simply want to impress your guests with a restaurant-quality dessert made right in your own kitchen. With a crispy exterior and a warm, luscious center, lava cake is sure to satisfy any chocolate lover’s cravings.
Making lava cake may seem intimidating, but it’s actually quite simple and requires just a few common ingredients. The key to achieving the perfect molten center lies in the timing of baking; too little time will leave you with a runny cake, while too much will result in a fully cooked dessert. Follow this recipe for a delightful lava cake that will leave your taste buds dancing with joy.
Ingredients:
- 1/2 cup unsalted butter
- 1 cup semi-sweet chocolate chips
- 1 cup powdered sugar
- 2 large eggs
- 2 large egg yolks
- 1 teaspoon vanilla extract
- 1/2 cup all-purpose flour
- Pinch of salt
Cooking Instructions:
Preheat your oven to 425°F (220°C) and grease four ramekins with butter, then lightly dust with cocoa powder. In a microwave-safe bowl, melt the butter and chocolate chips together in 30-second intervals, stirring until smooth. Once melted, mix in the powdered sugar until well combined. Add the eggs and egg yolks, followed by the vanilla extract, and mix until fully blended. Finally, fold in the flour and salt until just combined. Divide the batter evenly among the prepared ramekins and place them on a baking sheet. Bake for 12-14 minutes until the edges are firm but the center remains soft.
Extra Tips:
For the best results, guarantee your ramekins are well-greased to prevent sticking, and serve the lava cake immediately after baking for that molten effect. You can also experiment by adding a scoop of vanilla ice cream or a dusting of cocoa powder on top for presentation. If you’re preparing the cakes in advance, you can refrigerate the unbaked batter in the ramekins and bake them straight from the fridge; just add an extra minute or two to the baking time. Enjoy your decadent dessert!
Cooking Steps
Let’s get started on making that irresistible lava cake! First, I’ll preheat my oven to a toasty 425°F and grease the ramekins with a generous amount of butter. Once that’s done, I’ll mix up the chocolate batter and get ready to bake these little indulgences to perfection!
Step 1. Preheat Oven to 425°F
To achieve that perfect molten center in your lava cake, preheating your oven to 425°F is essential. This specific oven temperature guarantees the outer layer bakes quickly while keeping that rich, gooey center intact. As I set my oven, I like to think of it as creating the ideal environment for magic to happen.
Here’s a baking tip: don’t skip the preheating step! It might seem minor, but it greatly impacts the texture and flavor of your dessert. A properly preheated oven allows for even cooking, preventing any soggy or undercooked surprises. So, while your oven warms up, gather your ingredients, and get ready to create a chocolate masterpiece that’s sure to impress. Happy baking!
Step 2. Grease Ramekins With Butter
Before pouring in that luscious batter, I grab my trusty butter and a pastry brush to grease the ramekins. I prefer using unsalted butter for its pure flavor, but feel free to experiment with other butter types like ghee or coconut butter for a unique twist. Depending on the ramekin sizes, I scoop a generous amount of butter and glide the brush along the interior, ensuring every nook and cranny is coated. This step is essential; it prevents sticking and helps achieve that perfect, gooey center we crave. I pay special attention to the edges, as they often need extra love. With the ramekins ready, I can’t wait to fill them with that decadent chocolate batter!
Step 3. Add Chocolate Batter Mixture
With my ramekins prepped and ready, I carefully pour the rich chocolate batter into each one, filling them about three-quarters full to allow room for rising. The batter’s consistency should be smooth and glossy, a delightful blend of dark chocolate types that I’ve chosen—semi-sweet and bittersweet give the perfect depth. As I pour, I can’t help but admire the luxurious sheen, promising an indulgent treat. I gently tap the ramekins on the counter to release any air bubbles that might have formed. This step is essential for achieving that molten center. Each spoonful will soon reveal a warm, gooey core, and I can already picture the ooze of chocolate bliss. This is where the magic begins!
Step 4. Bake for 12 Minutes
Now that the chocolate batter is poured and ready, it’s time to slide those ramekins into the preheated oven. I set my timer for 12 minutes, knowing this baking time is vital for achieving that perfect texture. As the cakes bake, the aroma of melting chocolate fills the kitchen, creating a sense of anticipation. I keep an eye on them, watching for the edges to firm up while the center remains slightly jiggly. This delicate balance is what guarantees that gooey molten core we all crave. Once the timer goes off, I carefully remove the ramekins, letting them rest for just a minute. Trust me, the wait is worth it as you prepare for that indulgent moment!
Step 5. Serve With Vanilla Ice Cream
As the warm lava cakes cool slightly, I can’t resist the thought of pairing them with a scoop of silky vanilla ice cream. This delightful vanilla pairing creates a perfect harmony of flavors—the rich, molten chocolate contrasts beautifully with the creamy, sweet ice cream. I often opt for homemade vanilla bean ice cream, as the specks of vanilla elevate the experience. However, feel free to explore other ice cream choices like caramel swirl or hazelnut for a twist. Once the cakes are plated, I scoop the ice cream right on top, letting it melt into the warm cake, creating an indulgent sauce. Trust me, this combination will turn your dessert into an unforgettable culinary adventure that your guests will rave about!
Nutritional Guide
When it comes to enjoying a decadent lava cake, it’s essential to take into account its nutritional aspects. Understanding the caloric content and ingredient analysis can help you savor this indulgence without guilt. Here’s a quick breakdown to keep in mind:
| Ingredient | Calories (per serving) | Key Nutrients |
|---|---|---|
| Dark Chocolate | 200 | Antioxidants |
| Butter | 100 | Healthy Fats |
| Sugar | 150 | Carbohydrates |
| Eggs | 70 | Protein, Vitamins |
As you can see, while lava cake is rich in flavor, it’s also packed with energy. Balancing these elements can elevate your dessert experience, making it both delightful and mindful. Enjoy the sweet journey!
Final Thoughts
Enjoying a rich lava cake is not just about the taste; it’s also about appreciating the experience that comes with it. The moment that warm chocolate oozes out, you’re enveloped in a symphony of flavors that dance on your palate. Its luxurious taste profile, with a delightful balance of sweetness and richness, makes it an unforgettable treat. To elevate your lava cake experience, consider innovative dessert pairings—like a scoop of tangy raspberry sorbet or a dollop of creamy vanilla ice cream. These combinations not only complement the cake’s intensity but also add a revitalizing contrast. So, whether it’s for a special occasion or a personal indulgence, crafting this dessert is sure to impress and satisfy your cravings for something extraordinary.
Frequently Asked Questions
Can I Make Lava Cake in Advance?
I love preparing ahead with lava cakes. Just prepare the batter in advance, store it in the fridge, and bake when you’re ready. These baking tips help maintain that delightful molten center you crave!
How Do I Store Leftover Lava Cake?
Storing leftover lava cake’s like tucking a treasure into a velvet pouch. For storing tips, wrap it tightly in plastic. Reheating methods? Try the microwave for 10-15 seconds—just enough to reignite that gooey center!
Can I Use a Different Type of Chocolate?
Absolutely, I love experimenting with chocolate! Dark chocolate adds richness, while white chocolate brings a creamy sweetness. Each type transforms the dessert’s flavor, so don’t hesitate to try both for an innovative twist!
What Toppings Pair Well With Lava Cake?
Imagine a dessert garden, where chocolate sauce flows like a river, fresh berries bloom vibrantly, and whipped cream clouds drift above. Ice cream, caramel drizzle, and mint leaves complete this sweet symphony, inviting pure indulgence.
How Do I Know When the Cake Is Done?
I watch for the cake texture; it should be firm around the edges yet slightly jiggly in the center. Usually, a baking time of 10 to 12 minutes works well to achieve that perfect molten core.
Conclusion
As I pull that molten chocolate lava cake from the oven, it’s like revealing a hidden treasure—rich, warm, and inviting. Each bite is a reminder that life, much like this dessert, is all about savoring the sweet moments amidst the chaos. So, as you commence your baking adventure, remember to embrace the imperfections and enjoy the journey. After all, just like a perfectly gooey center, it’s the unexpected surprises that make life deliciously worthwhile.
Lava Cake Recipe
Ingredients
Equipment
Method
- Preheat oven to 425°F (220°C).
- Grease 4 ramekins with butter and dust with cocoa powder.
- In a microwave-safe bowl, melt chocolate and butter in 30-second bursts, stirring until smooth.
- In a separate bowl, whisk eggs, egg yolks, sugar, vanilla, and salt until pale and slightly thick.
- Gradually fold the melted chocolate into the egg mixture.
- Sift in flour and gently mix until just combined.
- Divide batter evenly into ramekins.
- Bake for 10-12 minutes (edges should be set, center slightly jiggly).
- Let cakes cool for 1 minute, then invert onto plates.
- Dust with powdered sugar or serve with vanilla ice cream.