

I love making mini cakes because they’re perfect for personal indulgence or sharing at gatherings. To whip up a simple vanilla mini cake, you’ll need flour, sugar, butter, eggs, and a dash of vanilla. Mix your dry and wet ingredients, pour them into mini pans, and bake at 350°F for about 20-25 minutes. Each bite is a delightful treat, and they’re easy to customize! Stick around to discover tips for decoration and flavor variation!
History
When I think about the history of mini cakes, I’m struck by how these delightful treats have evolved over time. Their cake origins trace back to ancient civilizations, where baked goods held immense cultural significance. In many societies, cakes symbolized celebration and prosperity, often crafted for special occasions. As baking techniques advanced, the idea of creating smaller, more intricate cakes emerged, allowing for innovative flavors and designs.
Mini cakes became particularly popular in the 19th century, reflecting a growing trend for personal-sized desserts that catered to individual tastes. Today, these charming confections embody creativity and individuality, celebrating diverse cultures and culinary practices. Their evolution showcases not just a dessert but a fascinating journey through history and tradition, inspiring bakers to explore new horizons.
Recipe
Baking a mini cake is a delightful way to satisfy your sweet tooth without having to make a large dessert. Perfect for small gatherings or when you simply want a slice of homemade goodness, mini cakes can be customized with various flavors and toppings. This simple recipe will guide you through making a moist and fluffy vanilla mini cake that can be adorned with your favorite icing or fresh fruits.
The best part about this mini cake recipe is its versatility. You can easily swap out the vanilla extract for lemon or almond extract to create different flavor profiles. Additionally, you can layer the cake with cream, jam, or fruit between the layers, or simply enjoy it plain with a dusting of powdered sugar. Whether it’s for a birthday celebration or just a treat for yourself, this mini cake is sure to impress.
Ingredients:
- 1 cup all-purpose flour
- 1/2 cup granulated sugar
- 1/2 teaspoon baking powder
- 1/4 teaspoon baking soda
- 1/4 teaspoon salt
- 1/2 cup unsalted butter, softened
- 2 large eggs
- 1 teaspoon vanilla extract
- 1/4 cup milk
Instructions:
Preheat your oven to 350°F (175°C) and grease a mini cake pan or line it with parchment paper. In a medium mixing bowl, combine the flour, baking powder, baking soda, and salt. In a separate large bowl, beat the softened butter and sugar together until creamy. Add the eggs one at a time, mixing well after each addition, then stir in the vanilla extract. Gradually add the dry ingredients to the wet mixture, alternating with the milk, until everything is well combined. Pour the batter into the prepared mini cake pan and bake for 20-25 minutes, or until a toothpick inserted in the center comes out clean. Allow the cake to cool before removing it from the pan.
Extra Tips:
When baking your mini cake, be sure to check it a few minutes before the suggested baking time, as ovens can vary widely. If you’re looking to decorate your cake, let it cool completely to prevent the icing from melting. Consider using a simple buttercream or cream cheese frosting for a rich flavor, and feel free to experiment with colors and toppings like sprinkles, fresh berries, or chocolate shavings for a fun presentation. Enjoy your baking!
Cooking Steps
To kick off our mini cake adventure, I always start by preheating the oven to get that perfect bake going. Then, I mix together the dry ingredients, creating a beautiful blend of flavors waiting to come alive. Once that’s ready, I slowly add the wet ingredients, ensuring everything combines smoothly for a delightful batter.
Step 1. Preheat the Oven First
Preheating the oven is an essential first step in creating a perfect mini cake. I always set my oven temperature to 350°F (175°C) as it’s ideal for achieving that delightful balance of moistness and a lightly crisp outer layer. The preheating importance cannot be overstated—starting with a hot oven guarantees even baking from the moment I place my batter inside. While the oven warms up, I can gather my ingredients, saving time and keeping the process efficient. Plus, this initial heat helps the cake rise beautifully, creating that signature fluffiness we all crave. So, let’s get that oven fired up—it’s the foundation for a mini cake that’s not just good, but truly exceptional!
Step 2. Mix Dry Ingredients Together
Mixing the dry ingredients is a crucial step that sets the foundation for a delicious mini cake. I start by selecting my flour types—usually a blend of all-purpose and almond flour for that unique texture. Next, I whisk together the chosen flours with baking powder, baking soda, and a pinch of salt, making sure they’re evenly distributed. It’s important to pay attention to ingredient ratios; too much flour can lead to a dense cake, while too little may result in a flat disappointment. I love experimenting with spices like cinnamon or nutmeg to elevate the flavor profile. This careful blending not only enhances the cake’s taste but also guarantees a perfect rise, paving the way for the moist, fluffy treat that awaits.
Step 3. Add Wet Ingredients Slowly
Once the dry ingredients are well-combined, I slowly incorporate the wet ingredients to guarantee a smooth, cohesive batter. This step is essential for achieving that fluffy texture we all crave in mini cakes. Using innovative wet ingredient techniques enhances the overall flavor and moisture of the cake.
As I mix, I focus on:
- Adding the wet ingredients gradually to prevent clumping.
- Using a whisk for a light and airy consistency.
- Ensuring everything’s blended without overmixing, which can toughen the cake.
These mixing methods not only create a delightful batter but also help in evenly distributing flavors. Remember, patience is key here; the result will be a mini cake that’s irresistibly soft and scrumptious!
Step 4. Pour Batter Into Pans
Now that the batter is perfectly blended, it’s time to pour it into the pans. I carefully select my pans, opting for mini round ones that guarantee even baking and a delightful presentation. With a gentle hand, I scoop the batter, noting its smooth consistency—just thick enough to hold its shape but fluid enough to spread evenly. I fill each pan to about two-thirds full, allowing space for that lovely rise. As I pour, I can’t help but admire how the batter glistens, a promise of the delicious mini cakes to come. It’s essential to guarantee an even distribution to avoid any lopsided treats. This step sets the stage for a baking experience that’s nothing short of magical!
Step 5. Bake for 25 Minutes
As I slide the mini cake pans into the preheated oven, anticipation fills the air. The aroma of sweet batter begins to waft through my kitchen, hinting at the delightful treat to come. I set the timer for 25 minutes, knowing that this is where the magic happens. Here are some baking tips to guarantee your mini cakes turn out perfectly:
- Check the oven temperature: A consistent heat is essential for even baking.
- Rotate the pans halfway through: This helps achieve a golden crust on all sides.
- Keep an eye on the timer: Every oven is different; don’t hesitate to check for doneness a minute early.
With patience, I wait, enthusiastic to see those gorgeous mini cakes rise and set!
Nutritional Guide
While indulging in a mini cake, I often find myself curious about its nutritional profile. Understanding the caloric content can enhance our enjoyment, making each bite feel more rewarding. With a serving size of one mini cake, I’ve found the following nutritional values:
| Nutrient | Amount per Serving |
|---|---|
| Calories | 150 |
| Total Fat | 6g |
| Carbohydrates | 22g |
| Protein | 3g |
These figures can help you make informed choices without sacrificing pleasure. When I savor a mini cake, I appreciate not just the taste but also the balance it offers within my dietary needs. It’s delightful to know I’m treating myself wisely!
Final Thoughts
Though I often find myself drawn to larger desserts, my encounters with mini cakes have taught me the joy of moderation. These delightful treats not only satisfy cravings but also spark creativity in the kitchen. Here are a few reasons to embrace mini cakes:
Mini cakes teach us the beauty of moderation while igniting our culinary creativity and satisfying sweet cravings.
- Innovative Baking Techniques: Experiment with different flavor profiles and textures that you might hesitate to try in a larger cake.
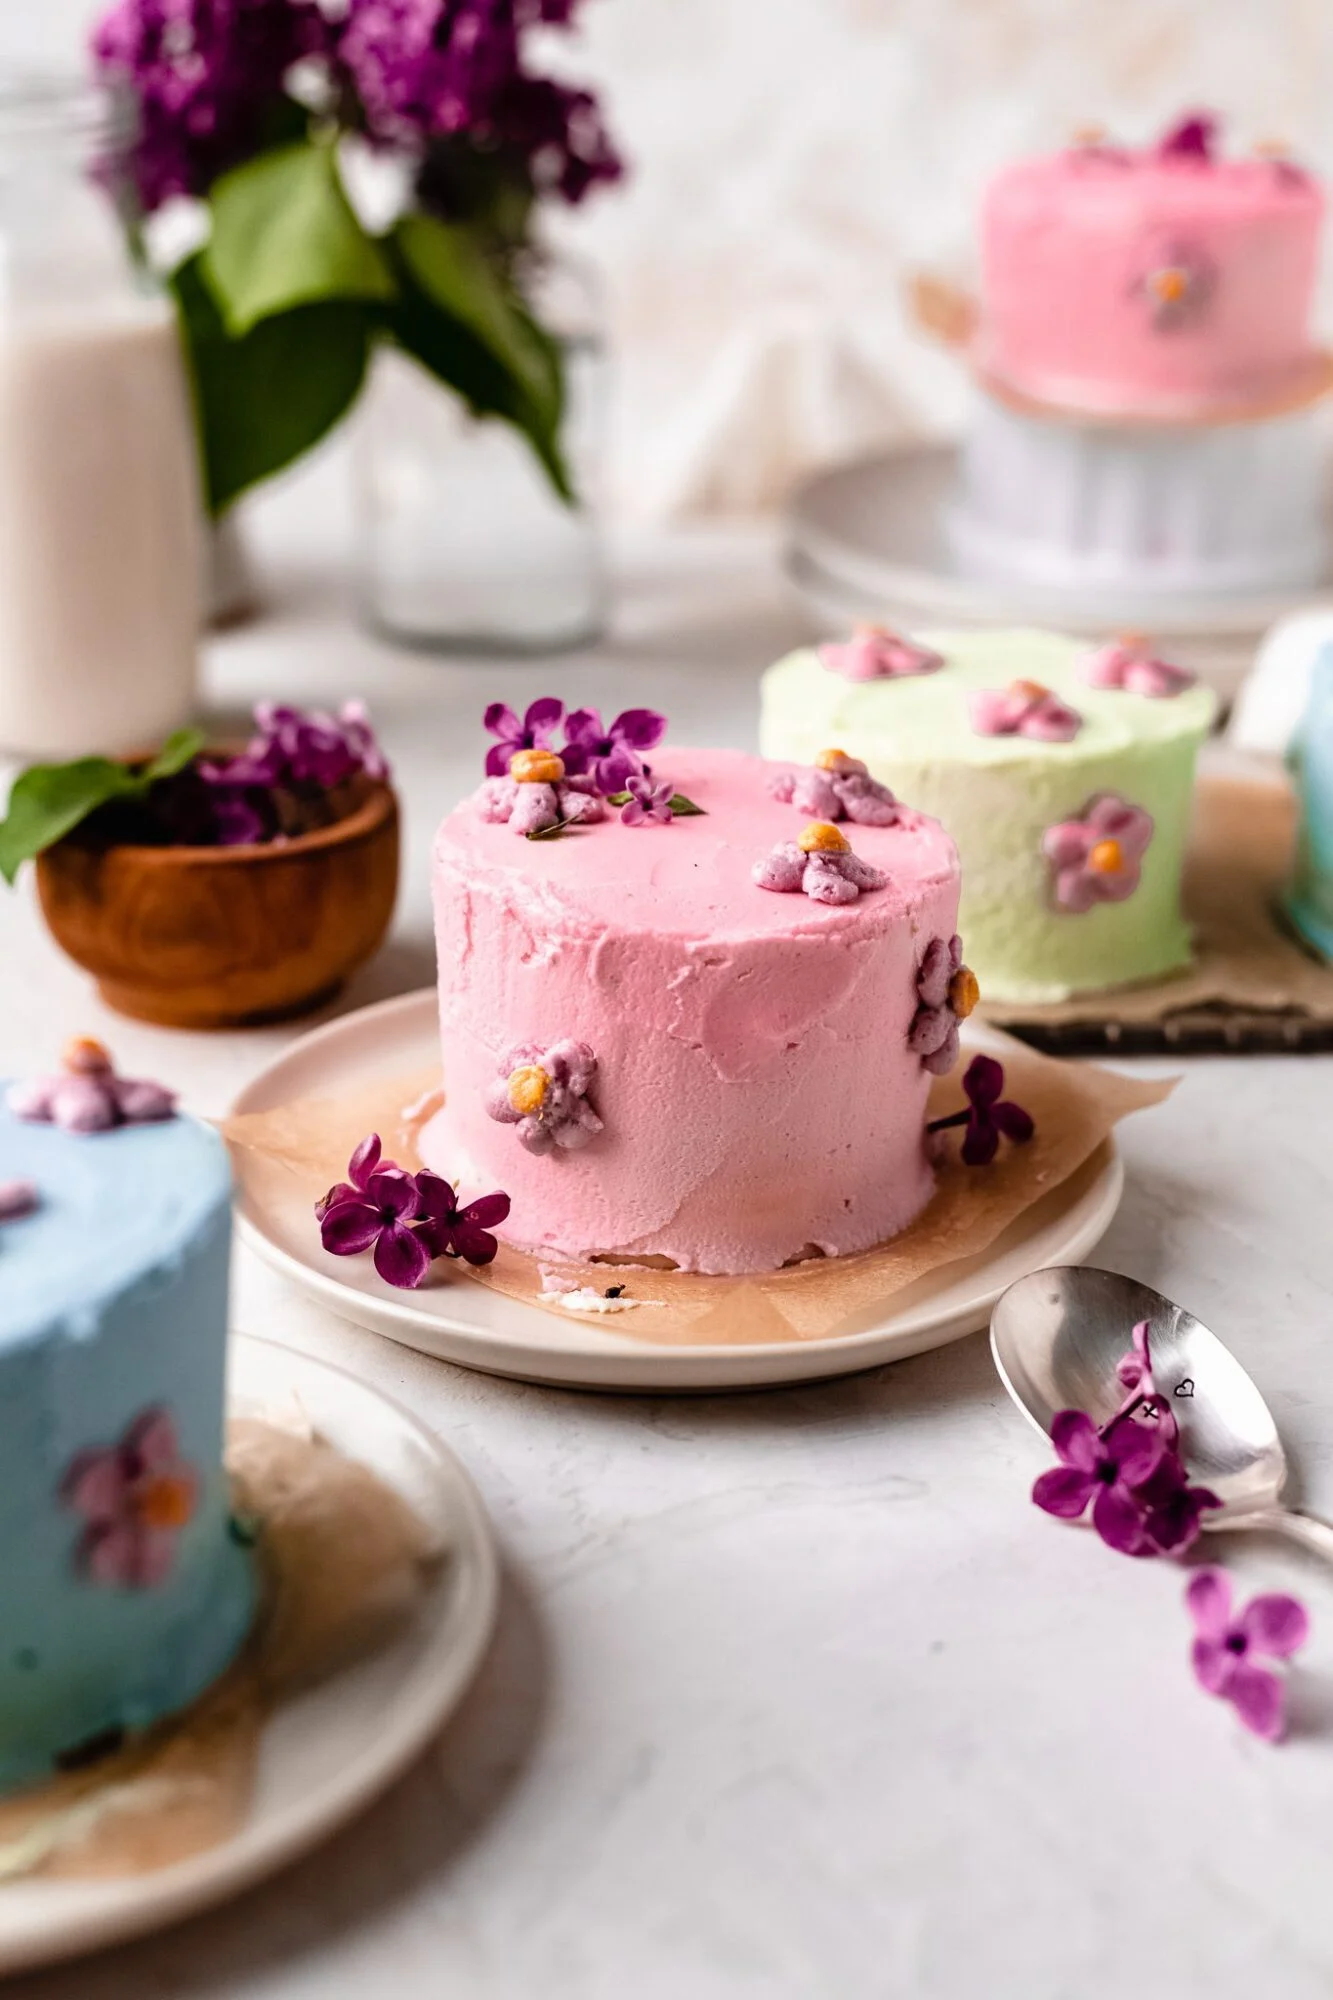
- Stunning Cake Decorations: Mini cakes offer an excellent canvas for intricate designs, allowing your artistic flair to shine.
- Perfect Portions: They cater to diverse tastes without overwhelming anyone, making them ideal for gatherings.
Incorporating these elements can transform a simple mini cake into a showstopper. So why not explore this charming world of mini desserts? You might just find a new favorite!
Frequently Asked Questions
Can I Use Gluten-Free Flour for Mini Cakes?
I love using gluten-free substitutes like almond or coconut flour for mini cakes. These flour types bring unique flavors and textures, making my creations delightfully innovative while catering to those avoiding gluten. Try it!
How Do I Store Leftover Mini Cakes?
I store leftover mini cakes by wrapping them tightly in plastic wrap, then refrigerate for freshness. For longer storage, I freeze them in airtight containers—perfect for a sweet treat whenever I crave something special!
What Are Popular Frosting Options for Mini Cakes?
When it comes to frosting, I adore the velvety embrace of buttercream and the tangy charm of cream cheese. Each adds a sweet symphony to my creations, making every bite a delightful dance on the palate.
Can I Make Mini Cakes in Advance?
Absolutely, I’ve found that making mini cakes in advance is a great time-saver! Just follow some baking tips, and experiment with various cake flavors. They freeze beautifully, preserving both taste and texture for later enjoyment.
What’s the Best Way to Decorate Mini Cakes?
Decorating mini cakes is like painting a masterpiece! I love using piping techniques for intricate designs and adding edible decorations like sprinkles or fresh fruits. It transforms each cake into a delightful edible work of art!
Conclusion
As I wrapped up my mini cake adventure, I found myself reflecting on how these delightful treats can spark joy in any occasion. The theory that small things can bring big happiness holds true here; each bite is a burst of flavor and creativity. Whether you’re celebrating a birthday or simply indulging in a quiet afternoon, these mini cakes are perfect. So go ahead, embrace the joy of baking, and treat yourself to a little slice of happiness!
Mini Cake Recipe
Ingredients
Equipment
Method
- Preheat oven to 350°F (175°C). Grease the cake pan or line it with parchment paper.
- In a bowl, whisk flour, baking powder, and salt. Set aside.
- Beat butter and sugar until fluffy (~2 mins). Add egg and vanilla, mixing well.
- Alternate adding the dry mix and milk to the butter mixture, starting and ending with flour. Mix until just combined.
- Pour batter into the pan and bake for 20-25 mins (or until a toothpick comes out clean).
- Let cool for 10 mins in the pan, then transfer to a rack. Frost or garnish as desired once fully cooled.
Notes
- Flavor Variations: Add cocoa powder (1 tbsp) for chocolate cake or lemon zest for citrusy flavor.
- Storage: Keep in an airtight container for up to 3 days.
- Vegan Option: Substitute butter with coconut oil, egg with flax egg, and milk with almond milk.