

There’s nothing quite like a moist chocolate cake to elevate any occasion! I use 1 ¾ cups each of flour and sugar, ¾ cup of cocoa powder, along with baking powder and baking soda to create the perfect base. Mixing in boiling water makes it incredibly rich. After baking at 350°F for 30 to 35 minutes and cooling, it’s time for frosting. Trust me, this cake captures the heart—and if you’re curious, I’ve got more tips to share!
History
When I think about the history of chocolate cake, I can’t help but savor the rich tapestry of its origins. Chocolate’s journey began with ancient Mesoamerican cultures, where cacao was revered as a divine elixir. As chocolate evolved, it changed from a bitter beverage to a sweet delight, thanks to European innovations. By the 19th century, the introduction of cocoa powder revolutionized baking, allowing us to create the luscious cakes we adore today. Each layer of chocolate cake tells a story of culinary creativity, reflecting the evolution of ingredients and techniques. From simple flour and cacao combinations to intricate creations, this dessert embodies the spirit of innovation, tantalizing our taste buds while celebrating its storied past.
Recipe
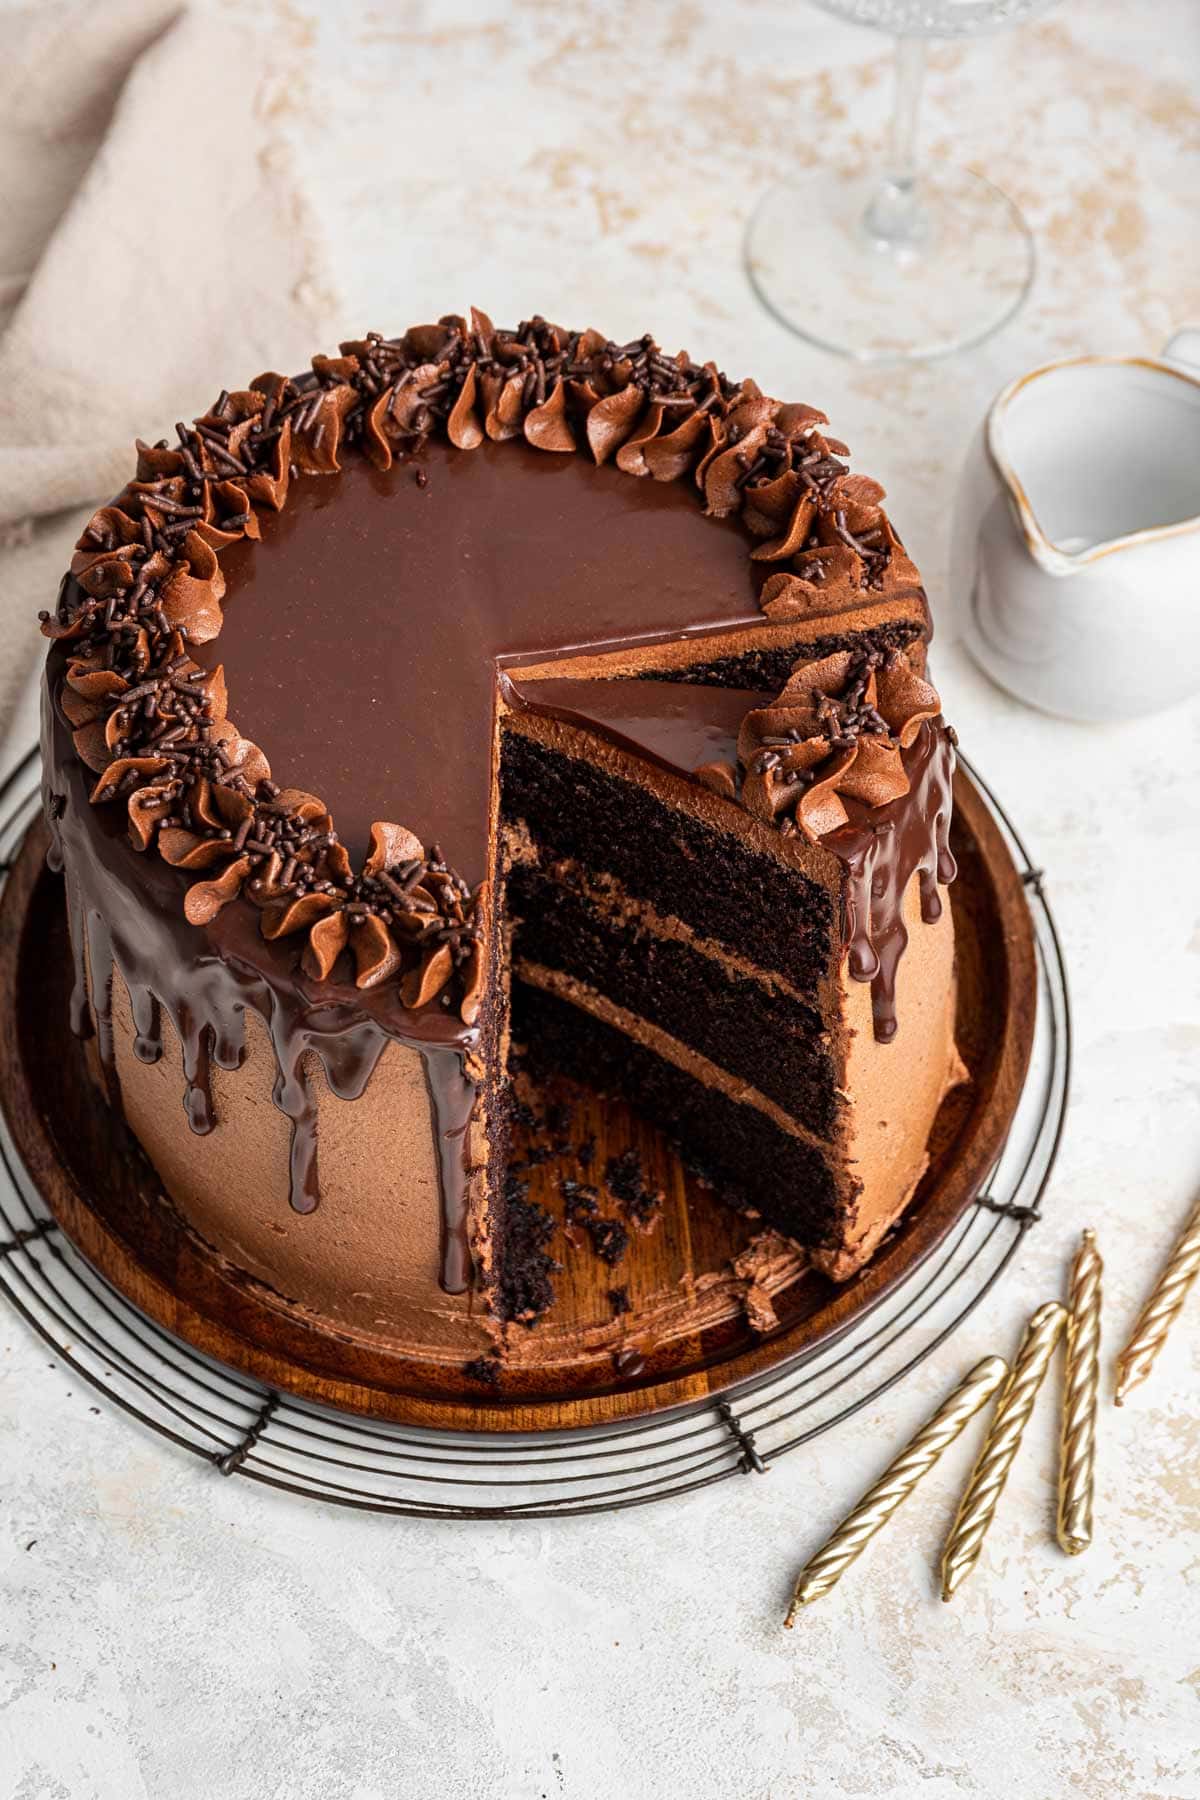
Indulging in a moist chocolate cake is a treat that can elevate any occasion, whether it’s a birthday celebration, a family gathering, or simply a cozy night in. This decadent dessert is known for its rich flavor and soft texture, making it a favorite among chocolate lovers. With just a few simple ingredients, you can create a cake that is guaranteed to impress friends and family alike.
Making a moist chocolate cake is not only easy but also allows you to experiment with different flavors and toppings. From whipped cream and berries to a drizzle of chocolate ganache, the possibilities are endless. This recipe will guide you through the steps to achieve a perfect balance of sweetness and richness, confirming that each bite leaves you wanting more.
Ingredients:
- 1 ¾ cups all-purpose flour
- 1 ¾ cups granulated sugar
- ¾ cup unsweetened cocoa powder
- 1 ½ teaspoons baking powder
- 1 ½ teaspoons baking soda
- 1 teaspoon salt
- 2 large eggs
- 1 cup whole milk
- ½ cup vegetable oil
- 2 teaspoons vanilla extract
- 1 cup boiling water
Cooking Instructions:
Preheat your oven to 350°F (175°C) and grease two 9-inch round cake pans. In a large mixing bowl, combine the flour, sugar, cocoa powder, baking powder, baking soda, and salt. In a separate bowl, whisk together the eggs, milk, vegetable oil, and vanilla extract. Gradually add the wet ingredients to the dry ingredients, mixing until just combined. Carefully stir in the boiling water until the batter is smooth and well-blended. Pour the batter evenly into the prepared cake pans and bake for 30 to 35 minutes, or until a toothpick inserted in the center comes out clean. Allow the cakes to cool in the pans for 10 minutes before transferring them to a wire rack to cool completely.
Extra Tips:
For an extra boost of flavor, consider adding a teaspoon of instant coffee granules to the dry ingredients to enhance the chocolate taste. If you want to make the cake even more indulgent, try adding chocolate chips to the batter or frosting it with a rich chocolate ganache or cream cheese icing. Always verify that your ingredients are at room temperature for better mixing, and be careful not to overmix the batter to maintain the cake’s moist texture.
Cooking Steps
To kick things off, I always start by preheating my oven to a cozy 350°F; this guarantees that my cake bakes evenly from the moment it hits the heat. Next, I mix the dry ingredients thoroughly, creating a perfect foundation for that rich chocolate flavor. As I add the wet ingredients gradually, I can already envision the deliciously moist cake that’s about to come to life.
Step 1. Preheat Oven to 350°F
Preheating the oven to 350°F is an essential step in baking a moist chocolate cake that rises perfectly and develops a rich, decadent flavor. Setting the correct oven temperature guarantees even heat distribution, which is vital for achieving that delightful texture we all crave. While the oven warms up, I can almost smell the chocolate hinting at the magic to come. This baking technique is not just a formality; it creates the ideal environment for the ingredients to interact harmoniously. Trust me, skipping this step could lead to a dense, disappointing cake. So, let’s embrace this pivotal moment and make certain our oven is ready to transform simple ingredients into a masterpiece of chocolaty goodness!
Step 2. Mix Dry Ingredients Thoroughly
Before diving into mixing the dry ingredients, I like to gather everything I need to ascertain a smooth process. This makes it easier to focus on those vital baking techniques that elevate my chocolate cake. Here’s what I do:
- Sift together flour, cocoa powder, baking soda, baking powder, and salt to guarantee a uniform blend. This step helps in achieving the perfect ingredient ratios for that moist texture.
- Whisk vigorously to aerate the mixture, enhancing the cake’s lightness.
- Set aside your blended dry ingredients, mentally prepping for the next steps.
Step 3. Add Wet Ingredients Gradually
With the dry ingredients perfectly blended, I’m ready to introduce the wet components that will bring my chocolate cake to life. I start by pouring in the rich, velvety buttermilk, letting it cascade into the dry mix like a silky river. Next, I crack in the eggs—each one a little treasure of moisture and flavor. I whisk everything together, but here’s the secret: I add the wet ingredients gradually. This technique guarantees they integrate smoothly, avoiding any clumps. As I drizzle in melted butter, the batter transforms, becoming a luscious, glossy mixture. Each gradual addition enhances the cake’s moistness, setting the stage for a delightful chocolate experience. Trust me; this step is essential for achieving that heavenly texture!
Step 4. Fold in Chocolate Chips
As I reach for the bag of chocolate chips, excitement bubbles within me—this is where the magic truly begins. Folding in chocolate chips isn’t just a step; it’s an art that brings my cake to life. Using the right baking techniques, I carefully incorporate the chips into the luscious batter. Here’s how I do it:
- Use a spatula: I gently scoop from the bottom, lifting the batter over the chocolate chips to avoid breaking them.
- Be gentle: It’s essential to fold, not stir, maintaining that airy texture while evenly distributing the sweetness.
- Even distribution: I guarantee every bite will have a delightful burst of chocolate.
With this step, my cake transforms into a decadent treat that’s hard to resist!
Step 5. Bake for 30 Minutes
Now that the chocolate chips are folded in, it’s time to let the oven work its magic. Preheat your oven to 350°F (175°C), ensuring it’s ready to create the perfect environment for our cake. Pour the luscious batter into a greased cake pan, smoothing the top with a spatula. As it bakes for 30 minutes, I can already envision the rich, moist textures developing. This baking technique is key; the gentle heat allows the cake to rise beautifully while locking in moisture. I watch for the edges to pull away slightly from the pan, a sign it’s nearly done. Once you insert a toothpick and it emerges clean, you know you’ve achieved that perfect, decadent chocolate cake.
Nutritional Guide
How often do we consider the nutritional aspects of our favorite treats, like a moist chocolate cake? I find it essential to understand what I’m indulging in, especially when it comes to caloric content. A slice of this heavenly cake can be both delightful and a little indulgent, so let’s break down the nutrition per serving size.
| Nutrient | Amount per Serving |
|---|---|
| Calories | 350 |
| Total Fat | 18g |
| Sugar | 25g |
Knowing the nutritional facts helps me enjoy every bite without guilt. I believe it’s all about balance, so why not savor this rich cake while being aware of its delightful yet decadent nature? Enjoy!
Final Thoughts
After considering the nutritional aspects of this moist chocolate cake, it’s clear that indulgence doesn’t have to come with regrets. By following some handy baking tips, you can elevate your baking game while enjoying every bite. Here are a few ideas to make this cake even more delightful:
- Experiment with Flavor Variations: Add espresso powder for a richer taste or a splash of vanilla extract for warmth.
- Use Quality Ingredients: High-quality cocoa and chocolate make a significant difference in flavor and texture.
- Don’t Overmix: Keep that batter light and airy to guarantee a fluffy cake.
Baking is all about creativity, so don’t hesitate to personalize this recipe. Enjoy the process and savor every delicious bite!
Frequently Asked Questions
Can I Substitute Cocoa Powder for Chocolate in This Recipe?
I’ve found substituting cocoa powder for chocolate works well, especially with dark chocolate types. Just remember, cocoa alternatives may alter sweetness and texture slightly, so adjust sugar and fat for the best results.
How Long Can I Store the Chocolate Cake?
When I think about cake storage, I envision airtight containers and cool spaces. For ideal freshness, I’ve found chocolate cake lasts about 3-4 days at room temperature, or up to a week refrigerated. Use these storage tips wisely!
What Type of Chocolate Works Best for This Cake?
When I bake, I love using dark chocolate for its rich flavor, but milk chocolate adds sweetness. Brands like Ghirardelli and Valrhona offer excellent baking chocolate, creating the perfect balance in my cakes.
Can I Use Gluten-Free Flour in the Recipe?
Imagine a garden where every flower blooms uniquely; that’s how gluten-free options can transform your baking. I’ve found that using gluten-free flour works beautifully—just remember to adjust your liquid and embrace creativity with baking tips!
Is There a Dairy-Free Version of This Chocolate Cake?
I use dairy alternatives like almond or coconut milk, and for egg substitutes, applesauce or flaxseed work wonders. This way, I create a delicious, dairy-free chocolate cake that everyone enjoys, no matter their dietary needs!
Conclusion
As I savor the last bite of this luscious chocolate cake, I’m reminded of the joy it brings to both the baker and the lucky ones at the table. With each moist crumb melting like a sweet whisper, it’s more than just dessert; it’s a hug for the soul. So, don’t hesitate—let this recipe dance into your kitchen, and watch as it transforms ordinary moments into delightful memories, one slice at a time.
Chocolate moist cake design
Ingredients
Equipment
Method
- Preheat the oven to 350°F (175°C). Grease and flour two 9-inch round cake pans or line them with parchment paper.
- Mix dry ingredients: In a medium bowl, whisk together flour, cocoa powder, baking powder, baking soda, and salt. Set aside.
- Mix wet ingredients: In a large mixing bowl, beat together sugar, eggs, milk, oil, and vanilla extract until smooth and combined.
- Add dry ingredients to wet ingredients: Gradually add the dry ingredient mixture into the wet ingredients. Mix until smooth. The batter will be thick.
- Add boiling water: Slowly pour the boiling water into the batter. Mix until well combined. The batter will be thin, but that’s okay—it ensures the cake stays moist!
- Bake: Divide the batter evenly between the two prepared pans. Bake for 30-35 minutes, or until a toothpick inserted into the center comes out clean.
- Cool the cakes: Let the cakes cool in the pans for 10 minutes before removing them from the pans. Cool completely on a wire rack before frosting.
- Make the frosting: In a large mixing bowl, beat the softened butter until creamy. Gradually add powdered sugar, cocoa powder, and salt. Add milk or heavy cream a little at a time, and beat until smooth. Stir in vanilla extract.
- Assemble the cake: Once the cakes have cooled, frost the top of one cake layer. Place the second layer on top, and frost the top and sides of the cake evenly with the frosting.
- Serve and enjoy! Slice and serve the cake at room temperature for the best texture.
Notes
- For an extra chocolatey taste, you can add ½ cup of mini chocolate chips to the batter before baking.
- If you want a richer frosting, you can substitute heavy cream for milk.
- This cake is perfect for birthdays and can be decorated with sprinkles, chocolate shavings, or even fresh fruit for a creative touch.
- Leftovers can be stored in an airtight container at room temperature for up to 3 days or refrigerated for up to 1 week.