

If you’re dreaming of a cozy Christmas dinner that would make grandma proud, I’ve got just the thing! Picture classic roast turkey with herb butter, honey-glazed ham, and traditional stuffing with sausage and sage. Don’t forget creamy mashed potatoes with garlic and that irresistible green bean casserole topped with crispy onions. For dessert, there’s old-fashioned mince pie and gingerbread cookies you can decorate. Trust me, each dish brings a piece of home to your table, and there’s even more to explore!
Classic Roast Turkey With Herb Butter
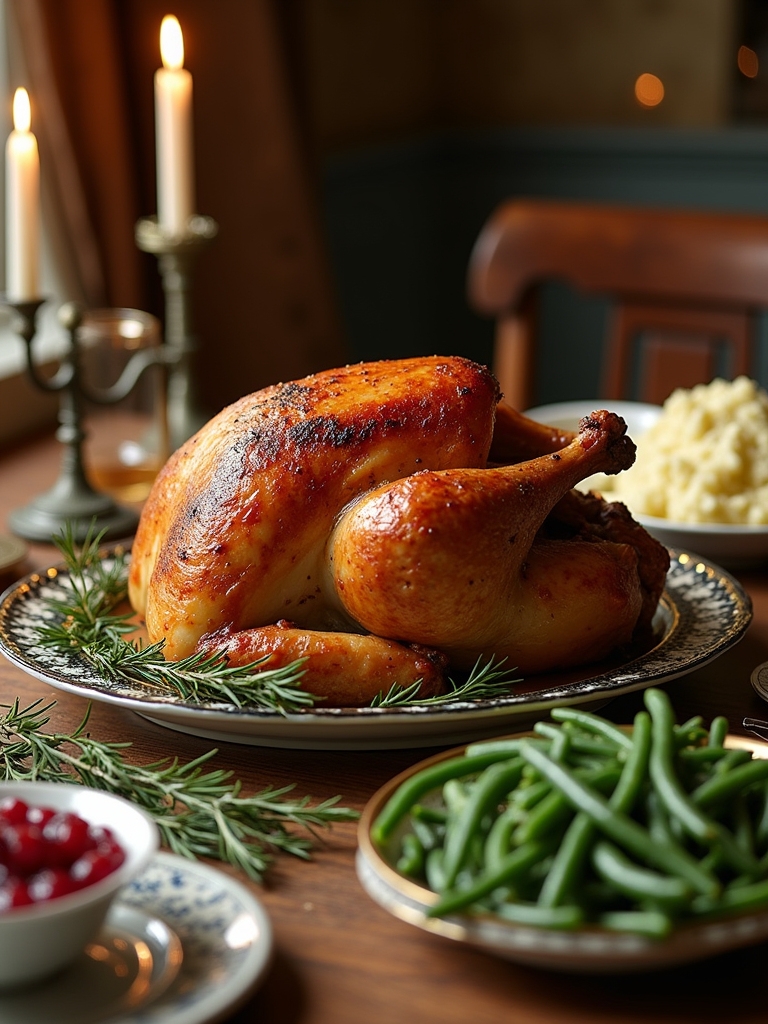
Roasting a classic turkey is a time-honored tradition that brings families together during the festive season. A perfectly cooked turkey not only serves as the centerpiece of the Christmas dinner table but also fills the home with delightful aromas that evoke holiday memories. This recipe focuses on a classic roast turkey infused with herb butter, which enhances the flavors and keeps the meat moist and succulent.
To achieve the best results, it is essential to start with a high-quality turkey, preferably organic or free-range. The herb butter, made with fresh herbs and spices, will be generously spread under the skin and over the turkey, guaranteeing that every bite is infused with rich flavor. Allowing the turkey to rest after roasting is vital for making sure the juices redistribute throughout the meat, making it tender and juicy.
Starting with a high-quality turkey and using herb butter ensures rich flavor and juicy, tender meat.
Ingredients:
- 1 (12-14 pound) whole turkey, thawed
- 1 cup unsalted butter, softened
- 2 tablespoons fresh rosemary, chopped
- 2 tablespoons fresh thyme, chopped
- 2 tablespoons fresh sage, chopped
- 4 cloves garlic, minced
- 1 tablespoon lemon zest
- Salt and pepper to taste
- 2 cups low-sodium chicken broth
- 1 onion, quartered
- 2 carrots, chopped
- 2 celery stalks, chopped
- Fresh herbs for garnish (optional)
To prepare the turkey, preheat your oven to 325°F (165°C). In a bowl, combine the softened butter with rosemary, thyme, sage, garlic, lemon zest, salt, and pepper, mixing well to create the herb butter. Pat the turkey dry with paper towels, and carefully loosen the skin over the breast and legs with your fingers, being careful not to tear it. Rub half of the herb butter directly onto the meat under the skin, and then spread the remaining butter all over the outside of the turkey. Place the quartered onion, carrots, and celery inside the cavity of the turkey for added flavor. Place the turkey on a roasting rack in a large roasting pan, and pour the chicken broth into the bottom of the pan. Roast the turkey for about 13-15 minutes per pound, or until the internal temperature reaches 165°F (75°C) in the thickest part of the thigh. Baste the turkey every 30 minutes with the pan juices to promote even browning. Once done, let the turkey rest for at least 20-30 minutes before carving.
When cooking a roast turkey, patience is key. Always allow the turkey to come to room temperature for about an hour before roasting, as this promotes even cooking. If the skin browns too quickly, cover the turkey loosely with aluminum foil. Use a meat thermometer to check for doneness; this is the most reliable way to verify that your turkey is perfectly cooked. Additionally, consider saving the leftover carcass to make a delicious turkey broth or soup, extending the flavors of your festive meal. Enjoy the process and the cherished moments with loved ones around the dinner table!
Honey-Glazed Ham
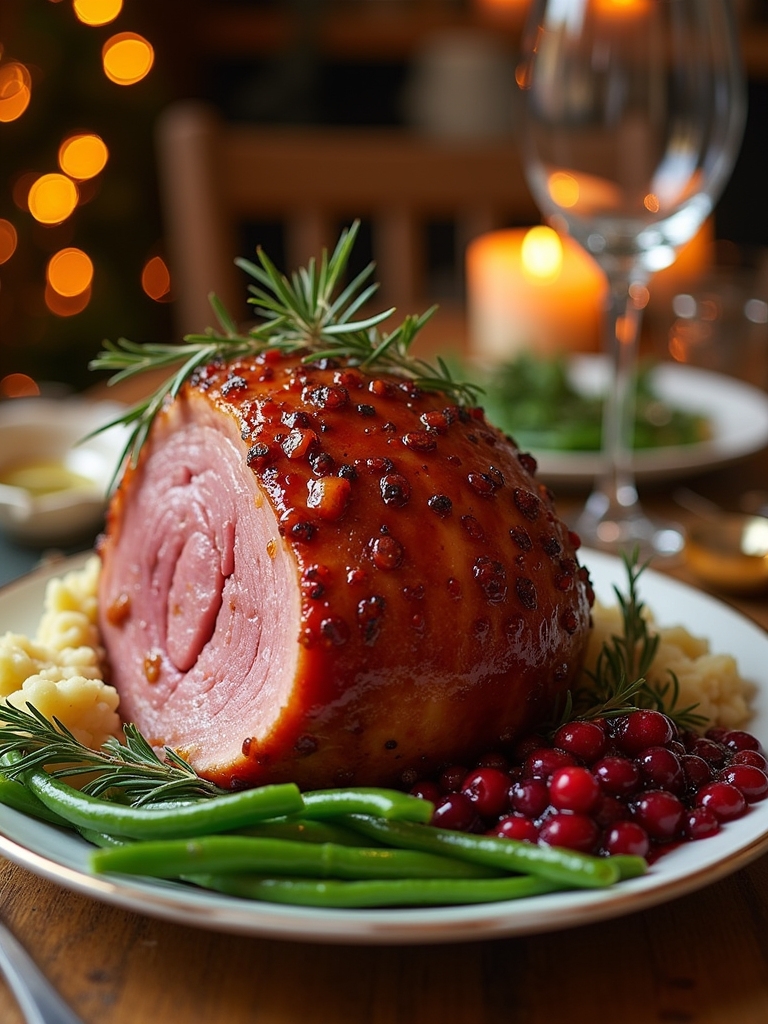
Honey-Glazed Ham is a classic centerpiece for any Christmas dinner table, embodying the essence of warmth and festivity. The combination of sweet honey, savory spices, and the rich flavor of the ham creates a dish that tantalizes the taste buds and brings family and friends together. This recipe not only delivers on flavor but also fills the kitchen with a delightful aroma, making it a cherished holiday tradition.
Preparing Honey-Glazed Ham is a straightforward process that allows you to enjoy more time with your loved ones. Using a pre-cooked ham makes this recipe simpler, as you’ll only need to enhance its flavor with a sweet and sticky glaze. Whether you opt for a bone-in or boneless ham, this dish will certainly become a favorite on your holiday table.
Ingredients:
- 1 fully cooked bone-in ham (about 8-10 pounds)
- 1 cup honey
- 1 cup brown sugar
- 1/4 cup Dijon mustard
- 1/4 cup apple cider vinegar
- 1 teaspoon ground cinnamon
- 1/2 teaspoon ground cloves
- 1/2 teaspoon ground ginger
- Whole cloves (optional for decoration)
To prepare the Honey-Glazed Ham, preheat your oven to 325°F (165°C). Score the surface of the ham in a diamond pattern, making shallow cuts about 1 inch apart. Place the ham in a roasting pan, cut side down. In a medium saucepan, combine honey, brown sugar, Dijon mustard, apple cider vinegar, cinnamon, cloves, and ginger. Heat over medium heat, stirring until the sugar has dissolved. Brush half of the glaze over the ham and cover it loosely with foil. Bake the ham for about 1.5 hours, basting with the glaze every 30 minutes. Remove the foil during the last 30 minutes of baking, brushing on the remaining glaze for a beautiful finish. The ham is done when it reaches an internal temperature of 140°F (60°C).
When cooking Honey-Glazed Ham, consider using a meat thermometer to verify it reaches the proper temperature without drying out. For added flavor, allow the ham to sit at room temperature for about 30 minutes before baking; this will help it heat evenly. Don’t hesitate to experiment with additional spices or even a splash of whiskey in the glaze for a unique twist. Finally, let the ham rest for at least 15 minutes before slicing; this helps retain its juices and results in tender, flavorful servings. Enjoy your festive feast!
Traditional Stuffing With Sausage and Sage
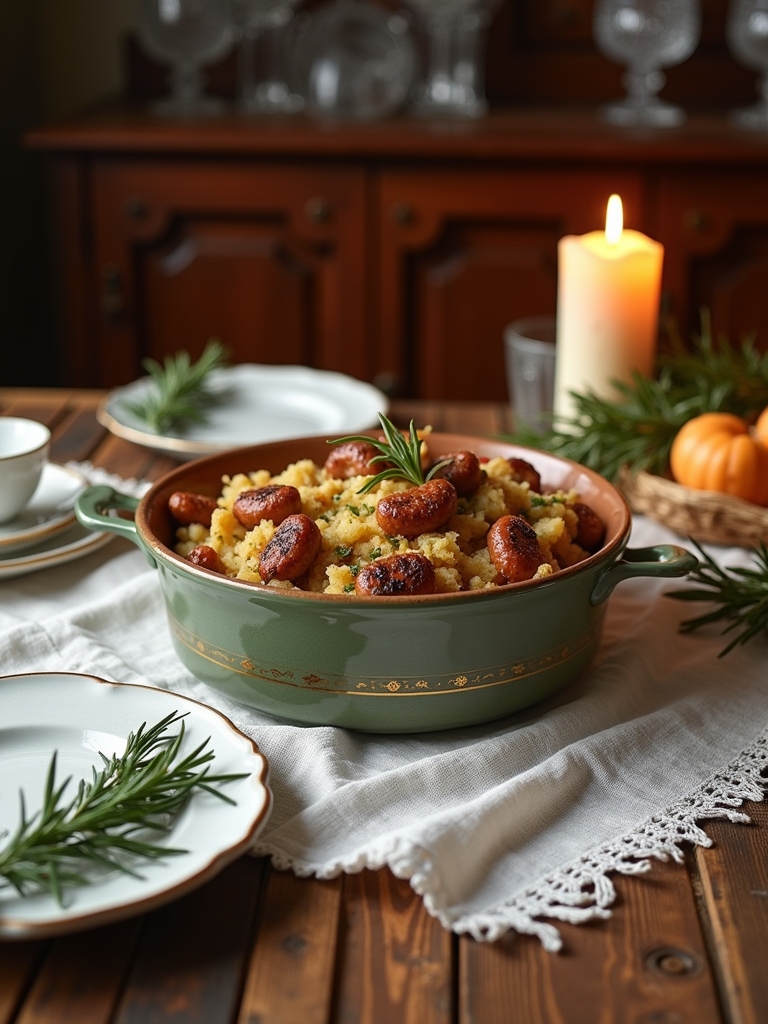
As the holiday season approaches, few dishes evoke the warmth and comfort of a traditional Christmas dinner quite like stuffing. This classic recipe for stuffing with sausage and sage combines savory flavors and delightful textures, making it a beloved side dish for many families. The hearty sausage mixed with aromatic sage and fresh vegetables creates a filling that perfectly complements roasted turkey or chicken, bringing together all the elements of a festive meal.
Making this traditional stuffing is not only straightforward but also a wonderful opportunity to involve family members in the kitchen. The blend of herbs and spices, combined with the delightful crunch of toasted bread, results in a dish that is both flavorful and satisfying. Whether you are preparing a small gathering or a grand feast, this stuffing recipe is sure to become a cherished part of your holiday traditions.
This traditional stuffing recipe invites family togetherness, offering a delightful blend of flavors that will enhance your holiday celebrations.
Ingredients:
- 1 pound sausage (Italian or breakfast, removed from casings)
- 1 cup celery, diced
- 1 cup onion, diced
- 1/2 cup butter
- 1 teaspoon dried sage
- 1 teaspoon dried thyme
- 1/2 teaspoon salt
- 1/4 teaspoon black pepper
- 1/2 cup chicken broth (more as needed)
- 8 cups bread cubes (preferably day-old bread)
- 1/4 cup fresh parsley, chopped
- 2 large eggs, beaten
Instructions:
In a large skillet over medium heat, cook the sausage until browned, breaking it up into small pieces as it cooks. Once cooked, add the diced celery and onion, cooking until softened, about 5-7 minutes. Stir in the butter, dried sage, thyme, salt, and pepper, allowing the mixture to simmer for a few minutes. In a large mixing bowl, combine the sausage mixture with the bread cubes, parsley, chicken broth, and beaten eggs. Mix until well combined, making sure the bread is evenly moistened. You can add more broth if the mixture seems dry. Transfer the stuffing to a greased baking dish and cover with foil.
Extra Tips:
To enhance the flavors of your traditional stuffing, consider using a mix of different types of bread, such as sourdough or cornbread, for added texture and taste. Additionally, feel free to customize the recipe by adding ingredients like dried cranberries or nuts for a unique twist. If you prefer a crispy topping, uncover the stuffing during the last 15-20 minutes of baking to allow the top to brown nicely. Remember to taste the mixture before baking to verify it’s seasoned to your liking, and don’t hesitate to adjust the herbs and spices according to your personal preference.
Creamy Mashed Potatoes With Garlic
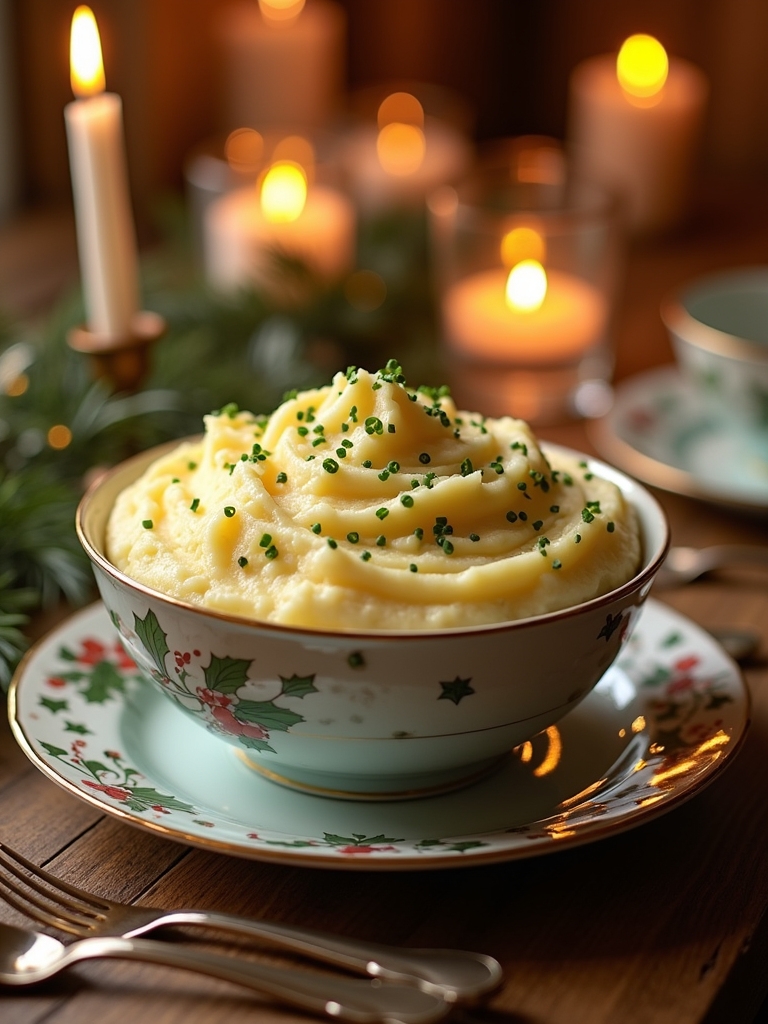
Creamy mashed potatoes with garlic are a quintessential side dish that can elevate any holiday dinner. This dish combines the comforting creaminess of traditional mashed potatoes with the rich, aromatic flavor of garlic, creating a delightful pairing that complements any roast or festive feast. The key to achieving the perfect texture lies in the choice of potatoes and the method of mashing.
For the best results, opt for starchy potatoes like Russets or Yukon Golds, as they yield a light and fluffy consistency. The addition of garlic not only enhances the flavor but also adds a touch of sophistication. Whether you’re celebrating a special occasion or simply indulging in a cozy family meal, these creamy mashed potatoes are sure to become a favorite on your dinner table.
Ingredients:
- 2 pounds of Russet or Yukon Gold potatoes
- 4 cloves of garlic, peeled
- 1 cup of heavy cream
- 4 tablespoons of unsalted butter
- Salt, to taste
- Pepper, to taste
- Fresh chives or parsley, for garnish (optional)
Instructions:
Begin by peeling the potatoes and cutting them into evenly sized chunks. Place the potato chunks and garlic cloves in a large pot, then cover with water and add a generous pinch of salt. Bring to a boil over high heat, then reduce the heat and let it simmer for about 15-20 minutes, or until the potatoes are fork-tender. Drain the potatoes and garlic, then return them to the pot. Add the butter and heavy cream, and mash everything together until smooth and creamy. Season with salt and pepper to taste, and garnish with fresh chives or parsley if desired.
Extra Tips:
For a richer flavor, consider roasting the garlic before adding it to the potatoes; simply wrap whole cloves in aluminum foil with a drizzle of olive oil and roast in the oven until soft and caramelized. To keep your mashed potatoes warm until serving, you can place them in a heatproof bowl set over a pot of simmering water. If you prefer ultra-smooth mashed potatoes, use a potato ricer or food mill instead of a traditional masher. Feel free to adjust the cream and butter quantities to achieve your desired creaminess, and enjoy your deliciously creamy mashed potatoes with garlic!
Green Bean Casserole With Crispy Onions
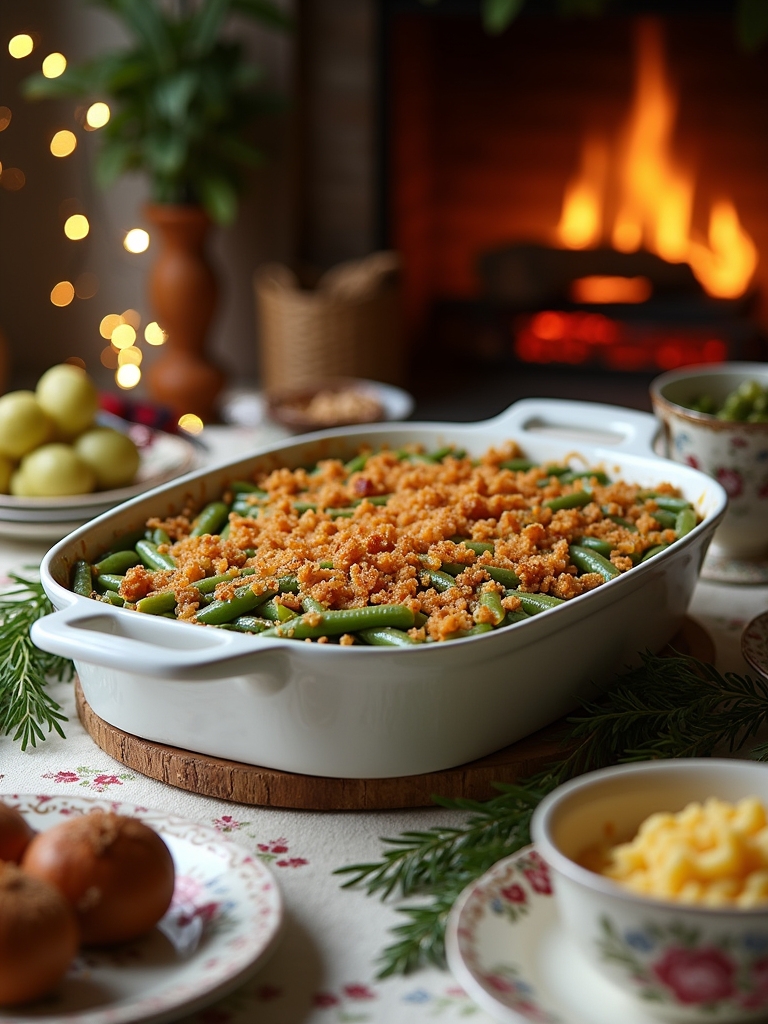
Green Bean Casserole with Crispy Onions is a classic dish that has graced holiday tables for generations. This comforting and creamy casserole combines tender green beans with a rich mushroom sauce, all topped with a crunchy layer of crispy fried onions. Whether it’s Thanksgiving, Christmas, or just a cozy family gathering, this dish brings warmth and nostalgia to any meal. The best part is that it’s easy to prepare, making it a perfect candidate for both novice cooks and seasoned chefs alike.
This recipe combines fresh or frozen green beans with a flavorful mix of cream of mushroom soup and milk, creating a luscious base that perfectly complements the beans. Topped with crispy onions, this dish not only provides a delightful texture contrast but also adds a savory crunch that elevates the entire casserole. Serve it alongside your favorite holiday mains for a delicious addition to your festive spread.
Ingredients:
- 1 pound fresh green beans (or 2 cans of green beans, drained)
- 1 can (10.5 ounces) cream of mushroom soup
- ¾ cup milk
- 1 teaspoon soy sauce
- 1 cup grated cheddar cheese (optional)
- 1 ½ cups crispy fried onions
- Salt and pepper to taste
To prepare the Green Bean Casserole, preheat your oven to 350°F (175°C). If using fresh green beans, wash and trim them, then blanch them in boiling water for about 5 minutes until just tender. In a large mixing bowl, combine the cream of mushroom soup, milk, and soy sauce. If desired, stir in the grated cheddar cheese and season with salt and pepper. Add the green beans to the mixture and stir until well coated. Transfer the mixture to a greased 9×13-inch casserole dish and bake in the preheated oven for 25 minutes. After 25 minutes, remove the dish and gently stir in half of the crispy fried onions. Top with the remaining onions and return the casserole to the oven for an additional 10-15 minutes, or until the onions are golden brown and the casserole is bubbling.
When preparing your Green Bean Casserole, consider using fresh green beans for the best flavor and texture. If you’re short on time, frozen green beans can be a great alternative. For added richness, you can mix in some sautéed mushrooms or garlic. Additionally, make sure not to overbake the casserole to prevent the beans from becoming too soft. For an extra crispy topping, you can increase the amount of fried onions or try adding some breadcrumbs mixed with Parmesan cheese for a delightful twist. Enjoy this classic dish and the joy it brings to your holiday celebrations!
Scalloped Potatoes With Cheddar Cheese

Scalloped potatoes with cheddar cheese are a classic side dish that brings warmth and comfort to any holiday dinner table. This creamy, cheesy dish features thinly sliced potatoes baked to perfection in a rich cheese sauce, making it a delightful accompaniment to your festive feast. Whether served alongside a succulent roast or as part of a potluck gathering, scalloped potatoes are guaranteed to please everyone with their decadent flavor and satisfying texture.
Scalloped potatoes with cheddar cheese bring warmth and comfort, making them a delightful addition to any festive gathering.
The beauty of this dish lies in its simplicity, allowing the natural flavors of the potatoes to shine through while being enriched by the sharpness of cheddar cheese. As the potatoes bake, they absorb the creamy sauce, creating layers of flavor that meld together beautifully. Perfect for family gatherings or cozy nights in, scalloped potatoes with cheddar cheese are a timeless recipe that will never go out of style.
Ingredients:
- 4 large russet potatoes, peeled and thinly sliced
- 2 cups sharp cheddar cheese, grated
- 2 cups heavy cream
- 1 medium onion, thinly sliced
- 3 tablespoons butter
- 2 tablespoons all-purpose flour
- 1 teaspoon garlic powder
- Salt and pepper to taste
- Fresh chives or parsley for garnish (optional)
To prepare scalloped potatoes with cheddar cheese, preheat your oven to 350°F (175°C). In a medium saucepan, melt the butter over medium heat. Stir in the flour and cook for about 1 minute, forming a roux. Gradually whisk in the heavy cream, garlic powder, salt, and pepper, cooking until the mixture thickens slightly. In a greased 9×13-inch baking dish, layer half of the sliced potatoes, followed by half of the onions, and half of the cheese. Pour half of the cream mixture over the layers. Repeat the process with the remaining potatoes, onions, cheese, and cream mixture. Cover the dish with aluminum foil and bake for 1 hour. Remove the foil and bake for an additional 30 minutes or until the top is golden and the potatoes are tender.
When making scalloped potatoes, it’s crucial to slice the potatoes evenly to guarantee they cook uniformly. A mandoline slicer can be a great tool for achieving consistent thickness. Additionally, feel free to experiment with different types of cheese, such as Gruyère or Monterey Jack, to customize the flavor to your liking. For an extra crispy top, broil the dish for a few minutes after baking, but keep a close eye on it to prevent burning. Let the dish rest for a few minutes before serving to allow the sauce to thicken up slightly. Enjoy your delicious scalloped potatoes!
Cranberry Sauce With Orange Zest
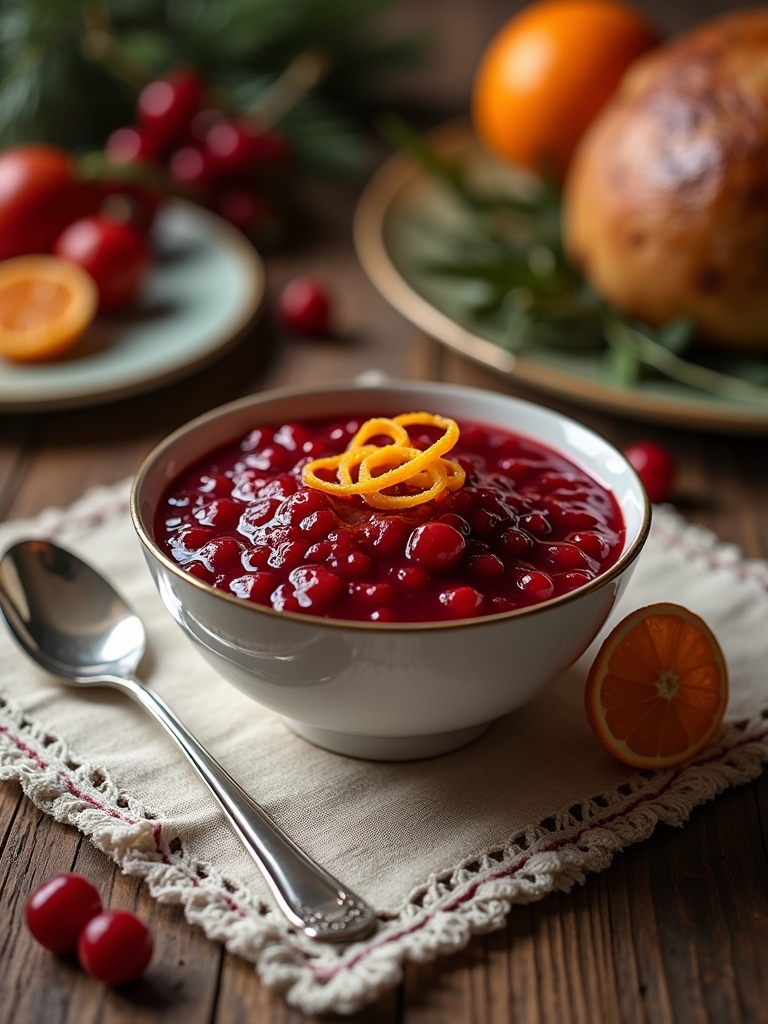
Cranberry sauce is a classic holiday side dish that adds a burst of tartness and color to your Christmas dinner plate. This particular recipe infuses the traditional cranberry sauce with a delightful twist of orange zest, elevating the flavors and bringing a fresh, citrusy brightness that complements the savory dishes on your holiday table. The sweet and tangy combination of cranberries and orange is not only delicious but also visually appealing, making it a must-have for your festive feast.
Making cranberry sauce from scratch is surprisingly simple and requires just a few ingredients. The process allows you to control the sweetness and flavor profile, ensuring you get a sauce that perfectly aligns with your taste preferences. Plus, preparing your own cranberry sauce means you can make it ahead of time, freeing up your schedule for other holiday preparations. So, gather your ingredients and get ready to create a delightful accompaniment to your Christmas dinner.
Ingredients:
- 12 ounces fresh cranberries
- 1 cup granulated sugar
- 1 cup water
- Zest of 1 large orange
- 1 tablespoon fresh orange juice
- Pinch of salt
Cooking Instructions:
In a medium saucepan, combine the fresh cranberries, sugar, and water over medium heat. Bring the mixture to a boil, then reduce the heat and let it simmer for about 10 minutes, or until the cranberries burst and the sauce thickens. Stir in the orange zest, fresh orange juice, and a pinch of salt. Remove from heat and let the sauce cool to room temperature before transferring it to a serving dish or an airtight container for refrigeration.
Extra Tips:
When making cranberry sauce, feel free to adjust the amount of sugar based on your preference for sweetness. If you enjoy a hint of spice, consider adding a dash of cinnamon or a few whole cloves during simmering for added warmth. Additionally, this sauce can be made several days in advance, and its flavors will deepen as it sits in the refrigerator, making it an excellent make-ahead option for your holiday meal.
Roasted Brussels Sprouts With Bacon
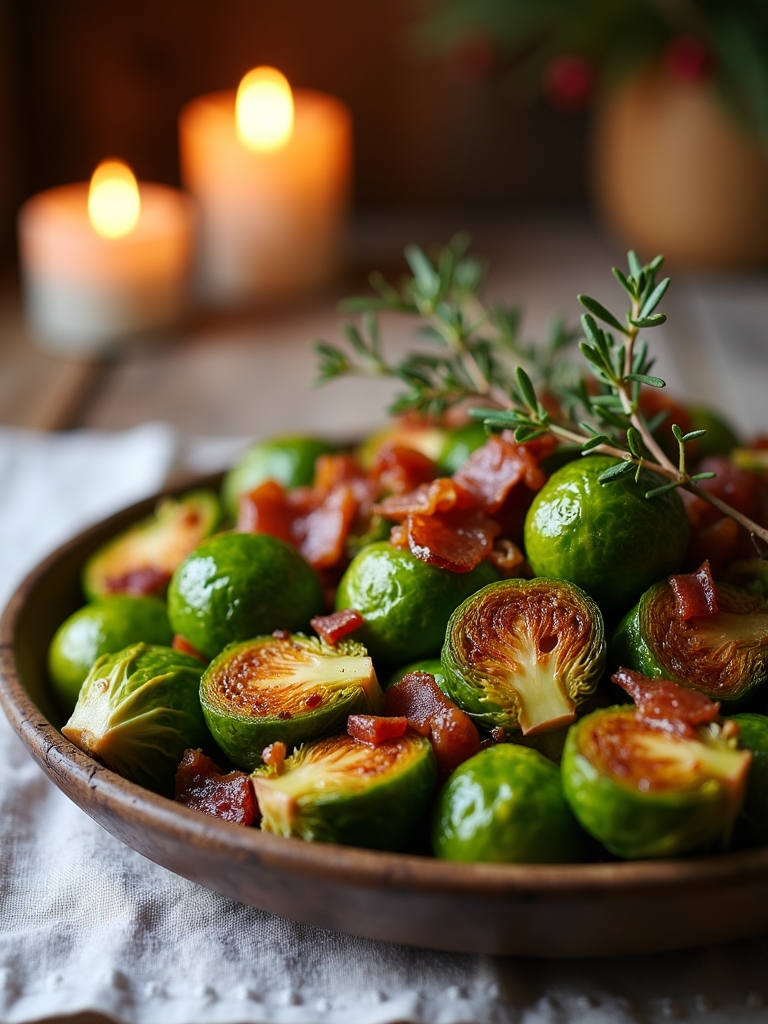
Roasted Brussels sprouts with bacon is a delightful side dish that adds a savory touch to your holiday table. The natural nuttiness of the Brussels sprouts pairs beautifully with the salty, crispy bacon, creating a dish that is both rich in flavor and satisfying in texture. This recipe is not only simple but also allows the ingredients to shine, making it a perfect addition to your Old-Fashioned Christmas Dinner.
Roasted Brussels sprouts with bacon bring savory richness to your holiday table, perfectly complementing any festive meal.
As the Brussels sprouts roast in the oven, their outer leaves become crispy while the insides remain tender and flavorful. The bacon contributes a smoky depth that complements the slight bitterness of the sprouts, balancing the dish perfectly. This recipe is sure to impress your guests and might even convert those who think they don’t like Brussels sprouts!
Ingredients:
- 1 pound Brussels sprouts, trimmed and halved
- 4 slices of thick-cut bacon, chopped
- 2 tablespoons olive oil
- Salt, to taste
- Black pepper, to taste
- 2 tablespoons balsamic vinegar (optional)
Instructions:
Preheat your oven to 400°F (200°C). In a large mixing bowl, combine the halved Brussels sprouts and chopped bacon. Drizzle with olive oil and season with salt and pepper, tossing everything together until the sprouts are evenly coated. Spread the mixture onto a baking sheet in a single layer and roast in the preheated oven for 25-30 minutes or until the Brussels sprouts are golden brown and crispy on the edges, stirring halfway through to guarantee even cooking. If desired, drizzle with balsamic vinegar before serving for an added flavor boost.
Extra Tips:
For an even more flavorful dish, consider adding minced garlic or a sprinkle of red pepper flakes to the mix before roasting. If you’re looking for a vegetarian alternative, you can substitute the bacon with chopped nuts, such as pecans or walnuts, which will still provide a satisfying crunch. Always taste your Brussels sprouts before serving, as you may want to adjust the seasoning with additional salt or pepper based on your preference. Enjoy this delicious side dish as part of your festive spread!
Sweet Potato Casserole With Marshmallows
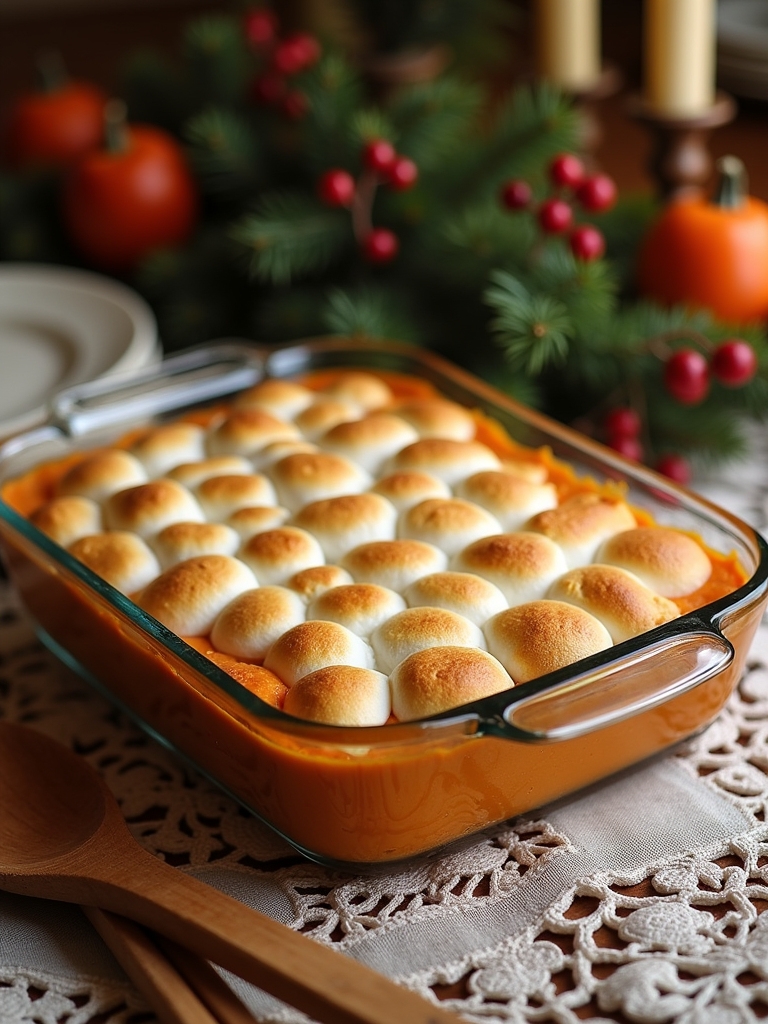
Sweet Potato Casserole with Marshmallows is a classic dish that many families look forward to during the holiday season. This delightful combination of creamy, sweet potatoes topped with fluffy marshmallows creates a perfect balance of flavors and textures. It’s not only a delicious side dish but also a warming comfort food that brings back memories of holiday gatherings and celebrations.
Making this casserole is a straightforward process that results in an impressive dish for your festive table. The natural sweetness of the sweet potatoes pairs wonderfully with the sugary marshmallows, creating a dessert-like side that everyone will love. Whether it’s a holiday feast or a cozy family dinner, this Sweet Potato Casserole is sure to be a crowd-pleaser.
Ingredients:
- 4 large sweet potatoes
- 1/2 cup granulated sugar
- 1/2 cup milk
- 1/4 cup unsalted butter, melted
- 1 teaspoon vanilla extract
- 1/2 teaspoon ground cinnamon
- 1/4 teaspoon ground nutmeg
- 2 cups mini marshmallows
Instructions:
Begin by preheating your oven to 350°F (175°C). Peel and chop the sweet potatoes into chunks, then boil them in a large pot of salted water until tender, about 15-20 minutes. Drain and mash the sweet potatoes in a large mixing bowl. Add the sugar, milk, melted butter, vanilla extract, cinnamon, and nutmeg to the mashed sweet potatoes, mixing until smooth and well combined. Transfer the mixture to a greased 9×13 inch baking dish, spreading it evenly. Top with mini marshmallows and bake for 25-30 minutes, or until the marshmallows are golden brown and the casserole is heated through.
Extra Tips:
For an added layer of flavor, consider mixing in some chopped pecans or walnuts before baking for a delightful crunch. You can also toast the marshmallows for a few minutes under the broiler at the end of baking for an even more caramelized top. If you’re preparing this dish ahead of time, you can assemble it and store it in the refrigerator for up to a day before baking; just be sure to let it sit at room temperature for about 30 minutes before putting it in the oven. Enjoy this sweet and satisfying dish as part of your Old-Fashioned Christmas Dinner!
Classic Beef Wellington
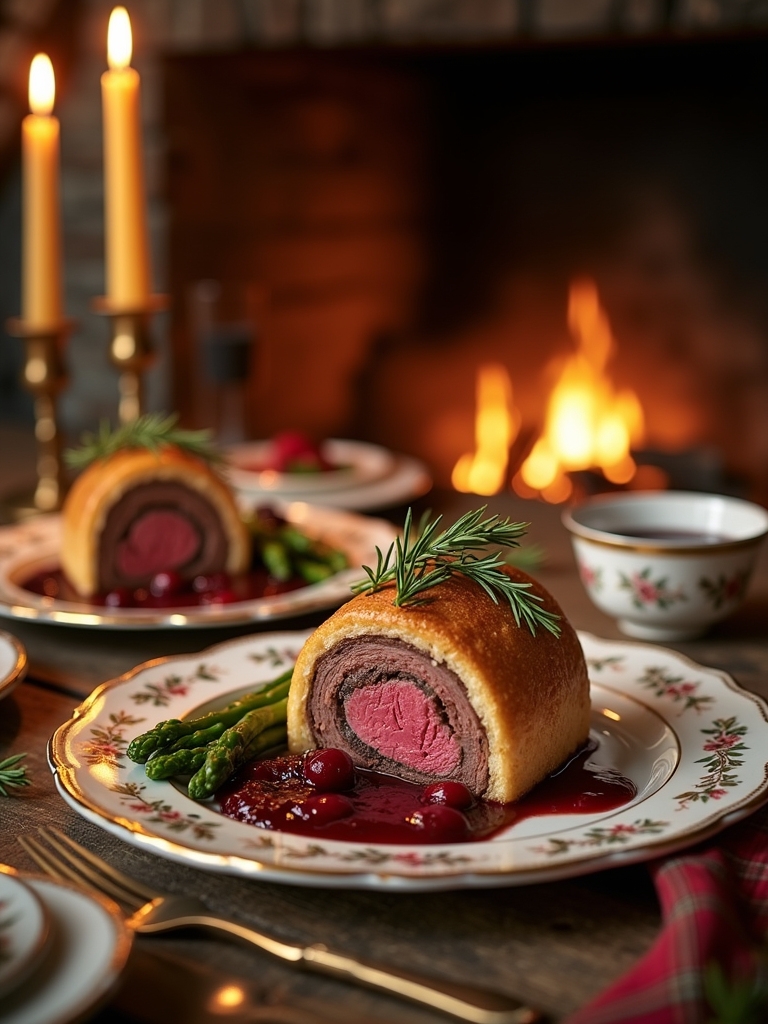
Beef Wellington is a quintessential dish that embodies the spirit of an old-fashioned Christmas dinner. This luxurious and elegant entrée features a tender fillet of beef coated in a savory mushroom duxelles and wrapped in flaky puff pastry, making it a show-stopping centerpiece for any festive table. With its rich flavors and impressive presentation, Beef Wellington is sure to impress your family and guests alike.
To create this classic dish, you’ll need to start with high-quality beef and fresh ingredients to guarantee the best flavor. The preparation involves a few key steps, including searing the beef, making the mushroom mixture, and assembling the Wellington before baking it to golden perfection. While it may seem complex, following these steps will lead to a memorable and delicious holiday meal that’s well worth the effort.
Ingredients:
- 2 lb beef tenderloin
- Salt and pepper, to taste
- 2 tablespoons olive oil
- 8 oz cremini or button mushrooms, finely chopped
- 2 tablespoons Dijon mustard
- 4 oz pâté (optional)
- 8 slices of prosciutto
- 1 sheet of puff pastry (thawed if frozen)
- 1 egg, beaten (for egg wash)
- Fresh thyme leaves, for garnish
To prepare the Beef Wellington, start by seasoning the beef tenderloin with salt and pepper. Heat olive oil in a skillet over high heat and sear the beef on all sides until browned, about 2-3 minutes per side. Remove the beef from the skillet and let it cool. In the same skillet, add the chopped mushrooms and cook until the moisture evaporates and they are golden brown. Mix in the Dijon mustard and let the mixture cool. Lay out the prosciutto slices on a sheet of plastic wrap, slightly overlapping them, and spread the cooled mushroom mixture over the prosciutto. Place the cooled beef on top, and using the plastic wrap, roll it tightly into a log. Chill in the refrigerator for 30 minutes. Preheat your oven to 400°F (200°C). Roll out the puff pastry and wrap it around the beef log. Seal the edges and brush the pastry with the beaten egg. Bake for 25-30 minutes or until the pastry is golden brown and the beef reaches your desired doneness. Allow to rest for 10 minutes before slicing.
When making Beef Wellington, it’s essential to make certain that the beef is properly cooled before wrapping it in pastry to prevent sogginess. Additionally, using a thermometer will help you achieve the perfect level of doneness; for medium-rare, aim for an internal temperature of 130°F (54°C). Finally, serve the Wellington with a rich red wine sauce or a side of roasted vegetables to enhance the festive dining experience. Enjoy your culinary masterpiece!
Old-Fashioned Mince Pie
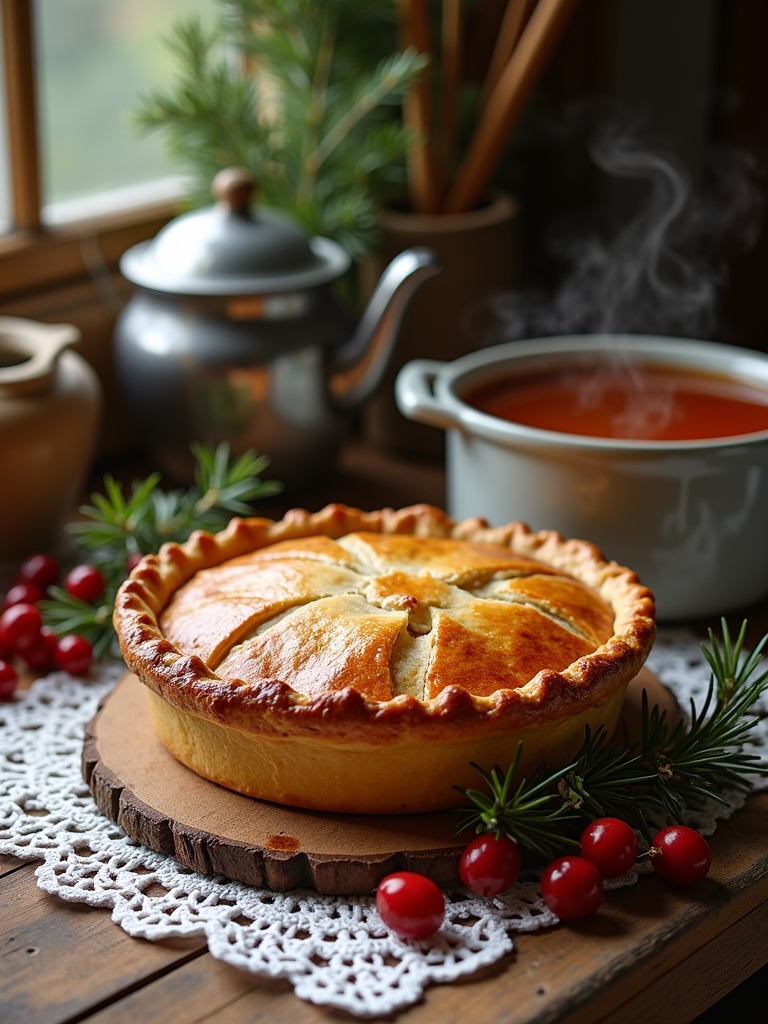
Old-Fashioned Mince Pie is a cherished holiday tradition that evokes the warm, nostalgic flavors of Christmases past. This traditional dessert, often filled with a rich mixture of dried fruits, spices, and sometimes a hint of meat, has roots that date back to medieval times. Today, it stands as a symbol of festive gatherings, bringing family and friends together over a deliciously spiced slice. The combination of sweet and savory elements, along with a perfectly flaky crust, makes this pie a delightful centerpiece for any Christmas dinner.
Creating a Mince Pie from scratch not only fills your home with tantalizing aromas but also allows you to customize the filling to suit your taste. Whether you prefer a more traditional mixture or a modern twist, this recipe offers a delightful balance of flavors and textures. The preparation may take some time, but the resulting pie is undeniably worth the effort, bringing joy and comfort to your holiday celebrations.
Ingredients:
- 2 cups all-purpose flour
- 1 teaspoon salt
- 1 cup unsalted butter, chilled and diced
- 6 to 8 tablespoons ice water
- 2 cups mincemeat filling (store-bought or homemade)
- 1 tablespoon brown sugar (for sprinkling)
- 1 tablespoon milk (for brushing)
- Ground nutmeg (for garnish, optional)
Instructions:
In a large mixing bowl, combine the flour and salt. Cut in the chilled butter until the mixture resembles coarse crumbs. Gradually add ice water, one tablespoon at a time, mixing until the dough comes together. Divide the dough in half, shape into discs, wrap in plastic wrap, and refrigerate for at least 1 hour. Preheat your oven to 425°F (220°C). Roll out one disc on a floured surface to fit your pie dish, then fill with the mincemeat filling. Roll out the second disc for the top crust, seal the edges, and cut slits for steam to escape. Brush the top with milk and sprinkle with brown sugar. Bake for 25 to 30 minutes or until golden brown.
Extra Tips:
When making Old-Fashioned Mince Pie, consider letting the filling rest overnight for a richer flavor. If using store-bought mincemeat, look for one with natural ingredients for the best taste. Additionally, you can add a splash of brandy or rum to the filling for an extra depth of flavor. If you prefer a sweeter pie, feel free to adjust the sweetness by adding a bit of sugar to the filling. Finally, serve your pie warm with a dollop of whipped cream or a scoop of vanilla ice cream for a delightful finish to your holiday meal!
Gingerbread Cookies Decorated With Icing

Gingerbread cookies are a delightful tradition during the holiday season, evoking a sense of warmth and nostalgia. Their rich, spiced flavor combined with the sweetness of icing makes them an irresistible treat for both kids and adults. Decorating these cookies can be a fun family activity, allowing everyone to express their creativity, whether through simple designs or intricate patterns. The aroma of freshly baked gingerbread fills the home, making it a perfect addition to your old-fashioned Christmas dinner spread.
Gingerbread cookies bring warmth and nostalgia to the holidays, inviting creativity and joy in every decorated bite.
In this recipe, you’ll find a classic gingerbread cookie dough that is easy to work with and yields deliciously soft and chewy cookies. Once baked, the cookies are ready to be transformed with colorful icing, making them not only tasty but also visually appealing. Prepare to gather your family around the kitchen, rolling out the dough and cutting it into festive shapes that will surely bring joy to your holiday celebrations.
Ingredients:
- 3 1/4 cups all-purpose flour
- 1 teaspoon baking soda
- 1 tablespoon ground ginger
- 1 tablespoon ground cinnamon
- 1/2 teaspoon ground cloves
- 1/2 teaspoon salt
- 3/4 cup unsalted butter, softened
- 1/2 cup brown sugar, packed
- 1/2 cup granulated sugar
- 1 large egg
- 1/2 cup unsulfured molasses
- 1 teaspoon vanilla extract
Cooking Instructions:
In a large mixing bowl, whisk together the flour, baking soda, ginger, cinnamon, cloves, and salt. In another bowl, cream the softened butter, brown sugar, and granulated sugar until light and fluffy. Beat in the egg, then stir in the molasses and vanilla extract. Gradually mix the dry ingredients into the wet mixture until well combined. Wrap the dough in plastic wrap and refrigerate for at least 2 hours or overnight for best results. Preheat your oven to 350°F (175°C). Roll out the chilled dough on a floured surface to about 1/4 inch thick and cut into desired shapes using cookie cutters. Place the cookies on lined baking sheets and bake for 8-10 minutes or until the edges are firm but the centers remain soft. Allow them to cool completely before decorating.
Extra Tips:
When decorating your gingerbread cookies, consider using royal icing for a professional finish. It’s crucial to let the cookies cool completely before applying icing to prevent it from melting. Experiment with different piping techniques to create intricate designs, or let the kids have fun with colorful sprinkles and edible glitter. You can also prepare the dough in advance and freeze it for future use, ensuring you always have gingerbread cookies ready for an unexpected holiday gathering. Finally, store the decorated cookies in an airtight container to keep them fresh and maintain their beautiful designs.
Eggnog With a Sprinkle of Nutmeg
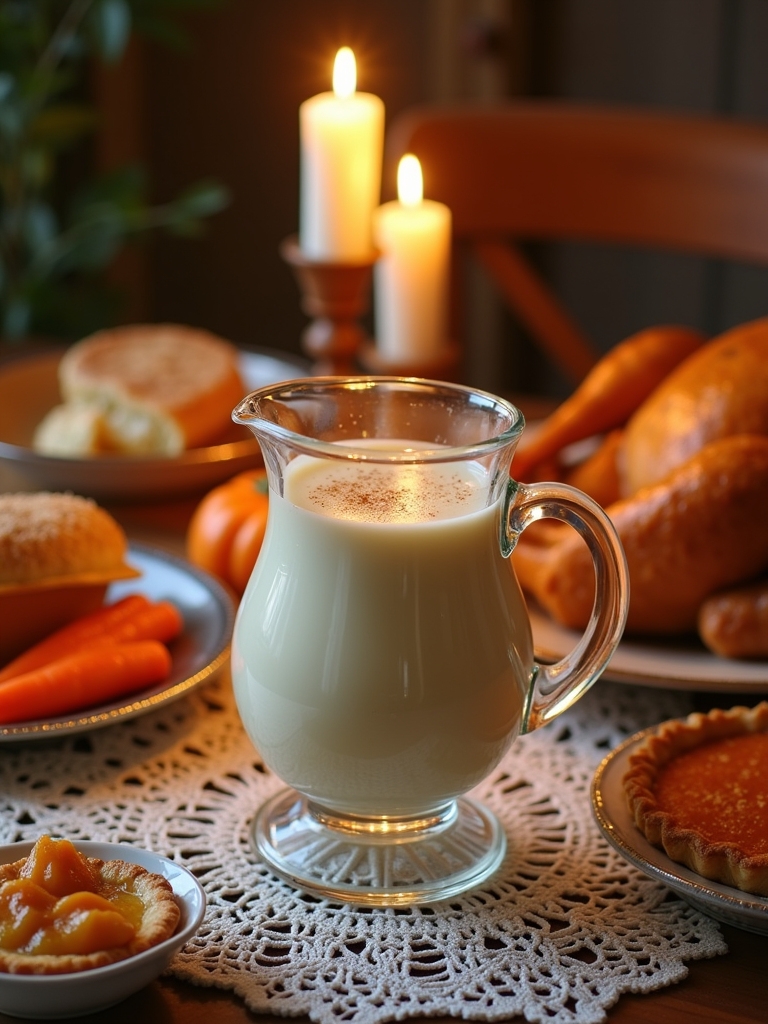
Eggnog is a traditional holiday beverage that warms the heart and brings a festive spirit to any Christmas gathering. Its creamy texture and rich flavors make it a perfect accompaniment to holiday celebrations. The addition of nutmeg not only enhances its flavor but also adds a touch of nostalgia, evoking memories of festive gatherings around a crackling fire. Whether shared with family or enjoyed during a quiet moment of reflection, homemade eggnog is sure to delight.
Making eggnog from scratch is surprisingly simple and rewarding. This classic recipe combines eggs, cream, milk, sugar, and spices to create a smooth and luscious drink. You can serve it chilled or warm, and it can be spiked with your favorite spirit for an adult twist. With just a sprinkle of freshly grated nutmeg on top, you’ve got a festive beverage that captures the essence of an old-fashioned Christmas.
Ingredients:
- 4 large eggs
- 1 cup granulated sugar
- 2 cups whole milk
- 1 cup heavy cream
- 1 teaspoon vanilla extract
- 1/2 teaspoon ground nutmeg (plus extra for garnish)
- 1/2 cup bourbon or rum (optional)
Instructions:
In a large mixing bowl, beat the eggs until they are light and frothy. Gradually add the sugar, continuing to whisk until the mixture is well combined. In a saucepan, heat the milk and heavy cream over medium heat until steaming, but not boiling. Slowly pour the warm milk mixture into the egg mixture, whisking constantly to temper the eggs and prevent curdling. Once combined, stir in the vanilla extract and ground nutmeg. If using, mix in the bourbon or rum. Chill the eggnog in the refrigerator for at least two hours before serving. When ready, pour into glasses and sprinkle with additional nutmeg on top.
Extra Tips:
When preparing eggnog, it’s important to use fresh, high-quality ingredients for the best flavor. If you prefer a non-alcoholic version, simply omit the bourbon or rum, and consider adding a dash of cinnamon for additional spice. For a richer texture, you can whip some additional cream and fold it into the eggnog just before serving. Always remember to serve chilled, and if you’re making it in advance, give it a good stir before pouring, as the ingredients may separate while sitting. Enjoy your festive drink responsibly!
Frequently Asked Questions
How Can I Make My Turkey Skin Extra Crispy?
To make my turkey skin extra crispy, I use brining techniques for moisture, then roast at high oven temperatures. Start at 450°F for the first hour, then reduce for even cooking and ultimate crispiness.
What Wine Pairs Best With a Traditional Christmas Dinner?
I love pairing a rich Pinot Noir from Oregon with traditional Christmas dinner. Its bold fruit flavors and earthy notes perfectly complement the meal, creating a delightful balance that enhances the festive experience without feeling outdated.
Can I Make Stuffing Ahead of Time?
I love making stuffing ahead of time. Just prepare the stuffing ingredients and mix them using your favorite stuffing methods. Then, store it in the fridge. On the big day, simply bake it!
How Do I Prevent My Mashed Potatoes From Being Gluey?
To prevent gluey mashed potatoes, I always use starchy potato varieties like Russets. I gently mix them with a potato masher, avoiding overmixing. It keeps them fluffy and light—perfect for any innovative meal!
What Are Some Alternatives to Eggnog for Non-Drinkers?
If you’re looking for alternatives to eggnog, I love festive mocktails with cranberry and lime or warm spiced cider. They’re both delicious and keep the holiday spirit alive without any alcohol. Give them a try!
Conclusion
So, as you gather around the table this holiday season, remember these timeless recipes that bring warmth and joy. Each dish holds a story, just like Grandma used to make, creating memories that linger long after the last bite. From the savory turkey to the sweet gingerbread cookies, each flavor connects us to family traditions. Let this Christmas be a celebration of togetherness, laughter, and delicious food that warms the heart, just like Grandma would have wanted.