

I love making Jello cake; it’s a fun and vibrant dessert that always brings smiles! To start, I bake my favorite cake mix and let it cool. Then, I dissolve Jello in boiling water, poke holes in the cooled cake, and pour the Jello mixture over. After chilling in the fridge, it’s set and ready to enjoy. Top it off with whipped cream and fresh fruit for an extra burst of flavor and color. There’s so much more to explore about this delightful treat!
History
When I think about the history of Jello cake, I can’t help but marvel at how this vibrant dessert has evolved over the years. Originally emerging as a staple in vintage desserts, Jello cake reflects the playful spirit of its time, capturing the imagination of home bakers. Its roots lie in gelatin innovations that revolutionized cooking, making it accessible and fun to experiment with colors and flavors. I find it fascinating how this once-simple treat transformed into a canvas for creativity, inspiring countless variations. As I explore its journey, I appreciate how it’s not just about taste; it’s a celebration of nostalgia and innovation, bridging generations and igniting the joy of dessert-making in kitchens everywhere.
Recipe
Jello cake is a delightful and colorful dessert that combines the lightness of a cake with the fun and vibrancy of Jello, making it a favorite for parties and gatherings. This dessert is not only visually appealing but also customizable, as you can choose your favorite flavors of Jello and cake to create a unique treat that everyone will enjoy. The layers of Jello provide an invigorating burst of flavor that complements the soft, fluffy cake perfectly, making it a wonderful addition to any dessert table.
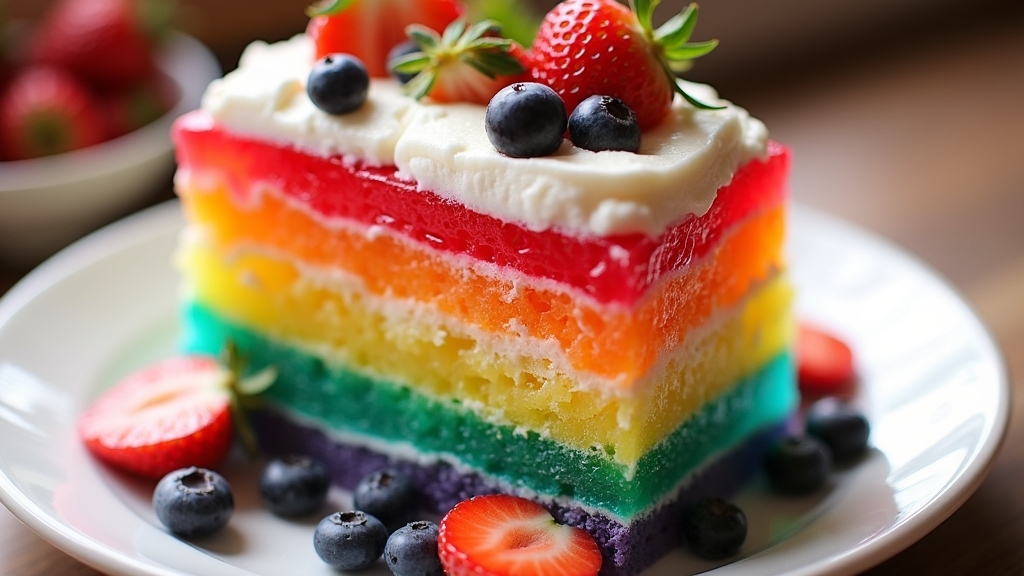
Jello cake is a vibrant and customizable dessert that delights with its colorful layers and flavorful combinations, perfect for any celebration.
Making a Jello cake is surprisingly simple, requiring just a few ingredients and minimal preparation time. This dish is perfect for those who want to impress their guests without spending hours in the kitchen. Once you master the basic recipe, you can experiment with different color combinations and flavors, ensuring that your Jello cake is both delicious and eye-catching. Follow this easy recipe to create your own version of this fun dessert!
Ingredients:
- 1 box of cake mix (any flavor)
- Ingredients required for cake mix (usually water, oil, and eggs)
- 1 box of Jello (any flavor)
- 2 cups of boiling water
- 1 cup of cold water
- Whipped cream or Cool Whip for topping (optional)
Cooking Instructions:
Begin by preheating your oven and preparing the cake according to the package instructions. Once baked, allow the cake to cool completely. While the cake is cooling, dissolve the Jello mix in boiling water, stirring until fully dissolved. After that, add cold water to the mixture. Once the cake is cooled, poke holes all over the top using a fork, then slowly pour the Jello mixture over the cake, ensuring it seeps into the holes. Refrigerate the cake for at least 4 hours or until the Jello is set, and then top with whipped cream or Cool Whip before serving.
Extra Tips:
When making your Jello cake, consider using a clear glass dish to showcase the beautiful layers of cake and Jello. You can also try using different flavors of Jello and cake to create a rainbow effect or match the theme of your event. For added texture and flavor, you might sprinkle some crushed fruit or nuts on top of the whipped cream. Be sure to plan ahead, as this dessert requires time to chill and set properly for the best results!
Cooking Steps
Now that we have our ingredients ready, let’s jump into the cooking steps for this delightful Jello cake. I’ll guide you through each stage, from whipping up the cake mix batter to layering on that vibrant Jello. Trust me, the process is as fun as it is rewarding, and you’ll be excited to enjoy the final masterpiece!
Step 1. Prepare Cake Mix Batter
To create a delicious Jello cake, the first step involves preparing the cake mix batter, and it’s easier than you might think. I start by grabbing my favorite cake mix and dumping it into a large mixing bowl. Next, I add the required ingredients—typically water, oil, and eggs. Using a whisk, I employ some effective mixing techniques, ensuring everything blends smoothly without any lumps. I love to mix until the batter reaches a velvety consistency, which really enhances the final texture of the cake. It’s important to scrape the sides of the bowl every so often to incorporate all the ingredients. Once I’m satisfied with the batter, I can’t wait to pour it into the pan and watch it rise in the oven!
Step 2. Chill Cake in Refrigerator
After the cake has baked to perfection and cooled slightly in the pan, I carefully transfer it onto a wire rack. It’s essential to let it cool completely; this step is where my chilling techniques come into play. Once it’s cool, I wrap the cake in plastic wrap and place it in the refrigerator. This not only helps set the texture but also enhances the flavors, allowing them to meld beautifully. The refrigeration benefits are undeniable—when I take it out, the cake feels firmer and ready for the next layer. Waiting for a couple of hours may test my patience, but it’s worth it for that delightful, invigorating bite I know is coming!
Step 3. Add Jello Layer
As I prepare to add the Jello layer, the anticipation of vibrant colors and invigorating flavors fills the kitchen. First, I choose my favorite jello flavors, opting for a mix that contrasts beautifully, like raspberry and lime. With boiling water, I dissolve the jello powder, then stir in cold water to cool it down. Next, I gently pour the mixture over the chilled cake, ensuring it seeps into the crevices for maximum flavor. Using layer techniques, I tilt the pan to create a stunning gradient effect, which adds visual appeal. I let it set in the fridge until firm, imagining how each slice will reveal those eye-catching layers. It’s all about bringing a burst of joy to every bite!
Step 4. Top With Whipped Cream
Now that the Jello layer has set beautifully, it’s time to elevate this dessert with a generous dollop of whipped cream. I love using fresh, homemade whipped cream for its rich flavor, but there are so many whipped cream variations to explore! For a twist, try adding a splash of vanilla extract or a hint of almond for extra depth. If you’re feeling adventurous, consider topping alternatives like chocolate shavings or crushed nuts to add texture and contrast. Just spread or pipe the whipped cream over the Jello layer, letting it cascade down the sides for a stunning presentation. This simple addition transforms the dish into a masterpiece, making it not just a treat but a conversation starter at any gathering!
Step 5. Serve With Fresh Fruit
Serving Jello cake with fresh fruit adds a burst of color and flavor that takes this dessert to a whole new level. I love experimenting with different fruit combinations to elevate the experience. Here are some of my favorite serving suggestions:
- Strawberries and blueberries: Their sweet and tart balance is simply irresistible.
- Kiwi and pineapple: This tropical duo brings a revitalizing twist that’s perfect for summer.
- Peaches and raspberries: Their vibrant colors and contrasting flavors create a stunning presentation.
- Mango and coconut: This combination transports me to a beach paradise with every bite.
These fresh fruit pairings not only enhance the visual appeal but also complement the Jello cake’s flavors beautifully. Give it a try, and watch your dessert shine!
Nutritional Guide
While indulging in a slice of Jello cake, you might be curious about its nutritional profile. Understanding its calorie count and ingredient benefits can enhance your enjoyment. Jello cake typically offers a delightful balance of flavors and textures, but let’s break down the numbers.
| Nutrient | Amount per Slice | Ingredient Benefits |
|---|---|---|
| Calories | 200 | Gelatin supports joint health |
| Sugar | 15g | Provides quick energy |
| Fat | 5g | Helps with nutrient absorption |
| Fiber | 1g | Aids in digestion |
This cake is a fun way to celebrate while being mindful of what’s in it! With a few tweaks, you can enjoy the sweetness without the guilt, making it a delightful treat.
Final Thoughts
Enjoying a slice of Jello cake is more than just a sweet treat; it’s a delightful experience that brings back fond memories of celebrations and gatherings. As I reflect on my baking journey, I’d like to share some final thoughts and baking tips to elevate your own Jello cake creation:
- Choose vibrant, seasonal fruits for a fresh twist.
- Experiment with flavored Jello to surprise your guests.
- Layer different colors for a stunning visual appeal.
- Don’t skip the whipped cream topping; it adds a luscious finish.
Each bite is a burst of flavor, and with these tips, you can make your Jello cake a showstopper. So, roll up your sleeves, release your creativity, and enjoy every sweet moment!
Frequently Asked Questions
Can I Use Sugar-Free Jello for This Recipe?
I’ve used sugar-free alternatives in my recipes, and the jello texture remains delightful. It’s a great way to enjoy a treat without the extra sugar, while still satisfying my sweet cravings. Give it a try!
How Long Does Jello Cake Last in the Fridge?
Did you know properly stored desserts can last up to a week? For jello cake, its shelf life in the fridge is about 3 to 5 days. I recommend keeping it covered for ideal freshness!
Can I Freeze Jello Cake for Later?
I wouldn’t recommend freezing jello cake, but if you try, use airtight containers for best results. It can affect texture, so I suggest exploring alternative storage methods for a fresher taste later on!
What Are Some Popular Flavor Combinations for Jello Cake?
I love experimenting with flavor combinations! Tropical fusion with pineapple and coconut creates a revitalizing treat, while berry blast, featuring strawberries and blueberries, offers a delightful burst of sweetness. Both options are sure to impress your guests!
Can I Make Jello Cake Without a Bundt Pan?
Absolutely, I’ve used alternative pans like square or round cake pans for jello cake. The presentation can still be stunning, and you can easily frost or layer it for a delightful twist on tradition.
Conclusion
As I take a final bite of the vibrant jello cake, I’m reminded that food is more than just sustenance; it’s a tapestry of memories woven with laughter and love. This delightful dessert not only brightens up any occasion but also invites conversations and smiles around the table. I hope you immerse yourself in this recipe and create your own sweet moments. After all, life’s too short to skip dessert—so let’s celebrate with a slice of joy!
Jello Poke Cake Recipe
Ingredients
Equipment
Method
- Bake the Cake:
- Preheat oven to 350°F (175°C).
- Prepare cake mix with water, oil, and eggs as directed on the box.
- Pour batter into a greased 9×13-inch pan and bake for 25–30 minutes, or until a toothpick comes out clean.
- Let cake cool for 15 minutes.
- Prepare the Jello:
- Dissolve Jello powder in 1 cup boiling water, then stir in ½ cup cold water.
- Poke the Cake:
- Use a fork or skewer to poke holes all over the warm cake (about ½-inch apart).
- Slowly pour Jello mixture over the cake, letting it soak into the holes.
- Chill & Top:
- Refrigerate for at least 3 hours (or overnight).
- Spread whipped topping over the cake before serving.