
I love making Jello Poke Cake for its colorful, fun flavors! Start by baking a cake mix of your choice, then poke holes in it once it cools. Next, prepare your favorite Jello by dissolving it in boiling water and pour it into the holes, letting it soak in. Chill it for a few hours, then frost with whipped topping for a creamy finish. Trust me, this cake is a hit at any gathering! Discover more tips to elevate your dessert!
History
When I think about the history of Jello Poke Cake, I can’t help but smile at its humble beginnings. This delightful dessert emerged in the 1960s, a time when Jello’s origins captured America’s imagination. The idea of infusing a simple cake with vibrant, flavored gelatin was revolutionary. As I explore the cake variations that sprang from this innovation, I’m amazed by how versatile it is. From classic vanilla to rich chocolate, each recipe invites creativity. Imagine a rejuvenating strawberry poke cake for summer gatherings or a spiced pumpkin version for fall festivities! This cake isn’t just dessert; it’s a canvas for flavors and memories, reminding us all of the joy that a little creativity can bring into our kitchens.
Recipe
Jello poke cake is a delightful dessert that combines the moistness of a cake with the vibrant flavors of Jello. This fun and colorful treat is perfect for parties, family gatherings, or just a special occasion at home. The beauty of a poke cake lies in its versatility; you can choose any flavor of Jello and cake mix to create a unique dessert that tantalizes the taste buds. The cake is poked with holes after baking, allowing the Jello to seep in and infuse the cake with its fruity flavor, resulting in a moist, flavorful, and visually appealing dish.
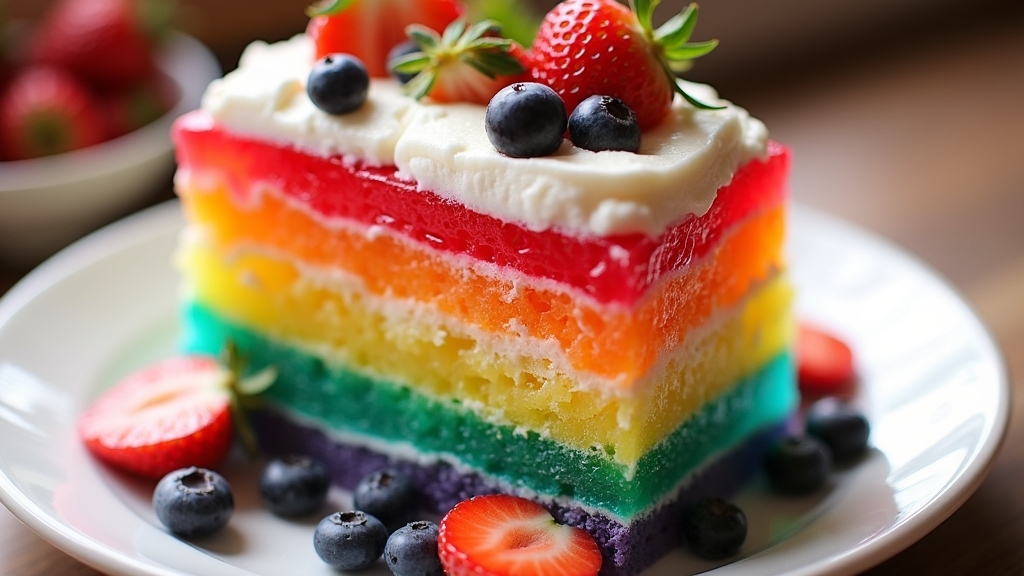
To elevate the dessert, it’s often topped with whipped cream or Cool Whip and garnished with fresh fruit, making it a feast for the eyes as well. The combination of textures from the fluffy cake and the smooth Jello creates a satisfying mouthfeel, while the sweetness of the Jello adds a burst of flavor in every bite. Whether you’re a seasoned baker or a first-timer, this recipe is simple and sure to impress everyone at your gathering.
Ingredients:
- 1 box of white or yellow cake mix
- 3 large eggs
- 1 cup water
- 1 box of Jello (any flavor)
- 1 cup boiling water
- 1 cup cold water
- 1 tub of whipped topping (Cool Whip or similar)
- Fresh fruit for garnish (optional)
Instructions:
Begin by preheating your oven according to the cake mix instructions. Prepare the cake batter by mixing the cake mix, eggs, and water in a large bowl until smooth. Pour the batter into a greased 9×13 inch baking pan and bake according to the package directions. Once baked, remove the cake from the oven and let it cool for about 15 minutes. While the cake is cooling, prepare the Jello by dissolving it in boiling water, then adding cold water. Once the cake has cooled slightly, use a fork or a skewer to poke holes all over the top of the cake. Pour the prepared Jello mixture evenly over the cake, ensuring it seeps into the holes. Allow the cake to chill in the refrigerator for at least 4 hours or overnight for the best results. Before serving, spread the whipped topping over the cake and garnish with fresh fruit if desired.
Extra Tips:
When making a Jello poke cake, you can experiment with different flavor combinations to suit your preferences or match the theme of your event. For example, try a lemon cake with raspberry Jello for a revitalizing summer dessert or a chocolate cake with cherry Jello for a rich twist. Be sure to poke the holes deep enough to allow the Jello to penetrate, but not so deep that the cake falls apart. For added texture and flavor, consider folding some crushed fruit or nuts into the whipped topping before spreading it on the cake. Enjoy your delicious creation!
Cooking Steps
Now that we have our ingredients ready, let’s jump into the cooking steps to create this delightful Jello poke cake. First, I’ll guide you through preparing the cake base, and then we’ll poke holes for the vibrant Jello mixture to soak in. Trust me, each step is simple and makes a world of difference in flavor!
Step 1. Prepare Cake Base
To get started on your Jello poke cake, I recommend preheating your oven to 350°F (175°C) so it’s ready for the cake base. Next, let’s choose a cake flavor that excites your taste buds—chocolate, vanilla, or perhaps lemon? Here’s how to prepare the base:
- Gather your ingredients: flour, sugar, eggs, and butter.
- Mix dry ingredients in one bowl and wet ingredients in another.
- Combine everything until smooth, avoiding lumps.
- Pour the batter into a greased baking pan.
- Bake for about 25-30 minutes, or until a toothpick comes out clean.
Keep an eye on those baking temperatures, and you’ll have a fantastic cake base ready for the next step! Enjoy the process!
Step 2. Poke Holes in Baked Cake
After your cake has cooled completely, it’s time to create those signature poke holes that will allow the Jello to seep in and infuse every bite with flavor. Using the handle of a wooden spoon or a straw, I gently poke holes into the cake, ensuring even hole placement throughout the surface. This isn’t just about aesthetics; it’s essential for maximizing the Jello’s absorption. I like to space the holes about an inch apart to maintain a delightful cake texture. The depth of each hole should be sufficient to reach the bottom without compromising the structural integrity of the cake. This step transforms an ordinary dessert into a vibrant, flavorful masterpiece that’s sure to impress at any gathering!
Step 3. Add Jello Mixture
Next up, we’ll prepare the vibrant Jello mixture that will bring your poke cake to life. For this step, I love experimenting with various jello flavors to create a stunning visual and delicious taste. Start by boiling water, then mix in your chosen gelatin, ensuring it dissolves completely. Here are some mixing techniques to enhance your mixture:
- Whisk vigorously to prevent lumps.
- Use a spatula to scrape the sides of your bowl.
- Let the mixture cool slightly before pouring.
- Experiment with layering different jello flavors for a rainbow effect.
- Pour the mixture slowly into the holes of your cake for maximum absorption.
This colorful infusion will create a moist, flavorful treat that’s sure to impress your guests!
Step 4. Chill Until Set
Once the Jello mixture is poured into the holes of the cake, I like to slide it into the refrigerator for a couple of hours to chill until set. This chilling time is essential, as it allows the Jello to firm up and reach that perfect consistency. I often check after an hour, just to see how it’s coming along. The vibrant colors of the Jello start to meld beautifully with the cake, creating a visual masterpiece. When it’s finally set, I can see that glossy sheen, hinting at the delicious flavor waiting inside. Trust me, patience pays off here—this step transforms the cake from ordinary to extraordinary, ensuring each slice is a delightful burst of flavor.
Step 5. Frost With Whipped Topping
As soon as the Jello has set to perfection, I can’t wait to add the finishing touch—whipped topping. This light, fluffy layer not only enhances the cake’s visual appeal, but it also brings a creamy balance to the fruity flavors below. Here are some whipped topping benefits and alternatives you might consider:
- Light and airy texture that complements the cake beautifully.
- Easy to spread; it glides on effortlessly for a smooth finish.
- Versatile flavors; try vanilla, chocolate, or even a hint of citrus.
- Healthier option compared to traditional frosting, with fewer calories.
- Topping alternatives like cream cheese or yogurt for a tangy twist.
With these choices, your Jello poke cake will be nothing short of extraordinary!
Nutritional Guide
When diving into the delicious world of Jello Poke Cake, it’s essential to contemplate its nutritional profile. Understanding the caloric content and ingredient benefits can help us savor this delightful treat without guilt.
Here’s a quick breakdown to keep you informed:
| Ingredient | Caloric Content (per serving) | Benefits |
|---|---|---|
| Vanilla Cake Mix | 150 | Provides energy |
| Jello (3 oz) | 80 | Low in calories, fun flavor |
| Whipped Topping | 30 | Light, creamy texture |
| Eggs | 70 | Protein source |
| Water | 0 | Hydration |
Final Thoughts
Savoring a slice of Jello Poke Cake brings joy, and understanding its nutritional profile adds to the experience. As I reflect on this delightful dessert, I can’t help but think about how it can brighten any occasion. Whether you’re hosting a party or simply indulging yourself, here are some baking tips and serving suggestions to elevate your Jello Poke Cake:
- Experiment with different flavored Jello for unique twists.
- Add fresh fruit layers for added freshness and texture.
- Serve with whipped cream or ice cream for a decadent touch.
- Pair with a light, fruity beverage to balance the sweetness.
- Consider using a gluten-free cake mix for dietary options.
With these ideas, your Jello Poke Cake will surely impress!
Frequently Asked Questions
Can I Use Different Flavors of Jello?
I love experimenting with Jello flavor combinations. Mixing vibrant flavors not only creates exciting taste but also adds unique texture variations. Don’t hesitate to get creative—your desserts will be a delightful surprise!
How Long Does Jello Poke Cake Last in the Fridge?
When I savor a slice of cake, I want it fresh! In the fridge, your Jello poke cake lasts about 3-5 days. For ideal freshness, store it tightly covered; it’ll keep those delightful flavors intact!
Can I Make This Cake Gluten-Free?
I’ve experimented with gluten-free alternatives like almond or coconut flour, and trusted Jello brands typically offer gluten-free options. With a few tweaks, you can enjoy a delicious, gluten-free version that everyone will love!
Is It Possible to Freeze Jello Poke Cake?
I’ve found that freezing Jello poke cake is possible, but it can alter the texture. I recommend using airtight containers and wrapping it well to minimize changes, ensuring it’s still delicious when you’re ready to enjoy!
What Toppings Pair Well With Jello Poke Cake?
Have you ever thought about how toppings can elevate a dessert? Fresh fruit, whipped cream, chocolate drizzle, and nuts topping create a delicious symphony, enhancing every bite and making your cake truly memorable.
Conclusion
As I slice into the vibrant layers of my jello poke cake, the sweet aroma fills the air, inviting everyone to gather around. Each forkful reveals a burst of color and flavor, with the jello seeping into the fluffy cake, creating a delightful mosaic of taste. This dessert isn’t just a treat; it’s a celebration of nostalgia and joy. I can’t wait to share this colorful masterpiece with friends, turning simple moments into cherished memories.
Jello Poke Cake Recipe
Ingredients
Equipment
Method
- Bake the Cake:
- Preheat oven to 350°F (175°C).
- Prepare cake mix with water, oil, and eggs as directed on the box.
- Pour batter into a greased 9×13-inch pan and bake for 25–30 minutes, or until a toothpick comes out clean.
- Let cake cool for 15 minutes.
- Prepare the Jello:
- Dissolve Jello powder in 1 cup boiling water, then stir in ½ cup cold water.
- Poke the Cake:
- Use a fork or skewer to poke holes all over the warm cake (about ½-inch apart).
- Slowly pour Jello mixture over the cake, letting it soak into the holes.
- Chill & Top:
- Refrigerate for at least 3 hours (or overnight).
- Spread whipped topping over the cake before serving.